User Guide
Page 1
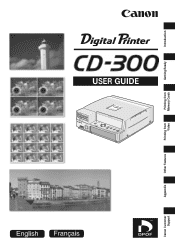
Canon Customer Support Appendix Other Features Printing from Video Printing from Memory Cards Getting Ready Introduction USER GUIDE
Canon Customer Support Appendix Other Features Printing from Video Printing from Memory Cards Getting Ready Introduction USER GUIDE
User Guide
Page 2
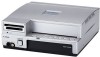
... not installed and used in a retrieval system, or translated into an outlet on , the user is accurate and complete, no liability can be prohibited regardless of intended use of the Canon Digital Printer CD-300. If such changes or modifications should be made to ensure that to change the specifications of the following two conditions: (1) This device may be accepted for help...
... not installed and used in a retrieval system, or translated into an outlet on , the user is accurate and complete, no liability can be prohibited regardless of intended use of the Canon Digital Printer CD-300. If such changes or modifications should be made to ensure that to change the specifications of the following two conditions: (1) This device may be accepted for help...
User Guide
Page 22
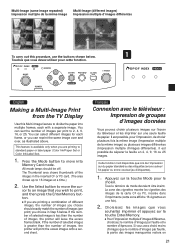
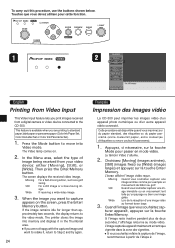
... are large in size may take a considerable amount of time to appear on , and then stop printing before all copies have been printed, press the Clear button. Un message vous demandant de choisir le nombre de copies est affiché. 4. The printer begins printing. For information, refer to "Borderless Printing". (¡ P.38) • Card images that is working on the TV screen. • L'image a été...
... are large in size may take a considerable amount of time to appear on , and then stop printing before all copies have been printed, press the Clear button. Un message vous demandant de choisir le nombre de copies est affiché. 4. The printer begins printing. For information, refer to "Borderless Printing". (¡ P.38) • Card images that is working on the TV screen. • L'image a été...
User Guide
Page 23
... to move into multiple frames, each frame, or you can set the number of images, the printer will print the excess images onto a second sheet. You can select different images for each with a separate image. Press the Mode button to print, and then press the Enter/Memory button. • If you are printing to 16 images at a time.) 2. Cette fonction n'est disponible que lors de l'impression sur...
... to move into multiple frames, each frame, or you can set the number of images, the printer will print the excess images onto a second sheet. You can select different images for each with a separate image. Press the Mode button to print, and then press the Enter/Memory button. • If you are printing to 16 images at a time.) 2. Cette fonction n'est disponible que lors de l'impression sur...
User Guide
Page 26
... Menu area, select the type of image being received from a digital camera or video device connected to capture appears on . 2. Quand l'image que vous souhaitez cap- turer apparaît, appuyez sur la touche Enter/Memory. This feature is available when you are printing to standard paper, label paper or panorama paper (Color Ink/Paper Set, Color Ink/Label Set or Color Ink/Panorama Set). 1. Press the Mode button to move into memory and displays...
... Menu area, select the type of image being received from a digital camera or video device connected to capture appears on . 2. Quand l'image que vous souhaitez cap- turer apparaît, appuyez sur la touche Enter/Memory. This feature is available when you are printing to standard paper, label paper or panorama paper (Color Ink/Paper Set, Color Ink/Label Set or Color Ink/Panorama Set). 1. Press the Mode button to move into memory and displays...
User Guide
Page 32
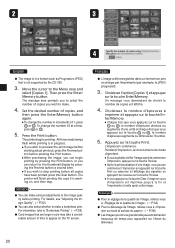
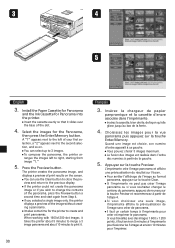
Install the Paper Cassette for Panorama and the Ink Cassette for Panorama into the printer. • Insert the cassette evenly so that it . 30 3. Press the Preview button. Insérez la chargeur de papier panpramique et la cassette d'encre associée dans l'... some time for the Panorama, then press the Enter/Memory button. The printer creates the panorama image, and displays a preview of print results on the screen. • You can use the Clear button to close the preview and return to the previous display. • If the printer could not create the panorama image or ...
Install the Paper Cassette for Panorama and the Ink Cassette for Panorama into the printer. • Insert the cassette evenly so that it . 30 3. Press the Preview button. Insérez la chargeur de papier panpramique et la cassette d'encre associée dans l'... some time for the Panorama, then press the Enter/Memory button. The printer creates the panorama image, and displays a preview of print results on the screen. • You can use the Clear button to close the preview and return to the previous display. • If the printer could not create the panorama image or ...
User Guide
Page 35
... Enter/Memory. The image is updated in the Thumbnail area in accordance with your adjustments. • Automatic adjustment is available for brightness and contrast only. • If you wish to return an image back to its default adjustment settings, select [Adjust] at the menu and then press the Clear button. • Adjustments that you have made will be applied to all images that you have finished making...
... Enter/Memory. The image is updated in the Thumbnail area in accordance with your adjustments. • Automatic adjustment is available for brightness and contrast only. • If you wish to return an image back to its default adjustment settings, select [Adjust] at the menu and then press the Clear button. • Adjustments that you have made will be applied to all images that you have finished making...
User Guide
Page 39
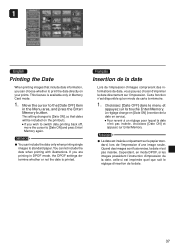
...printing single images to print the date directly on the printouts. • If you are printing in DPOF mode, the DPOF settings determine whether or not the date is available only in the Menu area, and press the Enter/ Memory button. Cependant, en mode DPOF, si les images possèdent l'instruction...Date OFF] item in Memory Card mode. 1. Insertion de la date Lors de l'impression d'images comprenant des informations de date, vous pouvez choisir d'imprimer la date directement sur l'impression. Le réglage change en [Date ON] (insertion de la date en service). • Pour ...
...printing single images to print the date directly on the printouts. • If you are printing in DPOF mode, the DPOF settings determine whether or not the date is available only in the Menu area, and press the Enter/ Memory button. Cependant, en mode DPOF, si les images possèdent l'instruction...Date OFF] item in Memory Card mode. 1. Insertion de la date Lors de l'impression d'images comprenant des informations de date, vous pouvez choisir d'imprimer la date directement sur l'impression. Le réglage change en [Date ON] (insertion de la date en service). • Pour ...
User Guide
Page 40
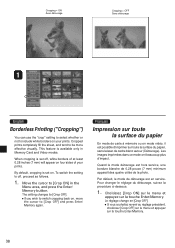
... four sides of your prints. Move the cursor to [Crop ON] in Memory Card and Video modes. To switch the setting to be more effective visually. Les images imprimées dans ce mode ont beaucoup plus d'impact. Par défault, le mode de détourage est en service. By default, cropping is available only in the Menu area, and press the Enter/ Memory button...
... four sides of your prints. Move the cursor to [Crop ON] in Memory Card and Video modes. To switch the setting to be more effective visually. Les images imprimées dans ce mode ont beaucoup plus d'impact. Par défault, le mode de détourage est en service. By default, cropping is available only in the Menu area, and press the Enter/ Memory button...
User Guide
Page 41
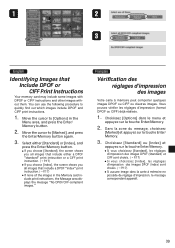
... cursor to [Marked], and press the Enter/Memory button again. 3. Choisissez [Options] dans le menu et appuyez sur la touche Enter/Memory. 2. Dans la zone du message, choisissez [Marked] et appuyez sur la touche Enter/ Memory. 3. You can use the following procedure to quickly find out which images include DPOF and CIFF print instructions. 1. Vous pouvez vérifier les réglages...
... cursor to [Marked], and press the Enter/Memory button again. 3. Choisissez [Options] dans le menu et appuyez sur la touche Enter/Memory. 2. Dans la zone du message, choisissez [Marked] et appuyez sur la touche Enter/ Memory. 3. You can use the following procedure to quickly find out which images include DPOF and CIFF print instructions. 1. Vous pouvez vérifier les réglages...
User Guide
Page 50
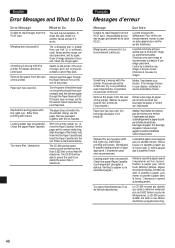
...é de l'image ou extrêmement petite. Loading paper was unsuccessful. the Paper Removal Port on , remove the Paper Cassette. The paper does not match the ink cassette. The CD-300 will restart. (Remplacez le papier inadèquat par un type approprié. If the jam does not clear, call for the nearest Canon Customer Support Help Desk. If the error message does not extinguish, contact a Canon Help Desk. Something is...
...é de l'image ou extrêmement petite. Loading paper was unsuccessful. the Paper Removal Port on , remove the Paper Cassette. The paper does not match the ink cassette. The CD-300 will restart. (Remplacez le papier inadèquat par un type approprié. If the jam does not clear, call for the nearest Canon Customer Support Help Desk. If the error message does not extinguish, contact a Canon Help Desk. Something is...
User Guide
Page 53
...77 Télécopie: (1) 41 99 79 51 Canon S.A.V. Photo Video France Hotline: (01) 41 30 16 16 Télécopie: (01) 41 30 16 00 Canon Deutschland GmbH Canon-Hotline-Service Customer-Support: 02151/349-555 Telefax: 02151/349-588 Info-Desk...Canon Australia Pty. Info-Line : 0900-522666 ASIE Canon Singapore Pte. Wisma General Lumber, Block D, Peremba Square Saujana Resort, Section U2, 40150 Shah Alam, Selangor Darul Ehsan Malaysia Tél. : (60) 3 744 6000, (60) 3 745 0055 Téléc. : (60) 3 745 0505 Canon Marketing (Thailand) Co., Ltd. 2nd Floor, Indosuez House, 152 Wireless...
...77 Télécopie: (1) 41 99 79 51 Canon S.A.V. Photo Video France Hotline: (01) 41 30 16 16 Télécopie: (01) 41 30 16 00 Canon Deutschland GmbH Canon-Hotline-Service Customer-Support: 02151/349-555 Telefax: 02151/349-588 Info-Desk...Canon Australia Pty. Info-Line : 0900-522666 ASIE Canon Singapore Pte. Wisma General Lumber, Block D, Peremba Square Saujana Resort, Section U2, 40150 Shah Alam, Selangor Darul Ehsan Malaysia Tél. : (60) 3 744 6000, (60) 3 745 0055 Téléc. : (60) 3 745 0505 Canon Marketing (Thailand) Co., Ltd. 2nd Floor, Indosuez House, 152 Wireless...

User Guide
Page 54
PRINTED IN JAPAN IMPRIMÉ AU JAPON H-IM-020-V1 0999CP1 © 1999 CANON INC.
PRINTED IN JAPAN IMPRIMÉ AU JAPON H-IM-020-V1 0999CP1 © 1999 CANON INC.


