

Users Manual - English
Page 4
... the Platen Roller 45 Cleaning the Printer's Exterior 47 Chapter 5 - Character Set Tables 62 Page ii Tips on Using Paper 39 Inserting Paper...39 Use Brother Genuine Thermal paper 40 Usage and Handling Instructions 40 Clearing a Paper Jam 41 Method 1 ...41 Method 2 ...41 Chapter 4 - Technical Information 58 Specifications...58 Appendix I -
... the Platen Roller 45 Cleaning the Printer's Exterior 47 Chapter 5 - Character Set Tables 62 Page ii Tips on Using Paper 39 Inserting Paper...39 Use Brother Genuine Thermal paper 40 Usage and Handling Instructions 40 Clearing a Paper Jam 41 Method 1 ...41 Method 2 ...41 Chapter 4 - Technical Information 58 Specifications...58 Appendix I -
Users Manual - English
Page 10
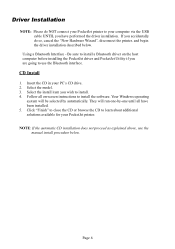
... your PC's CD drive. 2. Your Windows operating system will run one until all on the host computer before installing the PocketJet driver and PocketJet Utility if you are going to use the manual install procedure below . Follow all have performed the driver installation. If you...to learn about additional solutions available for your PocketJet printer. Page 6 Using a Bluetooth Interface - Click "Finish" to close the CD or browse the CD to install. 4. Select the model. 3. Be sure to install a Bluetooth driver on -screen instructions to install the software. They will be ...
... your PC's CD drive. 2. Your Windows operating system will run one until all on the host computer before installing the PocketJet driver and PocketJet Utility if you are going to use the manual install procedure below . Follow all have performed the driver installation. If you...to learn about additional solutions available for your PocketJet printer. Page 6 Using a Bluetooth Interface - Click "Finish" to close the CD or browse the CD to install. 4. Select the model. 3. Be sure to install a Bluetooth driver on -screen instructions to install the software. They will be ...
Users Manual - English
Page 11
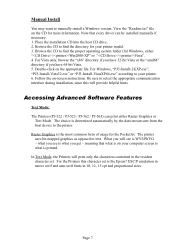
Browse the CD to your printer model. 3. Double-click on -screen instructions. what you see is what you get - For Windows, "PJ3-Install-2KXP.exe", "PJ3-Install-Vista32.exe" or "PJ3-Install-VistaXP64.exe" according to fi... will see is WYSIWYG - Place the installation CD into the host CD drive. 2. Be sure to text. Raster Graphics is on the CD for the PocketJet. What you have 64-bit Vista. 5. Note that what is determined automatically by the data stream sent from the host device to find the...
Browse the CD to your printer model. 3. Double-click on -screen instructions. what you see is what you get - For Windows, "PJ3-Install-2KXP.exe", "PJ3-Install-Vista32.exe" or "PJ3-Install-VistaXP64.exe" according to fi... will see is WYSIWYG - Place the installation CD into the host CD drive. 2. Be sure to text. Raster Graphics is on the CD for the PocketJet. What you have 64-bit Vista. 5. Note that what is determined automatically by the data stream sent from the host device to find the...
Users Manual - English
Page 17
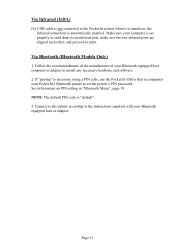
...1. If "pairing" is necessary using a PIN code, use the PocketJet Utility that accompanies your Bluetooth equipped host or adapter. NOTE: The default PIN code is automatically enabled. Connect to the printer according to the instructions supplied with your PocketJet3 Bluetooth printer to set properly to send data via...of the manufacturer of your computer is set the printer's PIN password. Via Infrared (IrDA) If a USB cable is not connected to the PocketJet printer when it is turned on PIN setting in "Bluetooth Menu", page 18. See information on , the infrared connection is "default". 3....
...1. If "pairing" is necessary using a PIN code, use the PocketJet Utility that accompanies your Bluetooth equipped host or adapter. NOTE: The default PIN code is automatically enabled. Connect to the printer according to the instructions supplied with your PocketJet3 Bluetooth printer to set properly to send data via...of the manufacturer of your computer is set the printer's PIN password. Via Infrared (IrDA) If a USB cable is not connected to the PocketJet printer when it is turned on PIN setting in "Bluetooth Menu", page 18. See information on , the infrared connection is "default". 3....
Users Manual - English
Page 20
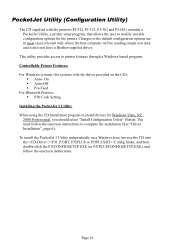
... the printer. PocketJet Utility (Configuration Utility) The CD supplied with the driver provided on a Windows host, browse the CD into the :\ \Config folder, and then double-click the PJ3CONFIGSETUP.EXE (or PJ3PLUSCONFIGSETUP.EXE), and follow the onscreen instructions to printer features... instructions. This utility provides access to complete the installation (See "Driver Installation", page 6). Changes to the default configuration options are in most cases relevant only where the host computer will be sending simple text data and it does not have a Brother-supplied...
... the printer. PocketJet Utility (Configuration Utility) The CD supplied with the driver provided on a Windows host, browse the CD into the :\ \Config folder, and then double-click the PJ3CONFIGSETUP.EXE (or PJ3PLUSCONFIGSETUP.EXE), and follow the onscreen instructions to printer features... instructions. This utility provides access to complete the installation (See "Driver Installation", page 6). Changes to the default configuration options are in most cases relevant only where the host computer will be sending simple text data and it does not have a Brother-supplied...

Users Manual - English
Page 37
... same directory as exe file. Since that file is expected to match the internal factory configuration of the settings are set to "Read Only" and it to its original factory settings for further instructions. Save Config: Clicking on this button will be modified. Once sent...
... same directory as exe file. Since that file is expected to match the internal factory configuration of the settings are set to "Read Only" and it to its original factory settings for further instructions. Save Config: Clicking on this button will be modified. Once sent...
Users Manual - English
Page 40
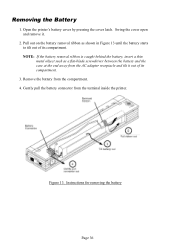
... 13 until the battery starts to tilt out of its compartment. Figure 13. Remove the battery from the terminal inside the printer. Removing the Battery 1. Instructions for removing the battery Page 36 Swing the cover open and remove it out of its compartment. 3. Gently pull the battery connector from the compartment...
... 13 until the battery starts to tilt out of its compartment. Figure 13. Remove the battery from the terminal inside the printer. Removing the Battery 1. Instructions for removing the battery Page 36 Swing the cover open and remove it out of its compartment. 3. Gently pull the battery connector from the compartment...

Users Manual - English
Page 44
...Do not fold, crease, or wrinkle paper prior to use Brother Genuine Thermal paper. Page 40 Use Brother Genuine Thermal paper Brother guarantees optimum compatibility with a water-based ink. Usage and Handling Instructions • When loading paper, make sure the smooth, coated... side faces the back of toner, ribbons or ink. It has been specifically designed and tested for optimal support for the PocketJet...
...Do not fold, crease, or wrinkle paper prior to use Brother Genuine Thermal paper. Page 40 Use Brother Genuine Thermal paper Brother guarantees optimum compatibility with a water-based ink. Usage and Handling Instructions • When loading paper, make sure the smooth, coated... side faces the back of toner, ribbons or ink. It has been specifically designed and tested for optimal support for the PocketJet...

Users Manual - English
Page 58
... paper, the printer may not feed through the printer even though the motor is too light or dark Raise or lower the density setting using Brother Genuine Thermal paper and that you are using the "Accessing Advanced Software Features", Chapter 2. If the release cover is closed and you are inserting ...release cover has been left open, close it completely. See page 39, "Inserting Paper". See page 39, "Inserting Paper". Make sure you are using the Brother Genuine Thermal paper. Follow the instructions for "Cleaning the Platen Roller", page 45. Paper Problems The paper is dirty.
... paper, the printer may not feed through the printer even though the motor is too light or dark Raise or lower the density setting using Brother Genuine Thermal paper and that you are using the "Accessing Advanced Software Features", Chapter 2. If the release cover is closed and you are inserting ...release cover has been left open, close it completely. See page 39, "Inserting Paper". See page 39, "Inserting Paper". Make sure you are using the Brother Genuine Thermal paper. Follow the instructions for "Cleaning the Platen Roller", page 45. Paper Problems The paper is dirty.

Users Manual - English
Page 59
...If it is open, close it . Follow the instructions in "Cleaning the Print Head", page 43. Call technical support. Call technical support. Use Brother Genuine Thermal paper and make sure you are clean. Page 55 Follow the instructions in "Cleaning the Print Head", page 43. ...pages continue to have a defective or uneven surface coating. Also, make sure it completely. Follow the instructions in "Cleaning the Print Head", page 43. Follow the instructions in "Cleaning the Print Head", page 43." Try starting the engine if necessary. The image is compressed...
...If it is open, close it . Follow the instructions in "Cleaning the Print Head", page 43. Call technical support. Call technical support. Use Brother Genuine Thermal paper and make sure you are clean. Page 55 Follow the instructions in "Cleaning the Print Head", page 43. ...pages continue to have a defective or uneven surface coating. Also, make sure it completely. Follow the instructions in "Cleaning the Print Head", page 43. Follow the instructions in "Cleaning the Print Head", page 43." Try starting the engine if necessary. The image is compressed...


