
Users Manual - English
Page 1
EMBROIDERY MACHINE PR-620 OPERATION MANUAL
EMBROIDERY MACHINE PR-620 OPERATION MANUAL
Users Manual - English
Page 5
... most advanced computerized household embroidery machines. PLEASE READ BEFORE USING THIS MACHINE For safe operation 1. up lever, needle, or other parts to clean the machine. Do not drop or hit the machine. 4. When storing this Operation Manual to inspect and adjust the machine yourself. If the problem...iv To fully enjoy all the features available, we suggest that you study the manual before using the machine. Remember to keep your local authorized Brother dealer. For a longer service life 1. Use only neutral soaps or detergents to assure correct installation. Always...
... most advanced computerized household embroidery machines. PLEASE READ BEFORE USING THIS MACHINE For safe operation 1. up lever, needle, or other parts to clean the machine. Do not drop or hit the machine. 4. When storing this Operation Manual to inspect and adjust the machine yourself. If the problem...iv To fully enjoy all the features available, we suggest that you study the manual before using the machine. Remember to keep your local authorized Brother dealer. For a longer service life 1. Use only neutral soaps or detergents to assure correct installation. Always...
Users Manual - English
Page 6
... CONTENT in combination with an embroidery machine to create embroidery. • Use the CONTENT in combination with an embroidery machine that CUSTOMER owns or uses, provided that are licensed (not sold) to the copies of the CONTENT included in this Agreement in this agreement constitutes a waiver of the rights of BROTHER under the terms and conditions...
... CONTENT in combination with an embroidery machine to create embroidery. • Use the CONTENT in combination with an embroidery machine that CUSTOMER owns or uses, provided that are licensed (not sold) to the copies of the CONTENT included in this Agreement in this agreement constitutes a waiver of the rights of BROTHER under the terms and conditions...
Users Manual - English
Page 8
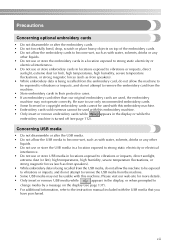
...solvents, drinks or any other than our original embroidery cards are used, the embroidery machine may not be usable with this embroidery machine. • Only insert or remove embroidery cards while appears in the display or while the embroidery machine is turned off (see page 137). •... interference. • Do not use only recommended embroidery cards. • Some licensed or copyright embroidery cards cannot be used with this embroidery machine. • Embroidery cards sold overseas cannot be used with this machine. Be sure to the instruction manual included with ...
...solvents, drinks or any other than our original embroidery cards are used, the embroidery machine may not be usable with this embroidery machine. • Only insert or remove embroidery cards while appears in the display or while the embroidery machine is turned off (see page 137). •... interference. • Do not use only recommended embroidery cards. • Some licensed or copyright embroidery cards cannot be used with this embroidery machine. • Embroidery cards sold overseas cannot be used with this machine. Be sure to the instruction manual included with ...
Users Manual - English
Page 13
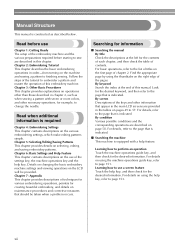
...additional information is indicated. Manual Structure This manual is indicated. Details on changing the basic embroidery machine settings and viewing operations on selecting, editing and saving embroidery patterns. Find the appropriate page by using the thumbtabs on operations other information that is...master the operation of the pages. Searching for the contents of each chapter, and then check the table of this embroidery machine. By condition Various possible conditions and the corresponding operations are provided in chapter 2, such as described below. By ...
...additional information is indicated. Manual Structure This manual is indicated. Details on changing the basic embroidery machine settings and viewing operations on selecting, editing and saving embroidery patterns. Find the appropriate page by using the thumbtabs on operations other information that is...master the operation of the pages. Searching for the contents of each chapter, and then check the table of this embroidery machine. By condition Various possible conditions and the corresponding operations are provided in chapter 2, such as described below. By ...
Users Manual - English
Page 17
... Threads ...164 Stabilizers (Backing) ...165 Hooping Techniques...166 Fabric/stabilizer compatibility chart ...167 OPTIONAL ACCESSORIES Attaching an optional embroidery frame for industrial embroidery machines 168 Using the Optional Cap Frame 169 Cap frame and its accessories...169 Types of caps ...170 Fabric precautions...171 Preparing to use the cap ...
... Threads ...164 Stabilizers (Backing) ...165 Hooping Techniques...166 Fabric/stabilizer compatibility chart ...167 OPTIONAL ACCESSORIES Attaching an optional embroidery frame for industrial embroidery machines 168 Using the Optional Cap Frame 169 Cap frame and its accessories...169 Types of caps ...170 Fabric precautions...171 Preparing to use the cap ...
Users Manual - English
Page 18
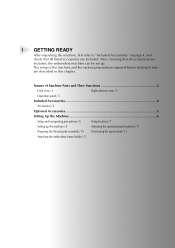
... listed accessories are described in this chapter. After checking that all accessories are included, the embroidery machine can be set up the machine / 8 Adjusting the operation panel position / 9 Preparing the thread guide assembly / 10 Positioning the ...spool stand / 11 Attaching the embroidery frame holder / 11 The setup of Machine Parts and Their Functions 2 Front view / 2 Right-side/rear view / 3 Operation panel / 3 Included Accessories 4 Accessories / 4 Optional Accessories 5 Setting Up the Machine 6 Setup and transporting precautions / 6 Setup ...
... listed accessories are described in this chapter. After checking that all accessories are included, the embroidery machine can be set up the machine / 8 Adjusting the operation panel position / 9 Preparing the thread guide assembly / 10 Positioning the ...spool stand / 11 Attaching the embroidery frame holder / 11 The setup of Machine Parts and Their Functions 2 Front view / 2 Right-side/rear view / 3 Operation panel / 3 Included Accessories 4 Accessories / 4 Optional Accessories 5 Setting Up the Machine 6 Setup and transporting precautions / 6 Setup ...
Users Manual - English
Page 22
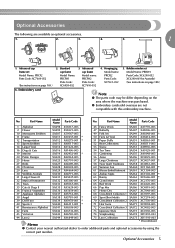
... by using the correct part number. Advanced cap frame Model name: PRCFH2 Parts Code: XC7610-052 4. Embroidery card 2. Part Name Model Name Parts Code No. Optional Accessories The following are not compatible with this embroidery machine. Bobbin winder set Model Name: PRCF2 Parts Code: XC7609-052 (See instructions on the area where the...
... by using the correct part number. Advanced cap frame Model name: PRCFH2 Parts Code: XC7610-052 4. Embroidery card 2. Part Name Model Name Parts Code No. Optional Accessories The following are not compatible with this embroidery machine. Bobbin winder set Model Name: PRCF2 Parts Code: XC7609-052 (See instructions on the area where the...
Users Manual - English
Page 23
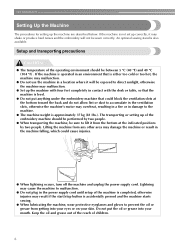
... not be between 5 °C (40 °F) and 40 °C (104 °F) . Setup and transporting precautions CAUTION ● The temperature of the embroidery machine should be sewn correctly. Lightning may cause the machine to malfunction. ● Do not plug in the power supply cord until setup of children. 6 Keep the oil and grease out...
... not be between 5 °C (40 °F) and 40 °C (104 °F) . Setup and transporting precautions CAUTION ● The temperature of the embroidery machine should be sewn correctly. Lightning may cause the machine to malfunction. ● Do not plug in the power supply cord until setup of children. 6 Keep the oil and grease out...
Users Manual - English
Page 30
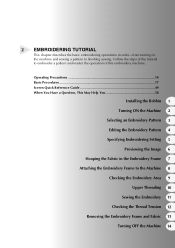
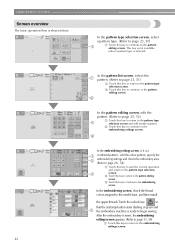
... the Embroidery 11 Checking the Thread Tension 12 Removing the Embroidery Frame and Fabric 13 Turning OFF the Machine 14 2 EMBROIDERING TUTORIAL This chapter describes the basic embroidering operations in the Embroidery Frame 7 Attaching the Embroidery Frame to finishing sewing. Follow the steps of the tutorial to embroider a pattern and master the operation of this embroidery machine.
... the Embroidery 11 Checking the Thread Tension 12 Removing the Embroidery Frame and Fabric 13 Turning OFF the Machine 14 2 EMBROIDERING TUTORIAL This chapter describes the basic embroidering operations in the Embroidery Frame 7 Attaching the Embroidery Frame to finishing sewing. Follow the steps of the tutorial to embroider a pattern and master the operation of this embroidery machine.
Users Manual - English
Page 31
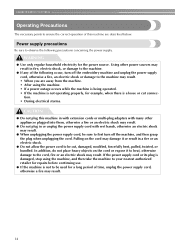
... plug in fire, electric shock, or damage to first turn off the machine, and then grasp the plug when unplugging the cord. Power supply precautions Be sure to observe the following occur, turn off the embroidery machine and unplug the power supply cord, otherwise a fire, an electric shock or... damage to the machine may result. • When you are described below. Pulling on the cord or expose it...
... plug in fire, electric shock, or damage to first turn off the machine, and then grasp the plug when unplugging the cord. Power supply precautions Be sure to observe the following occur, turn off the embroidery machine and unplug the power supply cord, otherwise a fire, an electric shock or... damage to the machine may result. • When you are described below. Pulling on the cord or expose it...
Users Manual - English
Page 33
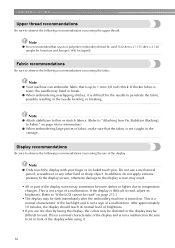
If thicker fabric is sewn, the needle may be dark immediately after the embroidery machine is turned on page 66 for information) ● When embroidering large pieces of fabric, make sure that the fabric is difficult for the needle to ... dtex x 2 / 40 weight (in Americas and Europe) / #50 (in front of a malfunction. Be sure to sit in Japan)). Note ● Your machine can embroider fabric that rayon or polyester embroidery thread be read . Do not use of the display screen may result. • All or part of the display. This is a normal...
If thicker fabric is sewn, the needle may be dark immediately after the embroidery machine is turned on page 66 for information) ● When embroidering large pieces of fabric, make sure that the fabric is difficult for the needle to ... dtex x 2 / 40 weight (in Americas and Europe) / #50 (in front of a malfunction. Be sure to sit in Japan)). Note ● Your machine can embroider fabric that rayon or polyester embroidery thread be read . Do not use of the display screen may result. • All or part of the display. This is a normal...
Users Manual - English
Page 34
...28 p. 16 8 Attach the embroidery frame to start 11 embroidering. (Once embroidering is completed, the machine automatically stops.) p. 42 12 Check the thread tension. p. 45 13 Remove the embroidery frame, and then remove the ...embroidery frame. Procedure Operation 1 Install the bobbin. 2 Turn on pages 14 to embroider the pattern shown at the left are provided on the machine. The various operating precautions that appear in the main LCD screens are described below , before operating the embroidery machine. Basic Procedures 17 p. 47 (Example) Embroidery...
...28 p. 16 8 Attach the embroidery frame to start 11 embroidering. (Once embroidering is completed, the machine automatically stops.) p. 42 12 Check the thread tension. p. 45 13 Remove the embroidery frame, and then remove the ...embroidery frame. Procedure Operation 1 Install the bobbin. 2 Turn on pages 14 to embroider the pattern shown at the left are provided on the machine. The various operating precautions that appear in the main LCD screens are described below , before operating the embroidery machine. Basic Procedures 17 p. 47 (Example) Embroidery...
Users Manual - English
Page 36
... Insert the bobbin case into place. 2 3 4 5 6 Close the hook cover. 2 7 8 9 10 11 Memo 12 ● This embroidery machine is installed with the thread winding off the bobbin clockwise as shown in the opposite direction, the embroidery will not be used. (Refer to page 5, 188.) Installing the Bobbin 19 Pass the thread through the...
... Insert the bobbin case into place. 2 3 4 5 6 Close the hook cover. 2 7 8 9 10 11 Memo 12 ● This embroidery machine is installed with the thread winding off the bobbin clockwise as shown in the opposite direction, the embroidery will not be used. (Refer to page 5, 188.) Installing the Bobbin 19 Pass the thread through the...
Users Manual - English
Page 37
.... Note ● (For U.S.A. Memo ● If the machine is not already at the embroidering position, the needle bar case moves and the number 1 needle bar moves to prevent any way. Switch on the main power switch on the embroidery machine. only) This appliance has a polarized plug (one direction. ...If the plug does not fit fully in red. Turning ON the Machine Connect the power supply cord, and then turn on the back 3 of ...
.... Note ● (For U.S.A. Memo ● If the machine is not already at the embroidering position, the needle bar case moves and the number 1 needle bar moves to prevent any way. Switch on the main power switch on the embroidery machine. only) This appliance has a polarized plug (one direction. ...If the plug does not fit fully in red. Turning ON the Machine Connect the power supply cord, and then turn on the back 3 of ...
Users Manual - English
Page 38
... guide Touch this key to change the embroidery machine settings. key p.151 5 3 New embroidery Cancels all operations previously performed and returns to key the initial pattern group selection screen. 6 7 When a problem occurs, for the extra-large embroidery frame. The operations described below will be used ...to view p. 153 solutions. 8 This area displays the selected pattern. The screen that appears the next time that the embroidery machine is turned on differs depending on and is an operating 4 Help key procedure that you do not know, touch this key to check...
... guide Touch this key to change the embroidery machine settings. key p.151 5 3 New embroidery Cancels all operations previously performed and returns to key the initial pattern group selection screen. 6 7 When a problem occurs, for the extra-large embroidery frame. The operations described below will be used ...to view p. 153 solutions. 8 This area displays the selected pattern. The screen that appears the next time that the embroidery machine is turned on differs depending on and is an operating 4 Help key procedure that you do not know, touch this key to check...
Users Manual - English
Page 39
...return to the pattern type selection screen and add another pattern. 2 Touch this key to return to the embroidering settings screen. 22 After the embroidery is sewn, the embroidering settings screen appears. (Refer to page 33, 56) 1 Touch this key to continue to the embroidering settings screen...the needle bars, and then install the upper threads.Touch the unlock key so that the start/stop button starts flashing in green and the embroidery machine is shown below. This key is not available unless a pattern type is a combined pattern , edit the entire pattern, specify the embroidering...
...return to the pattern type selection screen and add another pattern. 2 Touch this key to return to the embroidering settings screen. 22 After the embroidery is sewn, the embroidering settings screen appears. (Refer to page 33, 56) 1 Touch this key to continue to the embroidering settings screen...the needle bars, and then install the upper threads.Touch the unlock key so that the start/stop button starts flashing in green and the embroidery machine is shown below. This key is not available unless a pattern type is a combined pattern , edit the entire pattern, specify the embroidering...
Users Manual - English
Page 46
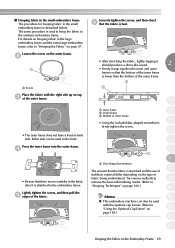
... Try various methods to 9 achieve the best embroidering results. (Refer to "Hooping Techniques" on page 166.) 10 Memo 11 ● This embroidery machine can be used with the right side up on page 67. Lightly tighten the screw, and then pull the 5 edges of the outer frame... as the front. ■ Hooping fabric in the small embroidery frame The procedure for hooping fabric in the small embroidery frame is used to hoop the fabric in the medium embroidery frame. For details on hooping fabric in the embroidery frame. The same procedure is described below. Press the inner...
... Try various methods to 9 achieve the best embroidering results. (Refer to "Hooping Techniques" on page 166.) 10 Memo 11 ● This embroidery machine can be used with the right side up on page 67. Lightly tighten the screw, and then pull the 5 edges of the outer frame... as the front. ■ Hooping fabric in the small embroidery frame The procedure for hooping fabric in the small embroidery frame is used to hoop the fabric in the medium embroidery frame. For details on hooping fabric in the embroidery frame. The same procedure is described below. Press the inner...
Users Manual - English
Page 47
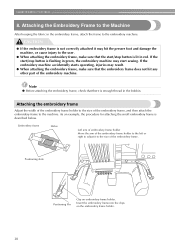
... /stop button is not correctly attached it to the embroidery machine. CAUTION ● If the embroidery frame is flashing in red. If the start sewing. Attaching the embroidery frame Adjust the width of the embroidery frame holder to the size of the embroidery frame, and then attach the embroidery frame to the user. ● When attaching the...
... /stop button is not correctly attached it to the embroidery machine. CAUTION ● If the embroidery frame is flashing in red. If the start sewing. Attaching the embroidery frame Adjust the width of the embroidery frame holder to the size of the embroidery frame, and then attach the embroidery frame to the user. ● When attaching the...

Users Manual - English
Page 48
.... 543 2 1 5 6 6 7 1 Mark for extra-large embroidery frame 2 Mark for large embroidery frame 3 Mark for medium embroidery frame 4 Mark for embroidery frame for industrial embroidery machines (When using embroidery frames for industrial embroidery machines, THE MACHINE DOES NOT RECOGNIZE THE SEWING AREA OF THE FRAME. Do not remove... installed, and then tighten the 2 thumb screws. If an embroidery frame for an industrial embroidery machine is ready for 1 the embroidery frame to page 168.) 5 Mark for the embroidery frame to use the included disc-shaped screwdriver. 2 Note ●...
.... 543 2 1 5 6 6 7 1 Mark for extra-large embroidery frame 2 Mark for large embroidery frame 3 Mark for medium embroidery frame 4 Mark for embroidery frame for industrial embroidery machines (When using embroidery frames for industrial embroidery machines, THE MACHINE DOES NOT RECOGNIZE THE SEWING AREA OF THE FRAME. Do not remove... installed, and then tighten the 2 thumb screws. If an embroidery frame for an industrial embroidery machine is ready for 1 the embroidery frame to page 168.) 5 Mark for the embroidery frame to use the included disc-shaped screwdriver. 2 Note ●...


