Users Manual - English
Page 8
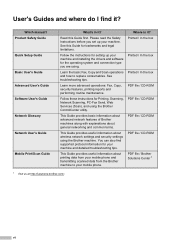
... before you are using. See troubleshooting tips. Which manual? vi This Guide provides useful information about wireless network settings and security settings using the Brother ControlCenter utility. Learn the basic Fax, Copy and Scan operations and how to your machine. Where is it ... Scanning, PC-Fax Send, Web Services (Scan), and using the Brother machine. Learn more advanced operations: Fax, Copy, security features, printing reports and performing routine maintenance. Follow these instructions for setting up your mobile phone. User's Guides and where do I find ...
... before you are using. See troubleshooting tips. Which manual? vi This Guide provides useful information about wireless network settings and security settings using the Brother ControlCenter utility. Learn the basic Fax, Copy and Scan operations and how to your machine. Where is it ... Scanning, PC-Fax Send, Web Services (Scan), and using the Brother machine. Learn more advanced operations: Fax, Copy, security features, printing reports and performing routine maintenance. Follow these instructions for setting up your mobile phone. User's Guides and where do I find ...
Users Manual - English
Page 9
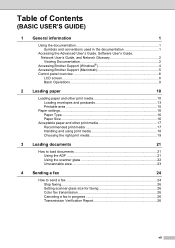
...Accessing the Advanced User's Guide, Software User's Guide, Network User's Guide, and Network Glossary 2 Viewing Documentation 2 Accessing Brother Support (Windows 4 Accessing Brother Support (Macintosh 5 Control panel overview 6 LCD screen...8 Basic Operations 9 2 Loading paper 10 Loading paper and other print... media 10 Loading envelopes and postcards 13 Printable area 15 Paper settings...16 Paper Type ...16 Paper Size ...
...Accessing the Advanced User's Guide, Software User's Guide, Network User's Guide, and Network Glossary 2 Viewing Documentation 2 Accessing Brother Support (Windows 4 Accessing Brother Support (Macintosh 5 Control panel overview 6 LCD screen...8 Basic Operations 9 2 Loading paper 10 Loading paper and other print... media 10 Loading envelopes and postcards 13 Printable area 15 Paper settings...16 Paper Type ...16 Paper Size ...
Users Manual - English
Page 10
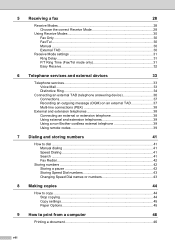
... Choose the correct Receive Mode 28 Using Receive Modes 30 Fax Only ...30 Fax/Tel...30 Manual ...30 External TAD 30 Receive Mode settings 31 Ring Delay ...31 F/T Ring Time (Fax/Tel mode only 31 Easy Receive 32 6 Telephone services and external devices 33 Telephone services...connections (PBX 38 External and extension telephones 38 Connecting an external or extension telephone 38 Using external and extension telephones 39 Using a non-Brother cordless external telephone 39 Using remote codes 39 7 Dialing and storing numbers 41 How to dial ...41 Manual dialing 41 Speed Dialing 41...
... Choose the correct Receive Mode 28 Using Receive Modes 30 Fax Only ...30 Fax/Tel...30 Manual ...30 External TAD 30 Receive Mode settings 31 Ring Delay ...31 F/T Ring Time (Fax/Tel mode only 31 Easy Receive 32 6 Telephone services and external devices 33 Telephone services...connections (PBX 38 External and extension telephones 38 Connecting an external or extension telephone 38 Using external and extension telephones 39 Using a non-Brother cordless external telephone 39 Using remote codes 39 7 Dialing and storing numbers 41 How to dial ...41 Manual dialing 41 Speed Dialing 41...
Users Manual - English
Page 13
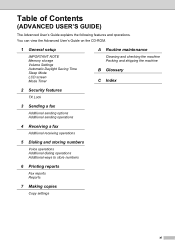
...'s Guide explains the following features and operations. You can view the Advanced User's Guide on the CD-ROM. 1 General setup IMPORTANT NOTE Memory storage Volume Settings Automatic Daylight Saving Time Sleep Mode LCD screen Mode Timer A Routine maintenance Cleaning and checking the machine Packing and shipping the machine B Glossary C Index 2 Security... Additional receiving operations 5 Dialing and storing numbers Voice operations Additional dialing operations Additional ways to store numbers 6 Printing reports Fax reports Reports 7 Making copies Copy settings xi
...'s Guide explains the following features and operations. You can view the Advanced User's Guide on the CD-ROM. 1 General setup IMPORTANT NOTE Memory storage Volume Settings Automatic Daylight Saving Time Sleep Mode LCD screen Mode Timer A Routine maintenance Cleaning and checking the machine Packing and shipping the machine B Glossary C Index 2 Security... Additional receiving operations 5 Dialing and storing numbers Voice operations Additional dialing operations Additional ways to store numbers 6 Printing reports Fax reports Reports 7 Making copies Copy settings xi
Users Manual - English
Page 20
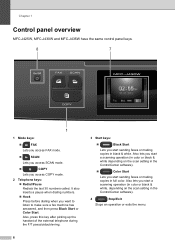
Chapter 1 Control panel overview 1 MFC-J425W, MFC-J430W and MFC-J435W have the same control panel keys. 8 7 1 1 Mode keys: FAX Lets you access... lets you start a scanning operation (in color or black & white depending on the scan setting in the ControlCenter software). Color Start Lets you start a scanning operation (in color or black & white, ...depending on the scan setting in the ControlCenter software). 4 Stop/Exit Stops an operation or exits the menu. 6 Also lets you ...
Chapter 1 Control panel overview 1 MFC-J425W, MFC-J430W and MFC-J435W have the same control panel keys. 8 7 1 1 Mode keys: FAX Lets you access... lets you start a scanning operation (in color or black & white depending on the scan setting in the ControlCenter software). Color Start Lets you start a scanning operation (in color or black & white, ...depending on the scan setting in the ControlCenter software). 4 Stop/Exit Stops an operation or exits the menu. 6 Also lets you ...

Users Manual - English
Page 21
...; Menu Access the main menu. Clear Press to delete characters or to go back to the previous menu level. OK Lets you choose a setting. 7 LCD (Liquid Crystal Display) Displays messages on the screen to help you store, look up, and dial numbers that are stored in the machine's memory...
...; Menu Access the main menu. Clear Press to delete characters or to go back to the previous menu level. OK Lets you choose a setting. 7 LCD (Liquid Crystal Display) Displays messages on the screen to help you store, look up, and dial numbers that are stored in the machine's memory...
Users Manual - English
Page 23
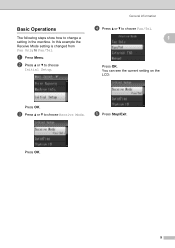
c Press a or b to Fax/Tel. Press OK. 9 In this example the Receive Mode setting is changed from Fax Only to choose Receive Mode. General information d Press a or b to choose Initial Setup. e Press Stop/Exit. b Press a or b to choose Fax/Tel. 1 Press OK. a Press Menu. Basic Operations 1 The following steps show how to change a setting in the machine. You can see the current setting on the LCD: Press OK.
c Press a or b to Fax/Tel. Press OK. 9 In this example the Receive Mode setting is changed from Fax Only to choose Receive Mode. General information d Press a or b to choose Initial Setup. e Press Stop/Exit. b Press a or b to choose Fax/Tel. 1 Press OK. a Press Menu. Basic Operations 1 The following steps show how to change a setting in the machine. You can see the current setting on the LCD: Press OK.

Users Manual - English
Page 27
Glue Double flaps Loading envelopes and postcards 2 a Before loading, press the corners and sides of envelopes or postcards to be set in the paper tray at a time. Occasionally you may experience paper feed problems caused by the thickness, size and flap shape of envelopes, as ... envelopes and postcards 2 About envelopes 2 Use envelopes that weigh from 20 to 25 lb (80 to 95 g/m2). Some envelopes need margin settings to make them as flat as they will cause paper feed problems: • That are of a baggy construction. • That have windows. • That...
Glue Double flaps Loading envelopes and postcards 2 a Before loading, press the corners and sides of envelopes or postcards to be set in the paper tray at a time. Occasionally you may experience paper feed problems caused by the thickness, size and flap shape of envelopes, as ... envelopes and postcards 2 About envelopes 2 Use envelopes that weigh from 20 to 25 lb (80 to 95 g/m2). Some envelopes need margin settings to make them as flat as they will cause paper feed problems: • That are of a baggy construction. • That have windows. • That...
Users Manual - English
Page 29
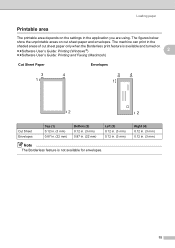
... mm) Left (3) 0.12 in. (3 mm) 0.12 in the shaded areas of cut sheet paper and envelopes. The figures below show the unprintable areas on the settings in . (3 mm) 15
... mm) Left (3) 0.12 in. (3 mm) 0.12 in the shaded areas of cut sheet paper and envelopes. The figures below show the unprintable areas on the settings in . (3 mm) 15

Users Manual - English
Page 30
... the machine, you are using. Press OK. Press OK. e Press Stop/Exit. 16 c Press a or b to choose Plain Paper, Inkjet Paper, Brother BP71, Brother BP61, Other Glossy or Transparency. d Press a or b to choose General Setup. Press OK. e Press Stop/Exit. Note The machine ejects the paper ...an incoming fax on the page. b Press a or b to choose Letter, Legal, A4, A5, EXE or 4"x6". Chapter 2 Paper settings 2 Paper Type 2 To get the best print quality, set the machine for printing faxes: Letter, Legal and A4. a Press Menu. Press OK. When you change the paper size...
... the machine, you are using. Press OK. Press OK. e Press Stop/Exit. 16 c Press a or b to choose Plain Paper, Inkjet Paper, Brother BP71, Brother BP61, Other Glossy or Transparency. d Press a or b to choose General Setup. Press OK. e Press Stop/Exit. Note The machine ejects the paper ...an incoming fax on the page. b Press a or b to choose Letter, Legal, A4, A5, EXE or 4"x6". Chapter 2 Paper settings 2 Paper Type 2 To get the best print quality, set the machine for printing faxes: Letter, Legal and A4. a Press Menu. Press OK. When you change the paper size...

Users Manual - English
Page 31
...Brother paper. When you print on inkjet paper (coated paper), transparencies and glossy paper, be sure to choose the proper print media in the "Basic" tab of the printer driver or in the Paper Type setting... of the machine's menu. (See Paper Type uu page 16.) When you print on Brother Photo paper, load one extra sheet... photo paper, remove each sheet at once to match the type of paper you print on transparencies. 2 Brother paper Paper Type Item Premium Plus Glossy Photo Letter BP71GLTR 4" 6" BP71GP ...
...Brother paper. When you print on inkjet paper (coated paper), transparencies and glossy paper, be sure to choose the proper print media in the "Basic" tab of the printer driver or in the Paper Type setting... of the machine's menu. (See Paper Type uu page 16.) When you print on Brother Photo paper, load one extra sheet... photo paper, remove each sheet at once to match the type of paper you print on transparencies. 2 Brother paper Paper Type Item Premium Plus Glossy Photo Letter BP71GLTR 4" 6" BP71GP ...
Users Manual - English
Page 37
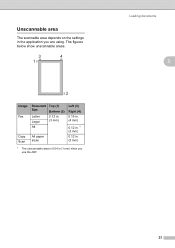
Unscannable area 3 The scannable area depends on the settings in (1 mm) when you are using. Loading documents 3 23 The figures below show unscannable areas. 3 4 1 2 Usage Fax Copy Scan Document Size Letter Legal A4 Top (1) Bottom (2) 0.12 in. (3 mm) All paper sizes Left (3) Right (4) 0.16 in. (4 mm) 0.12 in. 1 (3 mm) 0.12 in. (3 mm) 1 The unscannable area is 0.04 in the application you use the ADF.
Unscannable area 3 The scannable area depends on the settings in (1 mm) when you are using. Loading documents 3 23 The figures below show unscannable areas. 3 4 1 2 Usage Fax Copy Scan Document Size Letter Legal A4 Top (1) Bottom (2) 0.12 in. (3 mm) All paper sizes Left (3) Right (4) 0.16 in. (4 mm) 0.12 in. 1 (3 mm) 0.12 in. (3 mm) 1 The unscannable area is 0.04 in the application you use the ADF.
Users Manual - English
Page 38
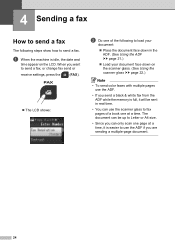
... glass to fax pages of the following steps show how to send a fax. When you want to send a fax, or change fax send or receive settings, press the (FAX). The LCD shows: b Do one of a book one page at a time. 4 Sending a fax 4 How to send a fax 4 The following to load...
... glass to fax pages of the following steps show how to send a fax. When you want to send a fax, or change fax send or receive settings, press the (FAX). The LCD shows: b Do one of a book one page at a time. 4 Sending a fax 4 How to send a fax 4 The following to load...
Users Manual - English
Page 39
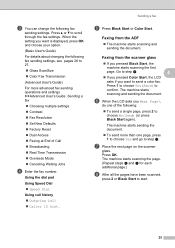
...Faxing from the ADF 4 The machine starts scanning and sending the document. Press 1 to choose Yes(Send) to scroll through the fax settings. Press OK. The machine starts scanning the page. (Repeat steps f and g for each additional page.) h After all the pages have been scanned... Overseas Mode Canceling Waiting Jobs d Enter the fax number. Sending a fax e Press Black Start or Color Start. When the setting you pressed Black Start, the machine starts scanning the first page. The machine starts scanning and sending the document. The machine starts sending the...
...Faxing from the ADF 4 The machine starts scanning and sending the document. Press 1 to choose Yes(Send) to scroll through the fax settings. Press OK. The machine starts scanning the page. (Repeat steps f and g for each additional page.) h After all the pages have been scanned... Overseas Mode Canceling Waiting Jobs d Enter the fax number. Sending a fax e Press Black Start or Color Start. When the setting you pressed Black Start, the machine starts scanning the first page. The machine starts scanning and sending the document. The machine starts sending the...

Users Manual - English
Page 40
... or sending, press Stop/Exit. 26 Transmission Verification Report 4 You can use the Transmission Verification Report as the new default) • This setting is only available for the Transmission Verification Report: On: Prints a report after every fax you send. On+Image: Prints...machines that the receiving machine prints in progress 4 If you send a color fax that support this feature. d Press a or b to choose Advanced Settings. Note • You can send a color fax to a transmission error. Canceling a fax in black & white. The report will send it as...
... or sending, press Stop/Exit. 26 Transmission Verification Report 4 You can use the Transmission Verification Report as the new default) • This setting is only available for the Transmission Verification Report: On: Prints a report after every fax you send. On+Image: Prints...machines that the receiving machine prints in progress 4 If you send a color fax that support this feature. d Press a or b to choose Advanced Settings. Note • You can send a color fax to a transmission error. Canceling a fax in black & white. The report will send it as...
Users Manual - English
Page 41
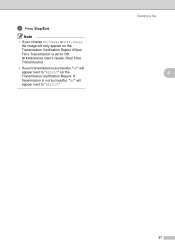
f Press Stop/Exit. Note • If you choose On+Image or Off+Image the image will only appear on the Transmission Verification Report. Sending a fax 4 27 If transmission is successful, "OK" will appear next to "RESULT" on the Transmission Verification Report if Real Time Transmission is set to Off. (uuAdvanced User's Guide: Real Time Transmission) • If your transmission is not successful, "NG" will appear next to "RESULT."
f Press Stop/Exit. Note • If you choose On+Image or Off+Image the image will only appear on the Transmission Verification Report. Sending a fax 4 27 If transmission is successful, "OK" will appear next to "RESULT" on the Transmission Verification Report if Real Time Transmission is set to Off. (uuAdvanced User's Guide: Real Time Transmission) • If your transmission is not successful, "NG" will appear next to "RESULT."
Users Manual - English
Page 42
...Fax & Alternate Number Ringing. (See Distinctive Ring uu page 34 for instructions on setting up your machine using this service.) Will you be using a Telephone Answering Device on the same telephone line as the Brother machine. Choose Fax/Tel as your telephone? You control the telephone line and ...TAD (telephone answering device) uu page 36.) Will you be using your Brother machine on a dedicated fax line? If you have other when receiving incoming calls. (See Voice Mail uu page 33 for instructions on setting up your machine using this feature.) Will you be using Voice Mail ...
...Fax & Alternate Number Ringing. (See Distinctive Ring uu page 34 for instructions on setting up your machine using this service.) Will you be using a Telephone Answering Device on the same telephone line as the Brother machine. Choose Fax/Tel as your telephone? You control the telephone line and ...TAD (telephone answering device) uu page 36.) Will you be using your Brother machine on a dedicated fax line? If you have other when receiving incoming calls. (See Voice Mail uu page 33 for instructions on setting up your machine using this feature.) Will you be using Voice Mail ...
Users Manual - English
Page 43
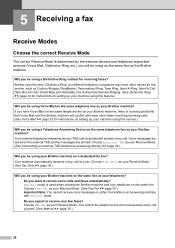
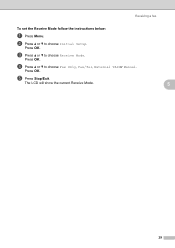
Press OK. Press OK. c Press a or b to choose Fax Only, Fax/Tel, External TAD or Manual. d Press a or b to choose Receive Mode. The LCD will show the current Receive Mode. 5 29 e Press Stop/Exit. Receiving a fax To set the Receive Mode follow the instructions below: a Press Menu. b Press a or b to choose Initial Setup. Press OK.
Press OK. Press OK. c Press a or b to choose Fax Only, Fax/Tel, External TAD or Manual. d Press a or b to choose Receive Mode. The LCD will show the current Receive Mode. 5 29 e Press Stop/Exit. Receiving a fax To set the Receive Mode follow the instructions below: a Press Menu. b Press a or b to choose Initial Setup. Press OK.
Users Manual - English
Page 45
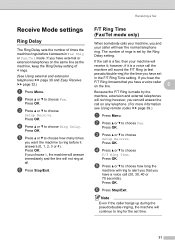
.... If the call (20, 30, 40 or 70 seconds). however, you and your caller will sound the F/T Ring (a fast pseudo/double-ring) for the set in Fax Only or Fax/Tel mode. Press OK. Press OK. f Press Stop/Exit. Receiving a fax F/T Ring Time (Fax/Tel mode only) 5 When...answer the call the machine will hear the normal telephone ring. Press OK. Press OK. Press OK. f Press Stop/Exit. Receive Mode settings 5 Ring Delay 5 The Ring Delay sets the number of 4 rings. (See Using external and extension telephones uu page 39 and Easy Receive uu page 32.) a Press Menu. ...
.... If the call (20, 30, 40 or 70 seconds). however, you and your caller will sound the F/T Ring (a fast pseudo/double-ring) for the set in Fax Only or Fax/Tel mode. Press OK. Press OK. f Press Stop/Exit. Receiving a fax F/T Ring Time (Fax/Tel mode only) 5 When...answer the call the machine will hear the normal telephone ring. Press OK. Press OK. Press OK. f Press Stop/Exit. Receive Mode settings 5 Ring Delay 5 The Ring Delay sets the number of 4 rings. (See Using external and extension telephones uu page 39 and Easy Receive uu page 32.) a Press Menu. ...
Users Manual - English
Page 46
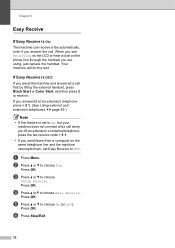
When you see Receiving on the LCD or hear a click on the same telephone line and the machine intercepts them, set to On, but your machine does not connect a fax call when you lift an extension or external telephone, press the fax receive code l 5 1. • If ... through the handset you are at an extension telephone press l 5 1. (See Using external and extension telephones uu page 39.) Note • If this feature is set Easy Receive to Off. Your machine will do the rest. b Press a or b to choose Easy Receive. d Press a or b to choose Fax. f Press Stop/Exit. 32...
When you see Receiving on the LCD or hear a click on the same telephone line and the machine intercepts them, set to On, but your machine does not connect a fax call when you lift an extension or external telephone, press the fax receive code l 5 1. • If ... through the handset you are at an extension telephone press l 5 1. (See Using external and extension telephones uu page 39.) Note • If this feature is set Easy Receive to Off. Your machine will do the rest. b Press a or b to choose Easy Receive. d Press a or b to choose Fax. f Press Stop/Exit. 32...


