Users Manual - English
Page 3
ii Safety precautions To use the printer safely WA RNING There are high voltage electrodes inside of the printer or replace parts, make sure that you have turned off the power switch and unplugged the printer from the AC power outlet. Doing this might cause an electrical shock. The fuser unit becomes extremely hot during operation. Before you clean the inside the printer. Wait until it has cooled down sufficiently before replacing consumable items. DO NOT remove or damage the caution label located on or around the fuser. DO NOT handle the plug with wet hands.
ii Safety precautions To use the printer safely WA RNING There are high voltage electrodes inside of the printer or replace parts, make sure that you have turned off the power switch and unplugged the printer from the AC power outlet. Doing this might cause an electrical shock. The fuser unit becomes extremely hot during operation. Before you clean the inside the printer. Wait until it has cooled down sufficiently before replacing consumable items. DO NOT remove or damage the caution label located on or around the fuser. DO NOT handle the plug with wet hands.
Users Manual - English
Page 87
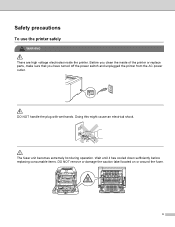
.... Control Panel Machine Info. (continued) Submenu Parts Life Reset Parts Life (Appears only when replacement parts have been changed) Menu Selections Drum Life Belt Life PF KitMP Life PF Kit1 Life PF Kit2 Life (HL-4050CDN/HL-4070CDW only) Fuser Life Laser Life Drum Unit Belt Unit PF KitMP PF ...Kit1 PF Kit2 (HL-4050CDN/HL-4070CDW only) Descriptions Shows the remaining...
.... Control Panel Machine Info. (continued) Submenu Parts Life Reset Parts Life (Appears only when replacement parts have been changed) Menu Selections Drum Life Belt Life PF KitMP Life PF Kit1 Life PF Kit2 Life (HL-4050CDN/HL-4070CDW only) Fuser Life Laser Life Drum Unit Belt Unit PF KitMP PF ...Kit1 PF Kit2 (HL-4050CDN/HL-4070CDW only) Descriptions Shows the remaining...
Users Manual - English
Page 105
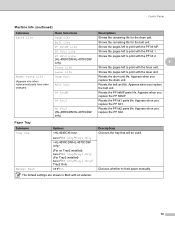
...disappeared. 3 Standard toner cartridge. 4 High-capacity toner cartridge. 96 LCD messages Ready K YMC Ready K YMC Ready K YMC Ready Consumable part Approximate life to replace Toner cartridge, Black 2,500 pages 1 2 3 5,000 pages 1 2 4 Toner cartridge, Yellow 1,500 pages 1 2 3 4,000 pages... 1 2 4 Toner cartridge, Magenta Toner cartridge, Cyan How to replace Order No. The following messages will be 'onno' (n=blinking o). These messages provide advanced warnings to replace the consumable items before the printer stops printing. See page 98 TN-110BK 3 TN-115BK 4 TN-...
...disappeared. 3 Standard toner cartridge. 4 High-capacity toner cartridge. 96 LCD messages Ready K YMC Ready K YMC Ready K YMC Ready Consumable part Approximate life to replace Toner cartridge, Black 2,500 pages 1 2 3 5,000 pages 1 2 4 Toner cartridge, Yellow 1,500 pages 1 2 3 4,000 pages... 1 2 4 Toner cartridge, Magenta Toner cartridge, Cyan How to replace Order No. The following messages will be 'onno' (n=blinking o). These messages provide advanced warnings to replace the consumable items before the printer stops printing. See page 98 TN-110BK 3 TN-115BK 4 TN-...
Users Manual - English
Page 106
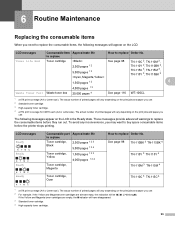
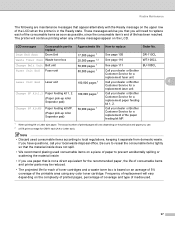
...Brother Customer Service for a replacement fuser unit. If you use paper that appear alternately with the Ready message on the LCD. These messages advise you that the material inside . • If you will continue printing when any color...1 Call your dealer or Brother Customer Service for a replacement laser unit. Be sure to ...printer parts may be reduced. • The projected life for CMYK each (A4 or Letter size). Change PF Kit1,2 Paper feeding kit 1, 2. (Paper pick-up roller Separator pad) 50,000 pages 1 Call your dealer or Brother Customer Service for a replacement...
...Brother Customer Service for a replacement fuser unit. If you use paper that appear alternately with the Ready message on the LCD. These messages advise you that the material inside . • If you will continue printing when any color...1 Call your dealer or Brother Customer Service for a replacement laser unit. Be sure to ...printer parts may be reduced. • The projected life for CMYK each (A4 or Letter size). Change PF Kit1,2 Paper feeding kit 1, 2. (Paper pick-up roller Separator pad) 50,000 pages 1 Call your dealer or Brother Customer Service for a replacement...
Users Manual - English
Page 108
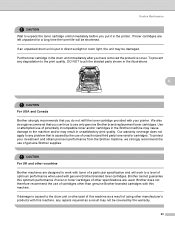
... or toner cartridges of potentially incompatible toner and/or cartridges in the printer. To protect your printer. If an unpacked drum unit is put it in the Brother machine may cause damage to a level of genuine Brother supplies. Put the toner cartridge in the drum unit immediately after you...to the machine and/or may be covered by the use only genuine Brother brand replacement toner cartridges. Our warranty coverage does not apply to any degradation to the print quality, DO NOT touch the shaded parts shown in unsatisfactory print quality. If toner cartridges are used with this...
... or toner cartridges of potentially incompatible toner and/or cartridges in the printer. To protect your printer. If an unpacked drum unit is put it in the Brother machine may cause damage to a level of genuine Brother supplies. Put the toner cartridge in the drum unit immediately after you...to the machine and/or may be covered by the use only genuine Brother brand replacement toner cartridges. Our warranty coverage does not apply to any degradation to the print quality, DO NOT touch the shaded parts shown in unsatisfactory print quality. If toner cartridges are used with this...

Users Manual - English
Page 119
b Press the + or - c Press OK to proceed to choose Drum Unit. d Press OK, and then press the + key to the next menu level, and then press the + or - e Press OK two times. 6 110 key to choose Reset Parts Life. key to choose Machine Info.. Routine Maintenance When you replace the drum unit with a new one, you need to reset the drum counter by completing the following steps: a Turn the printer power switch back on.
b Press the + or - c Press OK to proceed to choose Drum Unit. d Press OK, and then press the + key to the next menu level, and then press the + or - e Press OK two times. 6 110 key to choose Reset Parts Life. key to choose Machine Info.. Routine Maintenance When you replace the drum unit with a new one, you need to reset the drum counter by completing the following steps: a Turn the printer power switch back on.
Users Manual - English
Page 124
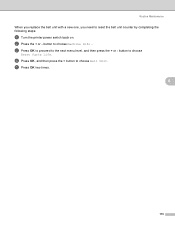
button to choose Belt Unit. d Press OK, and then press the + button to choose Reset Parts Life. c Press OK to proceed to choose Machine Info.. b Press the + or - e Press OK two times. 6 115 button to the next menu level, and then press the + or - Routine Maintenance When you replace the belt unit with a new one, you need to reset the belt unit counter by completing the following steps: a Turn the printer power switch back on.
button to choose Belt Unit. d Press OK, and then press the + button to choose Reset Parts Life. c Press OK to proceed to choose Machine Info.. b Press the + or - e Press OK two times. 6 115 button to the next menu level, and then press the + or - Routine Maintenance When you replace the belt unit with a new one, you need to reset the belt unit counter by completing the following steps: a Turn the printer power switch back on.


