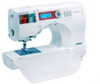
Users Manual - English
Page 11
... the pattern ...114 APPENDIX ...117 Stitch Settings ...118 Utility stitches ...118 Other stitches ...123 Maintenance ...124 Cleaning the machine surface ...124 Cleaning the shuttle ...124 Troubleshooting ...126 Error messages ...130 Nothing appears in the LCD ...131 Operation beep ...131 Cancelling the operation beep ...132 Index ...133 5 APPENDIX INDEX
Users Manual - English
Page 14
Be sure to keep your local authorized Brother dealer. Do not store anything on the needle while sewing. Plug the machine directly into the wall....machine yourself. CONTENTS GETTING READY SEWING BASICS UTILITY STITCHES CONGRATULATIONS ON CHOOSING OUR MACHINE Your machine is required, first follow the troubleshooting table in the back of the most advanced computerized household sewing machines. When storing this machine, avoid direct sunlight and high ...and should never be used. 3. For additional product information and updates, visit our web site at www.brother.com 8 APPENDIX INDEX
Users Manual - English
Page 123
CONTENTS GETTING READY SEWING BASICS UTILITY STITCHES 4 APPENDIX The various maintenance and troubleshooting procedures are described in this chapter. Stitch Settings ...118 Maintenance ...124 Troubleshooting 126 Index ...133 APPENDIX INDEX
Users Manual - English
Page 132
... use a bobbin designed specifically for the type of stitch that is used . page 18 APPENDIX INDEX 126 APPENDIX CONTENTS GETTING READY SEWING BASICS UTILITY STITCHES Troubleshooting If the machine stops operating correctly, check the following possible problems before requesting service. Symptom The sewing machine does not operate. Do not use the...
Users Manual - English
Page 133
.... Reference page 24 - page 18 page 22 - page 124 page 18 page 24 page 22 page 36 page 41 page 56 page 18 APPENDIX INDEX Troubleshooting 127
Users Manual - English
Page 135
... the nearest authorized service center. Adjust the brightness of stitch that is used is damaged. page 131 GETTING READY SEWING BASICS UTILITY STITCHES APPENDIX INDEX Troubleshooting 129 Nothing appears The brightness of stitch that is too fine. Attach the presser foot that you wish to sew. The sewing lamp is not...
Users Manual - English
Page 137
.... Turn off the sewing machine. 1 While pressing (back key) in the LCD when the sewing machine is the case, perform the following operation. APPENDIX INDEX Troubleshooting 131
Users Manual - English
Page 140
... B thread guide for bobbin winding Cover B thread guide plate Cover B thread tension 56 thread tension dial Cover B, 56 trial sewing 61 triple stretch stitch 95 troubleshooting 126 twin needle Cover A, 32, 39 U upper thread 24 upper thread tension 56 V vertical spool pin Cover A W walking foot 44, 91 wide table 1 wing needle...