
Quick Setup Guide - English
Page 1
... the latest driver and to find the best solution for your problem or question, access the Brother Solutions Center directly from the CD-ROM/Driver or go to . Setting Up Your Printer Read this Quick Setup Guide and supplied CD-ROM in a convenient place so you can use... must set up the hardware and install the driver. Step 1 Setting Up Your Printer Step 2 Installing the Driver Windows® USB Windows® Parallel Installing the Driver Windows® Network Laser Printer Quick Setup Guide HL-8050N Macintosh ® USB Macintosh ® Network USB page 17 Parallel Network page 19...
... the latest driver and to find the best solution for your problem or question, access the Brother Solutions Center directly from the CD-ROM/Driver or go to . Setting Up Your Printer Read this Quick Setup Guide and supplied CD-ROM in a convenient place so you can use... must set up the hardware and install the driver. Step 1 Setting Up Your Printer Step 2 Installing the Driver Windows® USB Windows® Parallel Installing the Driver Windows® Network Laser Printer Quick Setup Guide HL-8050N Macintosh ® USB Macintosh ® Network USB page 17 Parallel Network page 19...

Quick Setup Guide - English
Page 2
... ...2 Regulations ...7 ■ Getting Started Carton Components ...9 Control Panel ...10 Supplied CD-ROM ...11 Step 1 Setting Up Your Printer Install the Toner Cartridge ...12 Load Paper in the Paper Tray 13 Installing the Face-up Output Tray 14 Printing a Test Page ...15 ... Cable Users ...17 For Parallel Interface Cable Users 19 For Network Interface Cable Users 21 For Brother Peer-to-Peer Network Printer Users (LPR 21 For Brother Peer-to-Peer Network Printer Users (NetBIOS 23 For Network Shared Printer Users 25 For USB Interface Cable Users ...27 For Mac OS® 8.6 to 9.2 Users ...
... ...2 Regulations ...7 ■ Getting Started Carton Components ...9 Control Panel ...10 Supplied CD-ROM ...11 Step 1 Setting Up Your Printer Install the Toner Cartridge ...12 Load Paper in the Paper Tray 13 Installing the Face-up Output Tray 14 Printing a Test Page ...15 ... Cable Users ...17 For Parallel Interface Cable Users 19 For Network Interface Cable Users 21 For Brother Peer-to-Peer Network Printer Users (LPR 21 For Brother Peer-to-Peer Network Printer Users (NetBIOS 23 For Network Shared Printer Users 25 For USB Interface Cable Users ...27 For Mac OS® 8.6 to 9.2 Users ...

Quick Setup Guide - English
Page 3
...be performed. This section describes the conventions used in injuries. Make sure that require close attention. Do not place the printer near heaters or volatile, flammable, or combustible materials, such as curtains. Make sure that must be observed to prevent ...possible personal injury. User's Guide Network User's Guide Indicates reference to remember when using the printer. Indicates caution that you read the instructions carefully. Make sure that must be observed to use . WARNING CAUTION High temperature Flammable Electrical...
...be performed. This section describes the conventions used in injuries. Make sure that require close attention. Do not place the printer near heaters or volatile, flammable, or combustible materials, such as curtains. Make sure that must be observed to prevent ...possible personal injury. User's Guide Network User's Guide Indicates reference to remember when using the printer. Indicates caution that you read the instructions carefully. Make sure that must be observed to use . WARNING CAUTION High temperature Flammable Electrical...

Quick Setup Guide - English
Page 4
... ventilation grills on the left and right with the power cord connected can cause excessive internal heat to lift the printer by gripping other areas. Lifting the printer by gripping any other areas can cause the printer to your knees to avoid possible injuries to fall, resulting in .) from the wall on the side...
... ventilation grills on the left and right with the power cord connected can cause excessive internal heat to lift the printer by gripping other areas. Lifting the printer by gripping any other areas can cause the printer to your knees to avoid possible injuries to fall, resulting in .) from the wall on the side...

Quick Setup Guide - English
Page 5
...following requirements: Ambient temperature range of 10 to 32 °C (50.0 to 89.6 °F), relative humidity of the power, call your dealer or Brother Customer Service immediately. In a damp environment, a contaminated connector can, over time, draw non-negligible amounts of current that can cause damage. ■... not remove the toner cartridges, leave them locked in place. After that, call your dealer or Brother Customer Service. When unplugging the printer, grasp the plug instead of dust. When the relative humidity reaches 85%, the ambient temperature should not exceed 65%. ...
...following requirements: Ambient temperature range of 10 to 32 °C (50.0 to 89.6 °F), relative humidity of the power, call your dealer or Brother Customer Service immediately. In a damp environment, a contaminated connector can, over time, draw non-negligible amounts of current that can cause damage. ■... not remove the toner cartridges, leave them locked in place. After that, call your dealer or Brother Customer Service. When unplugging the printer, grasp the plug instead of dust. When the relative humidity reaches 85%, the ambient temperature should not exceed 65%. ...

Quick Setup Guide - English
Page 6
... or television reception, causing flickering or distortion. When the printer is advisable to unplug the printer. For external antennas, consult your dealer or Brother Customer Service immediately. Operating a debris-contaminated printer can short circuit internal components and cause a fire or electric shocks. Various covers confine the laser radiation to the inside of time, it is not...
... or television reception, causing flickering or distortion. When the printer is advisable to unplug the printer. For external antennas, consult your dealer or Brother Customer Service immediately. Operating a debris-contaminated printer can short circuit internal components and cause a fire or electric shocks. Various covers confine the laser radiation to the inside of time, it is not...

Quick Setup Guide - English
Page 7
... fall over or the heavy object can fall, resulting in injuries. An off the printer immediately and call your dealer or Brother Customer Service. Use a broom to sweep it out, or a cloth soaked with soap water to wipe it so as to avoid injuries or burns. Loose ... this can result in the cleaner due to remove it out. Loose toner can be hazardous to your dealer or Brother Customer Service. A heated or scratched drum can spill inside the printer and deteriorate print quality. ■ Do not tilt or shake the print head cartridges or transfer roll cartridges when removing...
... fall over or the heavy object can fall, resulting in injuries. An off the printer immediately and call your dealer or Brother Customer Service. Use a broom to sweep it out, or a cloth soaked with soap water to wipe it so as to avoid injuries or burns. Loose ... this can result in the cleaner due to remove it out. Loose toner can be hazardous to your dealer or Brother Customer Service. A heated or scratched drum can spill inside the printer and deteriorate print quality. ■ Do not tilt or shake the print head cartridges or transfer roll cartridges when removing...

Quick Setup Guide - English
Page 8
Only) Responsible Party: Brother International Corporation 100 Somerset Corporate Boulevard Bridgewater, NJ 08807-0911 USA Telephone: (908) 704-1700 declares, that the printer does not produce hazardous laser radiation. However, there is no guarantee that this manual may cause undesired operation. ... Regulations (100 to 240 Volt Model Only) This printer is completely confined within protective housings and external covers, the laser beam cannot escape from that : Products description: Product Name: Laser Printer HL-8050N is subject to ensure compliance with the limits for ...
Only) Responsible Party: Brother International Corporation 100 Somerset Corporate Boulevard Bridgewater, NJ 08807-0911 USA Telephone: (908) 704-1700 declares, that the printer does not produce hazardous laser radiation. However, there is no guarantee that this manual may cause undesired operation. ... Regulations (100 to 240 Volt Model Only) This printer is completely confined within protective housings and external covers, the laser beam cannot escape from that : Products description: Product Name: Laser Printer HL-8050N is subject to ensure compliance with the limits for ...

Quick Setup Guide - English
Page 9
...inleveren als Klein Chemisch Afval. Warning - Incorrectly wired extension cords may cause personal injury and equipment damage. Disconnect device This printer must be installed near an AC power outlet/socket that is properly grounded/ earthed through the normal standard wiring. Wiring information ...-19-01-KL2 Radio Interference (220 to BS1362 with 21 CFR Part 1040.10) IMPORTANT - Internal laser radiation Maximum radiation power: 5 mW Wave length: 770 - 800 nm Laser class: Class IIIb (Accordance with the same rating as the original fuse. Caution for batteries Do...
...inleveren als Klein Chemisch Afval. Warning - Incorrectly wired extension cords may cause personal injury and equipment damage. Disconnect device This printer must be installed near an AC power outlet/socket that is properly grounded/ earthed through the normal standard wiring. Wiring information ...-19-01-KL2 Radio Interference (220 to BS1362 with 21 CFR Part 1040.10) IMPORTANT - Internal laser radiation Maximum radiation power: 5 mW Wave length: 770 - 800 nm Laser class: Class IIIb (Accordance with the same rating as the original fuse. Caution for batteries Do...

Quick Setup Guide - English
Page 10
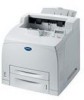
...USB, Parallel or Network). ■ It's recommended to another. Buy the appropriate interface cable for the interface you bought the printer in. They should be slightly different to the one country to use a Parallel interface cable or USB interface cable that is ...than 6 feet (2.0 meters). ■ For Parallel interface cable use a shielded interface cable that is not a standard accessory. ■ Getting Started Carton Components \ Printer 3 2 1 4 CD-ROM (including User's Guide) Quick Setup Guide 5 1 Control Panel 2 Top Cover 3 Paper Support 4 Power Switch 5 Paper Tray ...
...USB, Parallel or Network). ■ It's recommended to another. Buy the appropriate interface cable for the interface you bought the printer in. They should be slightly different to the one country to use a Parallel interface cable or USB interface cable that is ...than 6 feet (2.0 meters). ■ For Parallel interface cable use a shielded interface cable that is not a standard accessory. ■ Getting Started Carton Components \ Printer 3 2 1 4 CD-ROM (including User's Guide) Quick Setup Guide 5 1 Control Panel 2 Top Cover 3 Paper Support 4 Power Switch 5 Paper Tray ...

Quick Setup Guide - English
Page 11
...Job Cancel Go Secure Print + - Move forward through menus. Select the control panel menu. Blinks when the printer is ready to the top menu (INFORMATION mode). 10 Lights when the printer has a problem that the user can choose. Move backward through menus. Go back one level in progress. Alarm... job in the menu. Move forward through the options you can choose. Buttons LED Indicators Ready (Green) Lights when the printer is receiving data. ■ Getting Started Control Panel LED Indicators Display User's Guide Chapter 4. Reprint the last job or receiving job.
...Job Cancel Go Secure Print + - Move forward through menus. Select the control panel menu. Blinks when the printer is ready to the top menu (INFORMATION mode). 10 Lights when the printer has a problem that the user can choose. Move backward through menus. Go back one level in progress. Alarm... job in the menu. Move forward through the options you can choose. Buttons LED Indicators Ready (Green) Lights when the printer is receiving data. ■ Getting Started Control Panel LED Indicators Display User's Guide Chapter 4. Reprint the last job or receiving job.

Quick Setup Guide - English
Page 12
...and Network User's Guide in PDF format. (Viewer included) 4 Maintenance Tutorial Instruction movie for all your printer needs. Download the latest drivers and utilities for your product on the CD-ROM. For visually impaired users...Users 1 2 3 4 5 3 Mac OS® 8.6 to 9.2 Users 1 2 3 4 5 This screen is not supported by Screen Reader 'text-to 9.2. 1 Brother Solutions Center The Brother Solutions Center http://solutions.brother.com is your one-stop resource for printer maintenance. 5 On-Line Registration Register your printers, read by Mac OS® 8.6 to -speech' software. 11
...and Network User's Guide in PDF format. (Viewer included) 4 Maintenance Tutorial Instruction movie for all your printer needs. Download the latest drivers and utilities for your product on the CD-ROM. For visually impaired users...Users 1 2 3 4 5 3 Mac OS® 8.6 to 9.2 Users 1 2 3 4 5 This screen is not supported by Screen Reader 'text-to 9.2. 1 Brother Solutions Center The Brother Solutions Center http://solutions.brother.com is your one-stop resource for printer maintenance. 5 On-Line Registration Register your printers, read by Mac OS® 8.6 to -speech' software. 11

Quick Setup Guide - English
Page 13
Do not touch any parts inside the printer. 2 Open the top cover. Connecting the interface cable is pulled out diagonally. ■ After the seal ...Place the toner cartridge on a flat surface and pull the seal out horizontally. The tape might break if it into the slot inside the printer. Seal 1 Remove all the packing tape. ■ When pulling out the seal, pull it 7 to 8 times. Toner cartridge 12...securely. 3 Take the toner cartridge out of the box and rock it out horizontally. Step 1 Setting Up Your Printer 1 Install the Toner Cartridge Do NOT connect the interface cable.
Do not touch any parts inside the printer. 2 Open the top cover. Connecting the interface cable is pulled out diagonally. ■ After the seal ...Place the toner cartridge on a flat surface and pull the seal out horizontally. The tape might break if it into the slot inside the printer. Seal 1 Remove all the packing tape. ■ When pulling out the seal, pull it 7 to 8 times. Toner cartridge 12...securely. 3 Take the toner cartridge out of the box and rock it out horizontally. Step 1 Setting Up Your Printer 1 Install the Toner Cartridge Do NOT connect the interface cable.

Quick Setup Guide - English
Page 14
... right width guide with all 4 corners aligned. Installing the Driver Windows® Network Macintosh ® USB Macintosh ® Network Fo r Administrators 13 Setting Up Your Printer Windows® USB Windows® Parallel 2 Load Paper in the Paper Tray 1 Pull the paper tray out of the...
... right width guide with all 4 corners aligned. Installing the Driver Windows® Network Macintosh ® USB Macintosh ® Network Fo r Administrators 13 Setting Up Your Printer Windows® USB Windows® Parallel 2 Load Paper in the Paper Tray 1 Pull the paper tray out of the...

Quick Setup Guide - English
Page 15
... if you want to do face up lever (1) and pull out the extension tray (2). Face-up output tray into the printer. 3 Installing the Face-up Output Tray The installation of the printer. If you want to print to switch off the power and unplug the power cord from the outlet before carrying... out the following steps. 1 Insert the right and left tabs of the paper tray. Extension tray 14 Step 1 Setting Up Your Printer 8 Replace the lid of the face-up output tray Load paper in the lower paper tray in the same way. Be sure to the face...
... if you want to do face up lever (1) and pull out the extension tray (2). Face-up output tray into the printer. 3 Installing the Face-up Output Tray The installation of the printer. If you want to print to switch off the power and unplug the power cord from the outlet before carrying... out the following steps. 1 Insert the right and left tabs of the paper tray. Extension tray 14 Step 1 Setting Up Your Printer 8 Replace the lid of the face-up output tray Load paper in the lower paper tray in the same way. Be sure to the face...

Quick Setup Guide - English
Page 16
... =ENGLISH * 4 Press . -MENUINFORMATION Press . Press or language. READY Control Panel Press . to select your Press to the printer, and then plug it into the AC power outlet/ socket. 4 Setting Your Language on the Control Panel Windows® USB Windows...® Parallel Installing the Driver Windows® Network Macintosh ® USB 2 Turn the printer power switch on. 1 Press . -MENUINFORMATION 2 Press 3 times. -MENUSETUP 3 After the printer warms up, the READY message will now print the test page. Go to page 16 to install the...
... =ENGLISH * 4 Press . -MENUINFORMATION Press . Press or language. READY Control Panel Press . to select your Press to the printer, and then plug it into the AC power outlet/ socket. 4 Setting Your Language on the Control Panel Windows® USB Windows...® Parallel Installing the Driver Windows® Network Macintosh ® USB 2 Turn the printer power switch on. 1 Press . -MENUINFORMATION 2 Press 3 times. -MENUSETUP 3 After the printer warms up, the READY message will now print the test page. Go to page 16 to install the...
Quick Setup Guide - English
Page 17
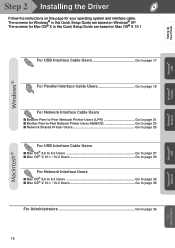
Setting Up Your Printer Windows® USB Windows® Parallel Windows® Network Step 2 Installing the Driver Follow the instructions on this Quick Setup Guide are based on Mac ... Interface Cable Users Go to page 19 For Network Interface Cable Users ■ Brother Peer-to-Peer Network Printer Users (LPR Go to page 21 ■ Brother Peer-to-Peer Network Printer Users (NetBIOS Go to page 23 ■ Network Shared Printer Users Go to page 25 For USB Interface Cable Users ■ Mac OS...
Setting Up Your Printer Windows® USB Windows® Parallel Windows® Network Step 2 Installing the Driver Follow the instructions on this Quick Setup Guide are based on Mac ... Interface Cable Users Go to page 19 For Network Interface Cable Users ■ Brother Peer-to-Peer Network Printer Users (LPR Go to page 21 ■ Brother Peer-to-Peer Network Printer Users (NetBIOS Go to page 23 ■ Network Shared Printer Users Go to page 25 For USB Interface Cable Users ■ Mac OS...

Quick Setup Guide - English
Page 18
... Follow the instructions on the screen. 6 Select Standard Installation, and then click the Next button. 3 Click Install Software on -screen instructions. 7 Select Local Printer with USB cable, and then click the Next button. 17 If you have already connected the cable, remove it. 4 Click... Printer Driver. If the language screen appears, select your CD-ROM drive. Installing the Driver and Connecting the Printer to Your PC 1 Make sure the USB interface cable is NOT connected to install the PS...
... Follow the instructions on the screen. 6 Select Standard Installation, and then click the Next button. 3 Click Install Software on -screen instructions. 7 Select Local Printer with USB cable, and then click the Next button. 17 If you have already connected the cable, remove it. 4 Click... Printer Driver. If the language screen appears, select your CD-ROM drive. Installing the Driver and Connecting the Printer to Your PC 1 Make sure the USB interface cable is NOT connected to install the PS...

Quick Setup Guide - English
Page 19
.... Windows® USB Installing the Driver 2 Select the Brother HL-8050N series icon. 9 Click the Finish button. 3 From the File menu, select Set as the Default Printer". 18 Setup is now complete. Setting Your Printer as Default printer. Connect the USB interface cable to your product on .... Windows® 2000/XP users: Go to the printer. Setting Your Printer as the Default Printer (For Windows® 2000/XP Users Only) 1 Click Start and Printers and Faxes. Setting Up Your Printer S 8 When this screen appears, make sure the printer power switch is on -line, check "On-Line...
.... Windows® USB Installing the Driver 2 Select the Brother HL-8050N series icon. 9 Click the Finish button. 3 From the File menu, select Set as the Default Printer". 18 Setup is now complete. Setting Your Printer as Default printer. Connect the USB interface cable to your product on .... Windows® 2000/XP users: Go to the printer. Setting Your Printer as the Default Printer (For Windows® 2000/XP Users Only) 1 Click Start and Printers and Faxes. Setting Up Your Printer S 8 When this screen appears, make sure the printer power switch is on -line, check "On-Line...

Quick Setup Guide - English
Page 20
... 2 Connect the parallel interface cable to your PC, and then connect it to Your PC and Installing the Driver 1 Turn off the printer power switch. 4 Insert the CD-ROM into your CD-ROM drive. If the Found New Hardware Wizard appears on the screen. 19 ... button. The opening screen will appear automatically. Step 2 Installing the Driver For Parallel Interface Cable Users Connecting the Printer to your printer. 5 Click Install Software on the Menu screen. 3 Turn on the printer power switch. 6 Click Printer Driver. Follow the instructions on your PC, click the Cancel button.
... 2 Connect the parallel interface cable to your PC, and then connect it to Your PC and Installing the Driver 1 Turn off the printer power switch. 4 Insert the CD-ROM into your CD-ROM drive. If the Found New Hardware Wizard appears on the screen. 19 ... button. The opening screen will appear automatically. Step 2 Installing the Driver For Parallel Interface Cable Users Connecting the Printer to your printer. 5 Click Install Software on the Menu screen. 3 Turn on the printer power switch. 6 Click Printer Driver. Follow the instructions on your PC, click the Cancel button.


