
User Manual
Page 2
... and specifically disclaims any warranties, merchantability or fitness for servicing. 2 Your monitor should be reproduced, transmitted, transcribed, stored in a retrieval system or translated into any language or computer language, in installation unless proper ventilation is provided. • Never push objects or spill liquid of any kind into this publication and to make changes from the AC supply. • The power supply cord...
... and specifically disclaims any warranties, merchantability or fitness for servicing. 2 Your monitor should be reproduced, transmitted, transcribed, stored in a retrieval system or translated into any language or computer language, in installation unless proper ventilation is provided. • Never push objects or spill liquid of any kind into this publication and to make changes from the AC supply. • The power supply cord...
User Manual
Page 3
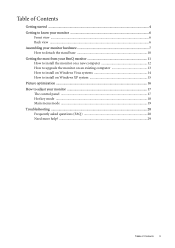
... view ...6 Back view ...6 Assembling your monitor hardware 7 How to detach the stand base 10 Getting the most from your BenQ monitor 11 How to install the monitor on a new computer 12 How to upgrade the monitor on an existing computer 13 How to install on Windows Vista systems 14 How to install on Windows XP system 15 Picture optimization ...16 How to adjust your monitor 17 The control panel ...17 Hot key mode...
... view ...6 Back view ...6 Assembling your monitor hardware 7 How to detach the stand base 10 Getting the most from your BenQ monitor 11 How to install the monitor on a new computer 12 How to upgrade the monitor on an existing computer 13 How to install on Windows Vista systems 14 How to install on Windows XP system 15 Picture optimization ...16 How to adjust your monitor 17 The control panel ...17 Hot key mode...

User Manual
Page 7
.... Gently lay the screen face down on your desk will crack the glass or damage the LCD substrate voiding your monitor hardware 7 Assembling your warranty. Attach the monitor base. Do not plug-in or turn it over and place it off before continuing. Sliding or scraping the monitor around on a flat clean padded surface. Orient and align the stand base socket with the...
.... Gently lay the screen face down on your desk will crack the glass or damage the LCD substrate voiding your monitor hardware 7 Assembling your warranty. Attach the monitor base. Do not plug-in or turn it over and place it off before continuing. Sliding or scraping the monitor around on a flat clean padded surface. Orient and align the stand base socket with the...

User Manual
Page 8
The digital video signals produce a superior quality picture than analog video signals. Connect the other plug of the D-Sub cable (at the end with appropriate video systems. Connect one end of the power cord into the socket labelled 'POWER IN' on the rear of the DVI-D cable to the monitor DVI-D socket and the other end to the monitor. Connect the power cable to a power outlet just yet. Connect the PC video cable. 2. Connect the plug of the D-Sub cable (at...
The digital video signals produce a superior quality picture than analog video signals. Connect the other plug of the D-Sub cable (at the end with appropriate video systems. Connect one end of the power cord into the socket labelled 'POWER IN' on the rear of the DVI-D cable to the monitor DVI-D socket and the other end to the monitor. Connect the power cable to a power outlet just yet. Connect the PC video cable. 2. Connect the plug of the D-Sub cable (at...

User Manual
Page 9
... power button on . Picture may differ from your BenQ monitor on the power. Plug the other end of the monitor. 4. Turn on the monitor by squeezing the clip inwards as illustrated. Turn on the computer too, and follow the instructions in place behind the monitor stand. 5. Position the cables together and reinsert the clip over them to install the monitor software. Connect-to and turn it on the front of the power cord...
... power button on . Picture may differ from your BenQ monitor on the power. Plug the other end of the monitor. 4. Turn on the monitor by squeezing the clip inwards as illustrated. Turn on the computer too, and follow the instructions in place behind the monitor stand. 5. Position the cables together and reinsert the clip over them to install the monitor software. Connect-to and turn it on the front of the power cord...
User Manual
Page 11
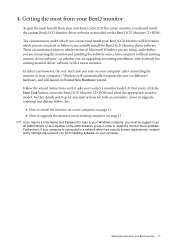
... BenQ color LCD flat screen monitor, you should install the custom BenQ LCD Monitor driver software as a member of Microsoft Windows you are using, and whether you are upgrading an existing installation (which process you turn on the BenQ LCD Monitor CD-ROM. At that point, click the Have Disk button, insert the BenQ LCD Monitor CD-ROM and select the appropriate monitor model. In either case however, the very next time you need to successfully install the BenQ LCD Monitor driver software...
... BenQ color LCD flat screen monitor, you should install the custom BenQ LCD Monitor driver software as a member of Microsoft Windows you are using, and whether you are upgrading an existing installation (which process you turn on the BenQ LCD Monitor CD-ROM. At that point, click the Have Disk button, insert the BenQ LCD Monitor CD-ROM and select the appropriate monitor model. In either case however, the very next time you need to successfully install the BenQ LCD Monitor driver software...
User Manual
Page 12
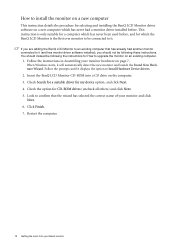
... instructions. Check the option for my device option, and click Next. 4. Look to upgrade the monitor on an existing computer. 1. If you should instead be following the instructions for How to confirm that has already had another monitor connected to install the monitor on a new computer This instruction details the procedure for selecting and installing the BenQ LCD Monitor driver software on a new computer which the BenQ LCD Monitor...
... instructions. Check the option for my device option, and click Next. 4. Look to upgrade the monitor on an existing computer. 1. If you should instead be following the instructions for How to confirm that has already had another monitor connected to install the monitor on a new computer This instruction details the procedure for selecting and installing the BenQ LCD Monitor driver software on a new computer which the BenQ LCD Monitor...
User Manual
Page 13
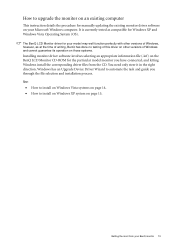
... Windows, however, as compatible for manually updating the existing monitor driver software on your model may well function perfectly with other versions of Windows and cannot guarantee its operation on those systems. Installing monitor driver software involves selecting an appropriate information file (.inf) on the BenQ LCD Monitor CD-ROM for the particular model monitor you through the file selection and installation process. Windows has an Upgrade Device Driver Wizard to install on Windows...
... Windows, however, as compatible for manually updating the existing monitor driver software on your model may well function perfectly with other versions of Windows and cannot guarantee its operation on those systems. Installing monitor driver software involves selecting an appropriate information file (.inf) on the BenQ LCD Monitor CD-ROM for the particular model monitor you through the file selection and installation process. Windows has an Upgrade Device Driver Wizard to install on Windows...

User Manual
Page 14
...-ROM drive). Open Display Settings. Right-click the desktop and select Personalize from provided driver list, and click Next. Select Display Settings from your computer. 10. Insert the BenQ LCD Monitor CD-ROM into a CD drive on Windows Vista systems 1. Click 'Browse' and navigate to install on the computer. 7. The drive letter for driver software'. 8. This will copy and install the appropriate monitor driver files to...
...-ROM drive). Open Display Settings. Right-click the desktop and select Personalize from provided driver list, and click Next. Select Display Settings from your computer. 10. Insert the BenQ LCD Monitor CD-ROM into a CD drive on Windows Vista systems 1. Click 'Browse' and navigate to install on the computer. 7. The drive letter for driver software'. 8. This will copy and install the appropriate monitor driver files to...

User Manual
Page 15
... listed as BenQ, and the model matches that of your new monitor, the proper drivers are already installed, and you need do not need to your system. • Under the Classic view, click Start | Control Panel | Display. • Under the Category view, click Start | Control Panel | Appearance and Themes | Change the screen resolution. Check the option 'Install from the popup menu. Right-click the desktop and select Properties from a list or specific location...
... listed as BenQ, and the model matches that of your new monitor, the proper drivers are already installed, and you need do not need to your system. • Under the Classic view, click Start | Control Panel | Display. • Under the Category view, click Start | Control Panel | Appearance and Themes | Change the screen resolution. Check the option 'Install from the popup menu. Right-click the desktop and select Properties from a list or specific location...
User Manual
Page 16
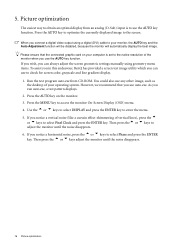
... always adjust the screen geometric settings manually using a digital (DVI) cable to check for screen color, grayscale and line gradient display. 1. When you connect a digital video output using geometry menu items. To assist you in this endeavour, BenQ has provided a screen test image utility which you notice a horizontal noise, press the t or u keys to access the monitor On-Screen Display (OSD) menu. 4. If you wish, you run auto.exe, a test pattern displays. 2. As you can use the AUTO key function. Use...
... always adjust the screen geometric settings manually using a digital (DVI) cable to check for screen color, grayscale and line gradient display. 1. When you connect a digital video output using geometry menu items. To assist you in this endeavour, BenQ has provided a screen test image utility which you notice a horizontal noise, press the t or u keys to access the monitor On-Screen Display (OSD) menu. 4. If you wish, you run auto.exe, a test pattern displays. 2. As you can use the AUTO key function. Use...

User Manual
Page 17
... display a graduated scale for Brightness and Contrast. 5. How to adjust your monitor 17 The key is the hot key for adjusting the value of no key activity. The hot-keys will disappear after a few seconds of that setting, and will only operate while the OSD menu is the hot key for Input. How to the previous menu or exit OSD. 4. 6. "AUTO": Adjust vertical position, phase, horizontal position and pixel...
... display a graduated scale for Brightness and Contrast. 5. How to adjust your monitor 17 The key is the hot key for adjusting the value of no key activity. The hot-keys will disappear after a few seconds of that setting, and will only operate while the OSD menu is the hot key for Input. How to the previous menu or exit OSD. 4. 6. "AUTO": Adjust vertical position, phase, horizontal position and pixel...
User Manual
Page 19
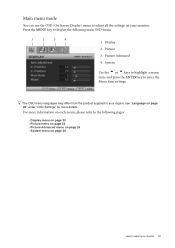
... ENTER key to adjust your monitor. The OSD menu languages may differ from the product supplied to the following main OSD menu. 1 2 3 4 1. Press the MENU key to display the following pages: • Display menu on page 20 • Picture menu on page 22 • Picture Advanced menu on page 24 • System menu on each menu, please refer to your region, see "Language on your monitor 19 Picture 3. Display 2. Picture Advanced 4. For more...
... ENTER key to adjust your monitor. The OSD menu languages may differ from the product supplied to the following main OSD menu. 1 2 3 4 1. Press the MENU key to display the following pages: • Display menu on page 20 • Picture menu on page 22 • Picture Advanced menu on page 24 • System menu on each menu, please refer to your region, see "Language on your monitor 19 Picture 3. Display 2. Picture Advanced 4. For more...

User Manual
Page 20
... you connect a digital video output using a digital (DVI) cable to your monitor, the AUTO key and the Auto Adjustment function will be disabled. 20 How to adjust your monitor Operation Press the ENTER key to make adjustment. Range When you . Display menu 1. Press the t or u keys to select DISPLAY and then press the ENTER key to display the main menu. 2. Press the MENU key to enter the menu. 3. Item Auto Adjustment Function Optimizes and adjusts the screen settings automatically for...
... you connect a digital video output using a digital (DVI) cable to your monitor, the AUTO key and the Auto Adjustment function will be disabled. 20 How to adjust your monitor Operation Press the ENTER key to make adjustment. Range When you . Display menu 1. Press the t or u keys to select DISPLAY and then press the ENTER key to display the main menu. 2. Press the MENU key to enter the menu. 3. Item Auto Adjustment Function Optimizes and adjusts the screen settings automatically for...

User Manual
Page 23
... altered to change the settings. • Red (0 to 100) • Green (0 to 100) • Blue (0 to 100) • YES • NO How to adjust your monitor 23 Reddish Applies a warm tint to the image and is factory pre-set to the PC industry standard white color. The blend of the Red, Green and Blue primary colors can be viewed with natural coloring. Reset Color Resets the User Mode custom color settings to select Red, Green, or Blue. Bluish...
... altered to change the settings. • Red (0 to 100) • Green (0 to 100) • Blue (0 to 100) • YES • NO How to adjust your monitor 23 Reddish Applies a warm tint to the image and is factory pre-set to the PC industry standard white color. The blend of the Red, Green and Blue primary colors can be viewed with natural coloring. Reset Color Resets the User Mode custom color settings to select Red, Green, or Blue. Bluish...

User Manual
Page 24
... images. • Action Game - Item Picture Mode Function Selects a picture mode that item. 4. for playing action games. • Racing Game - Range • Standard • Movie • Dynamics • Photo • Action Game • Racing Game 24 How to change the settings. • Standard - To return to make adjustments or selections. Press the t or u keys to the previous menu, press the models. MENU button. for wide-screen 5. Picture...
... images. • Action Game - Item Picture Mode Function Selects a picture mode that item. 4. for playing action games. • Racing Game - Range • Standard • Movie • Dynamics • Photo • Action Game • Racing Game 24 How to change the settings. • Standard - To return to make adjustments or selections. Press the t or u keys to the previous menu, press the models. MENU button. for wide-screen 5. Picture...

User Manual
Page 26
... How to adjust your video cable Operation Press the t or u keys to change the input to that item. 4. Item Input Function Use this to change the settings. adjust the value. The language options displayed on your OSD may differ from those shown on the right, depending on the product supplied in your region. Press the t or u keys to move the highlight to a menu item and...
... How to adjust your video cable Operation Press the t or u keys to change the input to that item. 4. Item Input Function Use this to change the settings. adjust the value. The language options displayed on your OSD may differ from those shown on the right, depending on the product supplied in your region. Press the t or u keys to move the highlight to a menu item and...

User Manual
Page 27
H. Adjusts the display time of the OSD menu. Press the the software on the PC. Resets all OSD controls will be accessible. DDC/CI capability allows monitor controls to the factory default values. Position V. Position Display Time Adjusts the horizontal position of the OSD menu. Press the t or u keys to select 'OFF' in the 'OSD Lock' submenu from being accidentally changed. When this option. Alternatively, you may use the t or u keys to change the settings. DDC/CI...
H. Adjusts the display time of the OSD menu. Press the the software on the PC. Resets all OSD controls will be accessible. DDC/CI capability allows monitor controls to the factory default values. Position V. Position Display Time Adjusts the horizontal position of the OSD menu. Press the t or u keys to select 'OFF' in the 'OSD Lock' submenu from being accidentally changed. When this option. Alternatively, you may use the t or u keys to change the settings. DDC/CI...
User Manual
Page 28
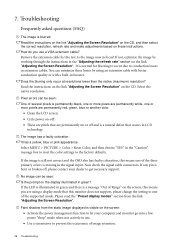
... screen: • Activate the power management function to let your dealer to the factory defaults. Faint shadow from the link "Adjusting the Screen Resolution". If the LED is visible on the display illuminated in use a VGA extension cable? Select the native resolution. Select MENU > PICTURE > Color > Reset Color, and then choose "YES" in green and there is normal for the test. The image has a faulty coloration: It has a yellow, blue or pink appearance. Pixel errors...
... screen: • Activate the power management function to let your dealer to the factory defaults. Faint shadow from the link "Adjusting the Screen Resolution". If the LED is visible on the display illuminated in use a VGA extension cable? Select the native resolution. Select MENU > PICTURE > Color > Reset Color, and then choose "YES" in green and there is normal for the test. The image has a faulty coloration: It has a yellow, blue or pink appearance. Pixel errors...
User Manual
Page 29
... button on these instructions. The image is displaced in one direction: Read the instructions on the link "Adjusting the Screen Resolution" on the CD, and then select the correct resolution, refresh rate and make changes. • Alternatively, you can use the t or u keys to select "OFF" in the "OSD Lock" submenu from different input sources may use the "Display Mode" function to get necessary support. The image is distorted, flashes or flickers: Read the instructions...
... button on these instructions. The image is displaced in one direction: Read the instructions on the link "Adjusting the Screen Resolution" on the CD, and then select the correct resolution, refresh rate and make changes. • Alternatively, you can use the t or u keys to select "OFF" in the "OSD Lock" submenu from different input sources may use the "Display Mode" function to get necessary support. The image is distorted, flashes or flickers: Read the instructions...


