
User Manual
Page 1
PV Series LCD Monitor User Manual
PV Series LCD Monitor User Manual
User Manual
Page 2
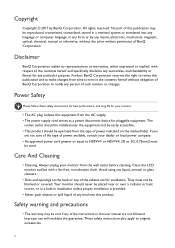
... © 2017 by any means, electronic, mechanical, magnetic, optical, chemical, manual or otherwise, without obligation of BenQ Corporation to notify any person of such revision or changes. Further, BenQ Corporation reserves the right to revise this publication and to make changes from the ...hereof and specifically disclaims any language or computer language, in the contents hereof without the prior written permission of this user manual are not followed. Your monitor should be reproduced, transmitted, transcribed, stored in a retrieval system or translated into this ...
... © 2017 by any means, electronic, mechanical, magnetic, optical, chemical, manual or otherwise, without obligation of BenQ Corporation to notify any person of such revision or changes. Further, BenQ Corporation reserves the right to revise this publication and to make changes from the ...hereof and specifically disclaims any language or computer language, in the contents hereof without the prior written permission of this user manual are not followed. Your monitor should be reproduced, transmitted, transcribed, stored in a retrieval system or translated into this ...

User Manual
Page 21
Installing shading hood 21 If you purchased and the provided software to the left end so the colorimeter can be installed. Follow the instruction manuals of the colorimeter you intend to calibrate the display's color by a colorimeter, slide the piece f to complete the installation and calibration process. Install the piece f . 2 1 f 8. 7.
Installing shading hood 21 If you purchased and the provided software to the left end so the colorimeter can be installed. Follow the instruction manuals of the colorimeter you intend to calibrate the display's color by a colorimeter, slide the piece f to complete the installation and calibration process. Install the piece f . 2 1 f 8. 7.
User Manual
Page 25
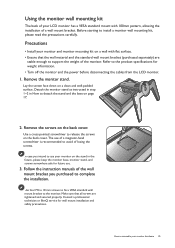
... base, monitor stand, and screws somewhere safe for future use. 3. Remove the screws on a clean and well-padded surface. Follow the instruction manuals of a wall mount bracket. The use your monitor on the stand in How to detach the stand and the base on a wall with 100mm... of a magnetic-head screwdriver is recommended to complete the installation. In case you purchased to avoid of the monitor. Consult a professional technician or BenQ service for weight information. • Turn off the monitor and the power before disconnecting the cables from the LCD monitor. 1. Use a cross-...
... base, monitor stand, and screws somewhere safe for future use. 3. Remove the screws on a clean and well-padded surface. Follow the instruction manuals of a wall mount bracket. The use your monitor on the stand in How to detach the stand and the base on a wall with 100mm... of a magnetic-head screwdriver is recommended to complete the installation. In case you purchased to avoid of the monitor. Consult a professional technician or BenQ service for weight information. • Turn off the monitor and the power before disconnecting the cables from the LCD monitor. 1. Use a cross-...
User Manual
Page 28
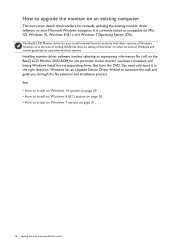
...versions of Windows and cannot guarantee its operation on those systems. Installing monitor driver software involves selecting an appropriate information file (.inf) on your BenQ monitor See: • How to install on Windows 10 system on page 29. • How to install on Windows 8 (8.1) system ...on page 30. • How to upgrade the monitor on an existing computer This instruction details the procedure for manually updating the existing monitor driver software on the BenQ LCD Monitor DVD-ROM for Mac OS, Windows 10, Windows 8 (8.1), and Windows 7 Operating System (OS). The...
...versions of Windows and cannot guarantee its operation on those systems. Installing monitor driver software involves selecting an appropriate information file (.inf) on your BenQ monitor See: • How to install on Windows 10 system on page 29. • How to install on Windows 8 (8.1) system ...on page 30. • How to upgrade the monitor on an existing computer This instruction details the procedure for manually updating the existing monitor driver software on the BenQ LCD Monitor DVD-ROM for Mac OS, Windows 10, Windows 8 (8.1), and Windows 7 Operating System (OS). The...

User Manual
Page 34
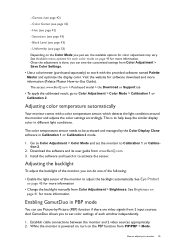
..., press and hold any of the following: • Apply the standard color settings from Color Adjustment > Color Mode. • Change the display and color settings manually from the OSD menu. Color Temp. (see Customizing the hot keys on page 34. • For Down/Decrease adjustment. 3 Custom Key 3 • By default, the...
..., press and hold any of the following: • Apply the standard color settings from Color Adjustment > Color Mode. • Change the display and color settings manually from the OSD menu. Color Temp. (see Customizing the hot keys on page 34. • For Down/Decrease adjustment. 3 Custom Key 3 • By default, the...
User Manual
Page 35
... use Picture-by the Color Display Clone software in different light conditions. While the monitor is done, you can save the customized settings from www.BenQ.com. 3. Once the adjustment is powered on, turn on the PBP function from 2 input sources. Saturation (see page 43) - Adjusting the ... Use a colorimeter (purchased separately) to activate the sensor. Gamma (see page 53) Depending on page 41 for more information • Change the backlight manually from Color Adjustment > Brightness. Establish cable connections between the monitor and 2 video sources appropriately. 2.
... use Picture-by the Color Display Clone software in different light conditions. While the monitor is done, you can save the customized settings from www.BenQ.com. 3. Once the adjustment is powered on, turn on the PBP function from 2 input sources. Saturation (see page 43) - Adjusting the ... Use a colorimeter (purchased separately) to activate the sensor. Gamma (see page 53) Depending on page 41 for more information • Change the backlight manually from Color Adjustment > Brightness. Establish cable connections between the monitor and 2 video sources appropriately. 2.
User Manual
Page 45
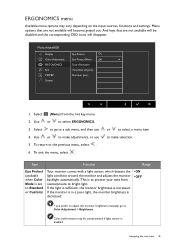
... keys that are not available will be compromised if light sensor is decreased. • ON • OFF If you prefer to adjust the monitor brightness manually, go to Color Adjustment > Brightness. Select to go to a sub menu, and then use 5. ERGONOMICS menu Available menu options may be disabled and the corresponding...
... keys that are not available will be compromised if light sensor is decreased. • ON • OFF If you prefer to adjust the monitor brightness manually, go to Color Adjustment > Brightness. Select to go to a sub menu, and then use 5. ERGONOMICS menu Available menu options may be disabled and the corresponding...
User Manual
Page 58
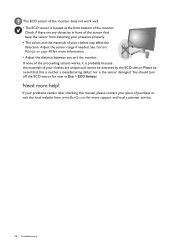
You should turn off the ECO sensor for now in front of the sensor that this manual, please contact your place of the monitor. See Sensor Range on page 48 for more support and local customer service. 58 Troubleshooting Need more information. &#... of your clothes are any obstacles in Eco > ECO Sensor. Check if there are unique and cannot be noted that keep the sensor from www.BenQ.com for more help?
You should turn off the ECO sensor for now in front of the sensor that this manual, please contact your place of the monitor. See Sensor Range on page 48 for more support and local customer service. 58 Troubleshooting Need more information. &#... of your clothes are any obstacles in Eco > ECO Sensor. Check if there are unique and cannot be noted that keep the sensor from www.BenQ.com for more help?

