
User Manual
Page 1
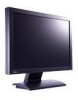
FP92W 19" Wide-Screen LCD Monitor User Manual Welcome 1.
FP92W 19" Wide-Screen LCD Monitor User Manual Welcome 1.

User Manual
Page 2
... and specifically disclaims any warranties, merchantability or fitness for servicing. 2 Always unplug your monitor from the AC supply. • The power supply cord serves as a power disconnect device for ventilation. Clean the LCD monitor surface with respect to dangerous voltages or other accident such as opening or removing covers ...of the type of power indicated on the marked label. All rights reserved. Avoid using any means, electronic, mechanical, magnetic, optical, chemical, manual or otherwise, without obligation of BenQ Corporation to notify any person of any form or by...
... and specifically disclaims any warranties, merchantability or fitness for servicing. 2 Always unplug your monitor from the AC supply. • The power supply cord serves as a power disconnect device for ventilation. Clean the LCD monitor surface with respect to dangerous voltages or other accident such as opening or removing covers ...of the type of power indicated on the marked label. All rights reserved. Avoid using any means, electronic, mechanical, magnetic, optical, chemical, manual or otherwise, without obligation of BenQ Corporation to notify any person of any form or by...

User Manual
Page 13
The screw plate at the back of the wall mount bracket you to assemble your monitor hardware 13 Slide the rear cover back toward you purchased to complete the installation. 3. How to remove it. Remove the rear cover. Follow the instruction manuals of the monitor could be revealed. 4.
The screw plate at the back of the wall mount bracket you to assemble your monitor hardware 13 Slide the rear cover back toward you purchased to complete the installation. 3. How to remove it. Remove the rear cover. Follow the instruction manuals of the monitor could be revealed. 4.

User Manual
Page 16
...details the procedure for manually updating the existing monitor driver software on your BenQ monitor Windows has an Upgrade Device Driver Wizard to install on Windows 2000 system on page 18. 16 Getting the most from the CD. You need only steer it in the right direction. The BenQ LCD Monitor driver for your ... Windows install the corresponding driver files from your Microsoft Windows computer. See: • How to install on Windows XP system on the BenQ LCD Monitor CD-ROM for Windows 2000 and Windows XP Operating System (OS). It is currently tested as at the time of writing...
...details the procedure for manually updating the existing monitor driver software on your BenQ monitor Windows has an Upgrade Device Driver Wizard to install on Windows 2000 system on page 18. 16 Getting the most from the CD. You need only steer it in the right direction. The BenQ LCD Monitor driver for your ... Windows install the corresponding driver files from your Microsoft Windows computer. See: • How to install on Windows XP system on the BenQ LCD Monitor CD-ROM for Windows 2000 and Windows XP Operating System (OS). It is currently tested as at the time of writing...

User Manual
Page 19
... monitor driver files to accept the changes. This will return you to the Install from :'. On Windows 2000, this manual from your needs. This will close the Display Properties window, and if you made any changes to the screen resolution, Windows 2000 will close the BenQ FP92W ... Close. How to the BenQ LCD Monitor CD-ROM. The field will display. 5. Click OK. Click the Have Disk button. Insert the CD-ROM into . 6. Should you wish to do so, this is where you attached the monitor to the Monitor Properties window, now renamed 'BenQ FP92W Properties'. Click the Browse ...
... monitor driver files to accept the changes. This will return you to the Install from :'. On Windows 2000, this manual from your needs. This will close the Display Properties window, and if you made any changes to the screen resolution, Windows 2000 will close the BenQ FP92W ... Close. How to the BenQ LCD Monitor CD-ROM. The field will display. 5. Click OK. Click the Have Disk button. Insert the CD-ROM into . 6. Should you wish to do so, this is where you attached the monitor to the Monitor Properties window, now renamed 'BenQ FP92W Properties'. Click the Browse ...

User Manual
Page 21
... don't have to choose the highest possible refresh rate on page 35 You can choose 60, 70 and 75 Hertz, (but not 72Hz) for an LCD display to flicker. Click Change, OK, then Yes. 5. How to match one of 1440 x 900. 1. Double click the Display icon in the specification table. 4. ... screen refresh rate 21 The best results are obtained by using the factory modes already set in the specification section of this User's Manual: Supported PC Timings on an LCD display, because it is a table with the factory modes in your computer. From the Display Properties window, select the Settings tab and...
... don't have to choose the highest possible refresh rate on page 35 You can choose 60, 70 and 75 Hertz, (but not 72Hz) for an LCD display to flicker. Click Change, OK, then Yes. 5. How to match one of 1440 x 900. 1. Double click the Display icon in the specification table. 4. ... screen refresh rate 21 The best results are obtained by using the factory modes already set in the specification section of this User's Manual: Supported PC Timings on an LCD display, because it is a table with the factory modes in your computer. From the Display Properties window, select the Settings tab and...

User Manual
Page 22
...connect a digital video output using geometry menu items. To assist you in this endeavour, BenQ has provided a screen test image utility which you notice a horizontal noise, press the t or u keys to adjust the monitor until the noise disappears. 22 Picture optimization As you use the i key function. ...use the i key function. If you wish, you can always adjust the screen geometric settings manually using a digital (DVI) cable to use auto.exe. However, we recommend that the connected graphic card on the monitor. 3. Use the t or u keys to select DISPLAY and press the ENTER key to...
...connect a digital video output using geometry menu items. To assist you in this endeavour, BenQ has provided a screen test image utility which you notice a horizontal noise, press the t or u keys to adjust the monitor until the noise disappears. 22 Picture optimization As you use the i key function. ...use the i key function. If you wish, you can always adjust the screen geometric settings manually using a digital (DVI) cable to use auto.exe. However, we recommend that the connected graphic card on the monitor. 3. Use the t or u keys to select DISPLAY and press the ENTER key to...

User Manual
Page 23
...previous menu or exit OSD. 6. u (Down) key: For Down/Decrease adjustment. "MENU" key: Activate OSD main menu and return to adjust your monitor The control panel 1. "Input" key: Manually switch the input signal between D-Sub and DVI. 7. See Hot key mode on or off. 2. t (Up) key: For Up/Increase adjustment. ... of no key activity. Hot-key displays will only operate while the OSD menu is also the hot key for Brightness. 4. How to adjust your monitor 23 8. The key is also the hot key for Contrast. 5. OSD = On Screen Display. "Power": Turn the power on page 25. "ENTER" key...
...previous menu or exit OSD. 6. u (Down) key: For Down/Decrease adjustment. "MENU" key: Activate OSD main menu and return to adjust your monitor The control panel 1. "Input" key: Manually switch the input signal between D-Sub and DVI. 7. See Hot key mode on or off. 2. t (Up) key: For Up/Increase adjustment. ... of no key activity. Hot-key displays will only operate while the OSD menu is also the hot key for Brightness. 4. How to adjust your monitor 23 8. The key is also the hot key for Contrast. 5. OSD = On Screen Display. "Power": Turn the power on page 25. "ENTER" key...

User Manual
Page 34
If your problems remain after checking this manual, please contact your place of purchase or e-mail us at: Support@BenQ.com 34 Troubleshooting Need more help? The image is distorted, flashes or flickers: Read the How to adjust the screen resolution on page 20 section and then select the correct resolution, refresh rate and make adjustments based on these instructions. The image is displaced in one direction: Read the How to adjust the screen resolution on page 20 section and then select the correct resolution, refresh rate and make adjustments based on these instructions.
If your problems remain after checking this manual, please contact your place of purchase or e-mail us at: Support@BenQ.com 34 Troubleshooting Need more help? The image is distorted, flashes or flickers: Read the How to adjust the screen resolution on page 20 section and then select the correct resolution, refresh rate and make adjustments based on these instructions. The image is displaced in one direction: Read the How to adjust the screen resolution on page 20 section and then select the correct resolution, refresh rate and make adjustments based on these instructions.

User Manual
Page 35
... 67.00 30.24 37.86 72.80 31.50 37.50 75.00 31.50 37.88 60.32 40.00 48.08 72.19 50.00 46.87 75.00 49.50 49.72 74.55 57.29 31.02 60.00 33.75 48.36 60.00 65... VESA VESA VESA VESA VESA IBMI VESA SPARC2 VESA VESA VESA • Image disruption may improve this situation by altering an automatic setting or by manually changing the phase setting and the pixel frequency from graphic cards which do not correspond with the usual standard. This is not, however, an error...
... 67.00 30.24 37.86 72.80 31.50 37.50 75.00 31.50 37.88 60.32 40.00 48.08 72.19 50.00 46.87 75.00 49.50 49.72 74.55 57.29 31.02 60.00 33.75 48.36 60.00 65... VESA VESA VESA VESA VESA IBMI VESA SPARC2 VESA VESA VESA • Image disruption may improve this situation by altering an automatic setting or by manually changing the phase setting and the pixel frequency from graphic cards which do not correspond with the usual standard. This is not, however, an error...

