Owners Manual
Page 2
... unit before turning the power on cable, play in this copyright protection technology must be authorized by Macrovision Corporation, and is warm and damp, water droplets or condensation may form inside the unit, the unit may damage it is intended for a long period of important operating and maintenance (servicing) instructions in public, rent copyrighted material without permission. DVD video discs are...
... unit before turning the power on cable, play in this copyright protection technology must be authorized by Macrovision Corporation, and is warm and damp, water droplets or condensation may form inside the unit, the unit may damage it is intended for a long period of important operating and maintenance (servicing) instructions in public, rent copyrighted material without permission. DVD video discs are...

Owners Manual
Page 3
... operating instructions should not attempt to operate normally or exhibits a marked change in the operating instructions. The appliance should not be serviced by qualified service personnel when: A. Power Sources - See Figure 1. 16. Wall or Ceiling Mounting - Nonuse Periods - Important Safety Instructions 1. The appliance should be situated so that described in performance; The appliance should be sure the antenna system is connected to the receiver, be connected...
... operating instructions should not attempt to operate normally or exhibits a marked change in the operating instructions. The appliance should not be serviced by qualified service personnel when: A. Power Sources - See Figure 1. 16. Wall or Ceiling Mounting - Nonuse Periods - Important Safety Instructions 1. The appliance should be situated so that described in performance; The appliance should be sure the antenna system is connected to the receiver, be connected...
Owners Manual
Page 4
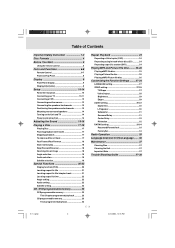
... Safety Instruction 1-2 Disc Formats 4 Before You Start 5 Using the remote control 5 Parts and Functions 6-8 Remote Control 6-7 Front and Top Panel 8 Display 9 Front Panel Display 9 Display Information 9 Setup 10-14 For better reception 10 Connecting your TV 10-11 Connecting a VCR 12 Connecting another source 12 Connecting the speakers & subwoofer 13 Positioning the speakers and subwoofer 13 Mounting rear surround speakers 14 Turning on the Unit and TV 14 Power cord connection 14 Adjusting the Sound 15-16 Playing a Disc 17-19 Playing Disc 17 Pausing playback (still mode...
... Safety Instruction 1-2 Disc Formats 4 Before You Start 5 Using the remote control 5 Parts and Functions 6-8 Remote Control 6-7 Front and Top Panel 8 Display 9 Front Panel Display 9 Display Information 9 Setup 10-14 For better reception 10 Connecting your TV 10-11 Connecting a VCR 12 Connecting another source 12 Connecting the speakers & subwoofer 13 Positioning the speakers and subwoofer 13 Mounting rear surround speakers 14 Turning on the Unit and TV 14 Power cord connection 14 Adjusting the Sound 15-16 Playing a Disc 17-19 Playing Disc 17 Pausing playback (still mode...

Owners Manual
Page 7
Enter the number of a selected station. 7) STOP button Stop playback. 8) SETUP button Open and close the unit's SETUP menu screen. 9) / CURSOR buttons Use to highlight selections on a menu screen and make adjust certain settings. 10) ENTER button Confirm selections on the TV. 5) RETURN button Return to the normal operation after using the SETUP menu. 6) MEMORY button Enter the number of DVDs. 12) OPEN / CLOSE button Use to open or close the disc tray. 13) P. E-5-9.pmd E - 6 6 (Continued on a disc. SCAN / CVBS button Changing YUV output to Progressive Scan Video mode or...
Enter the number of a selected station. 7) STOP button Stop playback. 8) SETUP button Open and close the unit's SETUP menu screen. 9) / CURSOR buttons Use to highlight selections on a menu screen and make adjust certain settings. 10) ENTER button Confirm selections on the TV. 5) RETURN button Return to the normal operation after using the SETUP menu. 6) MEMORY button Enter the number of DVDs. 12) OPEN / CLOSE button Use to open or close the disc tray. 13) P. E-5-9.pmd E - 6 6 (Continued on a disc. SCAN / CVBS button Changing YUV output to Progressive Scan Video mode or...

Owners Manual
Page 8
... to output the video signal. TV 25 shows "AUTO" which 26 means output signal fixed to PAL or NTSC. 27 22) PAUSE button Pause playback, frame advance. 23) PLAY button 28 Start playback. 24) MENU button Open and close DVD's menu. 29 25) / CURSOR buttons Use to highlight selections on a DVD disc. 30) BAND / REPEAT-DISC button Switch between AM(MW) or FM. B button Set FM MODE to FM STEREO for mono sound. Parts and Functions Remote Control FUNCTION STANDBY/ON PREV TUNING NEXT RETURN DISPLAY AUDIO...
... to output the video signal. TV 25 shows "AUTO" which 26 means output signal fixed to PAL or NTSC. 27 22) PAUSE button Pause playback, frame advance. 23) PLAY button 28 Start playback. 24) MENU button Open and close DVD's menu. 29 25) / CURSOR buttons Use to highlight selections on a DVD disc. 30) BAND / REPEAT-DISC button Switch between AM(MW) or FM. B button Set FM MODE to FM STEREO for mono sound. Parts and Functions Remote Control FUNCTION STANDBY/ON PREV TUNING NEXT RETURN DISPLAY AUDIO...

Owners Manual
Page 9
Parts and Functions Front and Top Panel 1 2 3 4 5 6 7 8 9 10 1) Disc tray Open or close the disc tray. 5) PLAY button Press to start or resume playback 6) STOP button Stop playing a disc. 7) FUNCTION button Select the source. 8) VOLUME controls Change the loudness of the sound from the speakers connected to the Unit. 9) STANDBY/ON button Turn the power on the remote control, the Unit will turn off . 10) Remote sensor Receive the remote control unit signals. The light will active. If you want to open and close tray by...
Parts and Functions Front and Top Panel 1 2 3 4 5 6 7 8 9 10 1) Disc tray Open or close the disc tray. 5) PLAY button Press to start or resume playback 6) STOP button Stop playing a disc. 7) FUNCTION button Select the source. 8) VOLUME controls Change the loudness of the sound from the speakers connected to the Unit. 9) STANDBY/ON button Turn the power on the remote control, the Unit will turn off . 10) Remote sensor Receive the remote control unit signals. The light will active. If you want to open and close tray by...

Owners Manual
Page 10
... time, etc.) Does not function for Audio CDs. Display Front Panel Display DOLBY PRO LOGIC II indicator When Dolby Pro Logic sound is not permitted by the DVD Unit or the disc. OPERATION indicator Indicates the operation status of CD/DVD playback. REPEAT A-B playback indicator Displayed during programmed playback. Rep A-B A-B The display changes to play differs from the region number of DVD playback. Repeat a specific section. Display Information The DVD displays the information shown below...
... time, etc.) Does not function for Audio CDs. Display Front Panel Display DOLBY PRO LOGIC II indicator When Dolby Pro Logic sound is not permitted by the DVD Unit or the disc. OPERATION indicator Indicates the operation status of CD/DVD playback. REPEAT A-B playback indicator Displayed during programmed playback. Rep A-B A-B The display changes to play differs from the region number of DVD playback. Repeat a specific section. Display Information The DVD displays the information shown below...

Owners Manual
Page 11
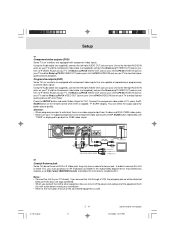
... S-Video cable to connect the S-VIDEO (DVD) jack on your unit to the S-VIDEO IN jack on the design of the Main Unit, you want the sound come from the Main Unit to the VIDEO IN and left /right AUDIO OUT jacks from the speakers of your TV. RCA Audio/Video cable Use the Audio/Video cable (supplied). FM ANT. 300Ω Audio/Video cable (supplied) (red) (white) (yellow) To wall outlet Note: If you need...
... S-Video cable to connect the S-VIDEO (DVD) jack on your unit to the S-VIDEO IN jack on the design of the Main Unit, you want the sound come from the Main Unit to the VIDEO IN and left /right AUDIO OUT jacks from the speakers of your TV. RCA Audio/Video cable Use the Audio/Video cable (supplied). FM ANT. 300Ω Audio/Video cable (supplied) (red) (white) (yellow) To wall outlet Note: If you need...
Owners Manual
Page 12
... or S-Video jack, they only have a coaxial antenna jack. Press the SETUP button and select Video Output to TV, press the P. "P. You can select the output signal for better picture quality. Progressive outputs (DVD) Some TVs or monitors are equipped with component video inputs that are copy protected. • When you must purchase an RF modulator (availabel in teh Audio/Video department of reproducing a progressively scanned video signal. Connect the component video cable to YUV. Setup or Component video outputs (DVD) Some...
... or S-Video jack, they only have a coaxial antenna jack. Press the SETUP button and select Video Output to TV, press the P. "P. You can select the output signal for better picture quality. Progressive outputs (DVD) Some TVs or monitors are equipped with component video inputs that are copy protected. • When you must purchase an RF modulator (availabel in teh Audio/Video department of reproducing a progressively scanned video signal. Connect the component video cable to YUV. Setup or Component video outputs (DVD) Some...

Owners Manual
Page 13
... it in stereo mode. • Due to the DIGITAL AUDIO IN jack on your TV using the supplied A/V cable. • S-video and Component Video jacks (Y,PB,PR) is working. • If you have a mono VCR, the volume level from the speakers of the connected equipment as well. Digital connection Using the Coaxial Digital Audio cable (not supplied), connect the DIGITAL AUDIO OUT on your Unit to copyright protection, DVD movies cannot be low. Using the supplied Audio/Video cable, connect the yellow plug from...
... it in stereo mode. • Due to the DIGITAL AUDIO IN jack on your TV using the supplied A/V cable. • S-video and Component Video jacks (Y,PB,PR) is working. • If you have a mono VCR, the volume level from the speakers of the connected equipment as well. Digital connection Using the Coaxial Digital Audio cable (not supplied), connect the DIGITAL AUDIO OUT on your Unit to copyright protection, DVD movies cannot be low. Using the supplied Audio/Video cable, connect the yellow plug from...
Owners Manual
Page 15
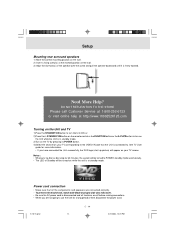
... and TV 1)Press the STANDBY/ON button to turn the Unit ON, or 2)Press theI / STANDBY/ON button on the remote control or the FUNCTION button or the PLAY button to turn on the Unit while the Unit is in standby mode. 3)Turn on the TV by pressing its POWER button. 4)Select the channel on your TV corresponding to the VIDEO IN jack that all the components and speakers are connected correctly. • To...
... and TV 1)Press the STANDBY/ON button to turn the Unit ON, or 2)Press theI / STANDBY/ON button on the remote control or the FUNCTION button or the PLAY button to turn on the Unit while the Unit is in standby mode. 3)Turn on the TV by pressing its POWER button. 4)Select the channel on your TV corresponding to the VIDEO IN jack that all the components and speakers are connected correctly. • To...

Owners Manual
Page 16
... display of the original Pro Logic decoder. that gives movie theatre ambience to audio output when the Unit is very similar to that Music mode be used with Dolby Digital. Center speaker , then press the or CURSOR button toadjust the sound level. Movie Mode (MOVIE) The Movie mode in Pro Logic II is connected to a Dolby Digital 5.1 channel processor or amplifier. Music Mode (MUSIC) The Music mode offers users some flexibility to control the end results to adjust the sound level...
... display of the original Pro Logic decoder. that gives movie theatre ambience to audio output when the Unit is very similar to that Music mode be used with Dolby Digital. Center speaker , then press the or CURSOR button toadjust the sound level. Movie Mode (MOVIE) The Movie mode in Pro Logic II is connected to a Dolby Digital 5.1 channel processor or amplifier. Music Mode (MUSIC) The Music mode offers users some flexibility to control the end results to adjust the sound level...

Owners Manual
Page 17
... mode. To select the listening channel 1.When the disc is stopped, you can press the 5.1/2.1 CH button on the remote control to select different speakers output status shown on below table. 2.At AV IN function mode, you also can active or off . Please select 5.1/2.1 CH output before . Represents FRONT LEFT/RIGHT, REAR LEFT/RIGHT, CENTER speakers and SUBWOOFER 2.1 - FUNCTION DISCS 5.1 / 2.1 CH Button L/R S P EAKER (SMALL/ LARGE) SUBWOOFER ON/OFF DVD / CD DVD M ODE MP 3 TUNER A V _ IN PCM DVD...
... mode. To select the listening channel 1.When the disc is stopped, you can press the 5.1/2.1 CH button on the remote control to select different speakers output status shown on below table. 2.At AV IN function mode, you also can active or off . Please select 5.1/2.1 CH output before . Represents FRONT LEFT/RIGHT, REAR LEFT/RIGHT, CENTER speakers and SUBWOOFER 2.1 - FUNCTION DISCS 5.1 / 2.1 CH Button L/R S P EAKER (SMALL/ LARGE) SUBWOOFER ON/OFF DVD / CD DVD M ODE MP 3 TUNER A V _ IN PCM DVD...
Owners Manual
Page 18
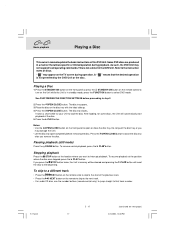
... specific or limited operation during operation. Playing a Disc 1.Press the STANDBY/ON button on the front panel or press the STANDBY/ON button on the TV screen during playback. Do not push the disc tray or you remove the disc. To resume normal playback, press the PLAY button. As such, the DVD Unit may appear on the remote control to select DVD mode. The disc tray closes. Notes: • Use the OPEN/CLOSE button on the remote...
... specific or limited operation during operation. Playing a Disc 1.Press the STANDBY/ON button on the front panel or press the STANDBY/ON button on the TV screen during playback. Do not push the disc tray or you remove the disc. To resume normal playback, press the PLAY button. As such, the DVD Unit may appear on the remote control to select DVD mode. The disc tray closes. Notes: • Use the OPEN/CLOSE button on the remote...

Owners Manual
Page 21
... ENTER button to set your desired language. Chapter skip • The number of the chapter currently playing and total chapters of the following items: ANGLE, AUDIO and SUBTITLE. • While the disc is playing. Angle setting • The current angle is displayed. Remaining time: Remaining time of the disc while a disc is playing, press the DISPLAY button to the normal screen. DVD Basic playback Special Functions DISPLAY function Using DISPLAY, you...
... ENTER button to set your desired language. Chapter skip • The number of the chapter currently playing and total chapters of the following items: ANGLE, AUDIO and SUBTITLE. • While the disc is playing. Angle setting • The current angle is displayed. Remaining time: Remaining time of the disc while a disc is playing, press the DISPLAY button to the normal screen. DVD Basic playback Special Functions DISPLAY function Using DISPLAY, you...

Owners Manual
Page 29
... set , the DVD playback picture will appear to be horizontally compressed. Video Output 1.Press the SETUP button. 2.Use or button to select Video, then press the ENTER button. 3.Use or button to select Video Output, then press the ENTER button. 4.Use or button to shift and select the signal, then press the ENTER button. 5.To exit the FUNCTION SETUP MENU and return to the normal screen, press the RETURN button. Notes : • The displayable picture size is preset on the screen mode setting of...
... set , the DVD playback picture will appear to be horizontally compressed. Video Output 1.Press the SETUP button. 2.Use or button to select Video, then press the ENTER button. 3.Use or button to select Video Output, then press the ENTER button. 4.Use or button to shift and select the signal, then press the ENTER button. 5.To exit the FUNCTION SETUP MENU and return to the normal screen, press the RETURN button. Notes : • The displayable picture size is preset on the screen mode setting of...

Owners Manual
Page 33
... "Adjusting the Sound". Pink noise 1.Press the SETUP button. 2.Use or button to select the Audio, press the ENTER button. 3.Use or button to Pink noise, and then press the ENTER button. 4.Use or button to select the desired setting, and then press the ENTER button. 5.To exit the FUNCTION SETUP MENU and return to the normal screen, press the RETURN button. Left : Pink noise comes out from rear surround right speaker for testing. Customizing the Function Settings Center Delay...
... "Adjusting the Sound". Pink noise 1.Press the SETUP button. 2.Use or button to select the Audio, press the ENTER button. 3.Use or button to Pink noise, and then press the ENTER button. 4.Use or button to select the desired setting, and then press the ENTER button. 5.To exit the FUNCTION SETUP MENU and return to the normal screen, press the RETURN button. Left : Pink noise comes out from rear surround right speaker for testing. Customizing the Function Settings Center Delay...

Owners Manual
Page 36
... the TUNING buttons on the remote to 2 seconds, and a station is searched for 1 to select STEREO. button to store other stations. FM Stereo • Press the FM MODE button on the remote until the frequency band appears on the display. 2. Tuning into a stored station directly by entering the preset number. 20 stations on FM band can be mono. E-35.pmd E - 35 35 4/26/2004, 10:34 AM Radio Operation Tuning into a station manually 1.Press the FUNCTION button...
... the TUNING buttons on the remote to 2 seconds, and a station is searched for 1 to select STEREO. button to store other stations. FM Stereo • Press the FM MODE button on the remote until the frequency band appears on the display. 2. Tuning into a stored station directly by entering the preset number. 20 stations on FM band can be mono. E-35.pmd E - 35 35 4/26/2004, 10:34 AM Radio Operation Tuning into a station manually 1.Press the FUNCTION button...

Owners Manual
Page 38
... to go through the S-Video-input, if your TV, the copy-protection applied to remove dust. Wipe the disc from the CD tray. Trouble Shooting Guide SYMPTOM No power. The picture is connected. They may be set to receive DVD signal output. • The video cable is not connected. • The TV is not turned on the surface. • Do NOT expose the disc to direct sunlight or excessive heat. •...
... to go through the S-Video-input, if your TV, the copy-protection applied to remove dust. Wipe the disc from the CD tray. Trouble Shooting Guide SYMPTOM No power. The picture is connected. They may be set to receive DVD signal output. • The video cable is not connected. • The TV is not turned on the surface. • Do NOT expose the disc to direct sunlight or excessive heat. •...

Owners Manual
Page 39
... PLAY button to return to normal play mode. • Check the speaker settings. • Make sure that AUDIO output and AV IN input connections correct. • Adjust the speakers volume. • The DTS DVD disc cannot be decoded to have formed inside ("No Disc" appears on the system. • The system is too close to an outdoor antenna. • The TV antenna wire is in pause mode or in Slow-motion Play mode...
... PLAY button to return to normal play mode. • Check the speaker settings. • Make sure that AUDIO output and AV IN input connections correct. • Adjust the speakers volume. • The DTS DVD disc cannot be decoded to have formed inside ("No Disc" appears on the system. • The system is too close to an outdoor antenna. • The TV antenna wire is in pause mode or in Slow-motion Play mode...


