Audiovox DPF800 - Digital Photo Frame Support and Manuals
Get Help and Manuals for this Audiovox item

View All Support Options Below
Free Audiovox DPF800 manuals!
Problems with Audiovox DPF800?
Ask a Question
Free Audiovox DPF800 manuals!
Problems with Audiovox DPF800?
Ask a Question
Popular Audiovox DPF800 Manual Pages
User Guide - Page 2
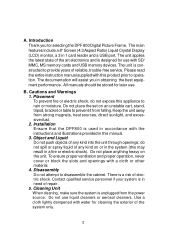
... years of the art electronics and is designed for selecting the DPF 800 Digital Picture Frame. B. Keep the unit away from the power source. Disassembly Do not attempt to prevent it from falling. Contact qualified service personnel if your system is used in accordance with the instructions and illustrations provided in obtaining the best equipment performance. The...
User Guide - Page 3
...
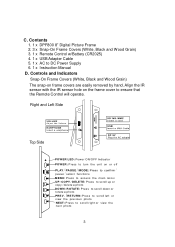
PREV./RETURN: Press to scroll left or
view the previous photo NEXT: Press to DC Power Supply 6. 1 x Instruction Manual
D. Contents 1. 1 x DPF800 8" Digital Picture Frame 2. 3 x Snap-On Frame Covers (White, Black and Wood Grain) 3. 1 x Remote Control w/Battery (CR2025) 4. 1 x USB Adapter Cable 5. 1 x AC to scrol l rig ht or view the next photo
3 Align the IR sensor with the IR sensor hole on...
User Guide - Page 4
...
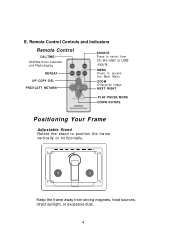
Remote Control
CAL/TIME
REPEAT UP/ COPY/ DEL
SOURCE Press to position the frame vertically or horizontally.
Keep the frame away from
SD/MS/MMC or USB inputs
MENU Press to access the Main Menu
ZOOM Enlarge an image NEXT/ RI GHT
PL AY/ PAU SE/ M ODE DO WN / RO TATE
Positioning Your Frame...
User Guide - Page 5
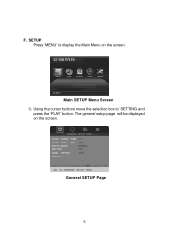
The general setup page will be displayed on the screen.
Main SETUP Menu Screen 1) Using the cursor buttons move the selection box to display the Main Menu on the screen. General SETUP Page
5 F.
SETUP Press 'MENU' to 'SETTING and
press the 'PLAY' button.
User Guide - Page 7
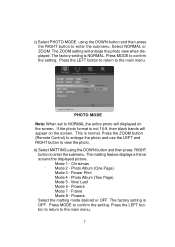
... 8 - Press the LEFT button to return to enter the submenu. The factory setting is normal. The matting feature displays a frame around the displayed picture. Press the ZOOM button (Remote Control) to enlarge the photo and use the LEFT and RIGHT button to confirm the setting. Vine/ Leaf Mode 6 - Flowers Select the matting mode desired or OFF...
User Guide - Page 8
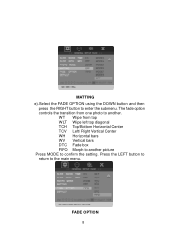
... Horizontal Center TCV Left/ Right Vertical Center WH Horizontal bars WV Vertical bars DTC Fade box FIFO Morph to another picture Press MODE to another.
WT Wipe from one photo to confirm the setting. Press the LEFT button to return to enter the submenu. MATTING e).Select the FADE OPTION using the DOWN button...
User Guide - Page 9
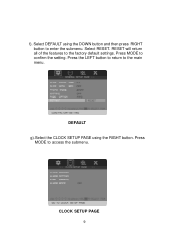
Select RESET. RESET will return all of the features to access the submenu. Press
MODE to the factory default settings. f). Press MODE to the main menu.
DEFAULT g).Select the CLOCK SETUP PAGE using the DOWN button and then press RIGHT button to enter the submenu.
Select DEFAULT using the RIGHT button. CLOCK SETUP PAGE
9 Press the LEFT button to return to confirm the setting.
User Guide - Page 10
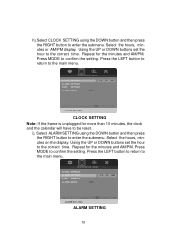
Press MODE to be reset. CLOCK SETTING Note: If the frame is unplugged for more than 10 minutes, the clock and the calendar will have to confirm the setting. Select the hours, minutes on the display. Press MODE to the correct time.
Using the UP or DOWN buttons set the hour to the main menu...
User Guide - Page 12
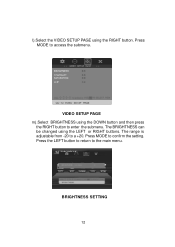
... main menu. Press the LEFT button to return to a +20. l).Select the VIDEO SETUP PAGE using the DOWN button and then press
the RIGHT button to enter the submenu. Press MODE to access the submenu. Press MODE to confirm the setting.
The BRIGHTNESS can be changed using the LEFT or RIGHT buttons.
User Guide - Page 13

... adjustable from -9 to a +16. Press the LEFT button to return to confirm the setting. SATURATION SETTING
13 The range is adjustable from -16 to a +9. CONTRAST SETTING o).Select SATURATION using the DOWN button and then press
the RIGHT button to the main menu... CONTRAST using the DOWN button and then press the RIGHT button to confirm the setting. Press MODE to enter the submenu.
User Guide - Page 14
... enter the submenu.
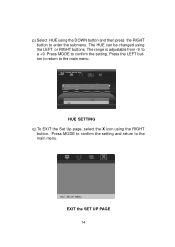
p).Select HUE using the DOWN button and then press the RIGHT button to the main menu. EXIT the SET UP PAGE
14 Press MODE to a +9. HUE SETTING q).To EXIT the Set Up page, select the X icon using the LEFT or RIGHT buttons. The range is adjustable from -9 to confirm the...
User Guide - Page 15
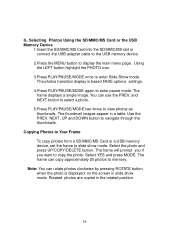
... displayed on the screen in a table. The thumbnail images appear in slide show mode. Copying Photos to Your Frame
To copy photos from a SD/MMC/MS Card or a USB memory device, set the frame to navigate through the thumbnails. Select the photo and press UP/COPY/DELETE button. Select YES and press MODE.
NEXT, UP and DOWN...
User Guide - Page 16
... select the desired track.
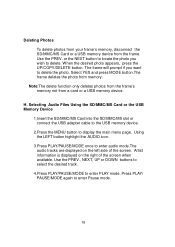
4.Press PLAY/PAUSE/MODE to delete. Press PLAY/ PAUSE/MODE again to delete the photo. Select YES and press MODE button.The frame deletes the photo from a card or a USB memory device. Using the LEFT button highlight the AUDIO icon.
3.Press PLAY/PAUSE/MODE once to display the main menu...
User Guide - Page 17
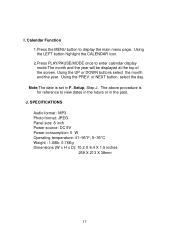
...CALENDAR icon. 2.Press PLAY/PAUSE/MODE once to display the main menu page. or NEXT button, select the day. Setup, Step J. SPECIFICATIONS Audio format : MP3 Photo format: JPEG Panel size: 8 inch Power source: DC 9V Power consumption: 5 W Operating temperature: 41~95°...future or in F. The above procedure is set in the past. Using the UP or DOWN buttons select the month and the year.
J. ...
User Guide - Page 18
...1-800-645-4994 FOR LOCATION OF WARRANTY STATION SERVING YOUR AREA
© 2007 Audiovox Electronics Corporation
128-5556G dated bill of sale), specification of defect(s), transportation prepaid, to any liability other express warranties or liabilities.
This Warranty is similarly warranted for installation, removal or reinstallation of the product, or to damage to digital memory/media...
Audiovox DPF800 Reviews
We have not received any reviews for Audiovox yet.