User Guide
Page 2
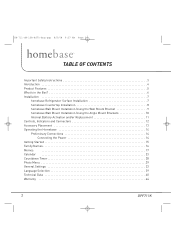
... Mount Bracket 9 homebase Wall Mount Installation Using the Angle Mount Brackets 10 Internal Battery Activation and/or Replacement 11 Controls, Indicators and Connectors 12 Accessory Placement 13 Operating the Homebase 14 Preliminary Connections 14 Connecting the Power 14 Getting Started 15 Family Names 16 Memos 17 Calendar 23 Countdown Timer 28 Photo Menu 29 General Settings 33 Language Selection 39 Technical Data 40 Warranty 44 2 DPF711K
... Mount Bracket 9 homebase Wall Mount Installation Using the Angle Mount Brackets 10 Internal Battery Activation and/or Replacement 11 Controls, Indicators and Connectors 12 Accessory Placement 13 Operating the Homebase 14 Preliminary Connections 14 Connecting the Power 14 Getting Started 15 Family Names 16 Memos 17 Calendar 23 Countdown Timer 28 Photo Menu 29 General Settings 33 Language Selection 39 Technical Data 40 Warranty 44 2 DPF711K
User Guide
Page 3
... on or pinched by items placed up or against them. For example: near water. Ventilation: The unit should not attempt to service the unit beyond those methods described in the User's Manual. Objects have a clear area from AC power during any openings or vents located on the unit. 1. The unit exhibits a marked change in the immediate vacinity...
... on or pinched by items placed up or against them. For example: near water. Ventilation: The unit should not attempt to service the unit beyond those methods described in the User's Manual. Objects have a clear area from AC power during any openings or vents located on the unit. 1. The unit exhibits a marked change in the immediate vacinity...
User Guide
Page 4
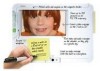
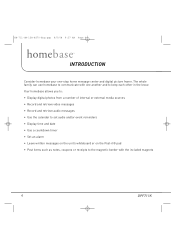
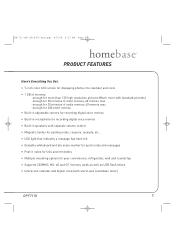
... to communicate with the included magnets 4 DPF711K Your homebase allows you to: • Display digital photos from a number of internal or external media sources • Record and retrieve video messages • Record and retrieve audio messages • Use the calendar to set audio and/or event reminders • Display time and date • Use a countdown timer • Set an alarm • Leave written messages on the unit's whiteboard or on the...
... to communicate with the included magnets 4 DPF711K Your homebase allows you to: • Display digital photos from a number of internal or external media sources • Record and retrieve video messages • Record and retrieve audio messages • Use the calendar to set audio and/or event reminders • Display time and date • Use a countdown timer • Set an alarm • Leave written messages on the unit's whiteboard or on the...
User Guide
Page 5
... Get: • 7-inch color LCD screen for displaying photos, the calendar and clock • 1 GB of memory -enough for more than 125 high resolution pictures (Much more with standard pictures) -enough for 20 minutes of video memos; 40 memos max -enough for 30 minutes of audio memos; 40 memos max -enough for 400 event memos • Built-in adjustable camera for recording digital voice memos...
... Get: • 7-inch color LCD screen for displaying photos, the calendar and clock • 1 GB of memory -enough for more than 125 high resolution pictures (Much more with standard pictures) -enough for 20 minutes of video memos; 40 memos max -enough for 30 minutes of audio memos; 40 memos max -enough for 400 event memos • Built-in adjustable camera for recording digital voice memos...
User Guide
Page 14
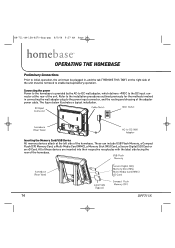
... homebase. The figure below illustrates a typical installation. These can include USB Flash Memory, a Compact Flash (CF) Memory Card, a Multi-Media Card (MMC), a Memory Stick (MS) Card, a Secure Digital (SD) Card or an xD Card. All of these devices are inserted into their respective receptacles with the label side facing the rear of the unit must be removed to enable backup battery operation. HB-711-OM-128-8270-Eng...
... homebase. The figure below illustrates a typical installation. These can include USB Flash Memory, a Compact Flash (CF) Memory Card, a Multi-Media Card (MMC), a Memory Stick (MS) Card, a Secure Digital (SD) Card or an xD Card. All of these devices are inserted into their respective receptacles with the label side facing the rear of the unit must be removed to enable backup battery operation. HB-711-OM-128-8270-Eng...
User Guide
Page 15
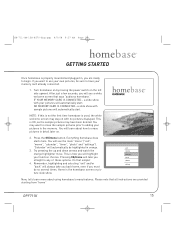
... the first time homebase is used, the white welcome screen may have your memory card already connected. 1. This is how you want to erase the sample pictures prior to adding your pictures will automatically start . exit mmeemmoo calendar timer photo setting Now, let's learn about using homebase's many features. You will highlight your own pictures, be highlighted in , you straight to have been deleted. You...
... the first time homebase is used, the white welcome screen may have your memory card already connected. 1. This is how you want to erase the sample pictures prior to adding your pictures will automatically start . exit mmeemmoo calendar timer photo setting Now, let's learn about using homebase's many features. You will highlight your own pictures, be highlighted in , you straight to have been deleted. You...
User Guide
Page 16
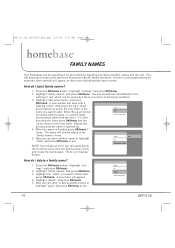
... button starts with a flashing curser. back all " which can be added to the "family names" menu. 5. Highlight "family names" and press OK/menu. How do I input family names? 1. Press the OK/menu button. If there is no backup button. There is a message waiting for "all mom add a new name 16 DPF711K Now you want to delete and press OK/menu. A new window will now be used...
... button starts with a flashing curser. back all " which can be added to the "family names" menu. 5. Highlight "family names" and press OK/menu. How do I input family names? 1. Press the OK/menu button. If there is no backup button. There is a message waiting for "all mom add a new name 16 DPF711K Now you want to delete and press OK/menu. A new window will now be used...
User Guide
Page 18
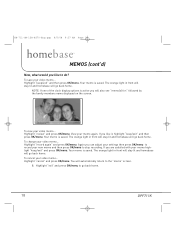
... clock display options is saved. Your memo is saved. To cancel your video memo... View your new memo and then press OK/menu to record your memo again. Again you can adjust your settings then press OK/menu to stop recording. Jan. 3rd, 2008 memo(s) for :" followed by the family members name displayed on the screen. Highlight "review" and press OK/menu. Highlight "record again" and press OK/menu...
... clock display options is saved. Your memo is saved. To cancel your video memo... View your new memo and then press OK/menu to record your memo again. Again you can adjust your settings then press OK/menu to stop recording. Jan. 3rd, 2008 memo(s) for :" followed by the family members name displayed on the screen. Highlight "review" and press OK/menu. Highlight "record again" and press OK/menu...
User Guide
Page 19
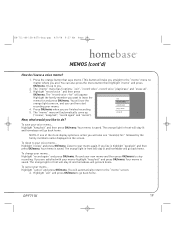
... memo is saved. Highlight "review" and press OK/menu. Listen to stop recording. To change your voice memo... Record your new memo and then press OK/menu to your memo. To cancel your voice memo... Your memo is active you are.) You can then start recording your memo again. The "record voice > for" will automatically come on the screen. The orange light in front...
... memo is saved. Highlight "review" and press OK/menu. Listen to stop recording. To change your voice memo... Record your new memo and then press OK/menu to your memo. To cancel your voice memo... Your memo is active you are.) You can then start recording your memo again. The "record voice > for" will automatically come on the screen. The orange light in front...
User Guide
Page 23
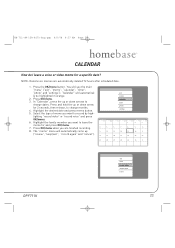
... record video record voice event DPF711K 23 Press OK/menu. 3. Highlight the desired date and press memo button. 5. "Calendar" will see the main "menu" ("exit", "memo", "calendar", "timer", "photo" and "settings"). In "Calendar", press the up ("review", "keep/exit", "record again" and "cancel"). Press OK/menu when you are automatically deleted 72 hours after scheduled date. 1. The "memo" menu will automatically come up or down arrow for a specific...
... record video record voice event DPF711K 23 Press OK/menu. 3. Highlight the desired date and press memo button. 5. "Calendar" will see the main "menu" ("exit", "memo", "calendar", "timer", "photo" and "settings"). In "Calendar", press the up ("review", "keep/exit", "record again" and "cancel"). Press OK/menu when you are automatically deleted 72 hours after scheduled date. 1. The "memo" menu will automatically come up or down arrow for a specific...
User Guide
Page 24
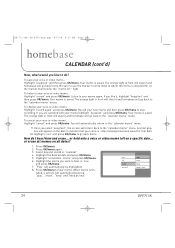
... I hear/view and erase... A small gray box will go back to the "calendar memo" menu. When memo is saved. To change your voice or video memo... Select day and month in front will stay lit and homebase will automatically pop up: "play erase keep keep as new 24 DPF711K Highlight "record again" and press OK/menu. or hold onto a voice or video memo...
... I hear/view and erase... A small gray box will go back to the "calendar memo" menu. When memo is saved. To change your voice or video memo... Select day and month in front will stay lit and homebase will automatically pop up: "play erase keep keep as new 24 DPF711K Highlight "record again" and press OK/menu. or hold onto a voice or video memo...
User Guide
Page 28
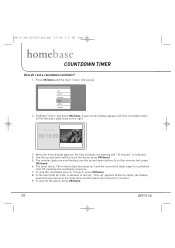
... 1 and the seconds (s) digits begin to "timeout", press OK/menu. 8. When the timer display appears, the hour (h) digits are now flashing; The timer starts. To shut off the alarm, press OK/menu. 28 DPF711K exit memo calendar timer photo settings 2. press OK/menu. 6. To stop the countdown prior to countdown from 59, initiating the countdown sequence. 7. countdown timer 00:10:00 h m s 3. Use the up and...
... 1 and the seconds (s) digits begin to "timeout", press OK/menu. 8. When the timer display appears, the hour (h) digits are now flashing; The timer starts. To shut off the alarm, press OK/menu. 28 DPF711K exit memo calendar timer photo settings 2. press OK/menu. 6. To stop the countdown prior to countdown from 59, initiating the countdown sequence. 7. countdown timer 00:10:00 h m s 3. Use the up and...
User Guide
Page 29
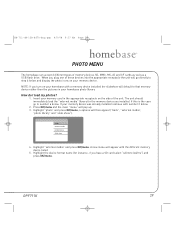
... load the "external media" library for instance, if you installed. Press OK/menu and the main "menu" will default to that memory device rather then the pictures in the appropriate receptacle on your homebase photo library How do I load my photos? 1. When you turn on your memory device was already installed continue with a memory device installed the slideshow will pop up. 3. Insert your memory card in your memory device. back external media photo library slide show "). Highlight the device format...
... load the "external media" library for instance, if you installed. Press OK/menu and the main "menu" will default to that memory device rather then the pictures in the appropriate receptacle on your homebase photo library How do I load my photos? 1. When you turn on your memory device was already installed continue with a memory device installed the slideshow will pop up. 3. Insert your memory card in your memory device. back external media photo library slide show "). Highlight the device format...
User Guide
Page 32
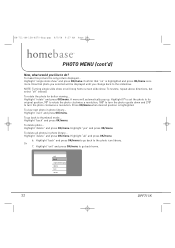
... screen slide show " and press OK/menu. Highlight "delete" and press OK/menu. To make this picture the only picture displayed... A menu will automatically pop up. Highlight "next" and press OK/menu. Highlight "back" and press OK/menu. exit back single slide display delete next rotate 32 DPF711K To restore, repeat above directions, but select "off" instead. To rotate the photo for better viewing... Highlight "rotate" and press OK/menu. Highlight 0° to set...
... screen slide show " and press OK/menu. Highlight "delete" and press OK/menu. To make this picture the only picture displayed... A menu will automatically pop up. Highlight "next" and press OK/menu. Highlight "back" and press OK/menu. exit back single slide display delete next rotate 32 DPF711K To restore, repeat above directions, but select "off" instead. To rotate the photo for better viewing... Highlight "rotate" and press OK/menu. Highlight 0° to set...
User Guide
Page 34
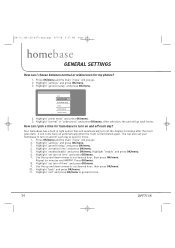
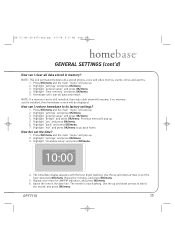
Highlight "settings" and press OK/menu. 3. exit general setup time/date setup alarm clock display family names 4. You can also set your homebase to turn on and off each day? Highlight "activation time" and press OK/menu. 5. Highlight "enable/disable" and press OK/menu. Repeat for my photos? 1. Press OK/menu. 8. Highlight "set turn on and off each day at specific times. 1. Your Homebase has a built in light sensor that will pop...
Highlight "settings" and press OK/menu. 3. exit general setup time/date setup alarm clock display family names 4. You can also set your homebase to turn on and off each day? Highlight "activation time" and press OK/menu. 5. Highlight "enable/disable" and press OK/menu. Repeat for my photos? 1. Press OK/menu. 8. Highlight "set turn on and off each day at specific times. 1. Your Homebase has a built in light sensor that will pop...
User Guide
Page 35
... pop up and down arrows to set the time? 1. Previous menu will clear all data stored in memory? Highlight "exit" and press OK/menu to its factory settings? 1. Highlight "time/date setup" and press OK/menu. 4. Use the up . 5. Use the up . 2. NOTE: If a memory card is now flashing. The time/date display appears with the hour digits flashing. The month is still installed, then auto slide show will pop up...
... pop up and down arrows to set the time? 1. Previous menu will clear all data stored in memory? Highlight "exit" and press OK/menu to its factory settings? 1. Highlight "time/date setup" and press OK/menu. 4. Use the up . 5. Use the up . 2. NOTE: If a memory card is now flashing. The time/date display appears with the hour digits flashing. The month is still installed, then auto slide show will pop up...

User Guide
Page 36
... press OK/menu to the "settings" menu automatically. 10. Press OK/menu and the main "menu" will automatically select the proper day name for the date entered. 8. A clock is now flashing. Note: When this is now complete, and the screen will return to go back home. Highlight "alarm set the alarm? 1. Repeat for AM/PM indication, and then press OK/menu. 36 DPF711K Use the...
... press OK/menu to the "settings" menu automatically. 10. Press OK/menu and the main "menu" will automatically select the proper day name for the date entered. 8. A clock is now flashing. Note: When this is now complete, and the screen will return to go back home. Highlight "alarm set the alarm? 1. Repeat for AM/PM indication, and then press OK/menu. 36 DPF711K Use the...

User Guide
Page 38
... Clock icon displayed on bottom of screen Clock icon displayed at left in split screen configuration 38 DPF711K Highlight "settings" and press OK/menu. 3. exit general setup time/date setup alarm clock display family names off ", "screen bottom edge", "large centered" and "split screen"), and then press OK/menu. HB-711-OM-128-8270-Eng.qxp 6/5/08 9:37 AM Page 38 GENERAL SETTINGS (cont'd) How do I change where the time is displayed...
... Clock icon displayed on bottom of screen Clock icon displayed at left in split screen configuration 38 DPF711K Highlight "settings" and press OK/menu. 3. exit general setup time/date setup alarm clock display family names off ", "screen bottom edge", "large centered" and "split screen"), and then press OK/menu. HB-711-OM-128-8270-Eng.qxp 6/5/08 9:37 AM Page 38 GENERAL SETTINGS (cont'd) How do I change where the time is displayed...
User Guide
Page 40
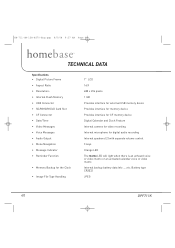
.../xD Card Slot • CF Connector • Date/Time • Video Messages • Voice Messages • Audio Output • Menu Navigation • Message Indicator • Reminder Function • Memory Backup for the Clock • Image File Type Handling 7" LCD 16:9 480 x 234 pixels 1 GB Provides interface for external USB memory device Provides interface for memory device Provides interface for CF memory device Digital Calendar and Clock Feature Internal camera for video recording Internal microphone for digital audio recording Internal speakers...
.../xD Card Slot • CF Connector • Date/Time • Video Messages • Voice Messages • Audio Output • Menu Navigation • Message Indicator • Reminder Function • Memory Backup for the Clock • Image File Type Handling 7" LCD 16:9 480 x 234 pixels 1 GB Provides interface for external USB memory device Provides interface for memory device Provides interface for CF memory device Digital Calendar and Clock Feature Internal camera for video recording Internal microphone for digital audio recording Internal speakers...
User Guide
Page 43
..., such defect(s) will be delivered with the sale of the product, or to damage to digital memory/media devices, gaming devices, discs, speakers, accessories, or electrical systems. This Warranty does not apply to be repaired or replaced with reconditioned product (at the address shown below. A game controller, if supplied, is authorized to assume for installation, removal or reinstallation of this product.
..., such defect(s) will be delivered with the sale of the product, or to damage to digital memory/media devices, gaming devices, discs, speakers, accessories, or electrical systems. This Warranty does not apply to be repaired or replaced with reconditioned product (at the address shown below. A game controller, if supplied, is authorized to assume for installation, removal or reinstallation of this product.


