Owners Manual
Page 3
... digital handset enables carriers supporting 1x technology to read the following pages of -the-art user-friendly features. Your new CDM-9900 provides you with 262k color. Please take a few moments to provide consumers with flash, TTY compatibility and GPS for hands-free use, while T9® Text Input, vibrating alert and multi-lingual menus make the most efficient use . Voice activated dialing and two...
... digital handset enables carriers supporting 1x technology to read the following pages of -the-art user-friendly features. Your new CDM-9900 provides you with 262k color. Please take a few moments to provide consumers with flash, TTY compatibility and GPS for hands-free use, while T9® Text Input, vibrating alert and multi-lingual menus make the most efficient use . Voice activated dialing and two...

Owners Manual
Page 4
... SAFETY INSTRUCTIONS 9 1 BEFORE USING YOUR PHONE 17 Package Contents 18 Front View 19 Key Functions 20 Icons on Main Display 21 Using the Battery 22 Installing the Battery Pack 22 Removing the Battery Pack 22 Charging the Battery 23 Charging the Phone's Battery 23 Charging with the Desktop Charger 24 Battery Information 24 Getting Started 25 Turning the Phone On/Off 25 Antenna Position 25 Multiple Languages 25 Security Code 25 Using Phone's Menu 26 Accessing Phone's Menu 26 Menu Tree 27 Using My Menu...
... SAFETY INSTRUCTIONS 9 1 BEFORE USING YOUR PHONE 17 Package Contents 18 Front View 19 Key Functions 20 Icons on Main Display 21 Using the Battery 22 Installing the Battery Pack 22 Removing the Battery Pack 22 Charging the Battery 23 Charging the Phone's Battery 23 Charging with the Desktop Charger 24 Battery Information 24 Getting Started 25 Turning the Phone On/Off 25 Antenna Position 25 Multiple Languages 25 Security Code 25 Using Phone's Menu 26 Accessing Phone's Menu 26 Menu Tree 27 Using My Menu...
Owners Manual
Page 6
... Editing a Phonebook Entry 48 Phonebook Edit Options 48 Selecting Ringer Type for Numbers 49 Assigning Pictures for Caller ID 50 Deleting Phone Numbers 51 Deleting Phonebook Entry 51 Using Speed Dialing 52 Speed Dialing 52 Quick Dialing 52 Assigning a Speed Dial Location 52 Changing Speed Dial Locations 53 Clearing a Speed Dial Entry 53 Voice Activated Dialing (VAD 54 Registering a Name 54 Replaying Registered Names 55 Dialing with Your Voice 55 Changing Registered Names 56 Deleting Registered Names 56 Deleting All Registered Names 56 Group List for Messaging...
... Editing a Phonebook Entry 48 Phonebook Edit Options 48 Selecting Ringer Type for Numbers 49 Assigning Pictures for Caller ID 50 Deleting Phone Numbers 51 Deleting Phonebook Entry 51 Using Speed Dialing 52 Speed Dialing 52 Quick Dialing 52 Assigning a Speed Dial Location 52 Changing Speed Dial Locations 53 Clearing a Speed Dial Entry 53 Voice Activated Dialing (VAD 54 Registering a Name 54 Replaying Registered Names 55 Dialing with Your Voice 55 Changing Registered Names 56 Deleting Registered Names 56 Deleting All Registered Names 56 Group List for Messaging...

Owners Manual
Page 21
... battery is charging. ♦ Flash: Improves picture or video quality in low-light conditions. Front View LED (green/red) Camera Lens Flash Antenna Main Display Earpiece Sub Display Center Key Left Softkey Navigation Key Send Key Volume Keys Side Camera Key Voice Mail Key Star Key (Vibration) Power Jack Data Connector Right Softkey Earphonemicrophone Jack End Key (Power) Camera/ Video Key Clear Key Speakerphone Key Pound Key (Side Key Lock) Microphone ♦ Sub Display: Displays the date and time, phone's status, notification of a scheduled event, missed call and incoming message...
... battery is charging. ♦ Flash: Improves picture or video quality in low-light conditions. Front View LED (green/red) Camera Lens Flash Antenna Main Display Earpiece Sub Display Center Key Left Softkey Navigation Key Send Key Volume Keys Side Camera Key Voice Mail Key Star Key (Vibration) Power Jack Data Connector Right Softkey Earphonemicrophone Jack End Key (Power) Camera/ Video Key Clear Key Speakerphone Key Pound Key (Side Key Lock) Microphone ♦ Sub Display: Displays the date and time, phone's status, notification of a scheduled event, missed call and incoming message...

Owners Manual
Page 22
... the Messaging menu (page 60). To scroll menu items press or . Camera/Video Key: Press to adjust the ringer volume in the standby mode. press and hold to make or answer a call (page 32); Key Functions Soft Keys: Press to lock or unlock the side keys. Send Key: Press to activate the vibration alert mode (page 99). Pound Key: Press and hold to perform the function indicated at the bottom of the display.
... the Messaging menu (page 60). To scroll menu items press or . Camera/Video Key: Press to adjust the ringer volume in the standby mode. press and hold to make or answer a call (page 32); Key Functions Soft Keys: Press to lock or unlock the side keys. Send Key: Press to activate the vibration alert mode (page 99). Pound Key: Press and hold to perform the function indicated at the bottom of the display.

Owners Manual
Page 29
... 1. Speed Dial #'s 4. Messaging 1. New Pix. DTMF Send 2. Contrast (Sub) 4. Security 1. Add New Entry 3. Voice Mail 2. Common 2. Erase All 1. Idle Screen 7. Any Key Answer 4. Group List 2. New Text Msg 3. Settings 1. Pix./Video Message 3. Mobile Web 6. Side Key Lock 4. Reset 5. Auto Retry Chapter 1 27 Recent Calls 1. Received 3. Call Timers 3. Get It Now 5. Vibration Alert 5. Auto Answer 2. Display 1. Time & Date 5. Open to Answer 3. Phonebook 1. Phone Lock 2. Text Message 4. Answer Options 1. Code Number 6. Quick Dialing...
... 1. Speed Dial #'s 4. Messaging 1. New Pix. DTMF Send 2. Contrast (Sub) 4. Security 1. Add New Entry 3. Voice Mail 2. Common 2. Erase All 1. Idle Screen 7. Any Key Answer 4. Group List 2. New Text Msg 3. Settings 1. Pix./Video Message 3. Mobile Web 6. Side Key Lock 4. Reset 5. Auto Retry Chapter 1 27 Recent Calls 1. Received 3. Call Timers 3. Get It Now 5. Vibration Alert 5. Auto Answer 2. Display 1. Time & Date 5. Open to Answer 3. Phonebook 1. Phone Lock 2. Text Message 4. Answer Options 1. Code Number 6. Quick Dialing...

Owners Manual
Page 48
... standby mode, press the right softkey under Options . ♦ Call to dial the phone number. ♦ Send Message to go to dial by selecting a phone number, e-mail address or Web address (URL) and pressing the right softkey under Contacts . 2. VAD Tip: To make a call using the speakerphone, press instead of . sage (only appears in phone numbers and e-mail addresses). ♦ Set Speed Dial to add the phone number to the Speed Dial list (see "Assigning a Speed Dial Location" on page 52). ♦ Set Voice Dial to add a voice dial tag...
... standby mode, press the right softkey under Options . ♦ Call to dial the phone number. ♦ Send Message to go to dial by selecting a phone number, e-mail address or Web address (URL) and pressing the right softkey under Contacts . 2. VAD Tip: To make a call using the speakerphone, press instead of . sage (only appears in phone numbers and e-mail addresses). ♦ Set Speed Dial to add the phone number to the Speed Dial list (see "Assigning a Speed Dial Location" on page 52). ♦ Set Voice Dial to add a voice dial tag...
Owners Manual
Page 50
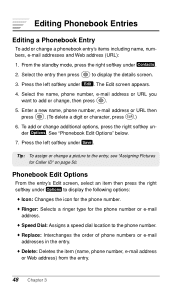
... following options: ♦ Icon: Changes the icon for the phone number. ♦ Ringer: Selects a ringer type for Caller ID" on page 50. Editing Phonebook Entries Editing a Phonebook Entry To add or change a picture to the entry, see "Assigning Pictures for the phone number or e-mail address. ♦ Speed Dial: Assigns a speed dial location to the phone number. ♦ Replace: Interchanges the order of phone numbers or e-mail addresses in the entry. ♦ Delete: Deletes the item (name, phone number, e-mail address or Web address) from the entry...
... following options: ♦ Icon: Changes the icon for the phone number. ♦ Ringer: Selects a ringer type for Caller ID" on page 50. Editing Phonebook Entries Editing a Phonebook Entry To add or change a picture to the entry, see "Assigning Pictures for the phone number or e-mail address. ♦ Speed Dial: Assigns a speed dial location to the phone number. ♦ Replace: Interchanges the order of phone numbers or e-mail addresses in the entry. ♦ Delete: Deletes the item (name, phone number, e-mail address or Web address) from the entry...

Owners Manual
Page 62
... ways: ♦ Displaying animation on the screen. ♦ Sound or vibrate in Inbox, Outbox and Saved Folder (page 74). Settings: Customizes the messaging feature (page 70). 0. Voice mail notification is the number of voice mails (page 61). 2. New Video Msg: Records and sends your videos (page 80). 5. Inbox: Saves incoming text/picture/video messages (page 66). 7. Saved: A folder that saves draft messages or moved messages from standby mode, press . 1. See "Alert" on a call, this alert is disabled. ♦ Displaying a message icon flashing (urgent/high) or...
... ways: ♦ Displaying animation on the screen. ♦ Sound or vibrate in Inbox, Outbox and Saved Folder (page 74). Settings: Customizes the messaging feature (page 70). 0. Voice mail notification is the number of voice mails (page 61). 2. New Video Msg: Records and sends your videos (page 80). 5. Inbox: Saves incoming text/picture/video messages (page 66). 7. Saved: A folder that saves draft messages or moved messages from standby mode, press . 1. See "Alert" on a call, this alert is disabled. ♦ Displaying a message icon flashing (urgent/high) or...

Owners Manual
Page 81
... phone takes a picture or starts recording a video automatically. The phone beeps every second. (The beep tone does not sound, if your phone's Ringer Volume is set to Silent or Vibration Alert is active, press the right softkey under Cancel . To activate the self-timer: 1. When the camera or video mode is activated.) The LED blinks green and turns red for the current video (see below). ♦ Camera Mode: Switch to the camera mode to take pictures...
... phone takes a picture or starts recording a video automatically. The phone beeps every second. (The beep tone does not sound, if your phone's Ringer Volume is set to Silent or Vibration Alert is active, press the right softkey under Cancel . To activate the self-timer: 1. When the camera or video mode is activated.) The LED blinks green and turns red for the current video (see below). ♦ Camera Mode: Switch to the camera mode to take pictures...

Owners Manual
Page 84
...9830; Quick Text: Select from the prepared text options. ♦ Emoticon: Select a smiley icon from options. ♦ Picture: Add or delete a picture. • Add Picture to take and add a picture (Camera) or to add a saved picture (Media Gallery). • Delete Picture to delete the picture. ♦ Sound: Add or delete a sound. • Add Sound to record and add your voice (Record New Voice) or to add a saved sound (Media Gallery or Voice Notes). • Delete Sound to delete the sound. ♦ Preview: View your signature that you want to send then press . 3. Picture Message Options...
...9830; Quick Text: Select from the prepared text options. ♦ Emoticon: Select a smiley icon from options. ♦ Picture: Add or delete a picture. • Add Picture to take and add a picture (Camera) or to add a saved picture (Media Gallery). • Delete Picture to delete the picture. ♦ Sound: Add or delete a sound. • Add Sound to record and add your voice (Record New Voice) or to add a saved sound (Media Gallery or Voice Notes). • Delete Sound to delete the sound. ♦ Preview: View your signature that you want to send then press . 3. Picture Message Options...

Owners Manual
Page 96
...; Delete Multiple: Delete pictures, images, videos, or tones. ♦ Rename: Edit a caption for My Folder, Photo Gallery and Video Gallery. Select Media Gallery then press . 3. See "Assigning a Picture to your recipients. (This option is only for My Folder, Graphics and Tones. To display the tone list, select Tones then press . 4. See "Sending Text Messages" on page 95. See "Sending a Video Message to an E-mail Address" on page 83.) ♦ Send Online Album: Send your picture or video to Phone...
...; Delete Multiple: Delete pictures, images, videos, or tones. ♦ Rename: Edit a caption for My Folder, Photo Gallery and Video Gallery. Select Media Gallery then press . 3. See "Assigning a Picture to your recipients. (This option is only for My Folder, Graphics and Tones. To display the tone list, select Tones then press . 4. See "Sending Text Messages" on page 95. See "Sending a Video Message to an E-mail Address" on page 83.) ♦ Send Online Album: Send your picture or video to Phone...

Owners Manual
Page 101
...: Sounds a short tone even if the key remains pressed. Audible alerts for these events will be muted. ♦ Incoming call received, even in the standby mode, press and hold . Press the left softkey under Menu then press 7 1 4 . 2. Chapter 8 99 Activating/Deactivating Vibration Alert: 1. Shortcut: To activate or deactivate Vibration Alert in Silent Alert mode. ♦ New Text/Picture/Video Messages received. ♦ New Voice Mail Notification received. ♦ Caller ID Alert, if activated. ♦ Service Alert, if activated. ♦ Alarm Clock...
...: Sounds a short tone even if the key remains pressed. Audible alerts for these events will be muted. ♦ Incoming call received, even in the standby mode, press and hold . Press the left softkey under Menu then press 7 1 4 . 2. Chapter 8 99 Activating/Deactivating Vibration Alert: 1. Shortcut: To activate or deactivate Vibration Alert in Silent Alert mode. ♦ New Text/Picture/Video Messages received. ♦ New Voice Mail Notification received. ♦ Caller ID Alert, if activated. ♦ Service Alert, if activated. ♦ Alarm Clock...

Owners Manual
Page 104
... normal mode. ♦ Low: Sets the power save mode. To change the main LCD backlight setting (in-use): 1. Press the left softkey under Menu then press 7 2 1 4 . 2. Note: Long backlight settings affect the battery's talk and standby times. 102 Chapter 8 Select Normal or Always On then press . ♦ Normal: Operates the same as the main LCD backlight setting (standby). ♦ Always On: Keeps the display...
... normal mode. ♦ Low: Sets the power save mode. To change the main LCD backlight setting (in-use): 1. Press the left softkey under Menu then press 7 2 1 4 . 2. Note: Long backlight settings affect the battery's talk and standby times. 102 Chapter 8 Select Normal or Always On then press . ♦ Normal: Operates the same as the main LCD backlight setting (standby). ♦ Always On: Keeps the display...

Owners Manual
Page 116
... data, the "Data Mode (Menu 763)" setting is selected, the icon the display. Data Mode (Menu 763) Sets the mode for receiving asynchronous data calls up to send asynchronous data. Quick Reference To Do To access Internet (Packet) Data Service (Menu 762) Packet Data Mode (Menu 763) (Off) To access Internet (QNC) To receive asynchronous data Circuit (Circuit) N/A Data To send asynchronous data Circuit N/A To make or answer voice calls N/A Off 114 Chapter 8 When your phone is on Note: 1. "Data Service (Menu 762)" must be reset to Data. 4. Select Off, Data or Data...
... data, the "Data Mode (Menu 763)" setting is selected, the icon the display. Data Mode (Menu 763) Sets the mode for receiving asynchronous data calls up to send asynchronous data. Quick Reference To Do To access Internet (Packet) Data Service (Menu 762) Packet Data Mode (Menu 763) (Off) To access Internet (QNC) To receive asynchronous data Circuit (Circuit) N/A Data To send asynchronous data Circuit N/A To make or answer voice calls N/A Off 114 Chapter 8 When your phone is on Note: 1. "Data Service (Menu 762)" must be reset to Data. 4. Select Off, Data or Data...

Owners Manual
Page 119
... and Password. ♦ Bearer 1: The same as advised by your service provider. ♦ Service Type: Select Auto, Packet Only or QNC Only. ♦ Bearer 0: Enter your service provider. Web Connection Settings (Menu 766) Enables Internet access through the web browser. Chapter 8 117 These may disable Web and Get It Now access capabilities. Enter the four-digit security code then press . 3. Press the left softkey under Menu then press 7 6 7 . 2. Connection Settings Never use the following "Connection" menus to change...
... and Password. ♦ Bearer 1: The same as advised by your service provider. ♦ Service Type: Select Auto, Packet Only or QNC Only. ♦ Bearer 0: Enter your service provider. Web Connection Settings (Menu 766) Enables Internet access through the web browser. Chapter 8 117 These may disable Web and Get It Now access capabilities. Enter the four-digit security code then press . 3. Press the left softkey under Menu then press 7 6 7 . 2. Connection Settings Never use the following "Connection" menus to change...

Owners Manual
Page 122
... make a call, enter a number then press VAD to listen to the voice guidance and to answer the call notification, new incoming messages, and phone locked). To display options, select Settings then press . 3. To activate or deactivate the option, select On or Off then press . ♦ Handset Status tells you display it. ♦ Standby Mode Guide beeps when the phone returns to standby mode. ♦ Menu Position Guide beeps when the first menu item is calling...
... make a call, enter a number then press VAD to listen to the voice guidance and to answer the call notification, new incoming messages, and phone locked). To display options, select Settings then press . 3. To activate or deactivate the option, select On or Off then press . ♦ Handset Status tells you display it. ♦ Standby Mode Guide beeps when the phone returns to standby mode. ♦ Menu Position Guide beeps when the first menu item is calling...

Owners Manual
Page 131
...; Alarm Time: Sounds the alarm in place of the scheduled event if the event alarm is activated, the phone will not sound. 2. To turn off , the alarm will vibrate in advance for Ringer Type, the image selected from Media Gallery or Animation (Work, Dinner, Leisure, Business, Meeting or Anniversary). To save the option settings, press the left softkey under Save . To return to the Edit Scheduler screen. ♦ Alarm Set: Activates or...
...; Alarm Time: Sounds the alarm in place of the scheduled event if the event alarm is activated, the phone will not sound. 2. To turn off , the alarm will vibrate in advance for Ringer Type, the image selected from Media Gallery or Animation (Work, Dinner, Leisure, Business, Meeting or Anniversary). To save the option settings, press the left softkey under Save . To return to the Edit Scheduler screen. ♦ Alarm Set: Activates or...

Owners Manual
Page 133
... set time, the clock will vibrate in Auto mode if you are on page 98. If the phone is activated, the phone will sound an alarm with animation. 2. Select Time then press . Select Notice then press press . . Note:1. To turn off , the alarm will sound after the call. 5. The clock may not sound an alarm in place of alarm. ♦ Ringer Volume: Adjusts the alarm volume. ♦ Ringer Type: Selects a ringer type for the alarm. Alarm Clock Sounds an alarm...
... set time, the clock will vibrate in Auto mode if you are on page 98. If the phone is activated, the phone will sound an alarm with animation. 2. Select Time then press . Select Notice then press press . . Note:1. To turn off , the alarm will sound after the call. 5. The clock may not sound an alarm in place of alarm. ♦ Ringer Volume: Adjusts the alarm volume. ♦ Ringer Type: Selects a ringer type for the alarm. Alarm Clock Sounds an alarm...

Owners Manual
Page 160
... Auto 116 Change 116 Name Tag 116 O One-Touch Dialing 52 One-Touch Voice Mail Dialing .. 61 Open to Answer 31, 107 P Pause 44, 47, 74 Phone (illus 19 Phone Setting Reset 111 Phonebook All Clear 110 Menu 42 Phonebook Entry Editing 48-51 Finding 45-47 Saving 43, 44 Photo Gallery 92, 93 Picture Inbox 84 Outbox 84 Sending 80-82 Taking 76, 77 Prepending Dialing 47 Q Quick Dialing 52, 112 R Recent Call All Clear...
... Auto 116 Change 116 Name Tag 116 O One-Touch Dialing 52 One-Touch Voice Mail Dialing .. 61 Open to Answer 31, 107 P Pause 44, 47, 74 Phone (illus 19 Phone Setting Reset 111 Phonebook All Clear 110 Menu 42 Phonebook Entry Editing 48-51 Finding 45-47 Saving 43, 44 Photo Gallery 92, 93 Picture Inbox 84 Outbox 84 Sending 80-82 Taking 76, 77 Prepending Dialing 47 Q Quick Dialing 52, 112 R Recent Call All Clear...

