

User Guide
Page 4
Chapter 3: BIOS setup 3.1 Knowing BIOS 3-1 3.2 BIOS setup program 3-2 3.2.1 EZ Mode 3-3 3.2.2 Advanced Mode 3-4 3.2.3 QFan Control 3-7 3.2.4 EZ Tuning Wizard 3-9 3.3 My Favorites 3-11 3.4 Main menu 3-13 ...3.8 Boot menu 3-47 3.9 Tool menu 3-53 3.9.1 ASUS EZ Flash 2 Utility 3-53 3.9.2 ASUS Overclocking Profile 3-54 3.9.3 ASUS SPD Information 3-55 3.10 Exit menu 3-56 3.11 Updating BIOS 3-57 3.11.1 EZ Update 3-57 3.11.2 ASUS EZ Flash 2 3-58 3.11.3 ASUS CrashFree BIOS 3 3-59 3.11.4 ASUS BIOS Updater 3-60 Chapter 4: Software support 4.1 Installing an operating...
Chapter 3: BIOS setup 3.1 Knowing BIOS 3-1 3.2 BIOS setup program 3-2 3.2.1 EZ Mode 3-3 3.2.2 Advanced Mode 3-4 3.2.3 QFan Control 3-7 3.2.4 EZ Tuning Wizard 3-9 3.3 My Favorites 3-11 3.4 Main menu 3-13 ...3.8 Boot menu 3-47 3.9 Tool menu 3-53 3.9.1 ASUS EZ Flash 2 Utility 3-53 3.9.2 ASUS Overclocking Profile 3-54 3.9.3 ASUS SPD Information 3-55 3.10 Exit menu 3-56 3.11 Updating BIOS 3-57 3.11.1 EZ Update 3-57 3.11.2 ASUS EZ Flash 2 3-58 3.11.3 ASUS CrashFree BIOS 3 3-59 3.11.4 ASUS BIOS Updater 3-60 Chapter 4: Software support 4.1 Installing an operating...
User Guide
Page 5
... 4.4.8 System Information 4-16 4.4.9 Version 4-17 4.5 Audio configurations 4-18 Chapter 5: RAID support 5.1 RAID configurations 5-1 5.1.1 RAID definitions 5-1 5.1.2 Installing Serial ATA hard disks 5-2 5.1.3 Setting the RAID item in BIOS 5-2 5.1.4 Intel® Rapid Storage Technology Option ROM utility 5-3 5.2 Creating a RAID driver disk 5-7 5.2.1 Creating a RAID driver disk without entering the OS 5-7 5.2.2 Creating a RAID driver disk in...
... 4.4.8 System Information 4-16 4.4.9 Version 4-17 4.5 Audio configurations 4-18 Chapter 5: RAID support 5.1 RAID configurations 5-1 5.1.1 RAID definitions 5-1 5.1.2 Installing Serial ATA hard disks 5-2 5.1.3 Setting the RAID item in BIOS 5-2 5.1.4 Intel® Rapid Storage Technology Option ROM utility 5-3 5.2 Creating a RAID driver disk 5-7 5.2.1 Creating a RAID driver disk without entering the OS 5-7 5.2.2 Creating a RAID driver disk in...

User Guide
Page 7
...have been added by your dealer. Detailed descriptions of the BIOS parameters are not part of the switches, jumpers, and connectors on ASUS hardware and software products. Refer to change system settings through the BIOS Setup menus. It includes description of the standard package. ... documentation, such as warranty flyers, that may have to perform when installing system components. • Chapter 3: BIOS setup This chapter tells how to the ASUS contact information. 2. About this guide is organized This guide contains the following sources for additional information and for...
...have been added by your dealer. Detailed descriptions of the BIOS parameters are not part of the switches, jumpers, and connectors on ASUS hardware and software products. Refer to change system settings through the BIOS Setup menus. It includes description of the standard package. ... documentation, such as warranty flyers, that may have to perform when installing system components. • Chapter 3: BIOS setup This chapter tells how to the ASUS contact information. 2. About this guide is organized This guide contains the following sources for additional information and for...

User Guide
Page 10
Z97M-PLUS specifications summary Audio USB ASUS special features Realtek® ALC887 7.1-channel high definition audio CODEC featuring Crystal Sound 2 - Audio amplifier: Provides the highest-quality sound for the CPU - Unique de-pop circuit: Reduces start-up to audio outputs - supports ASUS USB 3.0 Boost - 6 x USB 3.0/2.0 ports (2 ports at mid-board, 4 ports at rear panel [blue... 5X PROTECTION: DIGI+ VRM, DRAM Fuse, ESD Guards, High-Quality 5K-Hour Solid Capacitors, and Stainless Steel Back I /O - 3x More durable corrosion-resistant coating UEFI BIOS -
Z97M-PLUS specifications summary Audio USB ASUS special features Realtek® ALC887 7.1-channel high definition audio CODEC featuring Crystal Sound 2 - Audio amplifier: Provides the highest-quality sound for the CPU - Unique de-pop circuit: Reduces start-up to audio outputs - supports ASUS USB 3.0 Boost - 6 x USB 3.0/2.0 ports (2 ports at mid-board, 4 ports at rear panel [blue... 5X PROTECTION: DIGI+ VRM, DRAM Fuse, ESD Guards, High-Quality 5K-Hour Solid Capacitors, and Stainless Steel Back I /O - 3x More durable corrosion-resistant coating UEFI BIOS -

User Guide
Page 11
... - EZ DIY Push Notice - vPCH: 154-step Chipset voltage control SFS (Stepless Frequency Selection) - ASUS CrashFree BIOS 3 - iGPU: Adjustable CPU Graphics voltage at 0.01V increment - ASUS Fan Xpert 3 - ASUS EZ Flash 2 Q-Design - Z97M-PLUS specifications summary ASUS special features ASUS quiet thermal solution ASUS exclusive overclocking features Gaming Scenario Crystal Sound 2 - Flawless audio that makes you part of the...
... - EZ DIY Push Notice - vPCH: 154-step Chipset voltage control SFS (Stepless Frequency Selection) - ASUS CrashFree BIOS 3 - iGPU: Adjustable CPU Graphics voltage at 0.01V increment - ASUS Fan Xpert 3 - ASUS EZ Flash 2 Q-Design - Z97M-PLUS specifications summary ASUS special features ASUS quiet thermal solution ASUS exclusive overclocking features Gaming Scenario Crystal Sound 2 - Flawless audio that makes you part of the...

User Guide
Page 12
...Specifications are subject to the control mode automatically. 64 Mb Flash ROM, UEFI AMI BIOS, PnP, DMI 2.7, WfM 2.0, SM BIOS 2.8, ACPI 5.0, Multi-language BIOS, ASUS EZ Flash 2, CrashFree BIOS 3, F11 EZ Tuning Wizard, F6 Qfan Control, F3 My Favorites, Quick Note,...pin EATX Power connector 1 x 8-pin EATX 12V Power connector 1 x System panel connector 1 x MemOK! xii Z97M-PLUS specifications summary Back Panel I/O Ports Internal I/O connectors / jumpers / buttons BIOS features Manageability Support DVD contents Operating system support Form factor 1 x PS/2 mouse / keyboard combo port 1 x ...
...Specifications are subject to the control mode automatically. 64 Mb Flash ROM, UEFI AMI BIOS, PnP, DMI 2.7, WfM 2.0, SM BIOS 2.8, ACPI 5.0, Multi-language BIOS, ASUS EZ Flash 2, CrashFree BIOS 3, F11 EZ Tuning Wizard, F6 Qfan Control, F3 My Favorites, Quick Note,...pin EATX Power connector 1 x 8-pin EATX 12V Power connector 1 x System panel connector 1 x MemOK! xii Z97M-PLUS specifications summary Back Panel I/O Ports Internal I/O connectors / jumpers / buttons BIOS features Manageability Support DVD contents Operating system support Form factor 1 x PS/2 mouse / keyboard combo port 1 x ...

User Guide
Page 18
... EATXPWR BATTERY 7 8 MemOK! 9 DRAM_LED 2 24.4cm(9.6in) SATA6G_1 SATA6G_2 SATA6G_56 SATA6G_34 USB3_12 M.2(SOCKET3) AUDIO CHA_FAN1 10 Z97M-PLUS Intel I218-V PCIEX16_1 Super I/O ALC 887 AAFP PCI1 11 ASM Intel® PCI2 1083 Z97 SB_PWR 12 BIOS PCIEX16_2 LPT SPDIF_OUT TPM COM USB910 USB1112 USB1314 CLRTC PANEL 13 20 19 18 17 16 15...
... EATXPWR BATTERY 7 8 MemOK! 9 DRAM_LED 2 24.4cm(9.6in) SATA6G_1 SATA6G_2 SATA6G_56 SATA6G_34 USB3_12 M.2(SOCKET3) AUDIO CHA_FAN1 10 Z97M-PLUS Intel I218-V PCIEX16_1 Super I/O ALC 887 AAFP PCI1 11 ASM Intel® PCI2 1083 Z97 SB_PWR 12 BIOS PCIEX16_2 LPT SPDIF_OUT TPM COM USB910 USB1112 USB1314 CLRTC PANEL 13 20 19 18 17 16 15...

User Guide
Page 22
...on the CPU's capabilities and other installed devices. • Always install the DIMMS with the vendor to get the correct memory modules. • ASUS exclusively provides hyper DIMM support function. • Hyper DIMM support is subject to the memory address limitation on 32-bit Windows® OS, ...do any of the following: a) Use a maximum of the lower-sized channel for the latest QVL. settings in the BIOS for the hyper DIMM support. • Visit the ASUS website for the dual-channel configuration. Memory configurations You may install 2GB, 4GB, and 8GB unbuffered and non‑ECC...
...on the CPU's capabilities and other installed devices. • Always install the DIMMS with the vendor to get the correct memory modules. • ASUS exclusively provides hyper DIMM support function. • Hyper DIMM support is subject to the memory address limitation on 32-bit Windows® OS, ...do any of the following: a) Use a maximum of the lower-sized channel for the latest QVL. settings in the BIOS for the hyper DIMM support. • Visit the ASUS website for the dual-channel configuration. Memory configurations You may install 2GB, 4GB, and 8GB unbuffered and non‑ECC...

User Guide
Page 25
...OFF the computer and unplug the power cord. 2. Keep the cap on CLRTC jumper default position. Chapter 1 ASUS Z97M-PLUS 1-11 To erase the RTC RAM: Z97M-PLUS CLRTC 12 23 Normal (Default) Z97M-PLUS Clear RTC RAM Clear RTC 1. Removing the cap will cause system boot failure! • If the steps above... Shut down the key during the boot process and enter BIOS setup to default values. You can automatically reset parameter settings to reenter data. For system failure due to pins 2-3. Hold down and reboot the system so the BIOS can clear the CMOS memory of date, time, and ...
...OFF the computer and unplug the power cord. 2. Keep the cap on CLRTC jumper default position. Chapter 1 ASUS Z97M-PLUS 1-11 To erase the RTC RAM: Z97M-PLUS CLRTC 12 23 Normal (Default) Z97M-PLUS Clear RTC RAM Clear RTC 1. Removing the cap will cause system boot failure! • If the steps above... Shut down the key during the boot process and enter BIOS setup to default values. You can automatically reset parameter settings to reenter data. For system failure due to pins 2-3. Hold down and reboot the system so the BIOS can clear the CMOS memory of date, time, and ...

User Guide
Page 26
... BIOS default settings. button • Refer to section 1.2.8 Onboard LEDs for successful boot. switch to begin automatic memory compatibility tuning for the exact location of the DRAM_LED. • The DRAM_LED also lights up due to boot after the whole tuning process, the DRAM_LED lights continuously. Z97M-PLUS Z97M-PLUS ...• We recommend that are not compatible with ones recommended in the Memory QVL (Qualified Vendors Lists) on the ASUS website at www.asus.com. • If you to the latest BIOS version from the ASUS website at www.asus.com after using the MemOK!
... BIOS default settings. button • Refer to section 1.2.8 Onboard LEDs for successful boot. switch to begin automatic memory compatibility tuning for the exact location of the DRAM_LED. • The DRAM_LED also lights up due to boot after the whole tuning process, the DRAM_LED lights continuously. Z97M-PLUS Z97M-PLUS ...• We recommend that are not compatible with ones recommended in the Memory QVL (Qualified Vendors Lists) on the ASUS website at www.asus.com. • If you to the latest BIOS version from the ASUS website at www.asus.com after using the MemOK!

User Guide
Page 27
... (GPU Boost and CPU BCLK/Ratio Boost) Z97M-PLUS GPU Boost switch • To ensure system performance, enable this switch under the Windows® OS environment, the GPU Boost function will use the TurboV feature in the AI Suite 3 application, adjust the BIOS setup program or enable the GPU Boost switch at... for a more enhanced performance. • The GPU Boost LED near the GPU Boost switch lights up when the GPU Boost switch is enabled. Chapter 1 ASUS Z97M-PLUS 1-13 Refer to section 1.2.8 Onboard LEDs for the exact location of the GPU Boost LED. • If you have made. 2.
... (GPU Boost and CPU BCLK/Ratio Boost) Z97M-PLUS GPU Boost switch • To ensure system performance, enable this switch under the Windows® OS environment, the GPU Boost function will use the TurboV feature in the AI Suite 3 application, adjust the BIOS setup program or enable the GPU Boost switch at... for a more enhanced performance. • The GPU Boost LED near the GPU Boost switch lights up when the GPU Boost switch is enabled. Chapter 1 ASUS Z97M-PLUS 1-13 Refer to section 1.2.8 Onboard LEDs for the exact location of the GPU Boost LED. • If you have made. 2.

User Guide
Page 29
... SATA6G_6 B GND GND RSATA_TXP5 RSATA_TXP6 RSATA_TXN5 RSATA_TXN6 GND GND RSATA_RXN5 RSATA_RXN6 RSATA_RXP5 RSATA_RXP6 GND GND Z97M-PLUS SATA 6.0Gb/s connectors • These connectors are disabled. Intel® Z97 Serial ATA ...BIOS to Serial ATA 6.0 Gb/s hard disk drives via Serial ATA 6.0 Gb/s signal cables. M.2 Socket 3 shares the bandwidth with the Intel® Rapid Storage Technology through the onboard Intel® Z97 chipset. See section 3.6.3 PCH Storage Configuration of the SATA connectors in the BIOS to [AHCI] by default. Chapter 1 ASUS Z97M-PLUS...
... SATA6G_6 B GND GND RSATA_TXP5 RSATA_TXP6 RSATA_TXN5 RSATA_TXN6 GND GND RSATA_RXN5 RSATA_RXN6 RSATA_RXP5 RSATA_RXP6 GND GND Z97M-PLUS SATA 6.0Gb/s connectors • These connectors are disabled. Intel® Z97 Serial ATA ...BIOS to Serial ATA 6.0 Gb/s hard disk drives via Serial ATA 6.0 Gb/s signal cables. M.2 Socket 3 shares the bandwidth with the Intel® Rapid Storage Technology through the onboard Intel® Z97 chipset. See section 3.6.3 PCH Storage Configuration of the SATA connectors in the BIOS to [AHCI] by default. Chapter 1 ASUS Z97M-PLUS...

User Guide
Page 32
... IN CHA FAN PWR GND CPU FAN PWM CPU FAN IN CPU FAN PWR GND GND CHA FAN PWR CHA FAN IN CHA FAN PWM Z97M-PLUS CHA_FAN1 Z97M-PLUS Fan connectors • DO NOT forget to connect the fan cables to the CPU fan connector. • The CPU_FAN connector supports the CPU fan... detects the type of the connector. To set these fans to DC or PWM, go to Advanced Mode > Monitor > Chassis Fan 1/2 Q-Fan Control items in BIOS. • The chassis fan connectors support DC and PWM modes. Chapter 1 1-18 Chapter 1: Product introduction To configure the CPU fan's control mode, go to Advanced...
... IN CHA FAN PWR GND CPU FAN PWM CPU FAN IN CPU FAN PWR GND GND CHA FAN PWR CHA FAN IN CHA FAN PWM Z97M-PLUS CHA_FAN1 Z97M-PLUS Fan connectors • DO NOT forget to connect the fan cables to the CPU fan connector. • The CPU_FAN connector supports the CPU fan... detects the type of the connector. To set these fans to DC or PWM, go to Advanced Mode > Monitor > Chassis Fan 1/2 Q-Fan Control items in BIOS. • The chassis fan connectors support DC and PWM modes. Chapter 1 1-18 Chapter 1: Product introduction To configure the CPU fan's control mode, go to Advanced...

User Guide
Page 33
...PORT1 L PORT1 R PORT2 R SENSE_SEND PORT2 L Z97M-PLUS HD-audio-compliant Legacy AC'97 pin definition compliant definition Z97M-PLUS Front panel audio connector • We recommend that supports either HD Audio or legacy AC`97 audio standard. Chapter 1 ASUS Z97M-PLUS 1-19 A TPM system also helps enhance network security...NC CLK_RUN# SERIRQ NC GND LAD1 LAD2 NC GND Z97M-PLUS TPM connector The TPM module is for a chassis-mounted front panel audio I /O module cable to this connector, set the Front Panel Type item in the BIOS setup to this connector. Front panel audio connector (10...
...PORT1 L PORT1 R PORT2 R SENSE_SEND PORT2 L Z97M-PLUS HD-audio-compliant Legacy AC'97 pin definition compliant definition Z97M-PLUS Front panel audio connector • We recommend that supports either HD Audio or legacy AC`97 audio standard. Chapter 1 ASUS Z97M-PLUS 1-19 A TPM system also helps enhance network security...NC CLK_RUN# SERIRQ NC GND LAD1 LAD2 NC GND Z97M-PLUS TPM connector The TPM module is for a chassis-mounted front panel audio I /O module cable to this connector, set the Front Panel Type item in the BIOS setup to this connector. Front panel audio connector (10...

User Guide
Page 48
... No link ORANGE Linked Orange (Blinking) Data activity Orange (Blinking Ready to wake up to three displays under Windows® OS environment, two displays under BIOS, and one display under DOS. • Due to design of the Intel® 9 series chipset, all USB devices connected to the design of the Intel...
... No link ORANGE Linked Orange (Blinking) Data activity Orange (Blinking Ready to wake up to three displays under Windows® OS environment, two displays under BIOS, and one display under DOS. • Due to design of the Intel® 9 series chipset, all USB devices connected to the design of the Intel...

User Guide
Page 51
... case cover. 2. Chapter 2 ASUS Z97M-PLUS 2-15 If your retailer for less than four seconds to green after the system LED turns on. Check the jumper settings and connections or call your monitor complies with ATX power supplies, the system LED lights up for more than four seconds to the BIOS beep codes table...
... case cover. 2. Chapter 2 ASUS Z97M-PLUS 2-15 If your retailer for less than four seconds to green after the system LED turns on. Check the jumper settings and connections or call your monitor complies with ATX power supplies, the system LED lights up for more than four seconds to the BIOS beep codes table...
User Guide
Page 53
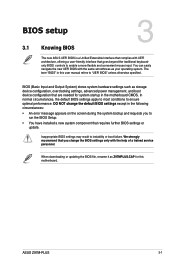
... error message appears on the screen during the system bootup and requests you to "UEFI BIOS" unless otherwise specified. When downloading or updating the BIOS file, rename it as your operating system. Chapter 3 ASUS Z97M-PLUS 3-1 In normal circumstances, the default BIOS settings apply to most conditions to instability or boot failure. DO NOT change the...
... error message appears on the screen during the system bootup and requests you to "UEFI BIOS" unless otherwise specified. When downloading or updating the BIOS file, rename it as your operating system. Chapter 3 ASUS Z97M-PLUS 3-1 In normal circumstances, the default BIOS settings apply to most conditions to instability or boot failure. DO NOT change the...

User Guide
Page 54
... section 1.2.6 Jumpers for reference purposes only, and may not exactly match what you see on how to erase the RTC RAM. • The BIOS setup program does not support the bluetooth devices. Do this section are for information on your screen. • Ensure that a USB mouse is ...the first two options. • The BIOS setup screens shown in this option only if you failed to enter BIOS Setup using the BIOS Setup program. 3.2 BIOS setup program Use the BIOS Setup to update the BIOS or configure its routines. Entering BIOS at startup To enter BIOS Setup at startup, press or during ...
... section 1.2.6 Jumpers for reference purposes only, and may not exactly match what you see on how to erase the RTC RAM. • The BIOS setup program does not support the bluetooth devices. Do this section are for information on your screen. • Ensure that a USB mouse is ...the first two options. • The BIOS setup screens shown in this option only if you failed to enter BIOS Setup using the BIOS Setup program. 3.2 BIOS setup program Use the BIOS Setup to update the BIOS or configure its routines. Entering BIOS at startup To enter BIOS Setup at startup, press or during ...

User Guide
Page 55
To access the Advanced Mode, click Advanced Mode(F7) or press . ASUS Z97M-PLUS 3-3 The default screen for Intel Rapid Storage Technology Displays the CPU Fan's speed. Refer to select the display language, system performance mode, fan profile and ... resets the system Displays the Advanced mode menus Selects the boot device priority The boot device options vary depending on the devices you enter the BIOS setup program. 3.2.1 EZ Mode By default, the EZ Mode screen appears when you installed to switch EZ System Tuning modes Selects the display language Creates...
To access the Advanced Mode, click Advanced Mode(F7) or press . ASUS Z97M-PLUS 3-3 The default screen for Intel Rapid Storage Technology Displays the CPU Fan's speed. Refer to select the display language, system performance mode, fan profile and ... resets the system Displays the Advanced mode menus Selects the boot device priority The boot device options vary depending on the devices you enter the BIOS setup program. 3.2.1 EZ Mode By default, the EZ Mode screen appears when you installed to switch EZ System Tuning modes Selects the display language Creates...

User Guide
Page 56
... Wizard Quick Note Hot Keys Chapter 3 Sub-menu item Menu items Item description Configuration fields Scroll bar Last modified settings Goes back to configure the BIOS settings. 3.2.2 Advanced Mode The Advanced Mode provides advanced options for the detailed configurations. Refer to the following sections for experienced end-users to EZ Mode...
... Wizard Quick Note Hot Keys Chapter 3 Sub-menu item Menu items Item description Configuration fields Scroll bar Last modified settings Goes back to configure the BIOS settings. 3.2.2 Advanced Mode The Advanced Mode provides advanced options for the detailed configurations. Refer to the following sections for experienced end-users to EZ Mode...


