Warranty Card English/Thai/Turkish
Page 3
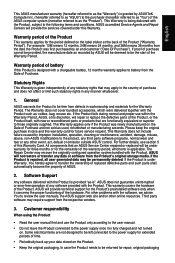
... connected to the power supply for the remainder of the Warranty Period. This Warranty applies only if the Product was first purchased by improper installation, operation, cleaning or maintenance, accident, damage, misuse, abuse, non-ASUS modifications to as the "Product"). ASUS will provide technical support for future service request. ASUS does not guarantee uninterrupted or error-free operation of the hardware. ASUS will not restore or transfer any software...
... connected to the power supply for the remainder of the Warranty Period. This Warranty applies only if the Product was first purchased by improper installation, operation, cleaning or maintenance, accident, damage, misuse, abuse, non-ASUS modifications to as the "Product"). ASUS will provide technical support for future service request. ASUS does not guarantee uninterrupted or error-free operation of the hardware. ASUS will not restore or transfer any software...
Warranty Card English/Thai/Turkish
Page 4
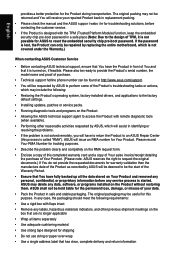
.... • Technical support hotline phone number can only be the start of TPM, it is turned on, if feasible. In any case, the packaging should meet the following : • Restoring the Product's operating system, factory-installed drivers, and applications to the factory default settings. • Installing updates, patches or service packs. • Running diagnostic tools and programs on the Product. • Allowing the ASUS technical support agent to access the Product with remote diagnostic tools...
.... • Technical support hotline phone number can only be the start of TPM, it is turned on, if feasible. In any case, the packaging should meet the following : • Restoring the Product's operating system, factory-installed drivers, and applications to the factory default settings. • Installing updates, patches or service packs. • Running diagnostic tools and programs on the Product. • Allowing the ASUS technical support agent to access the Product with remote diagnostic tools...

Warranty Card English/Thai/Turkish
Page 5
... to the Product caused by improper installation, improper connection or malfunction of a peripheral device such as printer, optical drive, network card, or USB device, etc.; (h) Damage to the Product caused by an external electrical fault or any accident; (i) Damage to the Product resulting from the Product. If access to the Product is blocked by passwords, then ASUS may occur during the Warranty Period...
... to the Product caused by improper installation, improper connection or malfunction of a peripheral device such as printer, optical drive, network card, or USB device, etc.; (h) Damage to the Product caused by an external electrical fault or any accident; (i) Damage to the Product resulting from the Product. If access to the Product is blocked by passwords, then ASUS may occur during the Warranty Period...
Warranty Card English/Thai/Turkish
Page 6
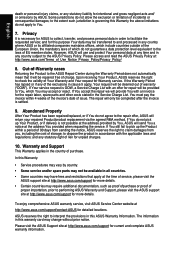
Out-of-Warranty cases Returning the Product to the ASUS Repair Center during the Warranty Period does not automatically mean that apply at the time of service, please visit the ASUS support site at http://www.asus.com/support for more details. • Certain countries may ...Support This Warranty applies in this warranty card may change without prior notice. In this purpose Your data may be provided to You, which do not apply to the repair offer, ASUS will return your repaired Product/product replacement via the agreed RMA method. If Your service request is OOW, a Service Charge List...
Out-of-Warranty cases Returning the Product to the ASUS Repair Center during the Warranty Period does not automatically mean that apply at the time of service, please visit the ASUS support site at http://www.asus.com/support for more details. • Certain countries may ...Support This Warranty applies in this warranty card may change without prior notice. In this purpose Your data may be provided to You, which do not apply to the repair offer, ASUS will return your repaired Product/product replacement via the agreed RMA method. If Your service request is OOW, a Service Charge List...
VM62N Users manual English
Page 2
... ASUS' suppliers and its reseller. SERVICE AND SUPPORT Visit our multi-language web site at http://support.asus.com E10310 Revised Edition V2 March 2015 COPYRIGHT INFORMATION No part of this manual, including the products and software ...ASUS' part or other actual and direct damages resulted from omission or failure of performing legal duties under this Warranty Statement. Products and corporate names appearing in this manual may or may arise where because of a default on which ASUS, its suppliers, and your reseller are used only for identification or explanation and to the owners...
... ASUS' suppliers and its reseller. SERVICE AND SUPPORT Visit our multi-language web site at http://support.asus.com E10310 Revised Edition V2 March 2015 COPYRIGHT INFORMATION No part of this manual, including the products and software ...ASUS' part or other actual and direct damages resulted from omission or failure of performing legal duties under this Warranty Statement. Products and corporate names appearing in this manual may or may arise where because of a default on which ASUS, its suppliers, and your reseller are used only for identification or explanation and to the owners...
VM62N Users manual English
Page 3
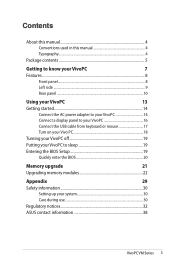
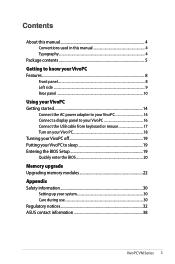
... know your VivoPC 7 Features...8 Front panel...8 Left side ...9 Rear panel...10 Using your VivoPC 13 Getting started 14 Connect the AC power adapter to your VivoPC 14 Connect a display panel to your VivoPC 16 Connect the USB cable from keyboard or mouse 17 Turn on your Vivo PC 18 Turning your VivoPC off 19 Putting your VivoPC to sleep 19 Entering the BIOS Setup 19 Quickly enter the BIOS 20 Memory upgrade 21 Upgrading memory modules 22 Appendix 29 Safety information 30 Setting up your...
... know your VivoPC 7 Features...8 Front panel...8 Left side ...9 Rear panel...10 Using your VivoPC 13 Getting started 14 Connect the AC power adapter to your VivoPC 14 Connect a display panel to your VivoPC 16 Connect the USB cable from keyboard or mouse 17 Turn on your Vivo PC 18 Turning your VivoPC off 19 Putting your VivoPC to sleep 19 Entering the BIOS Setup 19 Quickly enter the BIOS 20 Memory upgrade 21 Upgrading memory modules 22 Appendix 29 Safety information 30 Setting up your...

VM62N Users manual English
Page 11
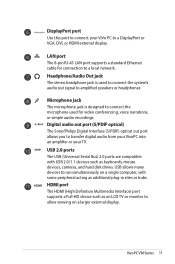
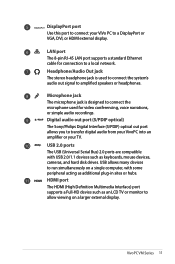
..., or HDMI external display. USB 2.0 ports The USB (Universal Serial Bus) 2.0 ports are compatible with some peripheral acting as keyboards, mouse devices, cameras, and hard disk drives. USB allows many devices to run simultaneously on a larger external display. DisplayPort port Use this port to connect your TV. Microphone jack The microphone jack is used for connection to allow viewing on a single computer, with USB 2.0/1.1 devices such as additional plug-in sites or hubs. HDMI port The HDMI (High Definition Multimedia Interface) port supports...
..., or HDMI external display. USB 2.0 ports The USB (Universal Serial Bus) 2.0 ports are compatible with some peripheral acting as keyboards, mouse devices, cameras, and hard disk drives. USB allows many devices to run simultaneously on a larger external display. DisplayPort port Use this port to connect your TV. Microphone jack The microphone jack is used for connection to allow viewing on a single computer, with USB 2.0/1.1 devices such as additional plug-in sites or hubs. HDMI port The HDMI (High Definition Multimedia Interface) port supports...

VM62N Users manual English
Page 17
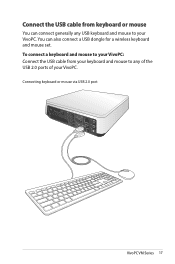
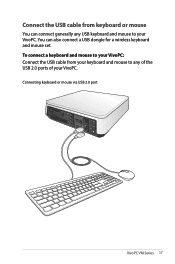
Connecting keyboard or mouse via USB 2.0 port VivoPC VM Series 17 Connect the USB cable from your keyboard and mouse to any USB keyboard and mouse to your VivoPC: Connect the USB cable from keyboard or mouse You can also connect a USB dongle for a wireless keyboard and mouse set. To connect a keyboard and mouse to your VivoPC. You can connect generally any of the USB 2.0 ports of your VivoPC.
Connecting keyboard or mouse via USB 2.0 port VivoPC VM Series 17 Connect the USB cable from your keyboard and mouse to any USB keyboard and mouse to your VivoPC: Connect the USB cable from keyboard or mouse You can also connect a USB dongle for a wireless keyboard and mouse set. To connect a keyboard and mouse to your VivoPC. You can connect generally any of the USB 2.0 ports of your VivoPC.
VM62N Users manual English
Page 19
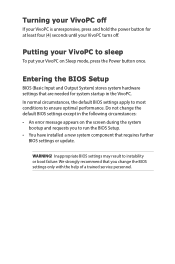
... system hardware settings that are needed for at least four (4) seconds until your VivoPC turns off. WARNING! Putting your VivoPC to sleep To put your VivoPC on the screen during the system bootup and requests you to run the BIOS Setup. • You have installed a new system component that you change the default BIOS settings except in the VivoPC. Do not change the BIOS settings only with the help of a trained service personnel...
... system hardware settings that are needed for at least four (4) seconds until your VivoPC turns off. WARNING! Putting your VivoPC to sleep To put your VivoPC on the screen during the system bootup and requests you to run the BIOS Setup. • You have installed a new system component that you change the default BIOS settings except in the VivoPC. Do not change the BIOS settings only with the help of a trained service personnel...
VM Series Users Manual English
Page 2
... COPYRIGHT INFORMATION No part of this manual, including the products and software described in it, may be registered trademarks or copyrights of their respective companies, and are used only for identification or explanation and to the owners' benefit, without the express written permission of ASUSTeK COMPUTER INC. ("ASUS"). SPECIFICATIONS AND INFORMATION CONTAINED IN THIS MANUAL ARE FURNISHED FOR...
... COPYRIGHT INFORMATION No part of this manual, including the products and software described in it, may be registered trademarks or copyrights of their respective companies, and are used only for identification or explanation and to the owners' benefit, without the express written permission of ASUSTeK COMPUTER INC. ("ASUS"). SPECIFICATIONS AND INFORMATION CONTAINED IN THIS MANUAL ARE FURNISHED FOR...

VM Series Users Manual English
Page 3
... know your VivoPC 7 Features...8 Front panel...8 Left side ...9 Rear panel...10 Using your VivoPC 13 Getting started 14 Connect the AC power adapter to your VivoPC 14 Connect a display panel to your VivoPC 16 Connect the USB cable from keyboard or mouse 17 Turn on your Vivo PC 18 Turning your VivoPC off 19 Putting your VivoPC to sleep 19 Entering the BIOS Setup 19 Quickly enter the BIOS 20 Memory upgrade 21 Upgrading memory modules 22 Appendix 29 Safety information 30 Setting up your...
... know your VivoPC 7 Features...8 Front panel...8 Left side ...9 Rear panel...10 Using your VivoPC 13 Getting started 14 Connect the AC power adapter to your VivoPC 14 Connect a display panel to your VivoPC 16 Connect the USB cable from keyboard or mouse 17 Turn on your Vivo PC 18 Turning your VivoPC off 19 Putting your VivoPC to sleep 19 Entering the BIOS Setup 19 Quickly enter the BIOS 20 Memory upgrade 21 Upgrading memory modules 22 Appendix 29 Safety information 30 Setting up your...
VM Series Users Manual English
Page 11
... to a DisplayPort or VGA, DVI, or HDMI external display. USB allows many devices to run simultaneously on a larger external display. DisplayPort port Use this port to connect your TV. VivoPC VM Series 11 Microphone jack The microphone jack is used for connection to allow viewing on a single computer, with USB 2.0/1.1 devices such as keyboards, mouse devices, cameras, and hard disk drives. HDMI port The HDMI (High Definition Multimedia Interface) port supports a Full-HD device such as additional plug-in sites or hubs...
... to a DisplayPort or VGA, DVI, or HDMI external display. USB allows many devices to run simultaneously on a larger external display. DisplayPort port Use this port to connect your TV. VivoPC VM Series 11 Microphone jack The microphone jack is used for connection to allow viewing on a single computer, with USB 2.0/1.1 devices such as keyboards, mouse devices, cameras, and hard disk drives. HDMI port The HDMI (High Definition Multimedia Interface) port supports a Full-HD device such as additional plug-in sites or hubs...
VM Series Users Manual English
Page 17
Connecting keyboard or mouse via USB 2.0 port VivoPC VM Series 17 You can connect generally any of the USB 2.0 ports of your VivoPC. Connect the USB cable from your keyboard and mouse to any USB keyboard and mouse to your VivoPC: Connect the USB cable from keyboard or mouse You can also connect a USB dongle for a wireless keyboard and mouse set. To connect a keyboard and mouse to your VivoPC.
Connecting keyboard or mouse via USB 2.0 port VivoPC VM Series 17 You can connect generally any of the USB 2.0 ports of your VivoPC. Connect the USB cable from your keyboard and mouse to any USB keyboard and mouse to your VivoPC: Connect the USB cable from keyboard or mouse You can also connect a USB dongle for a wireless keyboard and mouse set. To connect a keyboard and mouse to your VivoPC.

VM Series Users Manual English
Page 19
... service personnel. Inappropriate BIOS settings may result to run the BIOS Setup. • You have installed a new system component that requires further BIOS settings or update. Entering the BIOS Setup BIOS (Basic Input and Output System) stores system hardware settings that you to instability or boot failure. In normal circumstances, the default BIOS settings apply to most conditions to sleep To put your VivoPC on the screen during the system bootup and requests you change the default BIOS settings...
... service personnel. Inappropriate BIOS settings may result to run the BIOS Setup. • You have installed a new system component that requires further BIOS settings or update. Entering the BIOS Setup BIOS (Basic Input and Output System) stores system hardware settings that you to instability or boot failure. In normal circumstances, the default BIOS settings apply to most conditions to sleep To put your VivoPC on the screen during the system bootup and requests you change the default BIOS settings...
Windows 7 and USB 3.0 driver installation for 100 Series.English
Page 3
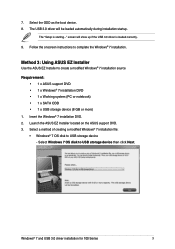
...DVD • 1 x Working system (PC or notebook) • 1 x SATA ODD • 1 x USB storage device (8 GB or more) 1. Select the ODD as the boot device. 8. screen will be loaded automatically during installation startup. Method 3: Using ASUS EZ Installer Use the ASUS EZ Installer to USB storage device - Select Windows 7 OS disk to complete the Windows® 7 installation. Windows® 7 and USB 3.0 driver installation for 100 Series 3 Insert the Windows® 7 installation DVD. 2. The "Setup is loaded correctly. 9. Launch the ASUS EZ Installer located on the ASUS support DVD...
...DVD • 1 x Working system (PC or notebook) • 1 x SATA ODD • 1 x USB storage device (8 GB or more) 1. Select the ODD as the boot device. 8. screen will be loaded automatically during installation startup. Method 3: Using ASUS EZ Installer Use the ASUS EZ Installer to USB storage device - Select Windows 7 OS disk to complete the Windows® 7 installation. Windows® 7 and USB 3.0 driver installation for 100 Series 3 Insert the Windows® 7 installation DVD. 2. The "Setup is loaded correctly. 9. Launch the ASUS EZ Installer located on the ASUS support DVD...
VM62 Series user s manual English
Page 2
...DATA; Copyright © 2016 ASUSTeK COMPUTER INC. SERVICE AND SUPPORT Visit our multi-language web site at https://www.asus.com/support E11597 Revised Edition V3 May 2016 COPYRIGHT INFORMATION No part of this manual, including the products and software described in it, may be reproduced, transmitted, ...their respective companies, and are used only for identification or explanation and to the owners' benefit, without the express written permission of the basis on ASUS' part or other actual and direct damages resulted from omission or failure of performing legal duties under this...
...DATA; Copyright © 2016 ASUSTeK COMPUTER INC. SERVICE AND SUPPORT Visit our multi-language web site at https://www.asus.com/support E11597 Revised Edition V3 May 2016 COPYRIGHT INFORMATION No part of this manual, including the products and software described in it, may be reproduced, transmitted, ...their respective companies, and are used only for identification or explanation and to the owners' benefit, without the express written permission of the basis on ASUS' part or other actual and direct damages resulted from omission or failure of performing legal duties under this...
VM62 Series user s manual English
Page 3
... ...9 Rear panel...10 Using your VivoPC Getting started 14 Connect the AC power adapter to your VivoPC 14 Connect a display panel to your VivoPC 16 Connect the USB cable from keyboard or mouse 17 Turn on your Vivo PC 18 Turning your VivoPC off 19 Putting your VivoPC to sleep 19 Entering the BIOS Setup 19 Quickly enter the BIOS 20 Memory upgrade Upgrading memory modules 22 Appendix Safety information 30 Setting up your system 30 Care during use 30 Regulatory notices 32 ASUS contact...
... ...9 Rear panel...10 Using your VivoPC Getting started 14 Connect the AC power adapter to your VivoPC 14 Connect a display panel to your VivoPC 16 Connect the USB cable from keyboard or mouse 17 Turn on your Vivo PC 18 Turning your VivoPC off 19 Putting your VivoPC to sleep 19 Entering the BIOS Setup 19 Quickly enter the BIOS 20 Memory upgrade Upgrading memory modules 22 Appendix Safety information 30 Setting up your system 30 Care during use 30 Regulatory notices 32 ASUS contact...
VM62 Series user s manual English
Page 11
... HDMI external display. HDMI port The HDMI (High Definition Multimedia Interface) port supports a Full-HD device such as an LCD TV or monitor to a local network. VivoPC VM Series 11 Microphone jack The microphone jack is used for connection to allow viewing on a single computer, with USB 2.0/1.1 devices such as additional plug-in sites or hubs. USB 2.0 ports The USB (Universal Serial Bus) 2.0 ports are compatible with some peripheral acting as keyboards, mouse devices, cameras, and hard disk drives...
... HDMI external display. HDMI port The HDMI (High Definition Multimedia Interface) port supports a Full-HD device such as an LCD TV or monitor to a local network. VivoPC VM Series 11 Microphone jack The microphone jack is used for connection to allow viewing on a single computer, with USB 2.0/1.1 devices such as additional plug-in sites or hubs. USB 2.0 ports The USB (Universal Serial Bus) 2.0 ports are compatible with some peripheral acting as keyboards, mouse devices, cameras, and hard disk drives...
VM62 Series user s manual English
Page 17
You can connect generally any of the USB 2.0 ports of your VivoPC. Connect the USB cable from your keyboard and mouse to any USB keyboard and mouse to your VivoPC: Connect the USB cable from keyboard or mouse You can also connect a USB dongle for a wireless keyboard and mouse set. To connect a keyboard and mouse to your VivoPC. Connecting keyboard or mouse via USB 2.0 port VivoPC VM Series 17
You can connect generally any of the USB 2.0 ports of your VivoPC. Connect the USB cable from your keyboard and mouse to any USB keyboard and mouse to your VivoPC: Connect the USB cable from keyboard or mouse You can also connect a USB dongle for a wireless keyboard and mouse set. To connect a keyboard and mouse to your VivoPC. Connecting keyboard or mouse via USB 2.0 port VivoPC VM Series 17
VM62 Series user s manual English
Page 19
... your VivoPC on the screen during the system bootup and requests you change the default BIOS settings except in the VivoPC. Do not change the BIOS settings only with the help of a trained service personnel. WARNING! Turning your VivoPC off . Entering the BIOS Setup BIOS (Basic Input and Output System) stores system hardware settings that requires further BIOS settings or update. Putting your VivoPC to run the BIOS Setup. • You have installed a new system component that are needed...
... your VivoPC on the screen during the system bootup and requests you change the default BIOS settings except in the VivoPC. Do not change the BIOS settings only with the help of a trained service personnel. WARNING! Turning your VivoPC off . Entering the BIOS Setup BIOS (Basic Input and Output System) stores system hardware settings that requires further BIOS settings or update. Putting your VivoPC to run the BIOS Setup. • You have installed a new system component that are needed...


