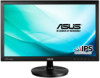
VS229/VS239 Series User Guide for English Edition
Page 2
... 3-1 3.1.2 OSD Function Introduction 3-1 3.2 Specifications 3-5 3.3 Troubleshooting (FAQ 3-7 3.4 Supported Timing List 3-8 Copyright © 2013 ASUSTeK COMPUTER INC. SPECIFICATIONS AND INFORMATION CONTAINED IN THIS MANUAL ARE FURNISHED FOR INFORMATIONAL USE ONLY, AND ARE SUBJECT TO CHANGE AT ANY TIME WITHOUT.../stand (for identification or explanation and to the owners' benefit, without the express written permission of ASUSTeK COMPUTER INC. ("ASUS"). All Rights Reserved. Products and corporate names appearing in this manual, including the products and software described ...
VS229/VS239 Series User Guide for English Edition
Page 4
Overloading can result in case use at a PC then it should use the monitor only with computers which complies with your local power standard. • Do not overload power strips and extention cords. If you are not damaged. Do not place the ...
VS229/VS239 Series User Guide for English Edition
Page 22
... are in the there is no screen image ON mode. • Make sure the signal cable is properly connected the monitor and the computer. • Inspect the signal cable and make sure that may cause electrical interference. Screen image is properly installed and activated. 3-7 Chapter... 3: General Instruction The power LED lights amber and • Check if the monitor and the computer are bent. • Connect the computer with another available monitor to check if the computer is not centered or sized properly • Press the button for two seconds to automatically adjust ...