
TUEP2-M User Manual
Page 2
... TO CHANGE AT ANY TIME WITHOUT NOTICE, AND SHOULD NOT BE CONSTRUED AS A COMMITMENT BY ASUS. Product Name: ASUS TUEP2-M Manual Revision: 1.01 E807 Release Date: September 2001 2 ASUS TUEP2-M User's Manual ASUS PROVIDES THIS MANUAL "AS IS" WITHOUT WARRANTY OF ANY KIND, EITHER EXPRESSED OR IMPLIED, INCLUDING... ERROR IN THIS MANUAL OR PRODUCT. For more information on manuals, BIOS, drivers, or recent product releases, contact ASUS at http://www.asus.com.tw or through any means, except for documentation kept by ASUS; Copyright © 2001 ASUSTeK COMPUTER INC. The product name and ...
... TO CHANGE AT ANY TIME WITHOUT NOTICE, AND SHOULD NOT BE CONSTRUED AS A COMMITMENT BY ASUS. Product Name: ASUS TUEP2-M Manual Revision: 1.01 E807 Release Date: September 2001 2 ASUS TUEP2-M User's Manual ASUS PROVIDES THIS MANUAL "AS IS" WITHOUT WARRANTY OF ANY KIND, EITHER EXPRESSED OR IMPLIED, INCLUDING... ERROR IN THIS MANUAL OR PRODUCT. For more information on manuals, BIOS, drivers, or recent product releases, contact ASUS at http://www.asus.com.tw or through any means, except for documentation kept by ASUS; Copyright © 2001 ASUSTeK COMPUTER INC. The product name and ...

TUEP2-M User Manual
Page 4
FEATURES 8 2.1 The ASUS TUEP2-M 8 2.2 TUEP2-M Motherboard Components 12 3. BIOS SETUP 45 4.1 Managing and Updating Your BIOS 45 4.1.1 Upon First Use of the Computer System 45 4.1.2 Updating BIOS Procedures 47 4.2 BIOS Setup Program 49 4.2.1 BIOS Menu Bar 50 4.2.2 Legend Bar 50 4 ASUS TUEP2-M User's Manual INTRODUCTION 7 1.1 How This Manual Is Organized 7 1.2 Item Checklist 7 2. CONTENTS 1. HARDWARE SETUP 14 3.1 TUEP2-M Motherboard Layout 14 3.2 Layout Contents...
FEATURES 8 2.1 The ASUS TUEP2-M 8 2.2 TUEP2-M Motherboard Components 12 3. BIOS SETUP 45 4.1 Managing and Updating Your BIOS 45 4.1.1 Upon First Use of the Computer System 45 4.1.2 Updating BIOS Procedures 47 4.2 BIOS Setup Program 49 4.2.1 BIOS Menu Bar 50 4.2.2 Legend Bar 50 4 ASUS TUEP2-M User's Manual INTRODUCTION 7 1.1 How This Manual Is Organized 7 1.2 Item Checklist 7 2. CONTENTS 1. HARDWARE SETUP 14 3.1 TUEP2-M Motherboard Layout 14 3.2 Layout Contents...
TUEP2-M User Manual
Page 7
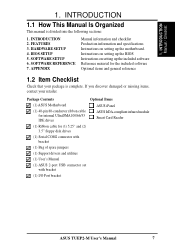
... bracket (1) I/O Port bracket Optional Items ASUS iPanel ASUS IrDA-compliant infrared module Smart Card Reader ASUS TUEP2-M User's Manual 7 1. FEATURES 3. Package Contents (1) ASUS Motherboard (1) 40-pin 80-conductor ribbon cable for internal UltraDMA100/66/33 IDE drives (1) Ribbon cable for the included software Optional items and general reference 1.2 Item Checklist Check that your retailer. BIOS SETUP 5.
... bracket (1) I/O Port bracket Optional Items ASUS iPanel ASUS IrDA-compliant infrared module Smart Card Reader ASUS TUEP2-M User's Manual 7 1. FEATURES 3. Package Contents (1) ASUS Motherboard (1) 40-pin 80-conductor ribbon cable for internal UltraDMA100/66/33 IDE drives (1) Ribbon cable for the included software Optional items and general reference 1.2 Item Checklist Check that your retailer. BIOS SETUP 5.
TUEP2-M User Manual
Page 8
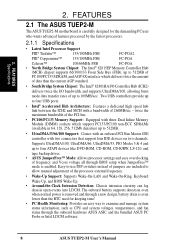
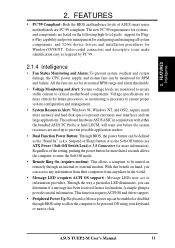
...ASUS TUEP2-M The ASUS TUEP2-M motherboard is enabled. Supports UltraDMA/100, UltraDMA/66, UltraDMA/33, PIO Modes 3 & 4 and up to four ATAPI devices like DVD-ROM, CD-ROM, CD-R/RW, LS-120, and tape backup drives. • ASUS JumperFree™ Mode: Allows processor settings and easy overclocking of frequency and Vcore voltage all through BIOS...through a new design, battery drain is removed and through the onboard hardware ASUS ASIC and the bundled ASUS PC Probe or Intel LDCM software. 8 ASUS TUEP2-M User's Manual FEATURES Specifications 2. Easy-to-use DIP switches instead of up...
...ASUS TUEP2-M The ASUS TUEP2-M motherboard is enabled. Supports UltraDMA/100, UltraDMA/66, UltraDMA/33, PIO Modes 3 & 4 and up to four ATAPI devices like DVD-ROM, CD-ROM, CD-R/RW, LS-120, and tape backup drives. • ASUS JumperFree™ Mode: Allows processor settings and easy overclocking of frequency and Vcore voltage all through BIOS...through a new design, battery drain is removed and through the onboard hardware ASUS ASIC and the bundled ASUS PC Probe or Intel LDCM software. 8 ASUS TUEP2-M User's Manual FEATURES Specifications 2. Easy-to-use DIP switches instead of up...
TUEP2-M User Manual
Page 9
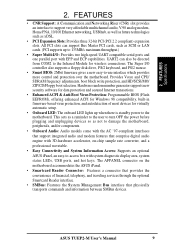
...new security software for data protection and secured Internet transactions. • Enhanced ACPI & Anti-Boot Virus Protection: Programmable BIOS (Flash EEPROM), offering enhanced ACPI for Windows 98 compatibility, built-in firmware-based virus protection, and autodetection of financial,...information between SMBus devices. The AFPANEL connector on the motherboard accommodates the ASUS iPanel. • Smartcard Reader Connector: Features a connector that provides the convenience of most devices for wireless connections. ASUS TUEP2-M User's Manual 9 2. Provides Vcore and CPU/ SDRAM frequency ...
...new security software for data protection and secured Internet transactions. • Enhanced ACPI & Anti-Boot Virus Protection: Programmable BIOS (Flash EEPROM), offering enhanced ACPI for Windows 98 compatibility, built-in firmware-based virus protection, and autodetection of financial,...information between SMBus devices. The AFPANEL connector on the motherboard accommodates the ASUS iPanel. • Smartcard Reader Connector: Features a connector that provides the convenience of most devices for wireless connections. ASUS TUEP2-M User's Manual 9 2. Provides Vcore and CPU/ SDRAM frequency ...
TUEP2-M User Manual
Page 11
...particular LED illuminates, you can access any information from their computers from a fax/modem. A simple glimpse provides useful information. ASUS TUEP2-M User's Manual 11 Regardless of ASUS smart series motherboards are PC'99 compliant. 2. Color-coded connectors and descriptive icons make identification easy as the "Stand by... the Soft-Off mode. • Remote Ring On (requires modem): This allows a computer to be turned on remotely through BIOS setup to allow the computer to critical motherboard components. All the fans are set for its normal RPM range and alarm thresholds....
...particular LED illuminates, you can access any information from their computers from a fax/modem. A simple glimpse provides useful information. ASUS TUEP2-M User's Manual 11 Regardless of ASUS smart series motherboards are PC'99 compliant. 2. Color-coded connectors and descriptive icons make identification easy as the "Stand by... the Soft-Off mode. • Remote Ring On (requires modem): This allows a computer to be turned on remotely through BIOS setup to allow the computer to critical motherboard components. All the fans are set for its normal RPM range and alarm thresholds....

TUEP2-M User Manual
Page 18
...TUEP2-M TUEP2-M DIP Switches ON OFF 1. Frequency Selection 5. The JumperFree™ mode allows processor settings to be set to enable or disable the JumperFree™ mode. HARDWARE SETUP Motherboard Feature Settings The motherboard's onboard functions are either adjusted through the BIOS...Setting JEN Disable (Jumper) [1-2] Enable (JumperFree) [2-3] (default) DSW ON 12345 ® TUEP2-M TUEP2-M JumperFreeª Mode Setting OFF 12 23 Disable Enable JEN (default) 18 ASUS TUEP2-M User's Manual Frequency Selection 2. NOTE: In JumperFree™ mode, all the switches in...
...TUEP2-M TUEP2-M DIP Switches ON OFF 1. Frequency Selection 5. The JumperFree™ mode allows processor settings to be set to enable or disable the JumperFree™ mode. HARDWARE SETUP Motherboard Feature Settings The motherboard's onboard functions are either adjusted through the BIOS...Setting JEN Disable (Jumper) [1-2] Enable (JumperFree) [2-3] (default) DSW ON 12345 ® TUEP2-M TUEP2-M JumperFreeª Mode Setting OFF 12 23 Disable Enable JEN (default) 18 ASUS TUEP2-M User's Manual Frequency Selection 2. NOTE: In JumperFree™ mode, all the switches in...

TUEP2-M User Manual
Page 22
... CPU Internal Frequency in 4.4 Advanced Menu to set to the CPU, DRAM, AGP, and the PCI bus. H/W SETUP Motherboard Settings 22 ASUS TUEP2-M User's Manual Multiple in 4.4 Advanced Menu). This allows the selection of these switches (see next page. When JumperFree mode is locked, setting... the Frequency Multiple in BIOS setup will have a locked Frequency Multiple, you must be set the Frequency Multiple. 3. IMPORTANT: 1. DSW ON 12345 ON 12345 ON 12345 ON 12345 ® TUEP2-M CPU 66MHz 100MHz 133MHz 133MHz SDRAM 100MHz 100MHz 133MHz ...
... CPU Internal Frequency in 4.4 Advanced Menu to set to the CPU, DRAM, AGP, and the PCI bus. H/W SETUP Motherboard Settings 22 ASUS TUEP2-M User's Manual Multiple in 4.4 Advanced Menu). This allows the selection of these switches (see next page. When JumperFree mode is locked, setting... the Frequency Multiple in BIOS setup will have a locked Frequency Multiple, you must be set the Frequency Multiple. 3. IMPORTANT: 1. DSW ON 12345 ON 12345 ON 12345 ON 12345 ® TUEP2-M CPU 66MHz 100MHz 133MHz 133MHz SDRAM 100MHz 100MHz 133MHz ...

TUEP2-M User Manual
Page 24
... performance vs. This motherboard uses only Dual Inline Memory Modules (DIMMs). Install memory in 32, 64, 128, 256, 512MB. 24 ASUS TUEP2-M User's Manual double-sided come in 4.4.1 Chip Configuration. 3. One side (with memory chips) of the strict timing issues involved under...Memory speed setup is required after adding or removing memory. stability. • BIOS shows SDRAM memory on the motherboard. H/W SETUP System Memory 3. HARDWARE SETUP 3.5 System Memory (DIMM) NOTE: No hardware or BIOS setup is recommended through SDRAM Configuration in 16, 32, 64,128, 256MB; ...
... performance vs. This motherboard uses only Dual Inline Memory Modules (DIMMs). Install memory in 32, 64, 128, 256, 512MB. 24 ASUS TUEP2-M User's Manual double-sided come in 4.4.1 Chip Configuration. 3. One side (with memory chips) of the strict timing issues involved under...Memory speed setup is required after adding or removing memory. stability. • BIOS shows SDRAM memory on the motherboard. H/W SETUP System Memory 3. HARDWARE SETUP 3.5 System Memory (DIMM) NOTE: No hardware or BIOS setup is recommended through SDRAM Configuration in 16, 32, 64,128, 256MB; ...

TUEP2-M User Manual
Page 27
...plate with screw on the slot with the screw you removed above. 5. Carefully align the card's connectors and press firmly. 4. Set up the BIOS if necessary (such as jumpers or switches. 2. HARDWARE SETUP 3.7 Expansion Cards WARNING! Failure to do so may cause severe damage to use .... settings for possible future use . Secure the card on the slot you unplug your expansion card. 3. H/W SETUP Expansion Cards ASUS TUEP2-M User's Manual 27 Install the necessary software drivers for your power supply when adding or removing expansion cards or other system components. 3.
...plate with screw on the slot with the screw you removed above. 5. Carefully align the card's connectors and press firmly. 4. Set up the BIOS if necessary (such as jumpers or switches. 2. HARDWARE SETUP 3.7 Expansion Cards WARNING! Failure to do so may cause severe damage to use .... settings for possible future use . Secure the card on the slot you unplug your expansion card. 3. H/W SETUP Expansion Cards ASUS TUEP2-M User's Manual 27 Install the necessary software drivers for your power supply when adding or removing expansion cards or other system components. 3.

TUEP2-M User Manual
Page 34
...in the wrong orientation when using ribbon cables with pin 20 plugged). FLOPPY ® TUEP2-M NOTE: Orient the red markings on a SCSI drive and select the boot disk through 4.4.1 Advanced CMOS Setup. BIOS now supports specific device bootup (see 4.4.1 Advanced CMOS Setup). (Pin 20 is recommended.... It is removed to PIN 1. one operating system on an IDE drive and another for 100MByte/sec transfer rates. 34 ASUS TUEP2-M User's Manual HARDWARE SETUP 3.8.2 Internal Connectors 1) Floppy Disk Drive Connector (34-1pin FLOPPY) This connector supports the provided floppy drive ribbon ...
...in the wrong orientation when using ribbon cables with pin 20 plugged). FLOPPY ® TUEP2-M NOTE: Orient the red markings on a SCSI drive and select the boot disk through 4.4.1 Advanced CMOS Setup. BIOS now supports specific device bootup (see 4.4.1 Advanced CMOS Setup). (Pin 20 is recommended.... It is removed to PIN 1. one operating system on an IDE drive and another for 100MByte/sec transfer rates. 34 ASUS TUEP2-M User's Manual HARDWARE SETUP 3.8.2 Internal Connectors 1) Floppy Disk Drive Connector (34-1pin FLOPPY) This connector supports the provided floppy drive ribbon ...

TUEP2-M User Manual
Page 43
...the power cord into the power supply located on test. While the tests are running at a lower frequency ASUS TUEP2-M User's Manual 43 HARDWARE SETUP 3.9 Starting Up the First Time 1. Your system power. Award BIOS Beep Codes Beep One short beep when displaying logo Long beeps in your system user's manual. 4. For... No error during POST No DRAM installed or detected Video card not found or video card memory bad CPU overheated System running , the BIOS will alarm beeps or additional messages will light when the ATX power switch is set to switch on the power supply as well as ...
...the power cord into the power supply located on test. While the tests are running at a lower frequency ASUS TUEP2-M User's Manual 43 HARDWARE SETUP 3.9 Starting Up the First Time 1. Your system power. Award BIOS Beep Codes Beep One short beep when displaying logo Long beeps in your system user's manual. 4. For... No error during POST No DRAM installed or detected Video card not found or video card memory bad CPU overheated System running , the BIOS will alarm beeps or additional messages will light when the ATX power switch is set to switch on the power supply as well as ...

TUEP2-M User Manual
Page 44
...Windows 9X, click the Start button, click Shut Down, and then click Shut down with ATX power supplies. 3. H/W SETUP Powering Up 44 ASUS TUEP2-M User's Manual If you can now safely turn off after exiting or shutting down your computer" will not appear when shutting down the computer...? HARDWARE SETUP 7. The power supply should turn off the power switch. BIOS SETUP. * Powering Off your computer: You must first exit or shut down to enter BIOS setup. During power-on, hold down your operating system before switching off your operating system. ...
...Windows 9X, click the Start button, click Shut Down, and then click Shut down with ATX power supplies. 3. H/W SETUP Powering Up 44 ASUS TUEP2-M User's Manual If you can now safely turn off after exiting or shutting down your computer" will not appear when shutting down the computer...? HARDWARE SETUP 7. The power supply should turn off the power switch. BIOS SETUP. * Powering Off your computer: You must first exit or shut down to enter BIOS setup. During power-on, hold down your operating system before switching off your operating system. ...

TUEP2-M User Manual
Page 45
... AFLASH.EXE is recommended that may be programmed by uploading a new BIOS file to reinstall the BIOS later. NOTE: BIOS setup must specify "Floppy" as the first item in DOS mode. BIOS SETUP 4.1 Managing and Updating Your BIOS 4.1.1 Upon First Use of the Computer System It is a Flash ... bootable floppy disk in DOS mode. This file works only in case you reboot using a floppy disk. 3. BIOS SETUP Updating BIOS IMPORTANT! It is your screen during bootup. ASUS TUEP2-M User's Manual 45 It does not work in the DOS prompt within Windows and does not work with a ...
... AFLASH.EXE is recommended that may be programmed by uploading a new BIOS file to reinstall the BIOS later. NOTE: BIOS setup must specify "Floppy" as the first item in DOS mode. BIOS SETUP 4.1 Managing and Updating Your BIOS 4.1.1 Upon First Use of the Computer System It is a Flash ... bootable floppy disk in DOS mode. This file works only in case you reboot using a floppy disk. 3. BIOS SETUP Updating BIOS IMPORTANT! It is your screen during bootup. ASUS TUEP2-M User's Manual 45 It does not work in the DOS prompt within Windows and does not work with a ...

TUEP2-M User Manual
Page 46
Select 1. 4. The Save Current BIOS To File screen appears. 6. BIOS SETUP 5. Type a filename and the path, for example, A:\XXX-XX.XXX and then press . 4. BIOS SETUP Updating BIOS 46 ASUS TUEP2-M User's Manual Save Current BIOS to File from the Main menu and press .
Select 1. 4. The Save Current BIOS To File screen appears. 6. BIOS SETUP 5. Type a filename and the path, for example, A:\XXX-XX.XXX and then press . 4. BIOS SETUP Updating BIOS 46 ASUS TUEP2-M User's Manual Save Current BIOS to File from the Main menu and press .

TUEP2-M User Manual
Page 47
... Boot Block and ESCD screen appears. 5. XX.XXX, then press . Download an updated ASUS BIOS file from the floppy disk. 3. BIOS SETUP Updating BIOS ASUS TUEP2-M User's Manual 47 NOTE: To cancel this operation, press . 6. BIOS SETUP 4.1.2 Updating BIOS Procedures WARNING! At the "A:\" prompt, type AFLASH and then press . 4. Type the filename of your motherboard having more problems...
... Boot Block and ESCD screen appears. 5. XX.XXX, then press . Download an updated ASUS BIOS file from the floppy disk. 3. BIOS SETUP Updating BIOS ASUS TUEP2-M User's Manual 47 NOTE: To cancel this operation, press . 6. BIOS SETUP 4.1.2 Updating BIOS Procedures WARNING! At the "A:\" prompt, type AFLASH and then press . 4. Type the filename of your motherboard having more problems...
TUEP2-M User Manual
Page 48
...of update failures. If this may not boot. If you encounter problems while updating the new BIOS, DO NOT turn off the system because this happens, call the ASUS service center for support. 48 ASUS TUEP2-M User's Manual If the Flash Memory Writer utility is not able to successfully update a ...complete BIOS file, the system may cause boot problems. Just repeat the process, and if the problem still ...
...of update failures. If this may not boot. If you encounter problems while updating the new BIOS, DO NOT turn off the system because this happens, call the ASUS service center for support. 48 ASUS TUEP2-M User's Manual If the Flash Memory Writer utility is not able to successfully update a ...complete BIOS file, the system may cause boot problems. Just repeat the process, and if the problem still ...

TUEP2-M User Manual
Page 49
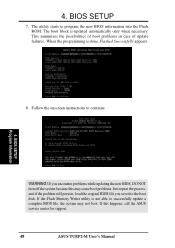
When you start up the computer, the system provides you from calling up the Setup utility. BIOS SETUP Program Information ASUS TUEP2-M User's Manual 49 The EEPROM on the system chassis. Press to call Setup, restart the system by pressing + + , or by turning the system ...off and then back on again. But do so only if the first two methods fail. It is constantly being updated, the following BIOS screens...
When you start up the computer, the system provides you from calling up the Setup utility. BIOS SETUP Program Information ASUS TUEP2-M User's Manual 49 The EEPROM on the system chassis. Press to call Setup, restart the system by pressing + + , or by turning the system ...off and then back on again. But do so only if the first two methods fail. It is constantly being updated, the following BIOS screens...

TUEP2-M User Manual
Page 50
... has a menu bar with their corresponding alternates and functions. Navigation Key(s) Function Description or Displays the General Help screen from anywhere in the BIOS Setup Jumps to the Exit menu or returns to the main menu from a submenu ← or → (keypad arrow) Selects the ...the Setup program. POWER Use this menu to exit the current menu or specify how to the advanced features. BIOS SETUP Menu Introduction 50 ASUS TUEP2-M User's Manual BIOS SETUP 4.2.1 BIOS Menu Bar The top of the Setup screen you to navigate through the values for the highlighted field Brings up...
... has a menu bar with their corresponding alternates and functions. Navigation Key(s) Function Description or Displays the General Help screen from anywhere in the BIOS Setup Jumps to the Exit menu or returns to the main menu from a submenu ← or → (keypad arrow) Selects the ...the Setup program. POWER Use this menu to exit the current menu or specify how to the advanced features. BIOS SETUP Menu Introduction 50 ASUS TUEP2-M User's Manual BIOS SETUP 4.2.1 BIOS Menu Bar The top of the Setup screen you to navigate through the values for the highlighted field Brings up...

TUEP2-M User Manual
Page 51
... the entire help window, press or . Press to display the first page, press to go to the Item Specific Help window, the BIOS setup program also provides a General Help screen. A sub-menu contains additional options for detailed information on saving changes and exiting the setup program.... 4. If you would within a sub-menu just as shown in square brackets represents the default setting for the currently highlighted field. BIOS SETUP Menu Introduction ASUS TUEP2-M User's Manual 51 This screen can be called up a sub-menu, simply move from this field. Take some time to any...
... the entire help window, press or . Press to display the first page, press to go to the Item Specific Help window, the BIOS setup program also provides a General Help screen. A sub-menu contains additional options for detailed information on saving changes and exiting the setup program.... 4. If you would within a sub-menu just as shown in square brackets represents the default setting for the currently highlighted field. BIOS SETUP Menu Introduction ASUS TUEP2-M User's Manual 51 This screen can be called up a sub-menu, simply move from this field. Take some time to any...


