User Guide
Page 3
... configurations 2-9 2.6.2 DIMM installation 2-13 2.7 Installing an expansion card 2-14 2.7.1 Expansion slots 2-14 2.7.2 Expansion card installation 2-15 2.8 Installing an optical drive 2-17 2.9 Installing a hard disk drive (HDD 2-17 2.10 Reinstalling the power supply unit 2-19 2.11 Replacing the cover 2-21 iii
... configurations 2-9 2.6.2 DIMM installation 2-13 2.7 Installing an expansion card 2-14 2.7.1 Expansion slots 2-14 2.7.2 Expansion card installation 2-15 2.8 Installing an optical drive 2-17 2.9 Installing a hard disk drive (HDD 2-17 2.10 Reinstalling the power supply unit 2-19 2.11 Replacing the cover 2-21 iii
User Guide
Page 12
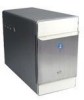
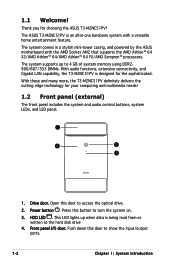
The ASUS T3-M2NC51PV is an all-in a stylish mini-tower casing, and powered by the ASUS motherboard with a versatile home entertainment feature. The system comes in -one barebone system with the AMD Socket AM2 that supports the AMD Athlon™ 64 ...; 64/AMD Athlon™ 64 FX/AMD Sempron™ processors. Power button . HDD LED . This LED lights up to 4 GB of system memory using DDR2800/667/533 DIMMs. With audio functions, extensive connectivity, and Gigabit LAN capability, the T3-M2NC51PV is being read from or written to turn the system on. 3. With these...
The ASUS T3-M2NC51PV is an all-in a stylish mini-tower casing, and powered by the ASUS motherboard with a versatile home entertainment feature. The system comes in -one barebone system with the AMD Socket AM2 that supports the AMD Athlon™ 64 ...; 64/AMD Athlon™ 64 FX/AMD Sempron™ processors. Power button . HDD LED . This LED lights up to 4 GB of system memory using DDR2800/667/533 DIMMs. With audio functions, extensive connectivity, and Gigabit LAN capability, the T3-M2NC51PV is being read from or written to turn the system on. 3. With these...
User Guide
Page 33
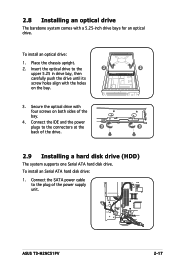
... to the plug of the drive. 2.9 Installing a hard disk drive (HDD) The system supports one Serial ATA hard disk drive. To install an optical drive: 1. Connect the SATA power cable to the connectors at the 3 3 back of the power supply unit. 1 ASUS T3-M2NC51PV 2-17 To install an Serial ATA hard disk drive: 1. Place...
... to the plug of the drive. 2.9 Installing a hard disk drive (HDD) The system supports one Serial ATA hard disk drive. To install an optical drive: 1. Connect the SATA power cable to the connectors at the 3 3 back of the power supply unit. 1 ASUS T3-M2NC51PV 2-17 To install an Serial ATA hard disk drive: 1. Place...

User Guide
Page 34
Insert a hard disk drive (with the HDD PCB facing the top of the drive. 3. Locate the HDD tray. 4. Tighten all the cables with four screws. 5. 2. Connect the SATA signal cable to the tray, then secure it with the plastic coils. 4 4 4 4 4 6 6 2-18 Chapter 2: Basic installation Connect the SATA signal 2 cable and the power plugs to the connectors at the back of the chassis) to the SATA connector on the motherboard. 6.
Insert a hard disk drive (with the HDD PCB facing the top of the drive. 3. Locate the HDD tray. 4. Tighten all the cables with four screws. 5. 2. Connect the SATA signal cable to the tray, then secure it with the plastic coils. 4 4 4 4 4 6 6 2-18 Chapter 2: Basic installation Connect the SATA signal 2 cable and the power plugs to the connectors at the back of the chassis) to the SATA connector on the motherboard. 6.
