Asus RS620SA-E10-RS12 Support and Manuals
Get Help and Manuals for this Asus item
View All Support Options Below
Free Asus RS620SA-E10-RS12 manuals!
Problems with Asus RS620SA-E10-RS12?
Ask a Question
Free Asus RS620SA-E10-RS12 manuals!
Problems with Asus RS620SA-E10-RS12?
Ask a Question
Popular Asus RS620SA-E10-RS12 Manual Pages
User Manual - Page 8

This server system is incorrectly replaced. Replace only with the same or equivalent type recommended by the authority responsible for the location. Dispose of used batteries according to the location and about any precautions that shall be gained by SERVICE PERSONS or by USERS who have been
instructed about the reasons for the restrictions applied...
User Manual - Page 9

...includes the motherboard layout, jumper settings, and connector locations. 5. Chapter 6: Driver Installation This chapter provides instructions for installing the necessary drivers for system integrators, and experienced users with the server.
Chapter 3: Installation Options This chapter describes how to change system settings through the BIOS Setup menus and describes the BIOS parameters...
User Manual - Page 10

... manual. x CAUTION: Information to prevent damage to the components when trying to select. NOTE: Tips and additional information to help you MUST follow to the ASUS contact information.
DANGER/WARNING: Information to prevent injury to yourself when trying to set up and use the proprietary ASUS server management utility.
ASUS websites
The ASUS websites worldwide provide updated...
User Manual - Page 13

...) 1 x Management Port (AST2500)
Aspeed AST2500 64MB
ASUS Control Center (ASWM Enterprise 2.0) ASMB9-iKVM for KVM-over-IP (On-Board)
(continued on the next page)
ASUS RS620SA-E10-RS12
1-3 The server supports AMD EPYC™ Rome Processors plus other latest technologies through the chipsets onboard.
1.3 System specifications
The ASUS RS620SA-E10 Series feature the ASUS KRPH-U8 server board.
User Manual - Page 15

ASUS RS620SA-E10-RS12
1-5
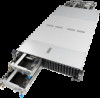
RS620SA-E10-RS12
Front panel LEDs & buttons Node 6
Front panel LEDs & buttons
handle
Node
Mgmt LAN port*
Node 5
VGA port
12 x 2.5" Storage Bays
handle
Gigabit LAN port
Power button Q-Code LED USB 3.2 Gen 1 ports
• * This port is for ASUS ASMB9-iKVM only.
• The Q-Code LED provides the most probable cause of an error code as a starting point...
User Manual - Page 19

...
Status
Description
OFF
No link
GREEN
Linked
BLINKING
Data activity
SPEED LED
Status
Description
OFF
10 Mbps connection
ORANGE
100 Mbps connection
GREEN
1 Gbps connection
ASUS RS620SA-E10-RS12
1-9
User Manual - Page 21

...set in fuse RAM Received an unexpected result VMG Storage Init failed Failure in mbedTLS user app An error...of the BIOS was revoked The platform model/vendor id fuse is not consistent ...error Function RunPostX86ReleaseUnitTests failed in case where not supported Fuse info on the next page)
ASUS RS620SA-E10-RS12
1-11 Action PSP Boot
PHASE PSP Boot Loader phase (Error Post Codes)
POST CODE...
User Manual - Page 23

...Driver Execution Environment) phase
BDS(Boot Device Selection) phase Normal boot Operating system phase
POST CODE... initial NB Initialization before installed memory SB Initialization before installed memory CPU POST-Memory ...Setup Utility password verify BIOS Setup Utility start BIOS Setup Utility input wait Ready to boot event Legacy boot event APIC mode PIC mode
ASUS RS620SA-E10-RS12
1-13
User Manual - Page 38

...
1
2 Keyboard Controller
2
- Turn on BIOS setup.
2. Assign an IRQ to the following tables.
3. Install the software drivers for ISA or PCI devices.
2-14
Chapter 2: Hardware Information Refer to the card. 2.5.2 Configuring an expansion card
After installing the expansion card, configure it by adjusting the software settings.
1.
Programmable Interrupt
3*
11 Communications Port (COM2...
User Manual - Page 47

... fasteners as shown. Turn the cable sled upside down the bracket latch (A) to pull it out of the chassis (B). cable fastener
cable fastener
cable fastener
ASUS RS620SA-E10-RS12
2-23 From the rear panel, press the latch (A) and then hold the cable sled at the same time to manage the cables of the cable...
User Manual - Page 49

Pull out the cables until the length of the chassis.
14. From the front panel, press down the bracket latch (A) to release the cable sled.
13.
Press down the latch to release the sled bracket.
15. ASUS RS620SA-E10-RS12
2-25 Pull the cable sled out of 8cm the protruding cables is approximately 8 cm. Push the sled bracket out of the cable sled (B).
16. 12.
User Manual - Page 53

... top and the bottom.
1U
ASUS RS620SA-E10-RS12
3-3 3.2 Installing the tool-less rack rail
To install the tool-less rack rails into the rack: 1. Refer to the two sides of the server using the set of three square mounting holes with different server models.
Secure the two fixing latches to your server user manual for details.
2. A 1U space...
User Manual - Page 59

... 3. VGA connector 6. Smart Ride Through (SmaRT) setting 9. BMC LED 11. M.2 slot
Page 4-5 4-5 4-7 4-7 4-8 4-6 4-4 4-6 4-8 4-10 4-10 4-11 4-11 4-9
ASUS RS620SA-E10-RS12
4-3 Location LED 14. 4.1.1 Layout contents
Internal connectors / Sockets / Jumpers / LEDs 1. Serial port connector 4. Clear RTC RAM 8. LANNCSI setting 7. Message LED 13. Power connector 10. Standby Power...
User Manual - Page 121

ASUS RS620SA-E10-RS12
6-3 6.2.1 Drivers menu tab
The Drivers Menu shows the available device drivers if the system detects installed devices. Install the necessary drivers to activate the devices.
6.2.2 Utilities menu tab
The Utilities menu displays the software applications and utilities that the motherboard supports.
User Manual - Page 122

You need an Internet browser installed in your OS to the Broadcom NetXtreme II Network Adapter user guide. 6.2.3 Manual menu
The Manual menu provides the link to view the User Guide.
6-4
Chapter 6: Driver Installation
Asus RS620SA-E10-RS12 Reviews
We have not received any reviews for Asus yet.