
User Manual
Page 5
... 5-27 5.4.8 Hardware Monitor 5-28 5.5 Server menu 5-30 5.6 Security menu 5-32 5.7 Boot menu 5-35 5.7.1 Boot Device Priority 5-35 5.7.2 Boot Settings Configuration 5-36 5.8 Exit menu 5-38 Chapter 6: RAID configuration 6.1 Setting up RAID 6-2 6.1.1 RAID definitions 6-2 6.1.2 Installing hard disk drives...
... 5-27 5.4.8 Hardware Monitor 5-28 5.5 Server menu 5-30 5.6 Security menu 5-32 5.7 Boot menu 5-35 5.7.1 Boot Device Priority 5-35 5.7.2 Boot Settings Configuration 5-36 5.8 Exit menu 5-38 Chapter 6: RAID configuration 6.1 Setting up RAID 6-2 6.1.1 RAID definitions 6-2 6.1.2 Installing hard disk drives...

User Manual
Page 6
Contents 6.2 NVIDIA® RAID configurations 6-4 6.2.1 Setting the BIOS RAID items 6-4 6.2.2 Entering the NVIDIA® RAID Utility 6-5 6.2.3 Creating a RAID 0 set (Stripe 6-6 6.2.4 Creating a RAID 1 set (Mirror 6-8 6.2.5 Rebuilding a RAID set 6-9 6.2.6 Deleting a RAID array 6-10 6.2.7 Clearing the disk data 6-11 Chapter 7: Driver installation 7.1 RAID driver installation 7-2 Creating a RAID driver disk 7-2 7.3 LAN driver installation 7-4 7.4 Support CD information 7-5 7.4.1 Running the support CD 7-5 7.4.2 Drivers menu 7-6 7.4.3 Management Software...
Contents 6.2 NVIDIA® RAID configurations 6-4 6.2.1 Setting the BIOS RAID items 6-4 6.2.2 Entering the NVIDIA® RAID Utility 6-5 6.2.3 Creating a RAID 0 set (Stripe 6-6 6.2.4 Creating a RAID 1 set (Mirror 6-8 6.2.5 Rebuilding a RAID set 6-9 6.2.6 Deleting a RAID array 6-10 6.2.7 Clearing the disk data 6-11 Chapter 7: Driver installation 7.1 RAID driver installation 7-2 Creating a RAID driver disk 7-2 7.3 LAN driver installation 7-4 7.4 Support CD information 7-5 7.4.1 Running the support CD 7-5 7.4.2 Drivers menu 7-6 7.4.3 Management Software...
User Manual
Page 9
Chapter 6: RAID configuration This chapter tells how to when configuring the motherboard. Appendix: Reference information This appendix includes additional information that you have to change system settings ...
Chapter 6: RAID configuration This chapter tells how to when configuring the motherboard. Appendix: Reference information This appendix includes additional information that you have to change system settings ...

User Manual
Page 13
... 2 x Broadcom® BCM5721 Gigabit PCI-E LAN controllers VGA ATI RAGE-XL PCI-based VGA controller with 8 MB display memory Expansion slots 2 x PCI Express™ x16 slots (x8 link) 1 x mini-PCI socket for...RAID 0, RAID 1, and JBOD configurations Management ASUS Server Web-based Management (ASWM) Monitoring Voltage, temperature, and fan speed monitoring Automatic System Restart (ASR) feature P o w e r r e q u i r e m e n t 500 W power supply, 100~240 VAC, 47~63 Hz Dimensions 663 mm (l) x 444 mm (w) x 43.6 mm (h) ASUS RS161-E2/PA2 1-3 1.2 System specifications The ASUS RS161...
... 2 x Broadcom® BCM5721 Gigabit PCI-E LAN controllers VGA ATI RAGE-XL PCI-based VGA controller with 8 MB display memory Expansion slots 2 x PCI Express™ x16 slots (x8 link) 1 x mini-PCI socket for...RAID 0, RAID 1, and JBOD configurations Management ASUS Server Web-based Management (ASWM) Monitoring Voltage, temperature, and fan speed monitoring Automatic System Restart (ASR) feature P o w e r r e q u i r e m e n t 500 W power supply, 100~240 VAC, 47~63 Hz Dimensions 663 mm (l) x 444 mm (w) x 43.6 mm (h) ASUS RS161-E2/PA2 1-3 1.2 System specifications The ASUS RS161...

User Manual
Page 55
... GND RSATA_TXP4 RSATA_TXN4 GND RSATA_RXN4 RSATA_RXP4 GND K8N-DRE SATA connectors SATA3 GND RSATA_TXP3 RSATA_TXN3 GND RSATA_RXN3 RSATA_RXP3 GND ASUS RS161-E2 (PA2) 4-9 If you installed Serial ATA hard disk drives, you can create a RAID 0, RAID 1, or JBOD configuration. 3. Serial ATA connectors (7-pin SATA1, SATA2, SATA3, SATA4) Supported by the NVIDIA® nForce4™...
... GND RSATA_TXP4 RSATA_TXN4 GND RSATA_RXN4 RSATA_RXP4 GND K8N-DRE SATA connectors SATA3 GND RSATA_TXP3 RSATA_TXN3 GND RSATA_RXN3 RSATA_RXP3 GND ASUS RS161-E2 (PA2) 4-9 If you installed Serial ATA hard disk drives, you can create a RAID 0, RAID 1, or JBOD configuration. 3. Serial ATA connectors (7-pin SATA1, SATA2, SATA3, SATA4) Supported by the NVIDIA® nForce4™...

User Manual
Page 77
...or disables any or both the primary and/or secondary IDE controllers. Configuration options: [Disabled] [Enabled] Configuration nVidia RAID ROM Main Configuration nVidia RAID ROM RAID Option ROM BIOS SETUP UTILITY [Disabled] →← Select Screen ↑↓ Select Item +- Change Field Tab...the system. Select an item then press if you to configure the item. ASUS RS161-E2/PA2 5-15 Main BIOS SETUP UTILITY IDE Configuration OnBoard PCI IDE Controller IDE DMA Transfer Configuration nVidia RAID ROM [Both] [Enabled] →← Select Screen ↑↓ Select...
...or disables any or both the primary and/or secondary IDE controllers. Configuration options: [Disabled] [Enabled] Configuration nVidia RAID ROM Main Configuration nVidia RAID ROM RAID Option ROM BIOS SETUP UTILITY [Disabled] →← Select Screen ↑↓ Select Item +- Change Field Tab...the system. Select an item then press if you to configure the item. ASUS RS161-E2/PA2 5-15 Main BIOS SETUP UTILITY IDE Configuration OnBoard PCI IDE Controller IDE DMA Transfer Configuration nVidia RAID ROM [Both] [Enabled] →← Select Screen ↑↓ Select...

User Manual
Page 78
...] Sets the tertiary master interface as RAID. Primary Master as RAID [Disabled] Sets the primary master interface as RAID. Configuration options: [Disabled] [Enabled] Secondary Slave as RAID [Disabled] Sets the secondary slave interface as RAID. Configuration options: [Disabled] [Enabled] Fifth Master as RAID [Disabled] Sets the fifth master interface as RAID. Configuration options: [Disabled] [Enabled] 5-16 Chapter...
...] Sets the tertiary master interface as RAID. Primary Master as RAID [Disabled] Sets the primary master interface as RAID. Configuration options: [Disabled] [Enabled] Secondary Slave as RAID [Disabled] Sets the secondary slave interface as RAID. Configuration options: [Disabled] [Enabled] Fifth Master as RAID [Disabled] Sets the fifth master interface as RAID. Configuration options: [Disabled] [Enabled] 5-16 Chapter...

User Manual
Page 103
RAID configuration Chapter 6 This chapter provides instructions for setting up, creating, and configuring RAID sets using the available utilities. ASUS RS161-E2/PA2
RAID configuration Chapter 6 This chapter provides instructions for setting up, creating, and configuring RAID sets using the available utilities. ASUS RS161-E2/PA2

User Manual
Page 104
... this setup. If one drive to hard disk drives that are not yet configured as it contains a complete copy of the data in the other RAID performance benefits. The new drive must be of data from the support CD to a floppy disk before you want to boot the system from a hard... disk drive included in a created RAID set . This configuration stores the same data redundantly on multiple disks that appear as a single drive but at a sustained data transfer rate, double that of...
... this setup. If one drive to hard disk drives that are not yet configured as it contains a complete copy of the data in the other RAID performance benefits. The new drive must be of data from the support CD to a floppy disk before you want to boot the system from a hard... disk drive included in a created RAID set . This configuration stores the same data redundantly on multiple disks that appear as a single drive but at a sustained data transfer rate, double that of...
User Manual
Page 105
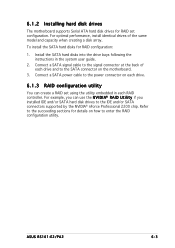
...t i l i t y if you installed IDE and/or SATA hard disk drives to the succeeding sections for RAID configuration: 1. Connect a SATA signal cable to enter the RAID configuration utility. Install the SATA hard disks into the drive bays following the instructions in each drive and to the ...RAID set using the utility embedded in the system user guide. 2. To install the SATA hard disks for details on the motherboard. 3. For example, you can create a RAID set configuration. Refer to the IDE and/or SATA connectors supported by the NVIDIA® nForce Professional 2200 chip. ASUS RS161...
...t i l i t y if you installed IDE and/or SATA hard disk drives to the succeeding sections for RAID configuration: 1. Connect a SATA signal cable to enter the RAID configuration utility. Install the SATA hard disks into the drive bays following the instructions in each drive and to the ...RAID set using the utility embedded in the system user guide. 2. To install the SATA hard disks for details on the motherboard. 3. For example, you can create a RAID set configuration. Refer to the IDE and/or SATA connectors supported by the NVIDIA® nForce Professional 2200 chip. ASUS RS161...

User Manual
Page 106
...are for reference only, and may not exactly match the items on your RAID configuration. Save your changes, then exit the BIOS Setup. • Refer to [Enabled], then press . The RAID controller supports RAID 0, RAID 1, and JBOD using the four independent Serial ATA channels or two IDE ...connectors, or both. 6.2.1 Setting the BIOS RAID items After installing the hard disk drives, make sure to set the BIOS RAID items: 1. Set the R A I D E C o n f i g u r a t i o n, then press . 3. Enter the BIOS Setup during POST. 2. The ...
...are for reference only, and may not exactly match the items on your RAID configuration. Save your changes, then exit the BIOS Setup. • Refer to [Enabled], then press . The RAID controller supports RAID 0, RAID 1, and JBOD using the four independent Serial ATA channels or two IDE ...connectors, or both. 6.2.1 Setting the BIOS RAID items After installing the hard disk drives, make sure to set the BIOS RAID items: 1. Set the R A I D E C o n f i g u r a t i o n, then press . 3. Enter the BIOS Setup during POST. 2. The ...

User Manual
Page 107
These keys allow you to display the utility main menu. NVIDIA RAID Utility Oct 5 2004 - Restart the computer. 2. RAID Mode: Striping Striping Block: Optimal Free Disks Loc Disk Model Name Array Disks Loc Disk Model Name 1.0.M 1.1.M 2.0.M 2.1.M XXXXXXXXXXXXXXXXXX XXXXXXXXXXXXXXXXXX XXXXXXXXXXXXXXXXXX XXXXXXXXXXXXXXXXXX [→] Add [&#... [↑↓] Select [ENTER] Popup The navigation keys vary depending on the menu level or option. Define a New Array - 6.2.2 Entering the NVIDIA® RAID Utility To enter the NVIDIA® RAID Utility: 1. ASUS RS161-E2/PA2 6-5
These keys allow you to display the utility main menu. NVIDIA RAID Utility Oct 5 2004 - Restart the computer. 2. RAID Mode: Striping Striping Block: Optimal Free Disks Loc Disk Model Name Array Disks Loc Disk Model Name 1.0.M 1.1.M 2.0.M 2.1.M XXXXXXXXXXXXXXXXXX XXXXXXXXXXXXXXXXXX XXXXXXXXXXXXXXXXXX XXXXXXXXXXXXXXXXXX [→] Add [&#... [↑↓] Select [ENTER] Popup The navigation keys vary depending on the menu level or option. Define a New Array - 6.2.2 Entering the NVIDIA® RAID Utility To enter the NVIDIA® RAID Utility: 1. ASUS RS161-E2/PA2 6-5

User Manual
Page 108
... stripe size values range from 8KB to 128KB. For typical disk usage, select 64 KB. The selected hard disk drives appear in the RAID set : 1. Select 128KB for audio and video editing, we recommend using a lower array block size. Press to move to the F...Define a New Array - Use the up or down arrow keys to add in the A r r a y D i s k s section. RAID Mode: Striping Striping Block: Optimal Free Disks Loc Disk Model Name Array Disks Loc Disk Model Name 1.0.M 1.1.M 2.0.M 2.1.M XXXXXXXXXXXXXXXXXX XXXXXXXXXXXXXXXXXX XXXXXXXXXXXXXXXXXX XXXXXXXXXXXXXXXXXX 1.0.M ...
... stripe size values range from 8KB to 128KB. For typical disk usage, select 64 KB. The selected hard disk drives appear in the RAID set : 1. Select 128KB for audio and video editing, we recommend using a lower array block size. Press to move to the F...Define a New Array - Use the up or down arrow keys to add in the A r r a y D i s k s section. RAID Mode: Striping Striping Block: Optimal Free Disks Loc Disk Model Name Array Disks Loc Disk Model Name 1.0.M 1.1.M 2.0.M 2.1.M XXXXXXXXXXXXXXXXXX XXXXXXXXXXXXXXXXXX XXXXXXXXXXXXXXXXXX XXXXXXXXXXXXXXXXXX 1.0.M ...

User Manual
Page 109
... drives, or to create the RAID 0 set . Press to delete all data on the disks. Array List - Boot No Id Status 4 Healthy Vendor NVIDIA Array Model Name STRIPING XXX.XXG [Ctrl-X]Exit [↑↓]Select [B]Set Boot [N]New Array [ENTER]Detail ASUS RS161-E2/PA2 6-7 7. Clear disk... data? [Y] YES [N] Cancel 8. NVIDIA RAID Utility Oct 5 2004 - After selecting the hard disk drives, press to continue creating the RAID set without deleting the data on the drives if you clear ...
... drives, or to create the RAID 0 set . Press to delete all data on the disks. Array List - Boot No Id Status 4 Healthy Vendor NVIDIA Array Model Name STRIPING XXX.XXG [Ctrl-X]Exit [↑↓]Select [B]Set Boot [N]New Array [ENTER]Detail ASUS RS161-E2/PA2 6-7 7. Clear disk... data? [Y] YES [N] Cancel 8. NVIDIA RAID Utility Oct 5 2004 - After selecting the hard disk drives, press to continue creating the RAID set without deleting the data on the drives if you clear ...

User Manual
Page 110
...the drives if you want to add in the A r r a y D i s k s section. 6.2.4 Creating a RAID 1 set (Mirror) To create a RAID 1 set . After selecting the hard disk drives, press to delete all desired hard disk drives are added. Press to a ... the up menu appears. 2. Press to move to select M i r r o r i n g, then press . Press to create the RAID 1 set : 1. RAID Mode: Mirroring Striping Block: Optimal Free Disks Loc Disk Model Name Array Disks Loc Disk Model Name 1.0.M 1.1.M 2.0.M 2.1.M XXXXXXXXXXXXXXXXXX XXXXXXXXXXXXXXXXXX XXXXXXXXXXXXXXXXXX XXXXXXXXXXXXXXXXXX 1.0.M...
...the drives if you want to add in the A r r a y D i s k s section. 6.2.4 Creating a RAID 1 set (Mirror) To create a RAID 1 set . After selecting the hard disk drives, press to delete all desired hard disk drives are added. Press to a ... the up menu appears. 2. Press to move to select M i r r o r i n g, then press . Press to create the RAID 1 set : 1. RAID Mode: Mirroring Striping Block: Optimal Free Disks Loc Disk Model Name Array Disks Loc Disk Model Name 1.0.M 1.1.M 2.0.M 2.1.M XXXXXXXXXXXXXXXXXX XXXXXXXXXXXXXXXXXX XXXXXXXXXXXXXXXXXX XXXXXXXXXXXXXXXXXX 1.0.M...

User Manual
Page 111
... Press . 3. Use the up or down arrow keys to select a the RAID set after rebuilding. Rebuild array? [Enter] OK [Esc] Cancel ASUS RS161-E2/PA2 6-9 The RAID set : 1. Array Detail - NVIDIA RAID Utility Oct 5 2004 - Array 1 : NVIDIA MIRROR XXX.XXG - Press to... start rebuilding the array, or to rebuild, then press . The A r r a y L i s t screen displays the RAID set you want to cancel. A confirmation message...
... Press . 3. Use the up or down arrow keys to select a the RAID set after rebuilding. Rebuild array? [Enter] OK [Esc] Cancel ASUS RS161-E2/PA2 6-9 The RAID set : 1. Array Detail - NVIDIA RAID Utility Oct 5 2004 - Array 1 : NVIDIA MIRROR XXX.XXG - Press to... start rebuilding the array, or to rebuild, then press . The A r r a y L i s t screen displays the RAID set you want to cancel. A confirmation message...

User Manual
Page 112
... r a y menu appears when you delete a disk array! 4. The RAID set . From the A r r a y L i s t, use the up or down arrow keys to select the RAID set following the instructions in the previous sections.. 6-10 Chapter 6: RAID configuration Press to delete the array, or press to delete, then press . ...NVAIrDrIaAy R1AI:D NUVtIiDlIiAtyMIRORcOtR 5 X2X0X0.4XXG - -ArArraryayLiDsetta-il - RAID MBoodoet: MiIrdrorSitnagtus Vendor Array Model Name StripiNnog Width4: 1Healthy NVIDSItAripinSgTRBIlPoIcNkG: 6X4XKX.XXG No 3 Healthy NVIDIA MIRRORING XXX...
... r a y menu appears when you delete a disk array! 4. The RAID set . From the A r r a y L i s t, use the up or down arrow keys to select the RAID set following the instructions in the previous sections.. 6-10 Chapter 6: RAID configuration Press to delete the array, or press to delete, then press . ...NVAIrDrIaAy R1AI:D NUVtIiDlIiAtyMIRORcOtR 5 X2X0X0.4XXG - -ArArraryayLiDsetta-il - RAID MBoodoet: MiIrdrorSitnagtus Vendor Array Model Name StripiNnog Width4: 1Healthy NVIDSItAripinSgTRBIlPoIcNkG: 6X4XKX.XXG No 3 Healthy NVIDIA MIRRORING XXX...

User Manual
Page 113
...Set Boot [N]New Array [ENTER]Detail 2. Array Detail - Clear disk data? [Y] Yes [N] Cancel ASUS RS161-E2/PA2 6-11 Array 1 : NVIDIA MIRROR XXX.XXG - NVIDIA RAID Utility Oct 5 2004 - 6.2.7 Clearing the disk data You will lose all data when you want to... t, use the up or down arrow keys to clear disk. Array List - When the array details appear, select the hard disk drive you clear a disk! RAID Mode: Striping Striping Width: 1 Striping Block: 64K Adapt Channel M/S 2 1 1 0 Master Master Index Disk Model Name 0 XXXXXXXXXXXXXXXXX 1 XXXXXXXXXXXXXXXXX Capacity XXX.XXGB ...
...Set Boot [N]New Array [ENTER]Detail 2. Array Detail - Clear disk data? [Y] Yes [N] Cancel ASUS RS161-E2/PA2 6-11 Array 1 : NVIDIA MIRROR XXX.XXG - NVIDIA RAID Utility Oct 5 2004 - 6.2.7 Clearing the disk data You will lose all data when you want to... t, use the up or down arrow keys to clear disk. Array List - When the array details appear, select the hard disk drive you clear a disk! RAID Mode: Striping Striping Width: 1 Striping Block: 64K Adapt Channel M/S 2 1 1 0 Master Master Index Disk Model Name 0 XXXXXXXXXXXXXXXXX 1 XXXXXXXXXXXXXXXXX Capacity XXX.XXGB ...

User Manual
Page 114
6-12 Chapter 6: RAID configuration
6-12 Chapter 6: RAID configuration

User Manual
Page 116
...hard disk drive or bootable array. The Makedisk menu appears. A floppy disk with data, the utility erases all the data before copying the RAID drivers. 7-2 Chapter 7: Driver installation Loading FreeDOS FAT KERNEL GO! When you are now ready to install an operating system to boot from ... the optical drive as the first boot priority to boot from the Internet. Press any key to boot from CDROM... 7.1 RAID driver installation After creating the RAID sets for Win2K3 64 bit driver 5. This part provides instructions on a hard disk drive that is required when installing Windows&#...
...hard disk drive or bootable array. The Makedisk menu appears. A floppy disk with data, the utility erases all the data before copying the RAID drivers. 7-2 Chapter 7: Driver installation Loading FreeDOS FAT KERNEL GO! When you are now ready to install an operating system to boot from ... the optical drive as the first boot priority to boot from the Internet. Press any key to boot from CDROM... 7.1 RAID driver installation After creating the RAID sets for Win2K3 64 bit driver 5. This part provides instructions on a hard disk drive that is required when installing Windows&#...