User Manual
Page 5
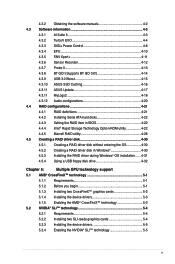
... 4.3.8 BT GO! (Supports BT GO 3.0 4-14 4.3.9 USB 3.0 Boost 4-15 4.3.10 ASUS SSD Caching 4-16 4.3.11 ASUS Update 4-17 4.3.11 MyLogo2 4-18 4.3.12 Audio configurations 4-20 4.4 RAID configurations 4-21 4.4.1 RAID definitions 4-21 4.4.2 Installing Serial ATA hard disks 4-22 4.4.3 Setting the ... 5.1.4 Installing the device drivers 5-3 5.1.5 Enabling the AMD® CrossFireX™ technology 5-3 5.2 NVIDIA® SLI™ technology 5-4 5.2.1 Requirements 5-4 5.2.2 Installing two SLI-ready graphics cards 5-4 5.2.3 Installing the device drivers 5-5 5.2.4 Enabling the NVIDIA®...
... 4.3.8 BT GO! (Supports BT GO 3.0 4-14 4.3.9 USB 3.0 Boost 4-15 4.3.10 ASUS SSD Caching 4-16 4.3.11 ASUS Update 4-17 4.3.11 MyLogo2 4-18 4.3.12 Audio configurations 4-20 4.4 RAID configurations 4-21 4.4.1 RAID definitions 4-21 4.4.2 Installing Serial ATA hard disks 4-22 4.4.3 Setting the ... 5.1.4 Installing the device drivers 5-3 5.1.5 Enabling the AMD® CrossFireX™ technology 5-3 5.2 NVIDIA® SLI™ technology 5-4 5.2.1 Requirements 5-4 5.2.2 Installing two SLI-ready graphics cards 5-4 5.2.3 Installing the device drivers 5-5 5.2.4 Enabling the NVIDIA®...

User Manual
Page 8
... technology support This chapter describes how to install and configure multiple AMD® CrossFireX™ and NVIDIA® SLI™ graphics cards. These documents are also provided. • Chapter 4: Software support This chapter describes the contents of the switches, jumpers, and connectors on ASUS hardware and software products. Refer to the following parts...
... technology support This chapter describes how to install and configure multiple AMD® CrossFireX™ and NVIDIA® SLI™ graphics cards. These documents are also provided. • Chapter 4: Software support This chapter describes the contents of the switches, jumpers, and connectors on ASUS hardware and software products. Refer to the following parts...

User Manual
Page 35
... - - - - - - - shared - - - - ASM 1042 USB 3.0 #3 - - Configuration Auto Mode PCI Express sharing mode PCIe x1_1 PCIe x1_2 x1 x1 BT3 Mode BT3 N/A eSATA Mode N/A eSATA ASUS P9X79 DELUXE 2-15 Refer to page 2-31 for details. • Connect a chassis fan to get better performance. • In 3-way SLI™ mode, use the PCIe 3.0 x16_1, PCIe... slot (navy blue) for a PCI Express x16 graphics card to get better performance. • In CrossFireX™ or SLI™ mode, use the PCIe 3.0 x16_1 and PCIe 3.0 x16_4 slots for PCI Express x16 graphics cards to get better ...
... - - - - - - - shared - - - - ASM 1042 USB 3.0 #3 - - Configuration Auto Mode PCI Express sharing mode PCIe x1_1 PCIe x1_2 x1 x1 BT3 Mode BT3 N/A eSATA Mode N/A eSATA ASUS P9X79 DELUXE 2-15 Refer to page 2-31 for details. • Connect a chassis fan to get better performance. • In 3-way SLI™ mode, use the PCIe 3.0 x16_1, PCIe... slot (navy blue) for a PCI Express x16 graphics card to get better performance. • In CrossFireX™ or SLI™ mode, use the PCIe 3.0 x16_1 and PCIe 3.0 x16_4 slots for PCI Express x16 graphics cards to get better ...

User Manual
Page 169
B4. The NVIDIA Control Panel window appears. Enabling SLI settings From the NVIDIA Control Panel window, select Set SLI Configuration. Click Enable SLI and set the display for viewing SLI rendered content. Chapter 5 B5. When done, click Apply. ASUS P9X79 DELUXE 5-7 Select the NVIDIA GeForce tab, and then click Start the NVIDIA Control Panel.
B4. The NVIDIA Control Panel window appears. Enabling SLI settings From the NVIDIA Control Panel window, select Set SLI Configuration. Click Enable SLI and set the display for viewing SLI rendered content. Chapter 5 B5. When done, click Apply. ASUS P9X79 DELUXE 5-7 Select the NVIDIA GeForce tab, and then click Start the NVIDIA Control Panel.


