

P8H61-M PLUS V3 User's Manual
Page 3
Contents Safety information vi About this guide vii P8H61-M PLUS V3 specifications summary ix Chapter 1 Product introduction 1.1 Before you proceed 1-1 1.2 Motherboard overview 1-2 1.2.1 Placement direction 1-2 1.2.2 Screw holes 1-2 1.2.3 Motherboard layout 1-3 1.2.4 Layout contents 1-3 1.3 Central Processing Unit (CPU 1-4 1.3.1 Installing the CPU 1-4 1.3.2 Installing the CPU heatsink and fan 1-7 1.3.3 Uninstalling the CPU heatsink and fan 1-8 1.4 System memory 1-9 1.4.1 Overview 1-9 1.4.2 Memory configurations 1-10...
Contents Safety information vi About this guide vii P8H61-M PLUS V3 specifications summary ix Chapter 1 Product introduction 1.1 Before you proceed 1-1 1.2 Motherboard overview 1-2 1.2.1 Placement direction 1-2 1.2.2 Screw holes 1-2 1.2.3 Motherboard layout 1-3 1.2.4 Layout contents 1-3 1.3 Central Processing Unit (CPU 1-4 1.3.1 Installing the CPU 1-4 1.3.2 Installing the CPU heatsink and fan 1-7 1.3.3 Uninstalling the CPU heatsink and fan 1-8 1.4 System memory 1-9 1.4.1 Overview 1-9 1.4.2 Memory configurations 1-10...
P8H61-M PLUS V3 User's Manual
Page 11
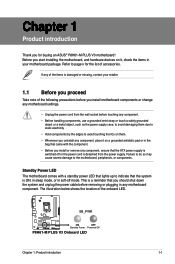
Refer to page x for buying an ASUS® P8H61-M PLUS V3 motherboard! If any of the following precautions before you install motherboard components or change any motherboard component. Failure to do so may cause severe damage... Before you uninstall any component, place it on it, check the items in your retailer. 1.1 Before you proceed Take note of the items is a reminder that lights up to the motherboard, peripherals, or components. The illustration below shows the location of accessories. SB_PWR P8H61-M PLUS V3 ON OFF Standby Power Powered Off P8H61-M PLUS V3 Onboard LED...
Refer to page x for buying an ASUS® P8H61-M PLUS V3 motherboard! If any of the following precautions before you install motherboard components or change any motherboard component. Failure to do so may cause severe damage... Before you uninstall any component, place it on it, check the items in your retailer. 1.1 Before you proceed Take note of the items is a reminder that lights up to the motherboard, peripherals, or components. The illustration below shows the location of accessories. SB_PWR P8H61-M PLUS V3 ON OFF Standby Power Powered Off P8H61-M PLUS V3 Onboard LED...

P8H61-M PLUS V3 User's Manual
Page 18
... B B A B A 1-8 ASUS P8H61-M PLUS V3 Pull up two fasteners at a time in a diagonal sequence to the connector on the motherboard. 2. 3. CPU_FAN CPU FAN PWM CPU FAN IN CPU FAN PWR GND P8H61-M PLUS V3 P8H61-M PLUS V3 CPU fan connector Do not forget to plug this connector. 1.3.3 Uninstalling the CPU heatsink and fan To... uninstall the CPU heatsink and fan: 1. Connect the CPU fan cable to...
... B B A B A 1-8 ASUS P8H61-M PLUS V3 Pull up two fasteners at a time in a diagonal sequence to the connector on the motherboard. 2. 3. CPU_FAN CPU FAN PWM CPU FAN IN CPU FAN PWR GND P8H61-M PLUS V3 P8H61-M PLUS V3 CPU fan connector Do not forget to plug this connector. 1.3.3 Uninstalling the CPU heatsink and fan To... uninstall the CPU heatsink and fan: 1. Connect the CPU fan cable to...


