

P8H61-M PLUS V3 User's Manual
Page 3
Contents Safety information vi About this guide vii P8H61-M PLUS V3 specifications summary ix Chapter 1 Product introduction 1.1 Before you proceed 1-1 1.2 Motherboard overview 1-2 1.2.1 Placement direction 1-2 1.2.2 Screw holes 1-2 1.2.3 Motherboard layout 1-3 1.2.4 Layout contents 1-3 1.3 Central Processing Unit (CPU 1-4 1.3.1 Installing the CPU 1-4 1.3.2 Installing the CPU heatsink and fan 1-7 1.3.3 Uninstalling the CPU heatsink and fan 1-8 1.4 System memory 1-9 1.4.1 Overview 1-9 1.4.2 Memory configurations 1-10...
Contents Safety information vi About this guide vii P8H61-M PLUS V3 specifications summary ix Chapter 1 Product introduction 1.1 Before you proceed 1-1 1.2 Motherboard overview 1-2 1.2.1 Placement direction 1-2 1.2.2 Screw holes 1-2 1.2.3 Motherboard layout 1-3 1.2.4 Layout contents 1-3 1.3 Central Processing Unit (CPU 1-4 1.3.1 Installing the CPU 1-4 1.3.2 Installing the CPU heatsink and fan 1-7 1.3.3 Uninstalling the CPU heatsink and fan 1-8 1.4 System memory 1-9 1.4.1 Overview 1-9 1.4.2 Memory configurations 1-10...
P8H61-M PLUS V3 User's Manual
Page 11
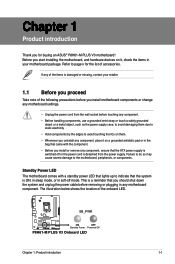
Before you uninstall any component, place it on it, check the items in... them due to static electricity. • Hold components by the edges to page x for buying an ASUS® P8H61-M PLUS V3 motherboard! Failure to do so may cause severe damage to indicate that the system is a reminder that came... to the motherboard, peripherals, or components. The illustration below shows the location of accessories. SB_PWR P8H61-M PLUS V3 ON OFF Standby Power Powered Off P8H61-M PLUS V3 Onboard LED Chapter 1: Product introduction 1-1 Refer to avoid touching the ICs on them. •...
Before you uninstall any component, place it on it, check the items in... them due to static electricity. • Hold components by the edges to page x for buying an ASUS® P8H61-M PLUS V3 motherboard! Failure to do so may cause severe damage to indicate that the system is a reminder that came... to the motherboard, peripherals, or components. The illustration below shows the location of accessories. SB_PWR P8H61-M PLUS V3 ON OFF Standby Power Powered Off P8H61-M PLUS V3 Onboard LED Chapter 1: Product introduction 1-1 Refer to avoid touching the ICs on them. •...

P8H61-M PLUS V3 User's Manual
Page 18
.... Pull up two fasteners at a time in a diagonal sequence to connect the CPU fan connector! A B A B B A B A 1-8 ASUS P8H61-M PLUS V3 Rotate each fastener counterclockwise. 3. Connect the CPU fan cable to plug this connector. 1.3.3 Uninstalling the CPU heatsink and fan To uninstall the CPU heatsink and fan: 1. Hardware monitoring errors can occur if you fail to the connector...
.... Pull up two fasteners at a time in a diagonal sequence to connect the CPU fan connector! A B A B B A B A 1-8 ASUS P8H61-M PLUS V3 Rotate each fastener counterclockwise. 3. Connect the CPU fan cable to plug this connector. 1.3.3 Uninstalling the CPU heatsink and fan To uninstall the CPU heatsink and fan: 1. Hardware monitoring errors can occur if you fail to the connector...


