P8B75-M LX User's Manual
Page 3
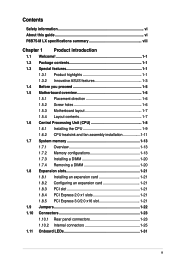
Contents Safety information vi About this guide vi P8B75-M LX specifications summary viii Chapter 1 Product introduction 1.1 Welcome 1-1 1.2 Package contents 1-1 1.3 Special features 1-1 1.3.1 Product highlights 1-1 1.3.2 Innovative ASUS features 1-3 1.4 Before you proceed 1-5 1.5 Motherboard overview 1-6 1.5.1 Placement direction 1-6 1.5.2 Screw holes 1-6 1.5.3 Motherboard layout 1-7 1.5.4 Layout contents 1-7 1.6 Central Processing Unit (CPU 1-8 1.6.1 Installing the CPU 1-9 1.6.2 CPU heatsink and fan assembly installation 1-11 1.7 System memory...
Contents Safety information vi About this guide vi P8B75-M LX specifications summary viii Chapter 1 Product introduction 1.1 Welcome 1-1 1.2 Package contents 1-1 1.3 Special features 1-1 1.3.1 Product highlights 1-1 1.3.2 Innovative ASUS features 1-3 1.4 Before you proceed 1-5 1.5 Motherboard overview 1-6 1.5.1 Placement direction 1-6 1.5.2 Screw holes 1-6 1.5.3 Motherboard layout 1-7 1.5.4 Layout contents 1-7 1.6 Central Processing Unit (CPU 1-8 1.6.1 Installing the CPU 1-9 1.6.2 CPU heatsink and fan assembly installation 1-11 1.7 System memory...

P8B75-M LX User's Manual
Page 16
... in the correct orientation. Do not overtighten the screws! Place this side towards the rear of the chassis P8B75-M LX 1-6 Chapter 1: Product introduction Doing so can cause you physical injury and damage motherboard components. 1.5.1 Placement direction When installing the motherboard, ensure that you place it . 1.5 Motherboard overview Before you install the motherboard, study...
... in the correct orientation. Do not overtighten the screws! Place this side towards the rear of the chassis P8B75-M LX 1-6 Chapter 1: Product introduction Doing so can cause you physical injury and damage motherboard components. 1.5.1 Placement direction When installing the motherboard, ensure that you place it . 1.5 Motherboard overview Before you install the motherboard, study...

P8B75-M LX User's Manual
Page 30
.... 2. Remove the DIMM from the socket. The DIMM might get damaged when it fits in the wrong direction to both the motherboard and the components. 1. Firmly insert the DIMM into a socket in only one direction. Press the retaining clips outward to unlock the DIMM. Failure to do so can cause severe damage...
.... 2. Remove the DIMM from the socket. The DIMM might get damaged when it fits in the wrong direction to both the motherboard and the components. 1. Firmly insert the DIMM into a socket in only one direction. Press the retaining clips outward to unlock the DIMM. Failure to do so can cause severe damage...

P8B75-M LX User's Manual
Page 64
BIOS Timer [0] Use the and keys to adjust the value or key in a number directly. 2.5.6 USB Configuration The items in a number directly. Legacy USB Support [Enabled] [Enabled] Enables the support for USB devices on legacy operating systems (OS). [Disabled] The USB devices can be used only for ...
BIOS Timer [0] Use the and keys to adjust the value or key in a number directly. 2.5.6 USB Configuration The items in a number directly. Legacy USB Support [Enabled] [Enabled] Enables the support for USB devices on legacy operating systems (OS). [Disabled] The USB devices can be used only for ...

P8B75-M LX User's Manual
Page 78
... 112, TAIWAN R.O.C. Country: TAIWAN Authorized representative in Europe: ASUS COMPUTER GmbH Address, City: HARKORT STR. 21-23, 40880 RATINGEN Country: GERMANY declare the following apparatus: Product name : Motherboard Model name : P8B75-M LX conform with the essential requirements of the following directives: 2004/108/EC-EMC Directive EN 55022:2010 EN 61000-3-2:2006+ A1:2009+ A2...
... 112, TAIWAN R.O.C. Country: TAIWAN Authorized representative in Europe: ASUS COMPUTER GmbH Address, City: HARKORT STR. 21-23, 40880 RATINGEN Country: GERMANY declare the following apparatus: Product name : Motherboard Model name : P8B75-M LX conform with the essential requirements of the following directives: 2004/108/EC-EMC Directive EN 55022:2010 EN 61000-3-2:2006+ A1:2009+ A2...