
Motherboard DIY Troubleshooting Guide
Page 4
... 2.6.2 Boot Settings Configuration 2-25 2.6.3 Security 2-26 2.7 Exit Menu 2-28 Chapter 3: Software Support 3.1 Installing An Operating System 3-2 3.2 Support CD Information 3-2 3.2.1 Running the support CD 3-2 3.2.2 Drivers menu 3-3 3.2.3 Utilities menu 3-3 3.2.4 Contacts menu 3-4 3.3 VIA RAID configurations 3-5 3.3.1 Installing hard disks 3-5 3.3.2 VIA RAID configurations 3-6 3.3 Creating a RAID...
... 2.6.2 Boot Settings Configuration 2-25 2.6.3 Security 2-26 2.7 Exit Menu 2-28 Chapter 3: Software Support 3.1 Installing An Operating System 3-2 3.2 Support CD Information 3-2 3.2.1 Running the support CD 3-2 3.2.2 Drivers menu 3-3 3.2.3 Utilities menu 3-3 3.2.4 Contacts menu 3-4 3.3 VIA RAID configurations 3-5 3.3.1 Installing hard disks 3-5 3.3.2 VIA RAID configurations 3-6 3.3 Creating a RAID...

Motherboard DIY Troubleshooting Guide
Page 9
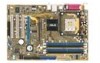
P4V800D-X Specifications Summary BIOS features Industry standard Manageability Power Requirement Support CD Accessary Form factor 4 Mb Flash ROM, AMI BIOS, PnP, DMI2.0, WfM2.0, SM BIOS 2.3, ACPI, ASUS EZ Flash, ASUS CrashFree BIOS 2, C.P.R. MyLogo PCI 2.2, USB 2.0/1.1 WfM 2.0, DMI 2.0, WOL by PME, WOR by PME ATX power supply (with 4-pin 12V plug) Drivers ASUS PC Probe...
P4V800D-X Specifications Summary BIOS features Industry standard Manageability Power Requirement Support CD Accessary Form factor 4 Mb Flash ROM, AMI BIOS, PnP, DMI2.0, WfM2.0, SM BIOS 2.3, ACPI, ASUS EZ Flash, ASUS CrashFree BIOS 2, C.P.R. MyLogo PCI 2.2, USB 2.0/1.1 WfM 2.0, DMI 2.0, WOL by PME, WOR by PME ATX power supply (with 4-pin 12V plug) Drivers ASUS PC Probe...

Motherboard DIY Troubleshooting Guide
Page 22
.... 2. Assign an IRQ to the chassis with it by adjusting the software settings. 1. Turn on the next page. 3. Make sure to use . 4. Install the software drivers for the card. 2. The following sub-sections describe the slots and the expansion cards that came with the screw you removed earlier. 6. Keep the screw...
.... 2. Assign an IRQ to the chassis with it by adjusting the software settings. 1. Turn on the next page. 3. Make sure to use . 4. Install the software drivers for the card. 2. The following sub-sections describe the slots and the expansion cards that came with the screw you removed earlier. 6. Keep the screw...

Motherboard DIY Troubleshooting Guide
Page 23
..., conflicts will arise between the two PCI groups, making the system unstable and the card inoperable. ASUS P4V800D-X Motherboard 1-13 shared - - - - - - - - used When using PCI cards on shared slots, ensure that the drivers support "Share IRQ" or that the cards do not need IRQ assignments; shared - - - - - shared - - - - - - - - - - - - - Standard interrupt assignments IRQ...
..., conflicts will arise between the two PCI groups, making the system unstable and the card inoperable. ASUS P4V800D-X Motherboard 1-13 shared - - - - - - - - used When using PCI cards on shared slots, ensure that the drivers support "Share IRQ" or that the cards do not need IRQ assignments; shared - - - - - shared - - - - - - - - - - - - - Standard interrupt assignments IRQ...

Motherboard DIY Troubleshooting Guide
Page 63
The CD automatically displays the Drivers menu if Autorun is NOT enabled in your OS documentation for updates. 3.2.1 Running the support CD Place the support CD to maximize the features of ... to run the CD. 3-2 Chapter 3: Software Support Motherboard settings and hardware options vary. Visit the ASUS website(www.asus.com) for detailed information. 3.2 Support CD information The support CD that came with the motherboard package contains the drivers, software applications, and utilities that you can install to locate the file ASSETUP.EXE from...
The CD automatically displays the Drivers menu if Autorun is NOT enabled in your OS documentation for updates. 3.2.1 Running the support CD Place the support CD to maximize the features of ... to run the CD. 3-2 Chapter 3: Software Support Motherboard settings and hardware options vary. Visit the ASUS website(www.asus.com) for detailed information. 3.2 Support CD information The support CD that came with the motherboard package contains the drivers, software applications, and utilities that you can install to locate the file ASSETUP.EXE from...

Motherboard DIY Troubleshooting Guide
Page 64
... may not be the same for 32 OS. ADI Audio Driver Install ADI Audio Driver. Install the necessary drivers to activate the devices. VIA 4 in 1 Driver Install VIA in healthy operating condition. ASUS P4V800D-X Motherboard 3-3 USB 2.0 Driver Install USB 2.0 driver. LAN Driver for 32 bit OS LAN Driver for different operating system versions. 3.2.3 Utilities menu The Utilities menu shows the...
... may not be the same for 32 OS. ADI Audio Driver Install ADI Audio Driver. Install the necessary drivers to activate the devices. VIA 4 in 1 Driver Install VIA in healthy operating condition. ASUS P4V800D-X Motherboard 3-3 USB 2.0 Driver Install USB 2.0 driver. LAN Driver for 32 bit OS LAN Driver for different operating system versions. 3.2.3 Utilities menu The Utilities menu shows the...
Motherboard DIY Troubleshooting Guide
Page 65
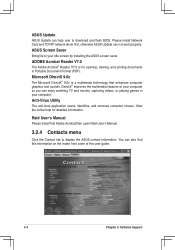
... Card and TCP/IP network driver first, otherwise ASUS Update can also find this information on the inside front cover of your computer so you can help for opening, viewing, and printing documents in your idle screen by installing the ASUS screen saver. Microsoft DirectX 9....-Virus Utility The anti-virus application scans, identifies, and removes computer viruses. You can not work properly. ASUS Screen Saver Bring life to display the ASUS contact information. Raid Userʼs Manual Please install first Adobe Acrobat,then open Raid Userʼs Manual. 3.2.4...
... Card and TCP/IP network driver first, otherwise ASUS Update can also find this information on the inside front cover of your computer so you can help for opening, viewing, and printing documents in your idle screen by installing the ASUS screen saver. Microsoft DirectX 9....-Virus Utility The anti-virus application scans, identifies, and removes computer viruses. You can not work properly. ASUS Screen Saver Bring life to display the ASUS contact information. Raid Userʼs Manual Please install first Adobe Acrobat,then open Raid Userʼs Manual. 3.2.4...

Motherboard DIY Troubleshooting Guide
Page 66
... fault tolerance to a second drive. JBOD (Spanning) stands for Just a Bunch of data from the support CD to section "5.5 Creating a RAID driver disk" for a RAID configuration: 1. Refer to a floppy disk before creating RAID configurations. RAID 1 (called Data ...174; 2000 operating system (OS), copy first the RAID driver from one drive fails, the disk array management software directs all applications to read and write data in the VIA VT8237R+ southbridge chipset. ASUS P4V800D-X Motherboard 3-5 This configuration stores the same data redundantly...
... fault tolerance to a second drive. JBOD (Spanning) stands for Just a Bunch of data from the support CD to section "5.5 Creating a RAID driver disk" for a RAID configuration: 1. Refer to a floppy disk before creating RAID configurations. RAID 1 (called Data ...174; 2000 operating system (OS), copy first the RAID driver from one drive fails, the disk array management software directs all applications to read and write data in the VIA VT8237R+ southbridge chipset. ASUS P4V800D-X Motherboard 3-5 This configuration stores the same data redundantly...

Motherboard DIY Troubleshooting Guide
Page 70
... succeeding screen information to floppy disk drive. 4. To install the RAID driver: 1. During the OS installation, the system prompts you to press the F6 key to complete the installation. To create a RAID driver disk: 1. ASUS P4V800D-X Motherboard 3-9 You can create a RAID driver disk using your motherboard support CD. Follow the succeeding screen instructions to...
... succeeding screen information to floppy disk drive. 4. To install the RAID driver: 1. During the OS installation, the system prompts you to press the F6 key to complete the installation. To create a RAID driver disk: 1. ASUS P4V800D-X Motherboard 3-9 You can create a RAID driver disk using your motherboard support CD. Follow the succeeding screen instructions to...


