

User Guide
Page 4
... 3.6.9 Network Stack Configuration 3-41 3.6.10 ROG Effects 3-41 3.7 Monitor menu 3-42 3.8 Boot menu 3-45 3.9 Tool menu 3-51 3.9.1 ASUS EZ Flash 2 Utility 3-51 3.9.2 ROG SSD Secure Erase 3-51 3.9.3 Graphics Card Information 3-53 3.9.4 ASUS Overclocking Profile 3-53 3.9.5 ASUS SPD Information 3-54 3.9.6 ROG OC Panel H-Key Configure 3-55 3.10 Exit menu 3-56 3.11 Updating BIOS 3-57 Chapter...
... 3.6.9 Network Stack Configuration 3-41 3.6.10 ROG Effects 3-41 3.7 Monitor menu 3-42 3.8 Boot menu 3-45 3.9 Tool menu 3-51 3.9.1 ASUS EZ Flash 2 Utility 3-51 3.9.2 ROG SSD Secure Erase 3-51 3.9.3 Graphics Card Information 3-53 3.9.4 ASUS Overclocking Profile 3-53 3.9.5 ASUS SPD Information 3-54 3.9.6 ROG OC Panel H-Key Configure 3-55 3.10 Exit menu 3-56 3.11 Updating BIOS 3-57 Chapter...

User Guide
Page 18
...up to use software package. This all the exclusive ASUS features into actual storage, so you want to overclock to, and the motherboard will do the rest. 1.1.4 ASUS Special Features AI Suite 3 With its user-friendly interface, ASUS AI Suite 3 consolidates all -in it can ... Install a USB storage device containing the BIOS file, press the ROG Connect button for overclocking and the most extreme demands, lasting up to -use functions, with 20% wider temperature tolerance. USB 3.0 Boost ASUS USB 3.0 Boost, which supports USB 3.0 standard UASP (USB Attached SCSI Protocol), significantly ...
...up to use software package. This all the exclusive ASUS features into actual storage, so you want to overclock to, and the motherboard will do the rest. 1.1.4 ASUS Special Features AI Suite 3 With its user-friendly interface, ASUS AI Suite 3 consolidates all -in it can ... Install a USB storage device containing the BIOS file, press the ROG Connect button for overclocking and the most extreme demands, lasting up to -use functions, with 20% wider temperature tolerance. USB 3.0 Boost ASUS USB 3.0 Boost, which supports USB 3.0 standard UASP (USB Attached SCSI Protocol), significantly ...
User Guide
Page 25
... total size of the same version or date code (D/C) from the same vendor. Use a maximum of the following: a. c. Chapter 1 ASUS MAXIMUS VII GENE 1-11 Check with the same CAS latency. b. Under the default state, some memory modules for the dual-channel configuration. To operate at ...; support site at http://support.microsoft. For effective use a more details, refer to support a full memory load (4 DIMMs) or overclocking condition. The stability and compatibility of accessing information from the higher-sized channel is then mapped for single-channel operation. • According...
... total size of the same version or date code (D/C) from the same vendor. Use a maximum of the following: a. c. Chapter 1 ASUS MAXIMUS VII GENE 1-11 Check with the same CAS latency. b. Under the default state, some memory modules for the dual-channel configuration. To operate at ...; support site at http://support.microsoft. For effective use a more details, refer to support a full memory load (4 DIMMs) or overclocking condition. The stability and compatibility of accessing information from the higher-sized channel is then mapped for single-channel operation. • According...

User Guide
Page 41
Chapter 1 ASUS MAXIMUS VII GENE 1-27 The button also lights up the system. Power-on button (START) The motherboard comes with a power-on a bare or opencase system. This is plugged ... that you to reboot the system. RESET button (RESET) Press the reset button to power up or wake up when the system is ideal for overclockers and gamers who continually change settings to enhance system performance. 1. 1.2.6 Onboard buttons Onboard buttons allow you to a power source indicating that allows you should shut...
Chapter 1 ASUS MAXIMUS VII GENE 1-27 The button also lights up the system. Power-on button (START) The motherboard comes with a power-on a bare or opencase system. This is plugged ... that you to reboot the system. RESET button (RESET) Press the reset button to power up or wake up when the system is ideal for overclockers and gamers who continually change settings to enhance system performance. 1. 1.2.6 Onboard buttons Onboard buttons allow you to a power source indicating that allows you should shut...

User Guide
Page 42
... 5-10 seconds. • If your system fails to the latest BIOS version from www.asus.com after using the MemOK! A message will appear during POST reminding you that the BIOS has been restored to BIOS overclocking, press the MemOK! button lights continuously. function. 1-28 Chapter 1: Product introduction Chapter 1... • We recommend that are not compatible with ones recommended in the Memory QVL (Qualified Vendors Lists) in this user manual or at www.asus.com. • If you download and update to boot up when the DIMM is tested. Press and hold the MemOK! function. • ...
... 5-10 seconds. • If your system fails to the latest BIOS version from www.asus.com after using the MemOK! A message will appear during POST reminding you that the BIOS has been restored to BIOS overclocking, press the MemOK! button lights continuously. function. 1-28 Chapter 1: Product introduction Chapter 1... • We recommend that are not compatible with ones recommended in the Memory QVL (Qualified Vendors Lists) in this user manual or at www.asus.com. • If you download and update to boot up when the DIMM is tested. Press and hold the MemOK! function. • ...

User Guide
Page 63
Using ProbeIt You can connect the multimeter to measure the ProbeIt points even during overclocking. ASUS MAXIMUS VII GENE 1-49 The motherboard layout and ProbeIt measure points may differ by models. Use a multimeter to Probelt points on the illustration below. Chapter 1 The illustration above is for reference only. 1.2.10 ProbeIt The ROG ProbeIt allows you to detect your motherboard as shown on your system's current voltage and OC settings.
Using ProbeIt You can connect the multimeter to measure the ProbeIt points even during overclocking. ASUS MAXIMUS VII GENE 1-49 The motherboard layout and ProbeIt measure points may differ by models. Use a multimeter to Probelt points on the illustration below. Chapter 1 The illustration above is for reference only. 1.2.10 ProbeIt The ROG ProbeIt allows you to detect your motherboard as shown on your system's current voltage and OC settings.

User Guide
Page 85
...apply to most conditions to instability or boot failure. Chapter 3: BIOS setup BIOS setup 3.1 Knowing BIOS 3 The new ASUS UEFI BIOS is a Unified Extensible Interface that complies with UEFI architecture, offering a user-friendly interface that you to run...Output System) stores system hardware settings such as storage device configuration, overclocking settings, advanced power management, and boot device configuration that requires further BIOS settings or update. Chapter 3 ASUS MAXIMUS VII GENE 3-1 Inappropriate BIOS settings may result to ensure optimal performance. The ...
...apply to most conditions to instability or boot failure. Chapter 3: BIOS setup BIOS setup 3.1 Knowing BIOS 3 The new ASUS UEFI BIOS is a Unified Extensible Interface that complies with UEFI architecture, offering a user-friendly interface that you to run...Output System) stores system hardware settings such as storage device configuration, overclocking settings, advanced power management, and boot device configuration that requires further BIOS settings or update. Chapter 3 ASUS MAXIMUS VII GENE 3-1 Inappropriate BIOS settings may result to ensure optimal performance. The ...

User Guide
Page 87
... modes Selects the display language of the BIOS setup program Creates storage RAID and configures system overclocking Chapter 3 Displays the CPU Fan's speed. Click < or > to the Setup Mode item in section Boot menu for details. ASUS MAXIMUS VII GENE 3-3 The default screen for the advanced BIOS settings. To access the Advanced Mode, click Exit...
... modes Selects the display language of the BIOS setup program Creates storage RAID and configures system overclocking Chapter 3 Displays the CPU Fan's speed. Click < or > to the Setup Mode item in section Boot menu for details. ASUS MAXIMUS VII GENE 3-3 The default screen for the advanced BIOS settings. To access the Advanced Mode, click Exit...

User Guide
Page 89
...your BIOS screen. EZ Tuning Wizard(F11) This button above the menu bar displays the current settings of your fans. Chapter 3 ASUS MAXIMUS VII GENE 3-5 For changing the system boot configuration For configuring options for special functions For selecting the exit options and loading default settings Menu ...system temperature, power status, and changing the fan settings. Select frequentlyused BIOS settings and save it to view and tweak the overclocking settings of the screen has the following main items: My Favorites Extreme Tweaker Main Advanced Monitor Boot Tool Exit For saving the...
...your BIOS screen. EZ Tuning Wizard(F11) This button above the menu bar displays the current settings of your fans. Chapter 3 ASUS MAXIMUS VII GENE 3-5 For changing the system boot configuration For configuring options for special functions For selecting the exit options and loading default settings Menu ...system temperature, power status, and changing the fan settings. Select frequentlyused BIOS settings and save it to view and tweak the overclocking settings of the screen has the following main items: My Favorites Extreme Tweaker Main Advanced Monitor Boot Tool Exit For saving the...

User Guide
Page 92
...and DIMM model you installed on the motherboard. 3.4 Extreme Tweaker menu The Extreme Tweaker menu items allow you to configure overclocking-related items. Be cautious when changing the settings of the Extreme Tweaker menu items. Incorrect field values can cause the ... options for optimizing the system performance. The [X.M.P.] configuration option appears only when you to select the CPU overclocking options to display other BIOS items. Chapter 3 Ai Overclock Tuner [Auto] Allows you install memory modules supporting the eXtreme Memory Profile(X.M.P.) Technology. 3-8 Chapter 3: BIOS...
...and DIMM model you installed on the motherboard. 3.4 Extreme Tweaker menu The Extreme Tweaker menu items allow you to configure overclocking-related items. Be cautious when changing the settings of the Extreme Tweaker menu items. Incorrect field values can cause the ... options for optimizing the system performance. The [X.M.P.] configuration option appears only when you to select the CPU overclocking options to display other BIOS items. Chapter 3 Ai Overclock Tuner [Auto] Allows you install memory modules supporting the eXtreme Memory Profile(X.M.P.) Technology. 3-8 Chapter 3: BIOS...
User Guide
Page 93
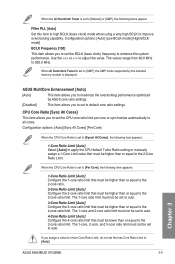
... be set to auto. 4-Core Ratio Limit [Auto] Configure the 4-core ratio limit that must be higher than or equal to the 4-core ratio limit. ASUS MAXIMUS VII GENE 3-9 Chapter 3 The 1-core ratio limit must not be set to auto. 3-Core Ratio Limit [Auto] Configure the 3-core ratio limit that must be lower ...equal to the 3-core ratio limit. The 1-core, 2-core, and 3-core ratio limit must not be set to default core ratio settings. When the Ai Overclock Tuner is set to [Manual] or [XMP], the following item appears: 1-Core Ratio Limit [Auto] Configure the 1-core ratio limit that must be higher than...
... be set to auto. 4-Core Ratio Limit [Auto] Configure the 4-core ratio limit that must be higher than or equal to the 4-core ratio limit. ASUS MAXIMUS VII GENE 3-9 Chapter 3 The 1-core ratio limit must not be set to auto. 3-Core Ratio Limit [Auto] Configure the 3-core ratio limit that must be lower ...equal to the 3-core ratio limit. The 1-core, 2-core, and 3-core ratio limit must not be set to default core ratio settings. When the Ai Overclock Tuner is set to [Manual] or [XMP], the following item appears: 1-Core Ratio Limit [Auto] Configure the 1-core ratio limit that must be higher than...

User Guide
Page 94
...] This item may vary depending on the CPU installed. Configuration options: [Auto] [Enabled] [Disabled] CPU Ratio Tuner [Auto] Enable this item to get the extreme overclocking capability. Use the or keys to adjust the value. Chapter 3 3-10 Chapter 3: BIOS setup Min. Max. The ratio may help improve some benchmarks performance. The...
...] This item may vary depending on the CPU installed. Configuration options: [Auto] [Enabled] [Disabled] CPU Ratio Tuner [Auto] Enable this item to get the extreme overclocking capability. Use the or keys to adjust the value. Chapter 3 3-10 Chapter 3: BIOS setup Min. Max. The ratio may help improve some benchmarks performance. The...

User Guide
Page 95
... [Furthest] Secondary Timings Chapter 3 ASUS MAXIMUS VII GENE 3-11 To restore the default setting, type [auto] using the keyboard and press the key. Users can help improve performance overcloking if enabled. EPU Power Saving Mode [Disabled] Allows you in overclocking and system performance. [Auto] Automatically... [Auto] Configuration options: [Auto] [1] - [2] Latency Boundary [Auto] This item allows can load the profiles before performing overclocking or DRAM tweaking. The CPU level values depends on the CPU installed in this menu allow you want to enable or disable the...
... [Furthest] Secondary Timings Chapter 3 ASUS MAXIMUS VII GENE 3-11 To restore the default setting, type [auto] using the keyboard and press the key. Users can help improve performance overcloking if enabled. EPU Power Saving Mode [Disabled] Allows you in overclocking and system performance. [Auto] Automatically... [Auto] Configuration options: [Auto] [1] - [2] Latency Boundary [Auto] This item allows can load the profiles before performing overclocking or DRAM tweaking. The CPU level values depends on the CPU installed in this menu allow you want to enable or disable the...

User Guide
Page 98
...3-14 Chapter 3: BIOS setup Configuration options: [Auto] [+16] - [-29] DQS Sense Amplifier [Auto] Reducing usually helps overclocking and over -voltage. Disable this item to [Optimized (ASUS)] to be reapplied right before entering OS. Configuration options: [Auto] [+16] - [-29] CMD Sense Amplifier [Auto] ... Both DIMMS] [Disable DIMM0] [Disable DIMM1] [Disable Both DIMMS] Scramble Setting [Optimized (ASUS)] Set this item to enhance the DRAM overclocking capability. Configuration options: [Optimized (ASUS)] [Default (MRC)] MCH Full Check [Auto] Enable this item to enable, disable or ...
...3-14 Chapter 3: BIOS setup Configuration options: [Auto] [+16] - [-29] DQS Sense Amplifier [Auto] Reducing usually helps overclocking and over -voltage. Disable this item to [Optimized (ASUS)] to be reapplied right before entering OS. Configuration options: [Auto] [+16] - [-29] CMD Sense Amplifier [Auto] ... Both DIMMS] [Disable DIMM0] [Disable DIMM1] [Disable Both DIMMS] Scramble Setting [Optimized (ASUS)] Set this item to enhance the DRAM overclocking capability. Configuration options: [Optimized (ASUS)] [Default (MRC)] MCH Full Check [Auto] Enable this item to enable, disable or ...

User Guide
Page 99
...] Configuration options: [Auto] [0]-[31] GPU.DIMM Post Automatically detects and displays the information about the devices or memory installed on the slots. Reducing usually helps overclocking and over-voltage. Chapter 3 ASUS MAXIMUS VII GENE 3-15
...] Configuration options: [Auto] [0]-[31] GPU.DIMM Post Automatically detects and displays the information about the devices or memory installed on the slots. Reducing usually helps overclocking and over-voltage. Chapter 3 ASUS MAXIMUS VII GENE 3-15

User Guide
Page 100
... KHz with an interval of the CPU. Use the or to enhance the system stability. Higher load-line calibration could get higher voltage and good overclocking performance, but increases the CPU and VRM thermal conditions. Configuration options [Auto] [Level 1] - [Level 9] The actual performance boost may vary depending on your CPU specification...
... KHz with an interval of the CPU. Use the or to enhance the system stability. Higher load-line calibration could get higher voltage and good overclocking performance, but increases the CPU and VRM thermal conditions. Configuration options [Auto] [Level 1] - [Level 9] The actual performance boost may vary depending on your CPU specification...

User Guide
Page 101
... item provides a total power range for the CPU right at which may be monitored. A higher value setting provides higher power consumption delivery and extends the overclocking frequency range simultaneously. Configuration options: [Auto] [Disabled] [Enabled] Initial PLL Termination Voltage [Auto] Initial Voltage at boot. Maintaining a level close to set the CPU ratio... Crossing Reset Voltage [Auto] The instantaneous voltage value when the rising edge of BCLK DN is equal to the falling edge of every phase component. [T. ASUS MAXIMUS VII GENE 3-17 Chapter 3
... item provides a total power range for the CPU right at which may be monitored. A higher value setting provides higher power consumption delivery and extends the overclocking frequency range simultaneously. Configuration options: [Auto] [Disabled] [Enabled] Initial PLL Termination Voltage [Auto] Initial Voltage at boot. Maintaining a level close to set the CPU ratio... Crossing Reset Voltage [Auto] The instantaneous voltage value when the rising edge of BCLK DN is equal to the falling edge of every phase component. [T. ASUS MAXIMUS VII GENE 3-17 Chapter 3

User Guide
Page 102
... following items appear only when you to set a higher current limit to 4096W. The values range from 1W to prevent frequency and power throttling when overclocking. The values range from 1 second to 4096W. Use the and keys to adjust the value. The values range from 1W to 127 seconds. Configuration options...
... following items appear only when you to set a higher current limit to 4096W. The values range from 1W to prevent frequency and power throttling when overclocking. The values range from 1 second to 4096W. Use the and keys to adjust the value. The values range from 1W to 127 seconds. Configuration options...

User Guide
Page 103
... transients to increase or decrease the output current sensed by the CPU. Use or key to enlarge the overclocking potential. Chapter 3 ASUS MAXIMUS VII GENE 3-19 Configuration options: [Auto] [0.00] - [1.50] CPU Internal Power Saving Control Power Saving Level 1 Threshold [...Auto] Lower value provides sufficient overclocking tolerance to adjust the value. Disable this item to improve power saving when the ...
... transients to increase or decrease the output current sensed by the CPU. Use or key to enlarge the overclocking potential. Chapter 3 ASUS MAXIMUS VII GENE 3-19 Configuration options: [Auto] [0.00] - [1.50] CPU Internal Power Saving Control Power Saving Level 1 Threshold [...Auto] Lower value provides sufficient overclocking tolerance to adjust the value. Disable this item to improve power saving when the ...

User Guide
Page 105
...value. CPU System Agent Voltage Offset [Auto] This item allows you to set the amount of voltage fed to adjust the value. Chapter 3 ASUS MAXIMUS VII GENE 3-21 The following item appears only when you set the CPU Core Voltage to [Adaptive Mode]. CPU Graphics Voltage Offset [Auto] This item allows...Manual Mode]. You can use the or keys to 0.999 V with a 0.001 V interval. The values range from 0.001V to enhance the overclocking capability. Increase the voltage when configuring a high CPU core frequency. Use the or keys to the CPU uncores including its PCIE controller and the PCU...
...value. CPU System Agent Voltage Offset [Auto] This item allows you to set the amount of voltage fed to adjust the value. Chapter 3 ASUS MAXIMUS VII GENE 3-21 The following item appears only when you set the CPU Core Voltage to [Adaptive Mode]. CPU Graphics Voltage Offset [Auto] This item allows...Manual Mode]. You can use the or keys to 0.999 V with a 0.001 V interval. The values range from 0.001V to enhance the overclocking capability. Increase the voltage when configuring a high CPU core frequency. Use the or keys to the CPU uncores including its PCIE controller and the PCU...


