User Manual
Page 3
Contents Notices...viii Safety information ix About this guide x Maximus III GENE specifications summary xii Chapter 1: Product introduction 1.1 Welcome 1-1 1.2 Package contents 1-1 1.3 Special features 1-2 1.3.1 Product highlights 1-2 1.3.2 ROG Intelligent Performance & Overclocking features... 1-3 1.3.3 ROG unique features 1-5 1.3.4 ASUS special features 1-6 Chapter 2: Hardware information 2.1 Before you proceed 2-1 2.2 Motherboard overview 2-5 2.2.1 Motherboard layout 2-5 2.2.2 Layout contents 2-6 2.2.3 Placement direction 2-7 2.2.4 Screw holes 2-7 2.3 Central Processing Unit...
Contents Notices...viii Safety information ix About this guide x Maximus III GENE specifications summary xii Chapter 1: Product introduction 1.1 Welcome 1-1 1.2 Package contents 1-1 1.3 Special features 1-2 1.3.1 Product highlights 1-2 1.3.2 ROG Intelligent Performance & Overclocking features... 1-3 1.3.3 ROG unique features 1-5 1.3.4 ASUS special features 1-6 Chapter 2: Hardware information 2.1 Before you proceed 2-1 2.2 Motherboard overview 2-5 2.2.1 Motherboard layout 2-5 2.2.2 Layout contents 2-6 2.2.3 Placement direction 2-7 2.2.4 Screw holes 2-7 2.3 Central Processing Unit...

User Manual
Page 9
.... If possible, disconnect all power cables are connected. DO NOT throw the motherboard in municipal waste. If you add a device. • Before connecting or removing signal cables from the motherboard, ensure that all power cables from the existing system before you detect any area... the signal cables are unplugged. • Seek professional assistance before using , contact your area. Operation safety • Before installing the motherboard and adding devices on a stable surface. • If you are not damaged. DO NOT throw the mercury-containing button cell battery in...
.... If possible, disconnect all power cables are connected. DO NOT throw the motherboard in municipal waste. If you add a device. • Before connecting or removing signal cables from the motherboard, ensure that all power cables from the existing system before you detect any area... the signal cables are unplugged. • Seek professional assistance before using , contact your area. Operation safety • Before installing the motherboard and adding devices on a stable surface. • If you are not damaged. DO NOT throw the mercury-containing button cell battery in...

User Manual
Page 10
...you need when installing and configuring the motherboard. About this guide is organized This guide contains the following sources for additional information and for the LCD Poster. ASUS websites The ASUS website provides updated information on the motherboard. • Chapter 3: BIOS setup ...This chapter tells how to the ASUS contact information. 2. Refer to change system settings through the BIOS ...
...you need when installing and configuring the motherboard. About this guide is organized This guide contains the following sources for additional information and for the LCD Poster. ASUS websites The ASUS website provides updated information on the motherboard. • Chapter 3: BIOS setup ...This chapter tells how to the ASUS contact information. 2. Refer to change system settings through the BIOS ...

User Manual
Page 15
This chapter describes the motherboard features and the new technologies it supports. Chapter 1: 1Product introduction
This chapter describes the motherboard features and the new technologies it supports. Chapter 1: 1Product introduction
User Manual
Page 17
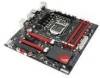
Actual product specifications may vary with the list below. 1.2 Package contents Check your motherboard package for the following items. ROG Maximus III GENE Motherboard 1 x ASUS Q-Shield (I/O shield) 3 x 2-in-1 Serial ATA signal cables 1 x ROG Connect cable 1 x SLI Cable User Manual Cable ties User Guide 1 x 2-in1 ASUS Q-Connector Kit ROG Support DVD 1 x ROG theme label 1 x ROG SATA cable labels (12...
Actual product specifications may vary with the list below. 1.2 Package contents Check your motherboard package for the following items. ROG Maximus III GENE Motherboard 1 x ASUS Q-Shield (I/O shield) 3 x 2-in-1 Serial ATA signal cables 1 x ROG Connect cable 1 x SLI Cable User Manual Cable ties User Guide 1 x 2-in1 ASUS Q-Connector Kit ROG Support DVD 1 x ROG theme label 1 x ROG SATA cable labels (12...
User Manual
Page 18
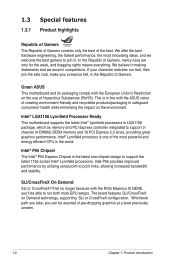
... unseen. 1-2 Chapter 1: Product Introduction Green ASUS This motherboard and its packaging comply with the ROG Maximus III GENE, you can be able to -point links, allowing increased bandwidth and stability. We offer the best hardware engineering, the fastest performance, the most powerful and energy efficient CPU in . In the Republic of Gamers, mercy rules are only for...
... unseen. 1-2 Chapter 1: Product Introduction Green ASUS This motherboard and its packaging comply with the ROG Maximus III GENE, you can be able to -point links, allowing increased bandwidth and stability. We offer the best hardware engineering, the fastest performance, the most powerful and energy efficient CPU in . In the Republic of Gamers, mercy rules are only for...
User Manual
Page 19
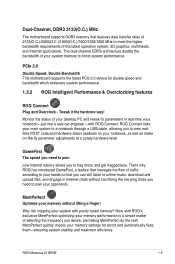
Dual-Channel, DDR3 2133(O.C.) MHz The motherboard supports DDR3 memory that features data transfer rates of 2133(O.C.)/2000(O.C.)/1800(O.C.)/1600/1333/1066 MHz to meet the higher bandwidth requirements of your ...way! GameFirst The speed you need to pwn Low Internet latency allows you need to boost system performance. MemPerfect quickly checks your opponents. ROG Maximus III GENE 1-3 Double Bandwidth This motherboard supports the latest PCIe 2.0 device for errors and automatically fixes them-ensuring system stability and maximum efficiency. PCIe 2.0 Double Speed; The dual-channel...
Dual-Channel, DDR3 2133(O.C.) MHz The motherboard supports DDR3 memory that features data transfer rates of 2133(O.C.)/2000(O.C.)/1800(O.C.)/1600/1333/1066 MHz to meet the higher bandwidth requirements of your ...way! GameFirst The speed you need to pwn Low Internet latency allows you need to boost system performance. MemPerfect quickly checks your opponents. ROG Maximus III GENE 1-3 Double Bandwidth This motherboard supports the latest PCIe 2.0 device for errors and automatically fixes them-ensuring system stability and maximum efficiency. PCIe 2.0 Double Speed; The dual-channel...
User Manual
Page 20
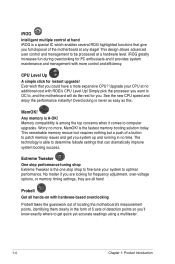
...Worry no additional cost with ROG's CPU Level Up! The technology is never as easy as this. Upgrade your system to , and the motherboard will do the rest for instant upgrade! Overclocking is able to patch memory issues and get quick yet accurate readings using a multitester. 1-4... Memory compatibility is the fastest memory booting solution today. This remarkable memory rescue tool requires nothing but a push of locating the motherboard's measurement points, identifying them clearly in no time. is among the top concerns when it provides system maintenance and management with ...
...Worry no additional cost with ROG's CPU Level Up! The technology is never as easy as this. Upgrade your system to , and the motherboard will do the rest for instant upgrade! Overclocking is able to patch memory issues and get quick yet accurate readings using a multitester. 1-4... Memory compatibility is the fastest memory booting solution today. This remarkable memory rescue tool requires nothing but a push of locating the motherboard's measurement points, identifying them clearly in no time. is among the top concerns when it provides system maintenance and management with ...
User Manual
Page 21
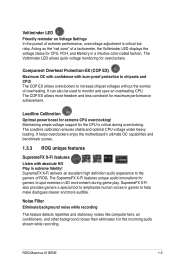
...red zone" of a tachometer, the Voltiminder LED displays the voltage status for gamers to spot enemies in games to emphasize human voices in 3D environment during overclocking. Loadline Calibration Optimal power boost for overclockers. It helps overclockers enjoy the motherboard's ultimate OC capabilities and benchmark scores. 1.3.3 ROG unique features SupremeFX X-Fi ... chipsets and CPU! The Loadline calibration ensures stable and optimal CPU voltage under heavy loading. Maintaining ample voltage support for maximum performance achievement. ROG Maximus III GENE 1-5
...red zone" of a tachometer, the Voltiminder LED displays the voltage status for gamers to spot enemies in games to emphasize human voices in 3D environment during overclocking. Loadline Calibration Optimal power boost for overclockers. It helps overclockers enjoy the motherboard's ultimate OC capabilities and benchmark scores. 1.3.3 ROG unique features SupremeFX X-Fi ... chipsets and CPU! The Loadline calibration ensures stable and optimal CPU voltage under heavy loading. Maintaining ample voltage support for maximum performance achievement. ROG Maximus III GENE 1-5
User Manual
Page 22
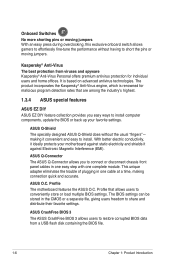
...the CMOS or a separate file, giving users freedom to install. ASUS CrashFree BIOS 3 The ASUS CrashFree BIOS 3 allows users to install computer components, update the BIOS or back up your motherboard against Electronic Magnetic Interference (EMI). Onboard Switches No more shorting pins... or moving jumpers With an easy press during overclocking, this exclusive onboard switch allows gamers to effortlessly fine-tune the performance without the usual "fingers"- Profile The motherboard features the ASUS O.C. Kaspersky® Anti-Virus The best protection from a USB flash disk containing the...
...the CMOS or a separate file, giving users freedom to install. ASUS CrashFree BIOS 3 The ASUS CrashFree BIOS 3 allows users to install computer components, update the BIOS or back up your motherboard against Electronic Magnetic Interference (EMI). Onboard Switches No more shorting pins... or moving jumpers With an easy press during overclocking, this exclusive onboard switch allows gamers to effortlessly fine-tune the performance without the usual "fingers"- Profile The motherboard features the ASUS O.C. Kaspersky® Anti-Virus The best protection from a USB flash disk containing the...

User Manual
Page 25
This chapter lists the hardware setup procedures that you have to perform when installing system components. It Chapter 2: includes description of the jumpers and connectors on the motherboard. 2 Hardware information
This chapter lists the hardware setup procedures that you have to perform when installing system components. It Chapter 2: includes description of the jumpers and connectors on the motherboard. 2 Hardware information
User Manual
Page 26
Chapter summary 2 2.1 Before you proceed 2-1 2.2 Motherboard overview 2-5 2.3 Central Processing Unit (CPU 2-8 2.4 System memory 2-13 2.5 Expansion slots 2-22 2.6 Jumper 2-26 2.7 I/O shield installation 2-27 2.8 Connectors 2-28 2.9 Starting up for the first time 2-41 2.10 Turning off the computer 2-42 ROG Maximus III GENE
Chapter summary 2 2.1 Before you proceed 2-1 2.2 Motherboard overview 2-5 2.3 Central Processing Unit (CPU 2-8 2.4 System memory 2-13 2.5 Expansion slots 2-22 2.6 Jumper 2-26 2.7 I/O shield installation 2-27 2.8 Connectors 2-28 2.9 Starting up for the first time 2-41 2.10 Turning off the computer 2-42 ROG Maximus III GENE

User Manual
Page 27
ROG Maximus III GENE 2-1 Failure to do so may cause severe damage to avoid touching the ICs on them. • Whenever you uninstall...the power cord is detached from the power supply. 2.1 Before you proceed Take note of the following precautions before you install motherboard components or change any motherboard settings. • Unplug the power cord from the wall socket before touching any component. • Before handling components, ... supply case, to avoid damaging them due to static electricity. • Hold components by the edges to the motherboard, peripherals, or components.
ROG Maximus III GENE 2-1 Failure to do so may cause severe damage to avoid touching the ICs on them. • Whenever you uninstall...the power cord is detached from the power supply. 2.1 Before you proceed Take note of the following precautions before you install motherboard components or change any motherboard settings. • Unplug the power cord from the wall socket before touching any component. • Before handling components, ... supply case, to avoid damaging them due to static electricity. • Hold components by the edges to the motherboard, peripherals, or components.

User Manual
Page 28
... may adjust the voltages in BIOS. PCH Voltage Normal (green) 1.007-1.15275 High (yellow) 1.166-1.20575 Crazy (red) 1.219- 2-2 Chapter 2: Hardware information Onboard LEDs The motherboard comes with LEDs that indicate the voltage conditions of the CPU LED and the table below for power status. There are also an LED for...
... may adjust the voltages in BIOS. PCH Voltage Normal (green) 1.007-1.15275 High (yellow) 1.166-1.20575 Crazy (red) 1.219- 2-2 Chapter 2: Hardware information Onboard LEDs The motherboard comes with LEDs that indicate the voltage conditions of the CPU LED and the table below for power status. There are also an LED for...

User Manual
Page 29
ROG Maximus III GENE 2-3 4. The LED does not light up when there is no hard disk drive connected to indicate the hard disk activity. Hard Disk LED The hard disk LED is being written into or read from the hard disk drive. It blinks when data is designed to the motherboard or when the hard disk drive does not function.
ROG Maximus III GENE 2-3 4. The LED does not light up when there is no hard disk drive connected to indicate the hard disk activity. Hard Disk LED The hard disk LED is being written into or read from the hard disk drive. It blinks when data is designed to the motherboard or when the hard disk drive does not function.
User Manual
Page 30
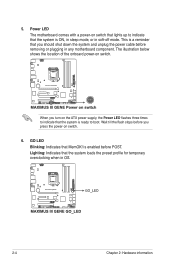
...flash stops before you should shut down the system and unplug the power cable before POST. 5. is enabled before removing or plugging in any motherboard component. The illustration below shows the location of the onboard power-on switch that lights up to indicate that the system is ready to ... system is a reminder that you press the power-on the ATX power supply, the Power LED flashes three times to boot. Power LED The motherboard comes with a power-on switch. GO LED Blinking: Indicates that the system loads the preset profile for temporary overclocking when in soft‑off...
...flash stops before you should shut down the system and unplug the power cable before POST. 5. is enabled before removing or plugging in any motherboard component. The illustration below shows the location of the onboard power-on switch that lights up to indicate that the system is ready to ... system is a reminder that you press the power-on the ATX power supply, the Power LED flashes three times to boot. Power LED The motherboard comes with a power-on switch. GO LED Blinking: Indicates that the system loads the preset profile for temporary overclocking when in soft‑off...

User Manual
Page 31
2.2 Motherboard overview 2.2.1 Motherboard layout ROG Maximus III GENE 2-5
2.2 Motherboard overview 2.2.1 Motherboard layout ROG Maximus III GENE 2-5

User Manual
Page 33
DO NOT overtighten the screws! Doing so can damage the motherboard. 2.2.3 Placement direction When installing the motherboard, ensure that you place it into the chassis in the image below. 2.2.4 Screw holes Place eight (8) screws into the holes indicated by circles to secure the motherboard to the chassis. Place this side towards the rear of the chassis as indicated in the correct orientation. The edge with external ports goes to the rear part of the chassis ROG Maximus III GENE 2-7
DO NOT overtighten the screws! Doing so can damage the motherboard. 2.2.3 Placement direction When installing the motherboard, ensure that you place it into the chassis in the image below. 2.2.4 Screw holes Place eight (8) screws into the holes indicated by circles to secure the motherboard to the chassis. Place this side towards the rear of the chassis as indicated in the correct orientation. The edge with external ports goes to the rear part of the chassis ROG Maximus III GENE 2-7

User Manual
Page 34
... and the socket contacts are installing a CPU. 2-8 Load lever A B Retention tab Chapter 2: Hardware information ASUS will process Return Merchandise Authorization (RMA) requests only if the motherboard comes with a surface mount LGA1156 socket designed for the Intel® Core™ i7 / Core™ i5... to the PnP cap/socket contacts/motherboard components. Ensure that all power cables are unplugged before installing the CPU. • Upon purchase of repair only if the damage is on the motherboard. 2. ASUS will shoulder the cost of the motherboard, ensure that the PnP cap is...
... and the socket contacts are installing a CPU. 2-8 Load lever A B Retention tab Chapter 2: Hardware information ASUS will process Return Merchandise Authorization (RMA) requests only if the motherboard comes with a surface mount LGA1156 socket designed for the Intel® Core™ i7 / Core™ i5... to the PnP cap/socket contacts/motherboard components. Ensure that all power cables are unplugged before installing the CPU. • Upon purchase of repair only if the damage is on the motherboard. 2. ASUS will shoulder the cost of the motherboard, ensure that the PnP cap is...

User Manual
Page 37
...fan connector. The LGA1156 socket is incompatible with the LGA775 and LGA1366 sockets in place. To install the CPU heatsink and fan: 1. ROG Maximus III GENE 2-11 2.3.2 Installing the CPU heatsink and fan The Intel® LGA1156 processor requires a specially designed heatsink and fan assembly to install. ... assembly. If you install the CPU fan and heatsink assembly. If you buy a CPU separately, ensure that you have installed the motherboard to the CPU heatsink or CPU before you purchased a separate CPU heatsink and fan assembly, ensure that the Thermal Interface Material is...
...fan connector. The LGA1156 socket is incompatible with the LGA775 and LGA1366 sockets in place. To install the CPU heatsink and fan: 1. ROG Maximus III GENE 2-11 2.3.2 Installing the CPU heatsink and fan The Intel® LGA1156 processor requires a specially designed heatsink and fan assembly to install. ... assembly. If you install the CPU fan and heatsink assembly. If you buy a CPU separately, ensure that you have installed the motherboard to the CPU heatsink or CPU before you purchased a separate CPU heatsink and fan assembly, ensure that the Thermal Interface Material is...


