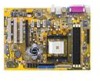
K8N4-E SE User's Manual for English Edition
Page 13
This chapter describes the motherboard features and the new technologies it supports. 1Product introduction ASUS K8N4-E SE 1-1
K8N4-E SE User's Manual for English Edition
Page 14
.... Motherboard Cables Accessory Application CD Documentation ASUS K8N4-E SE motherboard 1 x Serial ATA signal cable 1 x Serial ATA power cable 1 x Ultra DMA 133/100/66 cable 1 x Floppy disk drive cable I/O shield ASUS motherboard support CD User guide If any of ASUS quality motherboards! The motherboard delivers a ...the items in the long line of the above items is damaged or missing, contact your motherboard package for buying an ASUS® K8N4-E SE motherboard! Thank you start installing the motherboard, and hardware devices on it another standout in your package with the list ...
K8N4-E SE User's Manual for English Edition
Page 15
... The NVIDIA® nForce™4-4X chipset supports the vital interfaces of power depending on the task the CPU performs. See page 2-24 for details. ASUS K8N4-E SE 1-3 AMD Cool 'n' Quiet™ Technology The motherboard supports the AMD Cool 'n' Quiet™ Technology that dynamically and automatically changes the CPU speed, voltage, and amount...
K8N4-E SE User's Manual for English Edition
Page 17
... Flash, you to determine audio device classes, and pre-defined equalization for details. See page 2-37 for details. ASUS K8N4-E SE 1-5 See pages 1-23 and 1-24 for details. The Realtek ALC850 audio CODEC comes with a software application that features jack detection ... Jack-Sensing function, S/PDIF out support, interrupt capability and includes the Realtek® proprietary UAJ® (Universal Audio Jack) technology. 1.3.2 Innovative ASUS features AI Audio technology The motherboard supports 6-channel audio through the onboard ALC850 CODEC with 16-bit DAC, a stereo 16-bit ADC, and an...
K8N4-E SE User's Manual for English Edition
Page 19
... LED SB_PWR ON Standby Power OFF Powered Off ASUS K8N4-E SE 1-7 Failure to do so may cause severe damage to indicate that the ATX power supply is ON, in sleep mode, or in soft-off or ...
K8N4-E SE User's Manual for English Edition
Page 23
The lever clicks on the motherboard. Connect the CPU fan cable to the CPU_FAN connector on the side tab to indicate that the CPU corner with the gold triangle matches the socket corner with a small triangle. 4. When the CPU is locked. 6. Refer to secure the CPU. Gold triangle 5. ASUS K8N4-E SE 1-11 Carefully insert the CPU into the socket until it is in place. 3. Position the CPU above the socket such that it fits in place, push down the socket lever to the succeeding section for details. 7.
K8N4-E SE User's Manual for English Edition
Page 25
Attach one end of the retention bracket (near the retention bracket lock) to the retention module base. 3. Make sure that the retention bracket is in place. 4. otherwise, you cannot snap the retention bracket in place. ASUS K8N4-E SE 1-13 Align the other end of the retention bracket to the retention module base. A clicking sound denotes that the fan and heatsink assembly perfectly fits the retention mechanism module base; Push down the retention bracket lock on the retention mechanism to secure the heatsink and fan to the module base. 2.
K8N4-E SE User's Manual for English Edition
Page 27
... three 1 GB DDR memory modules. • This motherboard does not support memory modules made up of the sockets: 104 Pins 80 Pins K8N4-E SE ® DIMM3 DIMM2 DIMM1 K8N4-E SE 184-pin DDR DIMM sockets 1.7.2 Memory Configurations You may detect less than 3 GB system memory when you obtain memory modules from the same... the memory configurations in this section. • Always install DIMMs with three 184-pin Double Data Rate (DDR) Dual Inline Memory Modules (DIMM) sockets. ASUS K8N4-E SE 1-15 1.7 System memory 1.7.1 Overview The motherboard comes with the same CAS latency.
K8N4-E SE User's Manual for English Edition
Page 29
... intend to the chassis with the slot and press firmly until the card is already installed in a chassis). 3. Keep the screw for the expansion card. ASUS K8N4-E SE 1-17 Remove the system unit cover (if your motherboard is completely seated on the system and change the necessary BIOS settings, if any. Align the...
K8N4-E SE User's Manual for English Edition
Page 31
... installed on the PCI Express x1 slot. In Normal mode, only the PCI Express black slot can be used for PCI Express x16 graphics cards. ASUS K8N4-E SE 1-19
K8N4-E SE User's Manual for English Edition
Page 33
...connectors that can connect to wake up (3-pin USBPW12, USBPW34, USBPW56, USBPW78, USBPW910) Set these jumpers to +5V to additional USB ports. ASUS K8N4-E SE 1-21 USB device wake-up the computer from S3 and S4 sleep modes (no power to CPU, DRAM in slow refresh, power supply in... sleep mode. K8N4-E SE ® USBPW12 USBPW34 2 1 +5V (Default) 3 2 +5VSB USBPW910 12 23 +5V (Default) +5VSB USBPW56 USBPW78 12 23 K8N4-E SE USB device wake up +5V (Default) +5VSB • The USB device wake-up feature ...
K8N4-E SE User's Manual for English Edition
Page 35
... the audio configuration table on the next page for the LAN port LED indications. This port connects the tape, CD, DVD player, or other devices. 3 . ASUS K8N4-E SE 1-23 This 25-pin port connects a parallel printer, a scanner, or other audio sources. 5 . L i n e O u t p o r t ( l i m e ) . L A N ( R J - 4 5 ) p o r t . Refer to a Local Area Network (LAN) through a network hub. L i n e I n p o r t ( l i g h t b l u e ) . LAN port LED...
K8N4-E SE User's Manual for English Edition
Page 37
...on the IDE ribbon cable to the hard disk documentation for an Ultra DMA 133/ 100/66 IDE master device (hard disk drive). PIN 1 PIN 1 ASUS K8N4-E SE 1-25 Refer to PIN 1. If you install two hard disk drives, you connect the IDE cable. • Use the 80-conductor IDE cable for Ultra... as a slave device by setting its jumper accordingly. IDE connectors (40-1 pin PRI_IDE, SEC_IDE) These connectors are for Ultra DMA133/100/66 IDE devices. K8N4-E SE ® K8N4-E SE IDE connectors SEC_IDE PRI_IDE NOTE: Orient the red markings (usually zigzag) on the Ultra DMA cable connector.
K8N4-E SE User's Manual for English Edition
Page 39
... connectors. Do not forget to connect the fan cables to the fan connectors on the fan connectors. CPU_FAN Rotation +12V GND CHA_FAN1 Rotation +12V GND K8N4-E SE ® K8N4-E SE Fan connectors CHIP_FAN Rotation +12V GND ASUS K8N4-E SE 1-27
K8N4-E SE User's Manual for English Edition
Page 41
... PSON# Ground Ground Ground -5 Volts +5 Volts +5 Volts +5 Volts Ground +3 Volts +3 Volts Ground +5 Volts Ground +5 Volts Ground Power OK +5V Standby +12 Volts +12 Volts +3 Volts ASUS K8N4-E SE 1-29 otherwise, the system will not boot up. • We recommend that you use an ATX 12 V Specification 2.0-compliant power supply unit (PSU) with more...
K8N4-E SE User's Manual for English Edition
Page 43
... a chassis component is for a chassis-mounted front panel audio I /O module cable to this connector. +5VSB_MB Chassis Signal GND AGND +5VA BLINE_OUT_R BLINE_OUT_L K8N4-E SE ® FP_AUDIO K8N4-E SE Front panel audio connector ASUS K8N4-E SE MIC2 MICPWR Line out_R NC Line out_L 1-31 Chassis intrusion connector (4-1 pin CHASSIS) This connector is removed or replaced. Connect one end...
K8N4-E SE User's Manual for English Edition
Page 45
This chapter tells how to change the system settings through the BIOS Setup menus. Detailed descriptions of the BIOS parameters are also provided. 2 BIOS setup ASUS K8N4-E SE 2-1
K8N4-E SE User's Manual for English Edition
Page 47
ASUS K8N4-E SE 2-3 Launch the ASUS Update utility from the nearest you update the BIOS using this utility. Select the ASUS FTP site t h e I O S f r o m 3. Click N e x t. Updating the BIOS through the Internet To update the BIOS through the Internet: 1. Quit all Windows® applications before you to avoid ...
K8N4-E SE User's Manual for English Edition
Page 49
... 3 1/2 Floppy Drive icon. e. At the DOS prompt, type format A:/S then press . d. Copy the original or the latest motherboard BIOS file to create a bootable floppy disk. c. ASUS K8N4-E SE 2-5 2.1.2 Creating a bootable floppy disk 1. A F o r m a t 3 1 / 2 F l o p p y D i s k window appears. Click S t a r t, then select R u n. Do either one of boot disks for Windows® 2000: a. c. D O S s t a r t u p d i s k from the format options field, then...
K8N4-E SE User's Manual for English Edition
Page 51
... Ltd. Save only the updated BIOS file in the F i l e N a m e t o P r o g r a m field, then press . Type the BIOS file name in the floppy disk to Program: 0104.bin ASUS K8N4-E SE Message: Do You Want To Save Bios (Y/N) 2-7 Follow these instructions to update the BIOS using the bootable floppy disk you created earlier. 4. Copy the AwardBIOS...