H61M-PRO User's Manual
Page 4
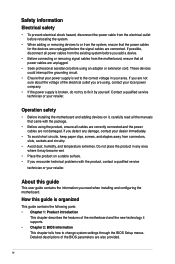
...a qualified service technician or your retailer. iv Detailed descriptions of the BIOS parameters are connected. Operation safety • Before installing the motherboard and adding devices on a stable surface. • If you detect any area where it by yourself. If possible, disconnect all ... Avoid dust, humidity, and temperature extremes. If you are not sure about the voltage of the motherboard and the new technology it , carefully read all the manuals that all cables are correctly connected and the power cables are not damaged. If you encounter technical problems...
...a qualified service technician or your retailer. iv Detailed descriptions of the BIOS parameters are connected. Operation safety • Before installing the motherboard and adding devices on a stable surface. • If you detect any area where it by yourself. If possible, disconnect all ... Avoid dust, humidity, and temperature extremes. If you are not sure about the voltage of the motherboard and the new technology it , carefully read all the manuals that all cables are correctly connected and the power cables are not damaged. If you encounter technical problems...
H61M-PRO User's Manual
Page 15
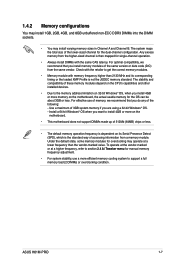
...; Due to the memory address limitation on 32-bit Windows® OS, when you install 4GB or more on the motherboard. • This motherboard does not support DIMMs made up of 512Mb (64MB) chips or less. • The default memory operation frequency is dependent on ...memory sizes in Channel A and Channel B. ASUS H61M-PRO 1-7 1.4.2 Memory configurations You may install 1GB, 2GB, 4GB, and 8GB unbuffered non-ECC DDR3 DIMMs into the DIMM sockets. • You may operate at a higher frequency, refer to section 2.4 Ai Tweaker menu for manual memory frequency adjustment. • For system...
...; Due to the memory address limitation on 32-bit Windows® OS, when you install 4GB or more on the motherboard. • This motherboard does not support DIMMs made up of 512Mb (64MB) chips or less. • The default memory operation frequency is dependent on ...memory sizes in Channel A and Channel B. ASUS H61M-PRO 1-7 1.4.2 Memory configurations You may install 1GB, 2GB, 4GB, and 8GB unbuffered non-ECC DDR3 DIMMs into the DIMM sockets. • You may operate at a higher frequency, refer to section 2.4 Ai Tweaker menu for manual memory frequency adjustment. • For system...
H61M-PRO User's Manual
Page 28
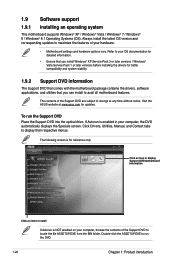
...to run the Support DVD Place the Support DVD into the optical drive. The contents of the Support DVD to change at www.asus.com for updates. Always install the latest OS version and corresponding updates to maximize the features of your computer, browse the contents ...ASSETUP.EXE from the BIN folder. Refer to avail all motherboard features. To run the DVD. 1-20 Chapter 1: Product introduction Click Drivers, Utilities, Manual, and Contact tabs to install If Autorun is NOT enabled on your hardware. • Motherboard settings and hardware options vary. The following screen is ...
...to run the Support DVD Place the Support DVD into the optical drive. The contents of the Support DVD to change at www.asus.com for updates. Always install the latest OS version and corresponding updates to maximize the features of your computer, browse the contents ...ASSETUP.EXE from the BIN folder. Refer to avail all motherboard features. To run the DVD. 1-20 Chapter 1: Product introduction Click Drivers, Utilities, Manual, and Contact tabs to install If Autorun is NOT enabled on your hardware. • Motherboard settings and hardware options vary. The following screen is ...
H61M-PRO User's Manual
Page 29
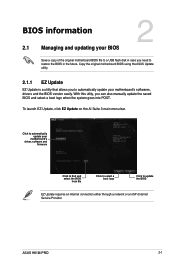
...your motherboard's softwares, drivers and the BIOS version easily. ASUS H61M-PRO 2-1 With this utlity, you need to restore the BIOS in the future. BIOS information 2.1 Managing and updating your BIOS 2 Save a copy of the original motherboard BIOS file to a USB flash disk in case you can also manually ...update the saved BIOS and select a boot logo when the system goes into POST. Copy the original motherboard BIOS using the ASUS Update utility. 2.1.1 EZ Update EZ Update is ...
...your motherboard's softwares, drivers and the BIOS version easily. ASUS H61M-PRO 2-1 With this utlity, you need to restore the BIOS in the future. BIOS information 2.1 Managing and updating your BIOS 2 Save a copy of the original motherboard BIOS file to a USB flash disk in case you can also manually ...update the saved BIOS and select a boot logo when the system goes into POST. Copy the original motherboard BIOS using the ASUS Update utility. 2.1.1 EZ Update EZ Update is ...
H61M-PRO User's Manual
Page 45
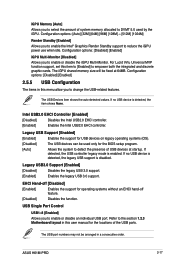
...[Enabled] Enables the Intel USB2.0 EHCI controller. ASUS H61M-PRO 2-17 Legacy USB Support [Enabled] [Enabled] Enables the support for USB devices on legacy operating systems (OS). [Disabled] The USB devices can be arranged in this user manual for the BIOS setup program. [Auto] Allows ...USB Single Port Control USB1~8 [Enabled] Allows you to empower both the integrated and discrete graphic cards. Refer to the section 1.2.3 Motherboard layout in a consecutive order. EHCI Hand-off [Disabled] [Enabled] Enables the support for operating systems without an EHCI hand‑off...
...[Enabled] Enables the Intel USB2.0 EHCI controller. ASUS H61M-PRO 2-17 Legacy USB Support [Enabled] [Enabled] Enables the support for USB devices on legacy operating systems (OS). [Disabled] The USB devices can be arranged in this user manual for the BIOS setup program. [Auto] Allows ...USB Single Port Control USB1~8 [Enabled] Allows you to empower both the integrated and discrete graphic cards. Refer to the section 1.2.3 Motherboard layout in a consecutive order. EHCI Hand-off [Disabled] [Enabled] Enables the support for operating systems without an EHCI hand‑off...


