
User Guide
Page 16
...sleep indicator light starts pulsing (indicating that appears. ÂÂ Choose Apple () > System Preferences, click Energy Saver, and set an ...You can put it to sleep. To put your MacBook to sleep, do one of data or the ...it and bypass the startup process. Putting Your MacBook to Sleep or Shutting It Down When you finish...ÂÂ Choose Apple () > Sleep from your MacBook. Putting Your MacBook to Sleep If you want help with your MacBook, you can set a...has stopped spinning) before you move your MacBook for the specific preference you 'll be away from ...
...sleep indicator light starts pulsing (indicating that appears. ÂÂ Choose Apple () > System Preferences, click Energy Saver, and set an ...You can put it to sleep. To put your MacBook to sleep, do one of data or the ...it and bypass the startup process. Putting Your MacBook to Sleep or Shutting It Down When you finish...ÂÂ Choose Apple () > Sleep from your MacBook. Putting Your MacBook to Sleep If you want help with your MacBook, you can set a...has stopped spinning) before you move your MacBook for the specific preference you 'll be away from ...

User Guide
Page 38
Lift off the case from the hinged side, and place it aside. 38 Chapter 3 Boost Your MacBook 2 Turn over your MacBook and remove the eight (8) screws that secure the bottom case.
Lift off the case from the hinged side, and place it aside. 38 Chapter 3 Boost Your MacBook 2 Turn over your MacBook and remove the eight (8) screws that secure the bottom case.

User Guide
Page 39
Avoid touching anything other than the hard drive assembly when you expose sensitive internal components. Chapter 3 Boost Your MacBook 39 Important: When you remove the bottom case, you remove or add a hard disk drive. 3 Touch a metal surface inside the computer to discharge any static electricity from your body.
Avoid touching anything other than the hard drive assembly when you expose sensitive internal components. Chapter 3 Boost Your MacBook 39 Important: When you remove the bottom case, you remove or add a hard disk drive. 3 Touch a metal surface inside the computer to discharge any static electricity from your body.

User Guide
Page 44
Grasp the case in the middle of each side, and push down first with one thumb and then the other to lock the snaps on the inside of the case. 44 Chapter 3 Boost Your MacBook 10 Replace the bottom case.
Grasp the case in the middle of each side, and push down first with one thumb and then the other to lock the snaps on the inside of the case. 44 Chapter 3 Boost Your MacBook 10 Replace the bottom case.
User Guide
Page 46
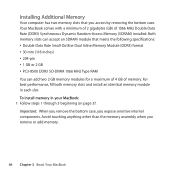
... internal components. Both memory slots can accept an SDRAM module that you access by removing the bottom case. Important: When you remove the bottom case, you remove or add memory. 46 Chapter 3 Boost Your MacBook Your MacBook comes with a minimum of 2 gigabytes (GB) of memory. To install memory in each slot. Installing Additional Memory... Data Rate (DDR3) Synchronous Dynamic Random-Access Memory (SDRAM) installed. For best performance, fill both memory slots and install an identical memory module in your MacBook: 1 Follow steps 1 through 3 beginning on page 37.
... internal components. Both memory slots can accept an SDRAM module that you access by removing the bottom case. Important: When you remove the bottom case, you remove or add memory. 46 Chapter 3 Boost Your MacBook Your MacBook comes with a minimum of 2 gigabytes (GB) of memory. To install memory in each slot. Installing Additional Memory... Data Rate (DDR3) Synchronous Dynamic Random-Access Memory (SDRAM) installed. For best performance, fill both memory slots and install an identical memory module in your MacBook: 1 Follow steps 1 through 3 beginning on page 37.

User Guide
Page 49
Chapter 3 Boost Your MacBook 49 Notches 6 Follow the instructions for replacing the bottom case in steps 10 and 11 on page 44 and page 45.
Chapter 3 Boost Your MacBook 49 Notches 6 Follow the instructions for replacing the bottom case in steps 10 and 11 on page 44 and page 45.
User Guide
Page 59
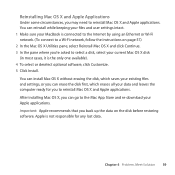
... select or deselect optional software, click Customize. 5 Click Install. Important: Apple recommends that you may need to reinstall Mac OS X and Apple applications. After installing Mac OS X, you can reinstall while keeping your files and user settings intact. 1 Make sure your MacBook is connected to the Internet by using an Ethernet or Wi... your data and leaves the computer ready for any lost data. You can go to select a disk, select your current Mac OS X disk (in most cases, it is not responsible for you can erase the disk first, which erases all your...
... select or deselect optional software, click Customize. 5 Click Install. Important: Apple recommends that you may need to reinstall Mac OS X and Apple applications. After installing Mac OS X, you can reinstall while keeping your files and user settings intact. 1 Make sure your MacBook is connected to the Internet by using an Ethernet or Wi... your data and leaves the computer ready for any lost data. You can go to select a disk, select your current Mac OS X disk (in most cases, it is not responsible for you can erase the disk first, which erases all your...

User Guide
Page 68
The serial number is etched into the bottom case. Serial number ÂÂ Choose Apple () > About This Mac, and then click the version number beneath the words "Mac OS X" to find your MacBook serial number: ÂÂ Turn over your MacBook. Locating Your Product Serial Number Use one of these methods to cycle through the Mac OS X version number, the build version, and the serial number. ÂÂ Open System Information in the Utilities folder in Launchpad. 68 Chapter 4 Problem, Meet Solution
The serial number is etched into the bottom case. Serial number ÂÂ Choose Apple () > About This Mac, and then click the version number beneath the words "Mac OS X" to find your MacBook serial number: ÂÂ Turn over your MacBook. Locating Your Product Serial Number Use one of these methods to cycle through the Mac OS X version number, the build version, and the serial number. ÂÂ Open System Information in the Utilities folder in Launchpad. 68 Chapter 4 Problem, Meet Solution
User Guide
Page 72
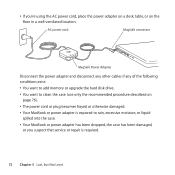
... or on page 76). ÂÂ The power cord or plug becomes frayed or otherwise damaged. ÂÂ Your MacBook or power adapter is exposed to clean the case (use only the recommended procedure described on the floor in a well-ventilated location. AC power cord MagSafe connector MagSafe Power ...upgrade the hard disk drive. ÂÂ You want to rain, excessive moisture, or liquid spilled into the case. ÂÂ Your MacBook or power adapter has been dropped, the case has been damaged, or you suspect that service or repair is required. 72 Chapter 5 Last, but Not Least
... or on page 76). ÂÂ The power cord or plug becomes frayed or otherwise damaged. ÂÂ Your MacBook or power adapter is exposed to clean the case (use only the recommended procedure described on the floor in a well-ventilated location. AC power cord MagSafe connector MagSafe Power ...upgrade the hard disk drive. ÂÂ You want to rain, excessive moisture, or liquid spilled into the case. ÂÂ Your MacBook or power adapter has been dropped, the case has been damaged, or you suspect that service or repair is required. 72 Chapter 5 Last, but Not Least