
Owners Manual
Page 2
... ........ 6 Initial System Start-Up 6 Adjusting Volume 7 Lowering Volume Quickly 7 Setting Time 7 Radio Listening to Radio 7 Manual Storing of Station Presets 7 Automatic Memory of Station Presets 8 Tuning to Preset Stations 8 Frequency Search Function 8 CD/MP3/WMA Playback 8 Repeat Play 9 M.I.X. (Random Play 9 Searching from CD Text 9 File/Folder Name Search (concerning MP3/WMA 10 Quick Search 10...
... ........ 6 Initial System Start-Up 6 Adjusting Volume 7 Lowering Volume Quickly 7 Setting Time 7 Radio Listening to Radio 7 Manual Storing of Station Presets 7 Automatic Memory of Station Presets 8 Tuning to Preset Stations 8 Frequency Search Function 8 CD/MP3/WMA Playback 8 Repeat Play 9 M.I.X. (Random Play 9 Searching from CD Text 9 File/Folder Name Search (concerning MP3/WMA 10 Quick Search 10...
Owners Manual
Page 8
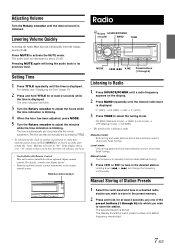
... (1 through 6) Listening to its previous level. Setting Time 1 Press TITLE repeatedly until the time is manually tuned in steps (Manual tuning). 4 Press or to another clock/watch or radio time announcement, press and hold TITLE for at least 2 seconds, any one hour. • Controllable... with Remote Control This unit can also be controlled with an optional Alpine remote control. The time can be manually set 5 seconds after setting the ...
... (1 through 6) Listening to its previous level. Setting Time 1 Press TITLE repeatedly until the time is manually tuned in steps (Manual tuning). 4 Press or to another clock/watch or radio time announcement, press and hold TITLE for at least 2 seconds, any one hour. • Controllable... with Remote Control This unit can also be controlled with an optional Alpine remote control. The time can be manually set 5 seconds after setting the ...
Owners Manual
Page 9
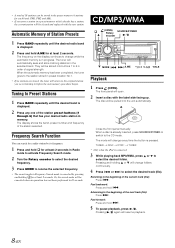
...change every time the button is connected. 3 While playing back MP3/WMA, press or to select the desired folder. Close the front panel manually. The frequency on the display continues to change while the automatic memory is displayed. 2 Press and hold . TUNER DISC IPOD* TUNER *...: Press and hold A.ME for at least 2 seconds. Tuning to Preset Stations 1 Press BAND repeatedly until the desired radio band is in the preset memory (6 stations for each band; CD/MP3/WMA (OPEN) SOURCE/POWER Rotary encoder / MODE A.ME 45 TITLE Playback 1 Press (OPEN). The front panel ...
...change every time the button is connected. 3 While playing back MP3/WMA, press or to select the desired folder. Close the front panel manually. The frequency on the display continues to change while the automatic memory is displayed. 2 Press and hold . TUNER DISC IPOD* TUNER *...: Press and hold A.ME for at least 2 seconds. Tuning to Preset Stations 1 Press BAND repeatedly until the desired radio band is in the preset memory (6 stations for each band; CD/MP3/WMA (OPEN) SOURCE/POWER Rotary encoder / MODE A.ME 45 TITLE Playback 1 Press (OPEN). The front panel ...
Owners Manual
Page 11
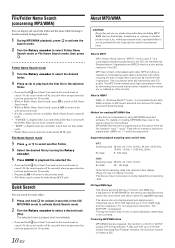
... data at least 2 seconds in an MP3/WMA file, this device can hold for WMA tags) and the underscore. What is similar to the user's manual for sampling rates, this device have folder name. • Folder Name search cannot be canceled when an operation has not been performed in the search... mode to a CD-R or CD-RW using MP3/WMA specified software. ID3 tags/WMA tags This device supports ID3 tag v1 and v2, and WMA tag. play back correctly depending...
... data at least 2 seconds in an MP3/WMA file, this device can hold for WMA tags) and the underscore. What is similar to the user's manual for sampling rates, this device have folder name. • Folder Name search cannot be canceled when an operation has not been performed in the search... mode to a CD-R or CD-RW using MP3/WMA specified software. ID3 tags/WMA tags This device supports ID3 tag v1 and v2, and WMA tag. play back correctly depending...
Owners Manual
Page 17
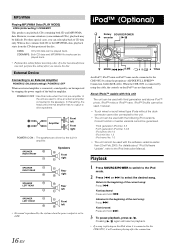
... with this setting, the head unit's internal amplifier has no output to the iPod Instruction Manual. For details about "iPod Software Update", refer to drive speakers. Pressing / again will continue...2005. Fast backward: Press and hold . 3 To pause playback, press / . CDDA: Only CD data can be played back. • Perform this mode when the front pre-amplifier of the unit...Front left Front right POWER IC ON : The speakers are driven by using the proprietary ALPINE FULL SPEED™ Connection Cable (KCE-422i). Return to the beginning of the current song...
... with this setting, the head unit's internal amplifier has no output to the iPod Instruction Manual. For details about "iPod Software Update", refer to drive speakers. Pressing / again will continue...2005. Fast backward: Press and hold . 3 To pause playback, press / . CDDA: Only CD data can be played back. • Perform this mode when the front pre-amplifier of the unit...Front left Front right POWER IC ON : The speakers are driven by using the proprietary ALPINE FULL SPEED™ Connection Cable (KCE-422i). Return to the beginning of the current song...
Owners Manual
Page 23
...on places such as not to each other units (e.g. When in doubt, consult your authorized Alpine dealer for connection to other or to prevent obstructions when driving. If so, please contact your Alpine dealer. • The CDE-9852 uses female RCA-type jacks for assistance. • .... This may result in hazards or product failure. The serial number or the engraved serial number is located on the bottom of this manual thoroughly for this product to the speaker (-) terminal. If swallowed, consult a physician immediately. Precautions • Be sure to the wiring...
...on places such as not to each other units (e.g. When in doubt, consult your authorized Alpine dealer for connection to other or to prevent obstructions when driving. If so, please contact your Alpine dealer. • The CDE-9852 uses female RCA-type jacks for assistance. • .... This may result in hazards or product failure. The serial number or the engraved serial number is located on the bottom of this manual thoroughly for this product to the speaker (-) terminal. If swallowed, consult a physician immediately. Precautions • Be sure to the wiring...
Owners Manual
Page 24
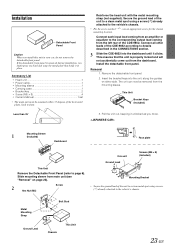
... mounting sleeve. Accessory List • Head unit 1 • Power cable 1 • Mounting sleeve 1 • Carrying case 1 • Bracket key 2 • Screw (M5 × 8 4 • Owner's Manual 1 set • The main unit must be removed from main unit (see "Removal" on either side. Connect all other leads of the CDE-9852. Remove...
... mounting sleeve. Accessory List • Head unit 1 • Power cable 1 • Mounting sleeve 1 • Carrying case 1 • Bracket key 2 • Screw (M5 × 8 4 • Owner's Manual 1 set • The main unit must be removed from main unit (see "Removal" on either side. Connect all other leads of the CDE-9852. Remove...


