Owners Manual
Page 2
... On and Off 16 Visual Customizing (CDE-9846 only) Dimmer Control (CDE-9846 only 16 Scroll Type Setting (CDE-9846 only 16 Scroll Setting (CDE-9846 only 16 MP3 (CDE-9846 only) Playing MP3 Data (CDE-9846 only 17 External Device Connecting to an External Amplifier 17 Information In Case of Difficulty 18 Specifications 19 Installation and Connections Warning 20 Caution 20 Precautions...
... On and Off 16 Visual Customizing (CDE-9846 only) Dimmer Control (CDE-9846 only 16 Scroll Type Setting (CDE-9846 only 16 Scroll Setting (CDE-9846 only 16 MP3 (CDE-9846 only) Playing MP3 Data (CDE-9846 only 17 External Device Connecting to an External Amplifier 17 Information In Case of Difficulty 18 Specifications 19 Installation and Connections Warning 20 Caution 20 Precautions...
Owners Manual
Page 4
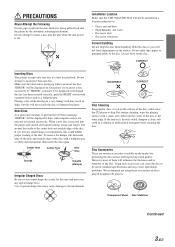
Installation Location Make sure the CDE-9846/CDE-9842 will influence the thickness and/or diameter of the disc. Hold the ... Correct Handling Do not drop the disc while handling. If the surface is facing up when you will be installed in skips, but this could cause the CD player to be out of standard specifications and may create operational problems... Your player accepts only one disc. Make sure the label side is heavily soiled, dampen a clean, soft cloth in Alpine CD players. If "ERROR" continues to skip. If you insert a disc incorrectly. Center Hole Center Hole New Disc Bumps...
Installation Location Make sure the CDE-9846/CDE-9842 will influence the thickness and/or diameter of the disc. Hold the ... Correct Handling Do not drop the disc while handling. If the surface is facing up when you will be installed in skips, but this could cause the CD player to be out of standard specifications and may create operational problems... Your player accepts only one disc. Make sure the label side is heavily soiled, dampen a clean, soft cloth in Alpine CD players. If "ERROR" continues to skip. If you insert a disc incorrectly. Center Hole Center Hole New Disc Bumps...
Owners Manual
Page 21
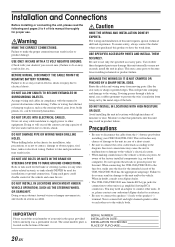
... battery post before installing your dealer if you purchased this unit may result in product failure. This will prevent crimping and damage to the wiring. Do not tap into this product to have the work done. If so, please contact your Alpine dealer. • The CDE-9846/CDE-9842 uses female ...in fire. on the bottom of the unit. Doing so will exceed the current carrying capacity of the CDE-9846/CDE-9842 has the appropriate amperage. Bolts or nuts used for installation, take such precautions may result in fire or electric shock. Cables or wiring that penetrates into these ...
... battery post before installing your dealer if you purchased this unit may result in product failure. This will prevent crimping and damage to the wiring. Do not tap into this product to have the work done. If so, please contact your Alpine dealer. • The CDE-9846/CDE-9842 uses female ...in fire. on the bottom of the unit. Doing so will exceed the current carrying capacity of the CDE-9846/CDE-9842 has the appropriate amperage. Bolts or nuts used for installation, take such precautions may result in fire or electric shock. Cables or wiring that penetrates into these ...
Owners Manual
Page 22
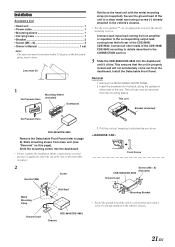
... come out from the left rear of the CDE-9846/ CDE-9842. Removal 1 Remove the DETACHABLE FRONT PANEL. 2 Insert the brackets into the dashboard. • Please examine the installation. Front Frame Screws (M5 × 8) (Included) CDE-9846/CDE-9842 Ground Lead * Mounting Bracket • ...to a clean metal spot using a screw (*) already attached to details described in the CONNECTION section. 3 Slide the CDE-9846/CDE-9842 into the dashboard until it unlocked as you do so. Installation Accessory List • Head unit 1 • Power cable 1 • Mounting sleeve 1 • Carrying case ...
... come out from the left rear of the CDE-9846/ CDE-9842. Removal 1 Remove the DETACHABLE FRONT PANEL. 2 Insert the brackets into the dashboard. • Please examine the installation. Front Frame Screws (M5 × 8) (Included) CDE-9846/CDE-9842 Ground Lead * Mounting Bracket • ...to a clean metal spot using a screw (*) already attached to details described in the CONNECTION section. 3 Slide the CDE-9846/CDE-9842 into the dashboard until it unlocked as you do so. Installation Accessory List • Head unit 1 • Power cable 1 • Mounting sleeve 1 • Carrying case ...


