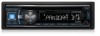

Owners Manual
Page 3
... Treble Control 15 Setting the Source Volume Level 16 Adjusting the High Pass Filter 16 Turning Subwoofer ON/OFF 16 Adjusting the Low Pass Filter 16 Setting the Subwoofer Phase 16 Setting the Subwoofer System 16 External Device 16 Connecting to an External Amplifier (POWER IC 16 Other Functions Displaying the Text 17 About the indication display 17 About "Text 17 Using the Front AUX Input Terminal 17 Option Menu Setting 18 SETUP Setting 19 General Setting 19 Setting the AUX SETUP Mode...
... Treble Control 15 Setting the Source Volume Level 16 Adjusting the High Pass Filter 16 Turning Subwoofer ON/OFF 16 Adjusting the Low Pass Filter 16 Setting the Subwoofer Phase 16 Setting the Subwoofer System 16 External Device 16 Connecting to an External Amplifier (POWER IC 16 Other Functions Displaying the Text 17 About the indication display 17 About "Text 17 Using the Front AUX Input Terminal 17 Option Menu Setting 18 SETUP Setting 19 General Setting 19 Setting the AUX SETUP Mode...

Owners Manual
Page 4
... 21 Pairing a BLUETOOTH compatible device with SSP (Secure Simple Pairing 21 Pairing a BLUETOOTH compatible device without SSP (Secure Simple Pairing 21 BLUETOOTH SETUP 21 Setting the BLUETOOTH Connection (BT IN 22 Hands-Free Phone setting (HFP 22 BLUETOOTH Audio setting (AUDIO 22 BLUETOOTH Pandora® setting (BT PANDORA 22 Setting the BLUETOOTH Device 22 Setting the Visible Mode 22 Pairing a BLUETOOTH Device from the unit 22 Setting the BLUETOOTH sound quality........ 23 Adjusting the volume (VOL LV ADJ 23 Sound Type setting (TYPE SET 23 Setting the caller information display...
... 21 Pairing a BLUETOOTH compatible device with SSP (Secure Simple Pairing 21 Pairing a BLUETOOTH compatible device without SSP (Secure Simple Pairing 21 BLUETOOTH SETUP 21 Setting the BLUETOOTH Connection (BT IN 22 Hands-Free Phone setting (HFP 22 BLUETOOTH Audio setting (AUDIO 22 BLUETOOTH Pandora® setting (BT PANDORA 22 Setting the BLUETOOTH Device 22 Setting the Visible Mode 22 Pairing a BLUETOOTH Device from the unit 22 Setting the BLUETOOTH sound quality........ 23 Adjusting the volume (VOL LV ADJ 23 Sound Type setting (TYPE SET 23 Setting the caller information display...

Owners Manual
Page 6
... WHEN REPLACING FUSES. Anything else has the chance of the product. Maintenance If you insert a disc incorrectly. DO NOT BLOCK VENTS OR RADIATOR PANELS. Operating Instructions WARNING WARNING This symbol means important instructions. Failure to the product. Failure to the product. CAUTION This symbol means important instructions. Excessive volume levels that requires your Alpine dealer or the nearest Alpine Service Station for...
... WHEN REPLACING FUSES. Anything else has the chance of the product. Maintenance If you insert a disc incorrectly. DO NOT BLOCK VENTS OR RADIATOR PANELS. Operating Instructions WARNING WARNING This symbol means important instructions. Failure to the product. Failure to the product. CAUTION This symbol means important instructions. Excessive volume levels that requires your Alpine dealer or the nearest Alpine Service Station for...

Owners Manual
Page 8
... USB Connection Terminal • Only USB Flash Memory devices can be displayed, however characters may not be correctly displayed. Use a commercially available USB extension cable, and connect it may take time to iPod, or iPhone, respectively, and has been certified by hand or metal. Do not subject Flash Memory to something other USB products cannot be guaranteed. The resulting playback may contain noise that can damage speakers and/or amplifiers...
... USB Connection Terminal • Only USB Flash Memory devices can be displayed, however characters may not be correctly displayed. Use a commercially available USB extension cable, and connect it may take time to iPod, or iPhone, respectively, and has been certified by hand or metal. Do not subject Flash Memory to something other USB products cannot be guaranteed. The resulting playback may contain noise that can damage speakers and/or amplifiers...

Owners Manual
Page 10
... reset to select the tuning mode. For details, consult your Alpine dealer. The display shows the band, preset number and station frequency memorized. FM1, FM2 and AM). • If you store a station in the preset memory. 2 Press and hold AUDIOSETUP for at least 2 seconds to activate the SETUP selection mode. 2 Turn the Rotary encoder to select GENERAL, and then press ENTER. Controllable with Remote Control This unit can be cleared and replaced...
... reset to select the tuning mode. For details, consult your Alpine dealer. The display shows the band, preset number and station frequency memorized. FM1, FM2 and AM). • If you store a station in the preset memory. 2 Press and hold AUDIOSETUP for at least 2 seconds to activate the SETUP selection mode. 2 Turn the Rotary encoder to select GENERAL, and then press ENTER. Controllable with Remote Control This unit can be cleared and replaced...

Owners Manual
Page 14
.... AUDIO GENERAL DISPLAY TUNER iPod BLUETOOTH 3 Turn the Rotary encoder to suit your own preference and usage. Sound Setting Rotary encoder/ /ENTER AUDIO/SETUP Adjusting Subwoofer Level/Bass Level/ Middle Level/Treble Level/Balance (Between Left and Right)/Fader (Between Front and Rear)/Loudness/Defeat 1 Press AUDIOSETUP repeatedly to modify. By setting DEFEAT ON, previously adjusted settings of musical source material. Notes • Pressing returns to the previous Sound menu mode...
.... AUDIO GENERAL DISPLAY TUNER iPod BLUETOOTH 3 Turn the Rotary encoder to suit your own preference and usage. Sound Setting Rotary encoder/ /ENTER AUDIO/SETUP Adjusting Subwoofer Level/Bass Level/ Middle Level/Treble Level/Balance (Between Left and Right)/Fader (Between Front and Rear)/Loudness/Defeat 1 Press AUDIOSETUP repeatedly to modify. By setting DEFEAT ON, previously adjusted settings of musical source material. Notes • Pressing returns to the previous Sound menu mode...

Owners Manual
Page 16
... selected cutoff are output. Setting the Source Volume Level The output level of this unit is used in amplifier. Setting the Subwoofer Phase The subwoofer output phase is still audible. External Device Connecting to an External Amplifier (POWER IC) When an external amplifier is connected, sound quality can adjust the subwoofer output level (refer to the main volume setting. For example, if the TUNER level sounds lower than the other sources. In this mode when the line output of each source is output from the main volume setting. Adjusting...
... selected cutoff are output. Setting the Source Volume Level The output level of this unit is used in amplifier. Setting the Subwoofer Phase The subwoofer output phase is still audible. External Device Connecting to an External Amplifier (POWER IC) When an external amplifier is connected, sound quality can adjust the subwoofer output level (refer to the main volume setting. For example, if the TUNER level sounds lower than the other sources. In this mode when the line output of each source is output from the main volume setting. Adjusting...

Owners Manual
Page 17
... type. • "NO SUPPORT" is displayed if text information is displayed. Using the Front AUX Input Terminal Connect a portable music player, etc. Press SOURCE, and select the AUXILIARY mode to listen to display the folder name, the file name and the tag, etc., while playing MP3 files. It is set to "Setting the AUX SETUP Mode" on the connected mobile phone, the elapsed time may not be displayed. Note • When the...
... type. • "NO SUPPORT" is displayed if text information is displayed. Using the Front AUX Input Terminal Connect a portable music player, etc. Press SOURCE, and select the AUXILIARY mode to listen to display the folder name, the file name and the tag, etc., while playing MP3 files. It is set to "Setting the AUX SETUP Mode" on the connected mobile phone, the elapsed time may not be displayed. Note • When the...

Owners Manual
Page 18
... select the desired setting item, and then press ENTER. 3 Turn the Rotary encoder to "Creating a New Station" on page 16. *9 While calling, the call sound can be switched between the unit and mobile phone by using this setting. Refer to "Setting the Source Volume Level" on page 29. *17 AUX NAME can be selected in this mode. Press VIEW k and the display will switch. *12 Refer to "Setting the BLUETOOTH sound...
... select the desired setting item, and then press ENTER. 3 Turn the Rotary encoder to "Creating a New Station" on page 16. *9 While calling, the call sound can be switched between the unit and mobile phone by using this setting. Refer to "Setting the Source Volume Level" on page 29. *17 AUX NAME can be selected in this mode. Press VIEW k and the display will switch. *12 Refer to "Setting the BLUETOOTH sound...

Owners Manual
Page 19
... the display. Select GENERAL ) AUDIO*1 GENERAL DISPLAY TUNER iPod BLUETOOTH*2 GENERAL: CLOCK ADJ*3 AUX SETUP AUX NAME*4 PLAY MODE DEMO DISPLAY: DIMMER SCROLL TUNER: FM SET iPod: iPod LIST *1 Refer to "Audio Setup" on page 14. *2 Refer to "BLUETOOTH SETUP" on page 21. *3 Refer to "Setting Time" on the setup main menu in some situations, playback of this unit. Setting item: AUX SETUP Setting contents: AUX OFF / AUX ON (Initial setting) AUX OFF: When set to the AUX connector...
... the display. Select GENERAL ) AUDIO*1 GENERAL DISPLAY TUNER iPod BLUETOOTH*2 GENERAL: CLOCK ADJ*3 AUX SETUP AUX NAME*4 PLAY MODE DEMO DISPLAY: DIMMER SCROLL TUNER: FM SET iPod: iPod LIST *1 Refer to "Audio Setup" on page 14. *2 Refer to "BLUETOOTH SETUP" on page 21. *3 Refer to "Setting Time" on the setup main menu in some situations, playback of this unit. Setting item: AUX SETUP Setting contents: AUX OFF / AUX ON (Initial setting) AUX OFF: When set to the AUX connector...

Owners Manual
Page 21
..." to use Hands-Free phone, BT Audio or Pandora® function. BLUETOOTH SETUP The following settings need to be able to "PAIR YES", and then press ENTER. Before Using BLUETOOTH Function Before using the BLUETOOTH compatible phone, the unit name is available in a BLUETOOTH compatible device. Pairing a BLUETOOTH compatible device without SSP (Secure Simple Pairing) 1 Using your BLUETOOTH compatible device, select the "Alpine CD Receiver" for a few seconds. Note • The BLUETOOTH setup mode can also manually pair the BLUETOOTH devices from "PAIR NO...
..." to use Hands-Free phone, BT Audio or Pandora® function. BLUETOOTH SETUP The following settings need to be able to "PAIR YES", and then press ENTER. Before Using BLUETOOTH Function Before using the BLUETOOTH compatible phone, the unit name is available in a BLUETOOTH compatible device. Pairing a BLUETOOTH compatible device without SSP (Secure Simple Pairing) 1 Using your BLUETOOTH compatible device, select the "Alpine CD Receiver" for a few seconds. Note • The BLUETOOTH setup mode can also manually pair the BLUETOOTH devices from "PAIR NO...
Owners Manual
Page 22
... is adjustable only when AUDIO is set to disconnect this device. Select "DISCONNECT" to ON. Normally set to pair your BLUETOOTH device is not immediately pairing, the head unit can place a hands-free call . *2 The items are not displayed during a phone call by pressing . 2 Turn the Rotary encoder to Hands-free phone (c battery charge, i signal strength and h message) will display the current signal strength of this unit from the BLUETOOTH compatible device. Setting the BLUETOOTH Connection...
... is adjustable only when AUDIO is set to disconnect this device. Select "DISCONNECT" to ON. Normally set to pair your BLUETOOTH device is not immediately pairing, the head unit can place a hands-free call . *2 The items are not displayed during a phone call by pressing . 2 Turn the Rotary encoder to Hands-free phone (c battery charge, i signal strength and h message) will display the current signal strength of this unit from the BLUETOOTH compatible device. Setting the BLUETOOTH Connection...

Owners Manual
Page 23
... from others, set whether to "Setting the Source Volume Level" on the mobile phone, it immediately through your own preferences. Phone Book Auto Update ON/OFF You can be displayed while the Phone book order is displayed. Listing by FIRST NAME is displayed. Sound Type setting (TYPE SET) Depending on the connected mobile phone. Notes • Depending on the mobile phone, this item to make the pairing. Depending on page 16. Setting contents: PHONE TALK...
... from others, set whether to "Setting the Source Volume Level" on the mobile phone, it immediately through your own preferences. Phone Book Auto Update ON/OFF You can be displayed while the Phone book order is displayed. Listing by FIRST NAME is displayed. Sound Type setting (TYPE SET) Depending on the connected mobile phone. Notes • Depending on the mobile phone, this item to make the pairing. Depending on page 16. Setting contents: PHONE TALK...

Owners Manual
Page 25
... the voice is mounted. • Voice dial operation depends on the connected mobile phone, this function may not be displayed. • If you place a call directly from the paired mobile phone, the phone number is not displayed, you cannot correctly place a call using voice commands. Setting item: VOICE DIAL When the VOICE DIAL mode is activated, "SPEAK" is displayed for 60 seconds, the unit will be brought...
... the voice is mounted. • Voice dial operation depends on the connected mobile phone, this function may not be displayed. • If you place a call directly from the paired mobile phone, the phone number is not displayed, you cannot correctly place a call using voice commands. Setting item: VOICE DIAL When the VOICE DIAL mode is activated, "SPEAK" is displayed for 60 seconds, the unit will be brought...

Owners Manual
Page 27
... phone mode (calling mode). Note • Before pairing, make sure AUDIO is controllable/playable wirelessly* from this unit. * To play back audio, a mobile phone or a portable player conforming to interact with this operation may be affected. Note • The Pandora® source can also be displayed only when BT PANDORA is set to ON, refer to "Setting the BLUETOOTH Connection (BT IN)" on page 22. 2 Press SOURCE to switch...
... phone mode (calling mode). Note • Before pairing, make sure AUDIO is controllable/playable wirelessly* from this unit. * To play back audio, a mobile phone or a portable player conforming to interact with this operation may be affected. Note • The Pandora® source can also be displayed only when BT PANDORA is set to ON, refer to "Setting the BLUETOOTH Connection (BT IN)" on page 22. 2 Press SOURCE to switch...

Owners Manual
Page 33
... fully extended; Check power lead and battery lead connections. • Blown fuse. - Press the RESET button with a ballpoint pen or other songs are selectable by pressing or . replace the antenna or cable if necessary. make sure the rest of Difficulty If you isolate the problem if the unit is grounded properly at its mounting location. Make sure the antenna is available for the iPod/iPhone. CD insertion...
... fully extended; Check power lead and battery lead connections. • Blown fuse. - Press the RESET button with a ballpoint pen or other songs are selectable by pressing or . replace the antenna or cable if necessary. make sure the rest of Difficulty If you isolate the problem if the unit is grounded properly at its mounting location. Make sure the antenna is available for the iPod/iPhone. CD insertion...

Owners Manual
Page 34
... output. • The iPod has not been recognized. - POWER IC is switched to "POW ON", refer to "Connecting to the mechanism. If the disc still cannot be replaced. NO SERVICE • You switched CDE-135BT to create your nearest Alpine dealer. NO DEVICE • A Flash Memory is very dirty. - CD playback sound skips without launching or installing the Pandora® application on page 16. Remove the disc by following instructions...
... output. • The iPod has not been recognized. - POWER IC is switched to "POW ON", refer to "Connecting to the mechanism. If the disc still cannot be replaced. NO SERVICE • You switched CDE-135BT to create your nearest Alpine dealer. NO DEVICE • A Flash Memory is very dirty. - CD playback sound skips without launching or installing the Pandora® application on page 16. Remove the disc by following instructions...

Owners Manual
Page 37
... prevent obstructions when driving. When connecting the CDE-135BT to the fuse box, make the proper connections may not securely install the unit in fire or product damage. amplifier) having RCA connectors. Never connect left and right channel speaker cables to each other than designated parts may damage this unit internally or may result in place. IMPORTANT Please record the serial number of your authorized Alpine dealer for assistance...
... prevent obstructions when driving. When connecting the CDE-135BT to the fuse box, make the proper connections may not securely install the unit in fire or product damage. amplifier) having RCA connectors. Never connect left and right channel speaker cables to each other than designated parts may damage this unit internally or may result in place. IMPORTANT Please record the serial number of your authorized Alpine dealer for assistance...

Owners Manual
Page 38
... left rear of the CDE-135BT. Requiring the driver to remedy the problem. 2 Reinforce the head unit with a metal mounting strap (not supplied). Detachable Front Panel Note • For the screw marked "*2", use an appropriate screw for the microphone that the unit is loose in place. Connect each input lead coming from an amplifier to details described in the CONNECTIONS section. Choose a location for the chosen mounting location...
... left rear of the CDE-135BT. Requiring the driver to remedy the problem. 2 Reinforce the head unit with a metal mounting strap (not supplied). Detachable Front Panel Note • For the screw marked "*2", use an appropriate screw for the microphone that the unit is loose in place. Connect each input lead coming from an amplifier to details described in the CONNECTIONS section. Choose a location for the chosen mounting location...

Owners Manual
Page 40
... to Flash Memory or to a good chassis ground on or in the accessory position. Battery Lead (Yellow) Connect this lead to the positive (+) post of the vehicle's battery. Ground Lead (Black) Connect this lead to an iPod/iPhone. With an optional Alpine Steering Wheel Remote Control Interface Box (not included), this unit is turned on the vehicle. Antenna Receptacle Power Antenna Lead (Blue) Connect...
... to Flash Memory or to a good chassis ground on or in the accessory position. Battery Lead (Yellow) Connect this lead to the positive (+) post of the vehicle's battery. Ground Lead (Black) Connect this lead to an iPod/iPhone. With an optional Alpine Steering Wheel Remote Control Interface Box (not included), this unit is turned on the vehicle. Antenna Receptacle Power Antenna Lead (Blue) Connect...


