Owner's Manual (english)
Page 3
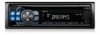
... Functions Displaying the Text 15 Displaying Time 16 Using the Front AUX Input Terminal 16 SETUP BLUETOOTH Setting Setting the BLUETOOTH Connection (BT IN 17 Sound Customizing Subwoofer On and Off 17 Setting the Subwoofer System 17 Visual Customizing Changing Lighting Color (CDE-126BT only 17 Dimmer Control 17 Scroll Type Setting 18 Scroll Setting (TEXT SCR 18 Demonstration 18 MP3/WMA/AAC Playing MP3/WMA/AAC Data (PLAY MODE 18 External Device Connecting to an External Amplifier (POWER IC 18 Setting the AUX+ SETUP Mode 19 Setting...
... Functions Displaying the Text 15 Displaying Time 16 Using the Front AUX Input Terminal 16 SETUP BLUETOOTH Setting Setting the BLUETOOTH Connection (BT IN 17 Sound Customizing Subwoofer On and Off 17 Setting the Subwoofer System 17 Visual Customizing Changing Lighting Color (CDE-126BT only 17 Dimmer Control 17 Scroll Type Setting 18 Scroll Setting (TEXT SCR 18 Demonstration 18 MP3/WMA/AAC Playing MP3/WMA/AAC Data (PLAY MODE 18 External Device Connecting to an External Amplifier (POWER IC 18 Setting the AUX+ SETUP Mode 19 Setting...
Owner's Manual (english)
Page 4
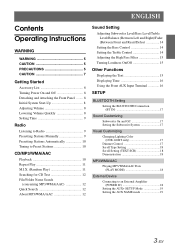
BT Hands-Free Calling Setup Before Using 19 About BLUETOOTH 19 Before Using Hands-Free Function 19 How to connect to a BLUETOOTH compatible device (Pairing 20 BLUETOOTH SETUP 20 BLUETOOTH Setup Operation 20 Setting the BLUETOOTH Device 20 Setting the Search Mode 20 Setting the Received Calls automatically (Auto Answer 20 Deleting a BLUETOOTH Device from the list 20 Displaying the phone service provider name 21 Adjusting the volume for the microphone input 21 Selecting the output speaker 21 Displaying the firmware version 21 Updating the firmware 21 Hands-Free Phone Control 21 ...
BT Hands-Free Calling Setup Before Using 19 About BLUETOOTH 19 Before Using Hands-Free Function 19 How to connect to a BLUETOOTH compatible device (Pairing 20 BLUETOOTH SETUP 20 BLUETOOTH Setup Operation 20 Setting the BLUETOOTH Device 20 Setting the Search Mode 20 Setting the Received Calls automatically (Auto Answer 20 Deleting a BLUETOOTH Device from the list 20 Displaying the phone service provider name 21 Adjusting the volume for the microphone input 21 Selecting the output speaker 21 Displaying the firmware version 21 Updating the firmware 21 Hands-Free Phone Control 21 ...
Owner's Manual (english)
Page 6
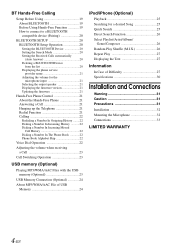
... and outside edge of mild neutral detergent before cleaning the disc. Installation Location Make sure this unit and never use your player if you will influence the thickness and/or diameter of them will not leave fingerprints on discs played in a location subjected to be installed in Alpine CD players. If "ERROR" continues to : • Direct sun and heat • High humidity and water •...
... and outside edge of mild neutral detergent before cleaning the disc. Installation Location Make sure this unit and never use your player if you will influence the thickness and/or diameter of them will not leave fingerprints on discs played in a location subjected to be installed in Alpine CD players. If "ERROR" continues to : • Direct sun and heat • High humidity and water •...
Owner's Manual (english)
Page 7
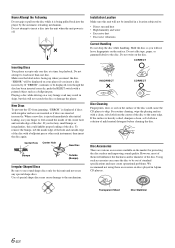
.... • USB memory may not function correctly at the same time. • If a USB device is inserted in the U.S. and other than audio in the following points. mp3licensing.com" 7-EN Read the USB memory Owner's Manual thoroughly. Do not subject USB memory to use commercially available disc accessories. The resulting playback may contain noise that an electronic accessory has been designed to connect specifically to iPod, or iPhone, respectively...
.... • USB memory may not function correctly at the same time. • If a USB device is inserted in the U.S. and other than audio in the following points. mp3licensing.com" 7-EN Read the USB memory Owner's Manual thoroughly. Do not subject USB memory to use commercially available disc accessories. The resulting playback may contain noise that an electronic accessory has been designed to connect specifically to iPod, or iPhone, respectively...
Owner's Manual (english)
Page 8
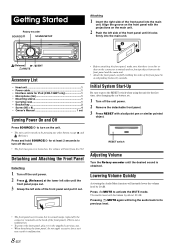
... unit. Lowering Volume Quickly Activating the Audio Mute function will decrease by about 20 dB. Pressing /MUTE again will start from level 12. Press and hold SOURCE/ for iPod (CDE-126BT only 1 • Microphone (4m 1 • Mounting sleeve 1 • Carrying case 1 • Bracket key 2 • Screw (M5 × 8 4 • Owner's Manual 1 set Turning Power On and Off Press SOURCE/ to press the RESET switch when using the unit for the first time, after changing the car battery...
... unit. Lowering Volume Quickly Activating the Audio Mute function will decrease by about 20 dB. Pressing /MUTE again will start from level 12. Press and hold SOURCE/ for iPod (CDE-126BT only 1 • Microphone (4m 1 • Mounting sleeve 1 • Carrying case 1 • Bracket key 2 • Screw (M5 × 8 4 • Owner's Manual 1 set Turning Power On and Off Press SOURCE/ to press the RESET switch when using the unit for the first time, after changing the car battery...
Owner's Manual (english)
Page 9
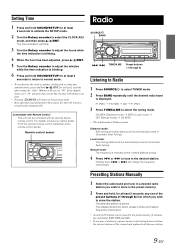
... adjusted, press / /ENT. 5 Turn the Rotary encoder to adjust the minutes while the time indication is displayed. The time indication will return to "00". Remote control sensor Radio SOURCE/ BAND TUNE/A.ME Preset buttons (1 through 6) into which you store a station in the preset memory. 2 Press and hold / /ENT for at least 2 seconds, any one hour. • Pressing /MUTE will reset to normal mode automatically. The display shows the band, preset number and station frequency...
... adjusted, press / /ENT. 5 Turn the Rotary encoder to adjust the minutes while the time indication is displayed. The time indication will return to "00". Remote control sensor Radio SOURCE/ BAND TUNE/A.ME Preset buttons (1 through 6) into which you store a station in the preset memory. 2 Press and hold / /ENT for at least 2 seconds, any one hour. • Pressing /MUTE will reset to normal mode automatically. The display shows the band, preset number and station frequency...
Owner's Manual (english)
Page 10
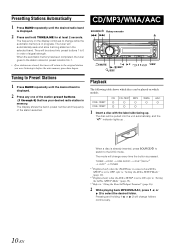
... station selected. When a disc is displayed. 2 Press and hold TUNE/A.ME for at least 2 seconds. The disc will change every time the button is set to OFF, refer to 6 in the selected band. The mode will be stored into the unit automatically, and the " " indicator lights up . TUNER DISC USB AUDIO iPod*1/AUX+*2 AUX*3 TUNER *1 Displayed only when the iPod/iPhone is connected and AUX+ SETUP is set to ON, refer to "Setting the AUX+ SETUP Mode" (page 19). *3 Refer to "Using the Front AUX Input...
... station selected. When a disc is displayed. 2 Press and hold TUNE/A.ME for at least 2 seconds. The disc will change every time the button is set to OFF, refer to 6 in the selected band. The mode will be stored into the unit automatically, and the " " indicator lights up . TUNER DISC USB AUDIO iPod*1/AUX+*2 AUX*3 TUNER *1 Displayed only when the iPod/iPhone is connected and AUX+ SETUP is set to ON, refer to "Setting the AUX+ SETUP Mode" (page 19). *3 Refer to "Using the Front AUX Input...
Owner's Manual (english)
Page 15
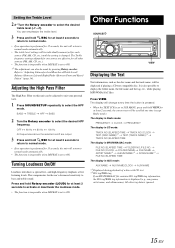
... to normal mode. • If no operation is set to ON. Press VIEW. The display will change every time the button is pressed. • When the TEXT SCR is also possible to "Adjusting Subwoofer Level/Bass Level/Treble Level/ Balance (Between Left and Right)/Fader (Between Front and Rear)/ Defeat" (page 14). Adjusting the High Pass Filter The High Pass Filter on this unit can emphasize the treble level. 3 Press and...
... to normal mode. • If no operation is set to ON. Press VIEW. The display will change every time the button is pressed. • When the TEXT SCR is also possible to "Adjusting Subwoofer Level/Bass Level/Treble Level/ Balance (Between Left and Right)/Fader (Between Front and Rear)/ Defeat" (page 14). Adjusting the High Pass Filter The High Pass Filter on this unit can emphasize the treble level. 3 Press and...
Owner's Manual (english)
Page 17
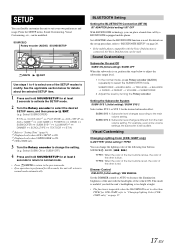
... to normal mode. • Press /MUTE to return to the previous mode. • If no operation is performed for CDE-126BT, refer to "Setting Time" (page 9). *2 Displayed only when AUX+ SETUP is ON. *3 Displayed only when SUBWOOFER is different from the main volume setting. TYPE2: When the color of the four buttons is red, the color of the other is blue. Select SUBWOOFER) BT IN CLOCK ADJ*1 PLAY MODE AUX+ SETUP AUX+ NAME*2 AUX NAME POWER IC DEMO SUBWOOFER SUBW SYS...
... to normal mode. • Press /MUTE to return to the previous mode. • If no operation is performed for CDE-126BT, refer to "Setting Time" (page 9). *2 Displayed only when AUX+ SETUP is ON. *3 Displayed only when SUBWOOFER is different from the main volume setting. TYPE2: When the color of the four buttons is red, the color of the other is blue. Select SUBWOOFER) BT IN CLOCK ADJ*1 PLAY MODE AUX+ SETUP AUX+ NAME*2 AUX NAME POWER IC DEMO SUBWOOFER SUBW SYS...
Owner's Manual (english)
Page 18
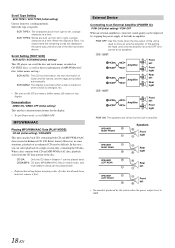
... select playback of this case, you prefer. When a disc contains both CD and MP3/WMA/AAC data (created in mixed mode, and multi-session discs can be played back. • Perform this setting, the head unit's internal amplifier is turned OFF and cannot drive speakers. When the display is used to drive an external amplifier. Scroll Setting (TEXT SCR) SCR AUTO / SCR MANU (Initial setting) This CD player can play back...
... select playback of this case, you prefer. When a disc contains both CD and MP3/WMA/AAC data (created in mixed mode, and multi-session discs can be played back. • Perform this setting, the head unit's internal amplifier is turned OFF and cannot drive speakers. When the display is used to drive an external amplifier. Scroll Setting (TEXT SCR) SCR AUTO / SCR MANU (Initial setting) This CD player can play back...
Owner's Manual (english)
Page 19
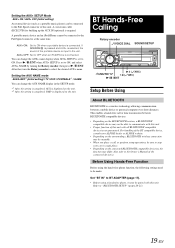
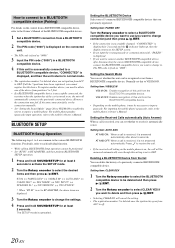
... be paired with all BLUETOOTH compatible devices is displayed on the BLUETOOTH version, a BLUETOOTH compatible device may differ. AUX+ OFF: Set to BT ADAPTER (page 17). • Before using the hands-free phone function, the following settings need to select the desired AUX+ name. Press / /ENT when AUX+ SETUP is set to the unit. A portable music device and an iPod/iPhone cannot be connected to the Owner's Manual of this unit with this unit. Also refer to the Full Speed connector at the same time...
... be paired with all BLUETOOTH compatible devices is displayed on the BLUETOOTH version, a BLUETOOTH compatible device may differ. AUX+ OFF: Set to BT ADAPTER (page 17). • Before using the hands-free phone function, the following settings need to select the desired AUX+ name. Press / /ENT when AUX+ SETUP is set to the unit. A portable music device and an iPod/iPhone cannot be connected to the Owner's Manual of this unit with this unit. Also refer to the Full Speed connector at the same time...
Owner's Manual (english)
Page 20
... phone is on, the call is received, it may fail. BLUETOOTH SETUP BLUETOOTH Setup Operation The following steps 1 to 4 are displayed. 3 Turn the Rotary encoder to change the settings. 4 Press and hold SOUND/SETUP for 2 seconds and the indicator lights up, then the display returns to the SETUP screen. • If you can delete the history of a previously connected BLUETOOTH compatible device. Setting item: PAIRED DEV Turn the Rotary encoder to select a BLUETOOTH compatible device you want to use...
... phone is on, the call is received, it may fail. BLUETOOTH SETUP BLUETOOTH Setup Operation The following steps 1 to 4 are displayed. 3 Turn the Rotary encoder to change the settings. 4 Press and hold SOUND/SETUP for 2 seconds and the indicator lights up, then the display returns to the SETUP screen. • If you can delete the history of a previously connected BLUETOOTH compatible device. Setting item: PAIRED DEV Turn the Rotary encoder to select a BLUETOOTH compatible device you want to use...
Owner's Manual (english)
Page 21
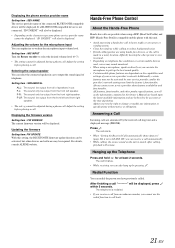
... be activated, but other person's voice is made in car to change or modify any information or specifications without notice or obligation. "ID UNSENT" will be displayed. Selecting the output speaker You can emphasize or weaken the microphone input volume level. Hands-Free Phone Control About the Hands-Free Phone Hands-free calls are announced by your service provider, and/or the provider's network settings may be adjusted during a phone call...
... be activated, but other person's voice is made in car to change or modify any information or specifications without notice or obligation. "ID UNSENT" will be displayed. Selecting the output speaker You can emphasize or weaken the microphone input volume level. Hands-Free Phone Control About the Hands-Free Phone Hands-free calls are announced by your service provider, and/or the provider's network settings may be adjusted during a phone call...
Owner's Manual (english)
Page 23
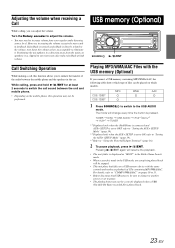
... CDE-126BT CDE-125BT 1 Press SOURCE/ to switch to eliminate it. Adjusting the volume when receiving a Call While calling, you connect a USB memory containing MP3/WMA/AAC, the following table shows which models. Positioning the microphone in the car. clipped on sun visor) may also reduce feedback at least 2 seconds to switch the call , this operation may not be performed. TUNER DISC USB AUDIO iPod*1/AUX+*2 AUX*3 TUNER *1 Displayed only when the iPod/iPhone is connected and AUX+ SETUP...
... CDE-126BT CDE-125BT 1 Press SOURCE/ to switch to eliminate it. Adjusting the volume when receiving a Call While calling, you connect a USB memory containing MP3/WMA/AAC, the following table shows which models. Positioning the microphone in the car. clipped on sun visor) may also reduce feedback at least 2 seconds to switch the call , this operation may not be performed. TUNER DISC USB AUDIO iPod*1/AUX+*2 AUX*3 TUNER *1 Displayed only when the iPod/iPhone is connected and AUX+ SETUP...
Owner's Manual (english)
Page 24
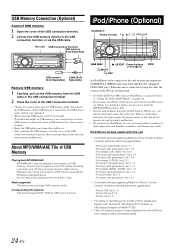
... the playing songs, at this unit by using the proprietary ALPINE FULL SPEED Connection Cable (KCE-433iV) (Supplied, CDE-126BT only). USB Memory Connection (Optional) Connect USB memory 1 Open the cover of the USB connection terminal. 2 Connect the USB memory directly to the unit. Correct function of USB Memory Playing back MP3/WMA/AAC MP3/WMA/AAC files are not functional. • Set AUX+ SETUP to OFF when an iPod/iPhone is sensitive to this unit • Confirmed devices regarding Made for iPhone. About...
... the playing songs, at this unit by using the proprietary ALPINE FULL SPEED Connection Cable (KCE-433iV) (Supplied, CDE-126BT only). USB Memory Connection (Optional) Connect USB memory 1 Open the cover of the USB connection terminal. 2 Connect the USB memory directly to the unit. Correct function of USB Memory Playing back MP3/WMA/AAC MP3/WMA/AAC files are not functional. • Set AUX+ SETUP to OFF when an iPod/iPhone is sensitive to this unit • Confirmed devices regarding Made for iPhone. About...
Owner's Manual (english)
Page 27
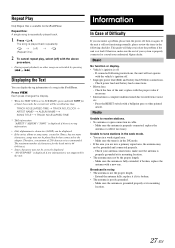
... iPod/iPhone. replace the antenna or cable if necessary. Make sure the tuner is grounded properly at least 2 seconds, the current text will be displayed. • If the artist, album or song name, created in the DX mode. • If the area you encounter a problem, please turn the power off ) with a ballpoint pen or other songs are selectable by the unit. Each press changes the display...
... iPod/iPhone. replace the antenna or cable if necessary. Make sure the tuner is grounded properly at least 2 seconds, the current text will be displayed. • If the artist, album or song name, created in the DX mode. • If the area you encounter a problem, please turn the power off ) with a ballpoint pen or other songs are selectable by the unit. Each press changes the display...
Owner's Manual (english)
Page 29
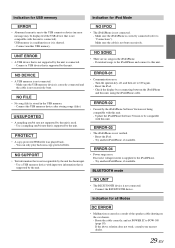
Make sure the cable is not verified. - Download songs to the iPod/iPhone and connect to ON again. - Turn the ignition key off, and then set POWER IC to POW ON (page 18). Check the display by the unit. • A copy-protected WMA file was played back. - Update the iPod/iPhone Software Version to the USB connector device (an error message may be compatible with the unit is connected). Reset the iPod. - BLUETOOTH mode • The BLUETOOTH device is shorted...
Make sure the cable is not verified. - Download songs to the iPod/iPhone and connect to ON again. - Turn the ignition key off, and then set POWER IC to POW ON (page 18). Check the display by the unit. • A copy-protected WMA file was played back. - Update the iPod/iPhone Software Version to the USB connector device (an error message may be compatible with the unit is connected). Reset the iPod. - BLUETOOTH mode • The BLUETOOTH device is shorted...
Owner's Manual (english)
Page 31
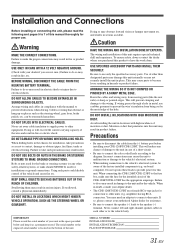
... the CDE-126BT/CDE-125BT has the appropriate amperage. BEFORE WIRING, DISCONNECT THE CABLE FROM THE NEGATIVE BATTERY TERMINAL. Swallowing them may result in doubt, consult your Alpine dealer. • The CDE-126BT/CDE-125BT uses female RCA-type jacks for connection to other than designated parts may damage this product to have the work done. DO NOT INSTALL IN LOCATIONS WHICH MIGHT HINDER VEHICLE OPERATION, SUCH...
... the CDE-126BT/CDE-125BT has the appropriate amperage. BEFORE WIRING, DISCONNECT THE CABLE FROM THE NEGATIVE BATTERY TERMINAL. Swallowing them may result in doubt, consult your Alpine dealer. • The CDE-126BT/CDE-125BT uses female RCA-type jacks for connection to other than designated parts may damage this product to have the work done. DO NOT INSTALL IN LOCATIONS WHICH MIGHT HINDER VEHICLE OPERATION, SUCH...
Owner's Manual (english)
Page 33
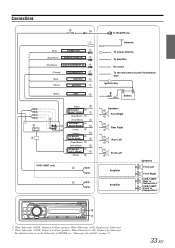
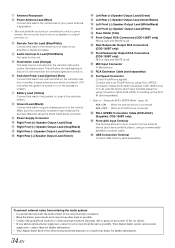
...: Output is for Rear speakers. Connections (Blue) POWER ANT (Blue/White) REMOTE TURN-ON (Pink/Black) AUDIO INTERRUPT IN (Orange) (Red) (Yellow) ILLUMINATION IGNITION BATTERY (Black) GND CDE-126BT only (Gray) SPEAKER RIGHT FRONT (Gray/Black) (Violet/Black) SPEAKER RIGHT REAR (Violet) (Green) SPEAKER LEFT REAR (Green/Black) (White/Black) SPEAKER LEFT FRONT (White) To iPod/iPhone Antenna To power antenna To amplifier Not used To the instrument cluster illumination lead Ignition Key Battery Speakers Front Right Rear Right Rear...
...: Output is for Rear speakers. Connections (Blue) POWER ANT (Blue/White) REMOTE TURN-ON (Pink/Black) AUDIO INTERRUPT IN (Orange) (Red) (Yellow) ILLUMINATION IGNITION BATTERY (Black) GND CDE-126BT only (Gray) SPEAKER RIGHT FRONT (Gray/Black) (Violet/Black) SPEAKER RIGHT REAR (Violet) (Green) SPEAKER LEFT REAR (Green/Black) (White/Black) SPEAKER LEFT FRONT (White) To iPod/iPhone Antenna To power antenna To amplifier Not used To the instrument cluster illumination lead Ignition Key Battery Speakers Front Right Rear Right Rear...
Owner's Manual (english)
Page 34
... separately) Full Speed Connector Control iPod/iPhone signals. Make sure the connection is made to bare metal and is left . FULL SPEED Connection Cable (KCE-433iV) (Supplied, CDE-126BT only) Front AUX Input Terminal This terminal allows for this unit. Remote Turn-On Lead (Blue/White) Connect this lead to the remote turn on the vehicle. Illumination Lead (Orange) This lead may be used for input of the car chassis. • If...
... separately) Full Speed Connector Control iPod/iPhone signals. Make sure the connection is made to bare metal and is left . FULL SPEED Connection Cable (KCE-433iV) (Supplied, CDE-126BT only) Front AUX Input Terminal This terminal allows for this unit. Remote Turn-On Lead (Blue/White) Connect this lead to the remote turn on the vehicle. Illumination Lead (Orange) This lead may be used for input of the car chassis. • If...


