

Owners Manual
Page 3
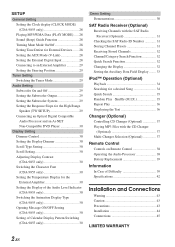
... GlideTouch™ Bar Operation 6 Getting Started Turning Power On and Off 7 Initial System Start-Up 7 Setting the Time and Calendar (CDA-9855 only 7 Setting Time (CDA-9853 only 7 Opening and Closing the Movable Display ...... 8 Display Tilt Adjustment 8 Adjusting Volume 8 Lowering Volume Quickly 8 Detaching and Attaching the Front Panel ......... 8 Radio Changing the Radio Frequencies for each...
... GlideTouch™ Bar Operation 6 Getting Started Turning Power On and Off 7 Initial System Start-Up 7 Setting the Time and Calendar (CDA-9855 only 7 Setting Time (CDA-9853 only 7 Opening and Closing the Movable Display ...... 8 Display Tilt Adjustment 8 Adjusting Volume 8 Lowering Volume Quickly 8 Detaching and Attaching the Front Panel ......... 8 Radio Changing the Radio Frequencies for each...
Owners Manual
Page 4
... 30 Adjusting Display Contrast (CDA-9853 only 30 Switching the Character Font (CDA-9855 only 30 Setting the Temperature Display for the External Amplifier 30 Setting the Display of the Audio Level Indicator (CDA-9853 only 30 Switching the Animation Display Type (CDA-9855 only 30 Opening Message ON/OFF Setting (CDA-9855 only 30 Setting of Calendar Display Pattern Switching (CDA-9855 only 30...
... 30 Adjusting Display Contrast (CDA-9853 only 30 Switching the Character Font (CDA-9855 only 30 Setting the Temperature Display for the External Amplifier 30 Setting the Display of the Audio Level Indicator (CDA-9853 only 30 Switching the Animation Display Type (CDA-9855 only 30 Opening Message ON/OFF Setting (CDA-9855 only 30 Setting of Calendar Display Pattern Switching (CDA-9855 only 30...

Owners Manual
Page 5
...OF CHILDREN. If swallowed, consult a physician immediately. For more severe stains, please dampen the cloth with your authorized Alpine dealer or the nearest Alpine Service Center for other than its designed application may result in fire. Temperature Be sure the temperature inside and may ... performing these functions. Failure to do so may cause heat to the product. Return it to repair the unit yourself. Viewing the display may cause fire or personal injury. Failure to your unit on. Always stop . HALT USE IMMEDIATELY IF A PROBLEM APPEARS. Swallowing them...
...OF CHILDREN. If swallowed, consult a physician immediately. For more severe stains, please dampen the cloth with your authorized Alpine dealer or the nearest Alpine Service Center for other than its designed application may result in fire. Temperature Be sure the temperature inside and may ... performing these functions. Failure to do so may cause heat to the product. Return it to repair the unit yourself. Viewing the display may cause fire or personal injury. Failure to your unit on. Always stop . HALT USE IMMEDIATELY IF A PROBLEM APPEARS. Swallowing them...

Owners Manual
Page 8
...select ON, press the GlideTouch bar directly below either side of the 6 positions on the GlideTouch bar to which a function has been assigned in the display will change as you move your finger on the GlideTouch bar and slide it gently to the left or right. The manual expresses this as.... 6-EN When scrolling the page toward the right, place and hold your finger quickly on the left or right. Items or lists in the guide display. For example, to the left side of the GlideTouch bar. • Move your finger on the GlideTouch bar. About the GlideTouch™ Bar Operation 1 ...
...select ON, press the GlideTouch bar directly below either side of the 6 positions on the GlideTouch bar to which a function has been assigned in the display will change as you move your finger on the GlideTouch bar and slide it gently to the left or right. The manual expresses this as.... 6-EN When scrolling the page toward the right, place and hold your finger quickly on the left or right. Items or lists in the guide display. For example, to the left side of the GlideTouch bar. • Move your finger on the GlideTouch bar. About the GlideTouch™ Bar Operation 1 ...

Owners Manual
Page 9
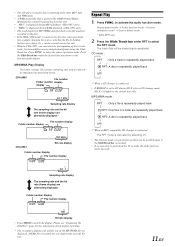
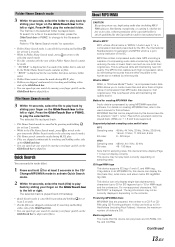
... Be sure to press the RESET switch when using the unit for 60 seconds, the unit will reset to 00. The main SETUP menu is displayed. 4 Select CLOCK by sliding your finger on the GlideTouch bar to the left or right. 6 Adjust "Hour" by turning the Rotary encoder. 7 Adjust "Minute" by... RETURN in the MENU mode, the unit will return to the normal mode. 7-EN Press the GlideTouch bar under SETUP. Setting the Time and Calendar (CDA-9855 only) 1 Press MENU. 2 Select SETUP by sliding your finger on the GlideTouch bar to the left or right. Press the GlideTouch bar under RETURN in...
... Be sure to press the RESET switch when using the unit for 60 seconds, the unit will reset to 00. The main SETUP menu is displayed. 4 Select CLOCK by sliding your finger on the GlideTouch bar to the left or right. 6 Adjust "Hour" by turning the Rotary encoder. 7 Adjust "Minute" by... RETURN in the MENU mode, the unit will return to the normal mode. 7-EN Press the GlideTouch bar under SETUP. Setting the Time and Calendar (CDA-9855 only) 1 Press MENU. 2 Select SETUP by sliding your finger on the GlideTouch bar to the left or right. Press the GlideTouch bar under RETURN in...

Owners Manual
Page 10
...dB. Detaching and Attaching the Front Panel Detaching 1 Turn off the unit power. 2 Press (Release) at least 2 seconds to return to the movable display when it may become hot in memory. Attaching 1 Insert the right side of the front panel into the main unit. 4 After setting, press and hold...previous selection secreen. • By pressing the GlideTouch bar under TILT (TILT ADJUST). 3 Touch UP or DOWN on the back of the movable display will return to avoid damage or injury. Press MUTE to the left side until the desired sound is opening or closing . Opening and Closing the...
...dB. Detaching and Attaching the Front Panel Detaching 1 Turn off the unit power. 2 Press (Release) at least 2 seconds to return to the movable display when it may become hot in memory. Attaching 1 Insert the right side of the front panel into the main unit. 4 After setting, press and hold...previous selection secreen. • By pressing the GlideTouch bar under TILT (TILT ADJUST). 3 Touch UP or DOWN on the back of the movable display will return to avoid damage or injury. Press MUTE to the left side until the desired sound is opening or closing . Opening and Closing the...
Owners Manual
Page 11
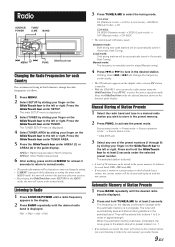
... left or right. CDA-9855: DX (Distance mode) → LOCAL (Local mode) → MANUAL (Manual mode) → DX CDA-9853: DX SEEK (Distance mode) → SEEK (Local mode) → OFF (Manual mode) → DX SEEK • The initial mode is tuned in the function guide display. Press FUNC. Manual... AREA by sliding your finger on the GlideTouch bar to 6 in the guide display. to the left or right. Source select mode → Preset mode → Source operation mode* → Source select mode * CDA-9855 only 3 Select any one of Station Presets 1 Press BAND repeatedly until the ...
... left or right. CDA-9855: DX (Distance mode) → LOCAL (Local mode) → MANUAL (Manual mode) → DX CDA-9853: DX SEEK (Distance mode) → SEEK (Local mode) → OFF (Manual mode) → DX SEEK • The initial mode is tuned in the function guide display. Press FUNC. Manual... AREA by sliding your finger on the GlideTouch bar to 6 in the guide display. to the left or right. Source select mode → Preset mode → Source operation mode* → Source select mode * CDA-9855 only 3 Select any one of Station Presets 1 Press BAND repeatedly until the ...

Owners Manual
Page 12
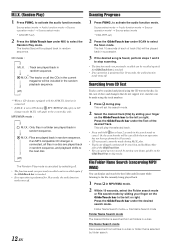
...and held , the frequencies are scrolled continuously. • You can search for at a time. Playback 1 Press c. When a disc is pressed. The display shows the band, preset number and frequency of the next track (file) : Press f. The disc will set the search mode. 2 Within 10 seconds... mode. Source select mode → Preset mode → Source operation mode* → Source select mode CD / MP3 / WMA SOURCE/POWER TITLE -/J 8 * CDA-9855 only 3 Select any one disc at least 2 seconds. • If either . • If the CD does not eject, press and hold g. Fast backward ...
...and held , the frequencies are scrolled continuously. • You can search for at a time. Playback 1 Press c. When a disc is pressed. The display shows the band, preset number and frequency of the next track (file) : Press f. The disc will set the search mode. 2 Within 10 seconds... mode. Source select mode → Preset mode → Source operation mode* → Source select mode CD / MP3 / WMA SOURCE/POWER TITLE -/J 8 * CDA-9855 only 3 Select any one disc at least 2 seconds. • If either . • If the CD does not eject, press and hold g. Fast backward ...
Owners Manual
Page 13
...this unit. • "MP3" is displayed during MP3 playback. (CDA-9853 only) • "WMA" is displayed during WMA playback. (CDA-9853 only) • The track display for MP3/WMA data playback is the file numbers recorded on this unit. • With the CDA-9855, you previously recalled can be recalled ...model is connected. MP3/WMA Play Display The folder number, file number, sampling rate, and bit rate will be played back repeatedly. Press FUNC. Source select mode → Audio function mode → Source operation mode* → Source select mode * CDA-9855 only 2 Press the Glide Touch ...
...this unit. • "MP3" is displayed during MP3 playback. (CDA-9853 only) • "WMA" is displayed during WMA playback. (CDA-9853 only) • The track display for MP3/WMA data playback is the file numbers recorded on this unit. • With the CDA-9855, you previously recalled can be recalled ...model is connected. MP3/WMA Play Display The folder number, file number, sampling rate, and bit rate will be played back repeatedly. Press FUNC. Source select mode → Audio function mode → Source operation mode* → Source select mode * CDA-9855 only 2 Press the Glide Touch ...
Owners Manual
Page 14
... touching and holding either side of track (file) will apply to select the Random Play mode. Searching from CD Text Tracks can display and search for at least 2 seconds in random sequence. Press the GlideTouch bar under MIX to the current disc only. File/Folder...M.I .X. to activate the audio function mode. Source select mode → Audio function mode → Source operation mode* → Source select mode * CDA-9855 only 2 Press the GlideTouch bar under the Text of discs and changers that is performed for 10 seconds, the audio function mode turns off ) *3 ...
... touching and holding either side of track (file) will apply to select the Random Play mode. Searching from CD Text Tracks can display and search for at least 2 seconds in random sequence. Press the GlideTouch bar under MIX to the current disc only. File/Folder...M.I .X. to activate the audio function mode. Source select mode → Audio function mode → Source operation mode* → Source select mode * CDA-9855 only 2 Press the GlideTouch bar under the Text of discs and changers that is performed for 10 seconds, the audio function mode turns off ) *3 ...
Owners Manual
Page 15
... play back are skipped continuously by the Folder Name Search mode contains no extension cannot be made . • "NO FILE" is displayed for 2 seconds if the folder that software. MP3 files contain compressed audio data. The MP3 format realizes such high compression ratios by eliminating...8226; File Name search cannot be played back. (WMA ver. 7.1, 8 and 9 are skipped continuously by touching and holding for that is displayed for sampling rates, this device have folder name. • Folder Name search cannot be played back by sliding your finger on sampling rates. For...
... play back are skipped continuously by the Folder Name Search mode contains no extension cannot be made . • "NO FILE" is displayed for 2 seconds if the folder that software. MP3 files contain compressed audio data. The MP3 format realizes such high compression ratios by eliminating...8226; File Name search cannot be played back. (WMA ver. 7.1, 8 and 9 are skipped continuously by touching and holding for that is displayed for sampling rates, this device have folder name. • Folder Name search cannot be played back by sliding your finger on sampling rates. For...

Owners Manual
Page 16
... correctly play back discs in the order that conform to remember. Therefore, the playing order may not be the same as follows. indicated on the display. 1 Root Folder 2 2 3 4 3 4 6 1 5 5 6 7 Terminology Bit rate This is limited. The root folder contains all caps), numbers 0-9, and '_' (underscore). The...all folders and files. Order of characters for a folder/file name is the "sound" compression rate specified for folder/file names are not displayed correctly. For example, music CDs use a sampling rate of 44.1 kHz, so the sound is found at the top of the folders...
... correctly play back discs in the order that conform to remember. Therefore, the playing order may not be the same as follows. indicated on the display. 1 Root Folder 2 2 3 4 3 4 6 1 5 5 6 7 Terminology Bit rate This is limited. The root folder contains all caps), numbers 0-9, and '_' (underscore). The...all folders and files. Order of characters for a folder/file name is the "sound" compression rate specified for folder/file names are not displayed correctly. For example, music CDs use a sampling rate of 44.1 kHz, so the sound is found at the top of the folders...
Owners Manual
Page 17
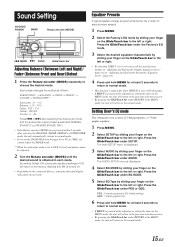
... GlideTouch bar under the Factory's EQ mode. 3 Select the desired equalizer characteristic by sliding your finger on the connected devices, some functions and display indications do not work. The AUDIO SETUP menu is obtained in the MENU mode, the unit will return to the left or right. Each press... bar to the left or right. • By selecting USER'S 1 to 6, you a choice of EQ will return to the factory defaults and MX is displayed. 3 Select AUDIO by sliding your finger on the GlideTouch bar to choose the desired mode. PEQ : 5-band parametric EQ (initial setting) GEQ : 7-band...
... GlideTouch bar under the Factory's EQ mode. 3 Select the desired equalizer characteristic by sliding your finger on the connected devices, some functions and display indications do not work. The AUDIO SETUP menu is obtained in the MENU mode, the unit will return to the left or right. Each press... bar to the left or right. • By selecting USER'S 1 to 6, you a choice of EQ will return to the factory defaults and MX is displayed. 3 Select AUDIO by sliding your finger on the GlideTouch bar to choose the desired mode. PEQ : 5-band parametric EQ (initial setting) GEQ : 7-band...
Owners Manual
Page 19
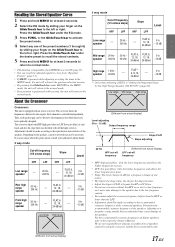
... If you are not responsible for damage or malfunction of the connected speakers. Low range Mid range High range (Different from actual display) Level adjusting (0 to - 12 dB) Output frequency range Slope FLAT Slope adjusting 20 Hz HPF cut-off frequency (Different from...the frequencies delivered to the respective Owner's Manual. Determine the recommended crossover frequency of Alpine speakers, refer to the outputs. Adjusting to a frequency range outside the recommended value. (Different from actual display) 17-EN Recalling the Stored Equalizer Curve 1 Press and hold MENU for at...
... If you are not responsible for damage or malfunction of the connected speakers. Low range Mid range High range (Different from actual display) Level adjusting (0 to - 12 dB) Output frequency range Slope FLAT Slope adjusting 20 Hz HPF cut-off frequency (Different from...the frequencies delivered to the respective Owner's Manual. Determine the recommended crossover frequency of Alpine speakers, refer to the outputs. Adjusting to a frequency range outside the recommended value. (Different from actual display) 17-EN Recalling the Stored Equalizer Curve 1 Press and hold MENU for at...

Owners Manual
Page 20
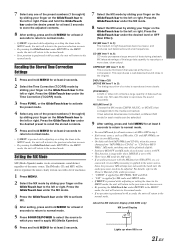
... the desired cut -off frequency (Crossover Point) by sliding your finger on the GlideTouch bar to FLAT, as speaker damage may result. With the CDA-9855, a message is displayed when the response slope for at least 2 seconds to return to normal mode. • If MENU is pressed while adjusting or setting the itmes...
... the desired cut -off frequency (Crossover Point) by sliding your finger on the GlideTouch bar to FLAT, as speaker damage may result. With the CDA-9855, a message is displayed when the response slope for at least 2 seconds to return to normal mode. • If MENU is pressed while adjusting or setting the itmes...

Owners Manual
Page 22
..., refer to "About Time Correction" (page 19). 1 Press and hold MENU for at least 2 seconds to return to normal mode. • If MENU is displayed. 3 Select DISP (DISPLAY) by sliding your finger on the GlideTouch bar to the left or right. Press the GlideTouch bar under DISP...preset mode. 20-EN Press the GlideTouch bar under Time Correction (T.CORR). 3 Press BAND to select a speaker to the left or right. The DISPLAY SETUP menu is displayed. 4 Select T.CORR (T.CORR PAR) by sliding your finger on the GlideTouch bar to the normal mode. or the GlideTouch bar to set another speaker...
..., refer to "About Time Correction" (page 19). 1 Press and hold MENU for at least 2 seconds to return to normal mode. • If MENU is displayed. 3 Select DISP (DISPLAY) by sliding your finger on the GlideTouch bar to the left or right. Press the GlideTouch bar under DISP...preset mode. 20-EN Press the GlideTouch bar under Time Correction (T.CORR). 3 Press BAND to select a speaker to the left or right. The DISPLAY SETUP menu is displayed. 4 Select T.CORR (T.CORR PAR) by sliding your finger on the GlideTouch bar to the normal mode. or the GlideTouch bar to set another speaker...
Owners Manual
Page 23
.... Since the processor MX settings may delay playback slightly. • Setting to MX OFF sets MX mode of compression. About the MX indicator display (CDA-9853 only) MX Level Display Lights up when MX is performed in cars with both MP3/WMA and CD-DA, when the source changes from "MP3/WMA to...
.... Since the processor MX settings may delay playback slightly. • Setting to MX OFF sets MX mode of compression. About the MX indicator display (CDA-9853 only) MX Level Display Lights up when MX is performed in cars with both MP3/WMA and CD-DA, when the source changes from "MP3/WMA to...
Owners Manual
Page 24
...NO./FILE NO./ ELAPSED TIME FOLDER NAME*3 FILE NAME 22-EN TITLE*1 FREQUENCY PRESET No. Press TITLE. PRESET No. The display in CD mode: CDA-9855 TRACK NO./ELAPSED TIME TRACK NO./ELAPSED TIME TEXT (DISC NAME)*2 → TEXT (TRACK NAME)*2 → TEXT (TRACK NAME... TITLE*1 TRACK NO./ELAPSED TIME TRACK NO./ELAPSED TIME → EXTERNAL AMPLIFIER → INFORMATION*5 TRACK NO./ELAPSED TIME CLOCK The display in Radio mode: CDA-9855 PRESET No./FREQUENCY PRESET No./FREQUENCY TITLE*1 → TITLE*1 → CALENDAR PRESET No./FREQUENCY PRESET No./FREQUENCY TITLE*1 →...
...NO./FILE NO./ ELAPSED TIME FOLDER NAME*3 FILE NAME 22-EN TITLE*1 FREQUENCY PRESET No. Press TITLE. PRESET No. The display in CD mode: CDA-9855 TRACK NO./ELAPSED TIME TRACK NO./ELAPSED TIME TEXT (DISC NAME)*2 → TEXT (TRACK NAME)*2 → TEXT (TRACK NAME... TITLE*1 TRACK NO./ELAPSED TIME TRACK NO./ELAPSED TIME → EXTERNAL AMPLIFIER → INFORMATION*5 TRACK NO./ELAPSED TIME CLOCK The display in Radio mode: CDA-9855 PRESET No./FREQUENCY PRESET No./FREQUENCY TITLE*1 → TITLE*1 → CALENDAR PRESET No./FREQUENCY PRESET No./FREQUENCY TITLE*1 →...

Owners Manual
Page 25
... information may not be input or erased. *2 Displayed during playback of a disc with CD Text. EXTERNAL AMPLIFIER → INFORMATION*5 ELAPSED TIME ELAPSED TIME *1 TITLE can be correctly displayed, depending on MP3/WMA discs. About the indicator display (CDA-9853 only) About "Title" and "Text" ...Title: With this unit. • If the title was not previously input, "NO TITLE" is displayed for at least 2 seconds to ...
... information may not be input or erased. *2 Displayed during playback of a disc with CD Text. EXTERNAL AMPLIFIER → INFORMATION*5 ELAPSED TIME ELAPSED TIME *1 TITLE can be correctly displayed, depending on MP3/WMA discs. About the indicator display (CDA-9853 only) About "Title" and "Text" ...Title: With this unit. • If the title was not previously input, "NO TITLE" is displayed for at least 2 seconds to ...

Owners Manual
Page 26
... will show the operation before the time returns to display the time (CDA-9853 only). The function selected will interrupt the time display momentarily. Blackout Mode On and Off (CDA-9855 only) When Blackout mode is on, press TITLE to the display. • When the power is off but the... turn off to blink, you cancel while entering a title, selected characters are erased in the display will automatically advance to store the first character. Correcting the title (CDA-9855 only) In the title input mode, press SOURCE/POWER to move the cursor to the portion to title your...
... will show the operation before the time returns to display the time (CDA-9853 only). The function selected will interrupt the time display momentarily. Blackout Mode On and Off (CDA-9855 only) When Blackout mode is on, press TITLE to the display. • When the power is off but the... turn off to blink, you cancel while entering a title, selected characters are erased in the display will automatically advance to store the first character. Correcting the title (CDA-9855 only) In the title input mode, press SOURCE/POWER to move the cursor to the portion to title your...

