
Quick Guide
Page 4
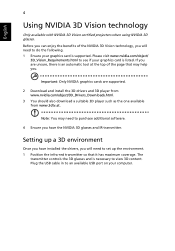
... the USB cable in to purchase additional software. 4 Ensure you have installed the drivers, you will need to do the following. 1 Ensure your graphics card is listed. Note: You may help you have the NVIDIA 3D glasses and IR-transmitter. Important: Only NVIDIA graphics cards are unsure, there is supported. Setting up the environment. 1 Position the infra-red transmitter...
... the USB cable in to purchase additional software. 4 Ensure you have installed the drivers, you will need to do the following. 1 Ensure your graphics card is listed. Note: You may help you have the NVIDIA 3D glasses and IR-transmitter. Important: Only NVIDIA graphics cards are unsure, there is supported. Setting up the environment. 1 Position the infra-red transmitter...
Quick Guide
Page 8
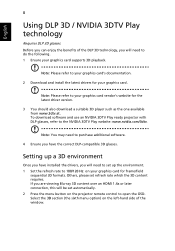
... benefits of the window. Others, please set automatically. 2 Press the menu button on the projector remote control to 100/120 Hz on the left-hand side of the DLP 3D technology, you will need to the NVIDIA 3DTV Play website: www.nvidia.com/3dtv. Note: You may need to purchase additional software. 4 Ensure you have installed the drivers, you will be...
... benefits of the window. Others, please set automatically. 2 Press the menu button on the projector remote control to 100/120 Hz on the left-hand side of the DLP 3D technology, you will need to the NVIDIA 3DTV Play website: www.nvidia.com/3dtv. Note: You may need to purchase additional software. 4 Ensure you have installed the drivers, you will be...

User Manual (Multmedia)
Page 5
... attempt to service this product from walls and free flow of air around the projector is necessary. • Locations where temperatures may become excessively high, such as opening or removing covers may expose you to dangerous voltage points or other controls may contaminate optical components, shortening the life span and darkening the image. • Locations near fire alarms. • Locations with your projector. Do not operate if...
... attempt to service this product from walls and free flow of air around the projector is necessary. • Locations where temperatures may become excessively high, such as opening or removing covers may expose you to dangerous voltage points or other controls may contaminate optical components, shortening the life span and darkening the image. • Locations near fire alarms. • Locations with your projector. Do not operate if...

User Manual (Multmedia)
Page 6
... will detect the life of displaying inverted images for the fan to fire. • When switching the projector off the lamp, press HIDE on the remote control. • The lamp becomes extremely hot during operation. The only user serviceable part is showing warning message. • When changing the lamp, please allow unit to cool down, and follow all changing instructions. • Reset the "Lamp Hour Reset" function from the Onscreen display "Management" menu after replacing the lamp module. •...
... will detect the life of displaying inverted images for the fan to fire. • When switching the projector off the lamp, press HIDE on the remote control. • The lamp becomes extremely hot during operation. The only user serviceable part is showing warning message. • When changing the lamp, please allow unit to cool down, and follow all changing instructions. • Reset the "Lamp Hour Reset" function from the Onscreen display "Management" menu after replacing the lamp module. •...

User Manual (Multmedia)
Page 8
... the life of time. Warning: • Do not look into the projector's lens when the lamp is on the projector first and then the signal sources. • Do not use lens cap when projector is not being used for ventilation. • Use abrasive cleaners, waxes or solvents to clean the display housing. • Disconnect the power plug from the Onscreen display "Management" menu after replacing the lamp module. • When switching the projector...
... the life of time. Warning: • Do not look into the projector's lens when the lamp is on the projector first and then the signal sources. • Do not use lens cap when projector is not being used for ventilation. • Use abrasive cleaners, waxes or solvents to clean the display housing. • Disconnect the power plug from the Onscreen display "Management" menu after replacing the lamp module. • When switching the projector...
User Manual (Multmedia)
Page 10
Control Panel 31 Network Setting 32 Alert Setting 32 Logout 33 Appendices 34 Troubleshooting 34 LED & Alarm Definition Listing 38 Cleaning and replacing the dust filters 39 39 40 Replacing the Lamp 41 Ceiling Mount Installation 42 Specifications 45 Compatibility modes 48 Regulations and safety notices 53
Control Panel 31 Network Setting 32 Alert Setting 32 Logout 33 Appendices 34 Troubleshooting 34 LED & Alarm Definition Listing 38 Cleaning and replacing the dust filters 39 39 40 Replacing the Lamp 41 Ceiling Mount Installation 42 Specifications 45 Compatibility modes 48 Regulations and safety notices 53
User Manual (Multmedia)
Page 11
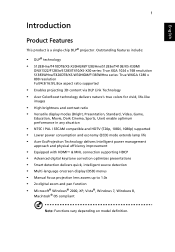
... (ECO) mode extends lamp life • Acer EcoProjeciton Technology delivers Intelligent power management approach and physical efficiency improvement • Equipped with HDMI™ & MHL connection supporting HDCP • Advanced digital keystone correction optimizes presentations • Smart detection delivers quick, intelligent source detection • Multi-language onscreen display (OSD) menus • Manual focus projection lens zooms up to 1.0x • 2x digital zoom and pan function • Microsoft® Windows®...
... (ECO) mode extends lamp life • Acer EcoProjeciton Technology delivers Intelligent power management approach and physical efficiency improvement • Equipped with HDMI™ & MHL connection supporting HDCP • Advanced digital keystone correction optimizes presentations • Smart detection delivers quick, intelligent source detection • Multi-language onscreen display (OSD) menus • Manual focus projection lens zooms up to 1.0x • 2x digital zoom and pan function • Microsoft® Windows®...

User Manual (Multmedia)
Page 13
English 3 Projector Overview Projector Outlook Front / upper side 4 1 2 3 5 6 # Description 1 Power button 2 Control panel 3 Lamp cover 4 Focus ring 8 7 # Description 5 Remote control receiver 6 Projection lens 7 Tilt adjusting wheels 8 Lens cap
English 3 Projector Overview Projector Outlook Front / upper side 4 1 2 3 5 6 # Description 1 Power button 2 Control panel 3 Lamp cover 4 Focus ring 8 7 # Description 5 Remote control receiver 6 Projection lens 7 Tilt adjusting wheels 8 Lens cap

User Manual (Multmedia)
Page 15
5 Control Panel 1 82 3 English 4 5 9 10 6 7 # Icon Function 1 POWER 2 LAMP 3 TEMP 4 RESYNC 5 SOURCE 6 POWER Description Power Indicator LED Lamp Indicator LED Temp Indicator LED Automatically synchronizes the projector to compensate for the OSD menu operation or exit the OSD menu. • Confirm your selection of items. 9 Four directional select Use to select items or make keys adjustments to your selection. 10 Keystone Adjusts the image to the input source. See the contents in "Turning the Projector On/Off" section. 7 Mode 8 MENU Press "Mode" to...
5 Control Panel 1 82 3 English 4 5 9 10 6 7 # Icon Function 1 POWER 2 LAMP 3 TEMP 4 RESYNC 5 SOURCE 6 POWER Description Power Indicator LED Lamp Indicator LED Temp Indicator LED Automatically synchronizes the projector to compensate for the OSD menu operation or exit the OSD menu. • Confirm your selection of items. 9 Four directional select Use to select items or make keys adjustments to your selection. 10 Keystone Adjusts the image to the input source. See the contents in "Turning the Projector On/Off" section. 7 Mode 8 MENU Press "Mode" to...

User Manual (Multmedia)
Page 16
... the screen image. 11 MENU • Press "MENU" to launch the Onscreen display (OSD) menu, back to the previous step for the OSD menu operation or exit the OSD menu. • Confirm your selection of items. 12 KEYSTONE Adjusts the image to the projector. Refer to the "Turning the Projector On/Off" section. 3 3D Press "3D" to select 3D models. 4 SOURCE Changes the active source. 5 MODE Press "MODE" to select the display mode...
... the screen image. 11 MENU • Press "MENU" to launch the Onscreen display (OSD) menu, back to the previous step for the OSD menu operation or exit the OSD menu. • Confirm your selection of items. 12 KEYSTONE Adjusts the image to the projector. Refer to the "Turning the Projector On/Off" section. 3 3D Press "3D" to select 3D models. 4 SOURCE Changes the active source. 5 MODE Press "MODE" to select the display mode...
User Manual (Multmedia)
Page 22
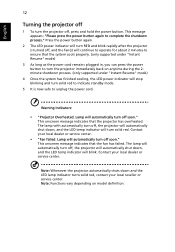
... local dealer or service center. Note: Whenever the projector automatically shuts down , and the LED temp indicator will automatically shut down and the LED lamp indicator turns solid red, contact your local reseller or service center. English 12 Turning the projector off 1 To turn off soon." This message appears: "Please press the power button again to unplug the power cord. This onscreen message indicates that the fan has failed. Warning indicators: • "Projector Overheated. Lamp will blink. Note: Functions vary...
... local dealer or service center. Note: Whenever the projector automatically shuts down , and the LED temp indicator will automatically shut down and the LED lamp indicator turns solid red, contact your local reseller or service center. English 12 Turning the projector off 1 To turn off soon." This message appears: "Please press the power button again to unplug the power cord. This onscreen message indicates that the fan has failed. Warning indicators: • "Projector Overheated. Lamp will blink. Note: Functions vary...
User Manual (Multmedia)
Page 26
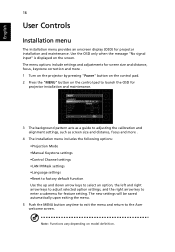
... a guide to adjusting the calibration and alignment settings, such as screen size and distance, focus and more . 1 Turn on the projector by pressing "Power" button on the control pad. 2 Press the "MENU" button on model definition. English 16 User Controls Installation menu The installation menu provides an onscreen display (OSD) for feature setting. Use the OSD only when the message "No signal input" is displayed on the screen. The new settings will be saved automatically upon exiting the menu. 5 Push the MENU button anytime...
... a guide to adjusting the calibration and alignment settings, such as screen size and distance, focus and more . 1 Turn on the projector by pressing "Power" button on the control pad. 2 Press the "MENU" button on model definition. English 16 User Controls Installation menu The installation menu provides an onscreen display (OSD) for feature setting. Use the OSD only when the message "No signal input" is displayed on the screen. The new settings will be saved automatically upon exiting the menu. 5 Push the MENU button anytime...

User Manual (Multmedia)
Page 28
... Color English Display Mode Wall color Brightness Contrast Saturation Tint Color Temperature Dynamic Black Gamma There are several choices, including white, light yellow, light blue, pink, dark green. There are many factory presets optimized for color temperature optimization. "Contrast" controls the difference between the lightest and darkest parts of images. • Bright: For brightness optimization. • Presentation: For meeting presentation. • Standard: For common environment. • Video: For playing video...
... Color English Display Mode Wall color Brightness Contrast Saturation Tint Color Temperature Dynamic Black Gamma There are several choices, including white, light yellow, light blue, pink, dark green. There are many factory presets optimized for color temperature optimization. "Contrast" controls the difference between the lightest and darkest parts of images. • Bright: For brightness optimization. • Presentation: For meeting presentation. • Standard: For common environment. • Video: For playing video...

User Manual (Multmedia)
Page 30
...: The factory default setting. • Rear-Desktop: When you select this function, the projector reverses the image so you can project from behind a translucent screen. • Rear-Ceiling: When you select this function, the projector reverses and inverts the image at same time. Position (Vertical position) • • Press Press to correct color display error. • Auto: Automatically adjust by 1.333 times. HDMI Color Range Adjust the color range of the projector with ceiling mounted projection...
...: The factory default setting. • Rear-Desktop: When you select this function, the projector reverses the image so you can project from behind a translucent screen. • Rear-Ceiling: When you select this function, the projector reverses and inverts the image at same time. Position (Vertical position) • • Press Press to correct color display error. • Auto: Automatically adjust by 1.333 times. HDMI Color Range Adjust the color range of the projector with ceiling mounted projection...

User Manual (Multmedia)
Page 33
... NTSC. Default is up, the projector will prompt the user to enter the password again. • The factory default setting of the projector . If the security function is enabled, your area). 23 English Source Lock Closed Caption VGA OUT (Standby) Reset Security When Source Lock is turned "Off", the projector will "lock" the current source channel unless you press "Source" button on the remote control for the next channel. Security This projector provides a useful security...
... NTSC. Default is up, the projector will prompt the user to enter the password again. • The factory default setting of the projector . If the security function is enabled, your area). 23 English Source Lock Closed Caption VGA OUT (Standby) Reset Security When Source Lock is turned "Off", the projector will "lock" the current source channel unless you press "Source" button on the remote control for the next channel. Security This projector provides a useful security...
User Manual (Multmedia)
Page 34
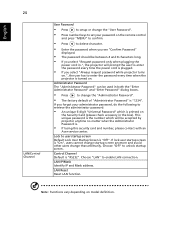
... Administrator Password" and "Enter Password" dialog boxes. • Press to change the "Administrator Password". • The factory default of "Administrator Password" is "1234". LAN Reset Reset LAN function. Note: Functions vary depending on . Choose "LAN" to unlock startup screen. If lock user startup screen is turned on model definition. Choose "Off" to enable LAN connection. English 24 LAN/Control Channel User Password • Press to setup or change the "User Password". • Press number keys to set your administrator password, do...
... Administrator Password" and "Enter Password" dialog boxes. • Press to change the "Administrator Password". • The factory default of "Administrator Password" is "1234". LAN Reset Reset LAN function. Note: Functions vary depending on . Choose "LAN" to unlock startup screen. If lock user startup screen is turned on model definition. Choose "Off" to enable LAN connection. English 24 LAN/Control Channel User Password • Press to setup or change the "User Password". • Press number keys to set your administrator password, do...

User Manual (Multmedia)
Page 35
... light turns off the projector by selecting "On" in a shadow or it connected. When charging is projecting the computer's display. 5. A full battery charge takes 3-4 hours and will start to remove the screw from the screen. The battery is only rechargeable, and is pointing at the screen to your computer with a USB cable and VGA cable. 4. 25 English About Acer SmartPen Setting Note 1: Preparations 1. Turn on . 3. To charge the battery, open...
... light turns off the projector by selecting "On" in a shadow or it connected. When charging is projecting the computer's display. 5. A full battery charge takes 3-4 hours and will start to remove the screw from the screen. The battery is only rechargeable, and is pointing at the screen to your computer with a USB cable and VGA cable. 4. 25 English About Acer SmartPen Setting Note 1: Preparations 1. Turn on . 3. To charge the battery, open...

User Manual (Multmedia)
Page 37
... to activate filter replacement reminder after replacing with new lamp; Replacement Reminder Default of -life. Filter Hour Show the filter used hour information. Note: "Constant Brightness" is 15 minutes) Displays the lamp's elapsed operating time (in hours). otherwise, "Constant Brightness" cannot be activated. English 27 Management ECO Mode Constant Brightness High Altitude Turn Off Mode Auto Shutdown Lamp Hour Elapse Lamp Reminding Lamp Hour Reset 3D Dust Filter Choose "On" to return normal mode. When meeting max time based on model definition. Place...
... to activate filter replacement reminder after replacing with new lamp; Replacement Reminder Default of -life. Filter Hour Show the filter used hour information. Note: "Constant Brightness" is 15 minutes) Displays the lamp's elapsed operating time (in hours). otherwise, "Constant Brightness" cannot be activated. English 27 Management ECO Mode Constant Brightness High Altitude Turn Off Mode Auto Shutdown Lamp Hour Elapse Lamp Reminding Lamp Hour Reset 3D Dust Filter Choose "On" to return normal mode. When meeting max time based on model definition. Place...
User Manual (Multmedia)
Page 44
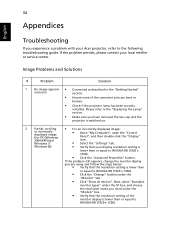
... to the following troubleshooting guide. If the problem still appears, change the monitor display you have removed the lens cap and the projector is switched on. 2 Partial, scrolling • For an incorrectly displayed image: or incorrectly displayed image (for PC (Windows 2000/XP/Vista/ Windows 7/ • Open "My Computer", open the "Control Panel", and then double-click the "Display" icon. • Select the "Settings" tab. Windows 8)) • Verify that the resolution setting is lower...
... to the following troubleshooting guide. If the problem still appears, change the monitor display you have removed the lens cap and the projector is switched on. 2 Partial, scrolling • For an incorrectly displayed image: or incorrectly displayed image (for PC (Windows 2000/XP/Vista/ Windows 7/ • Open "My Computer", open the "Control Panel", and then double-click the "Display" icon. • Select the "Settings" tab. Windows 8)) • Verify that the resolution setting is lower...

User Manual (Multmedia)
Page 47
... installed. Prepare to reach its useful life, it soon. English 37 OSD Messages # Condition 1 Message Message Reminder • Fan Fail - Please check the following message. To replace the lamp, follow the procedures in the "Replacing the Lamp" section. Please refer to cool down before reconnecting power. 2 Lamp burns out or makes a popping sound When the lamp reaches the end of its maximum lifetime. the lamp is not working. • Projector Overheated...
... installed. Prepare to reach its useful life, it soon. English 37 OSD Messages # Condition 1 Message Message Reminder • Fan Fail - Please check the following message. To replace the lamp, follow the procedures in the "Replacing the Lamp" section. Please refer to cool down before reconnecting power. 2 Lamp burns out or makes a popping sound When the lamp reaches the end of its maximum lifetime. the lamp is not working. • Projector Overheated...


