

Quick Start Guide
Page 1
...the monitor base from the packaging and place it . 3 Do not apply pressure to service this unit yourself. OSD functions Press to open the Acer eColor Management OSD and access the scenario modes. Amber indicates standby/power saving mode. / Minus / Plus If the OSD is locked onto the monitor...any of -20° to rain. • The LCD monitor or case is active, press Auto to toggle between the OSD options. English Acer LCD Monitor Quick Start Guide (QSG) Important safety instructions Please read the following circumstances occur: • Monitor-to-PC signal cable is frayed ...
...the monitor base from the packaging and place it . 3 Do not apply pressure to service this unit yourself. OSD functions Press to open the Acer eColor Management OSD and access the scenario modes. Amber indicates standby/power saving mode. / Minus / Plus If the OSD is locked onto the monitor...any of -20° to rain. • The LCD monitor or case is active, press Auto to toggle between the OSD options. English Acer LCD Monitor Quick Start Guide (QSG) Important safety instructions Please read the following circumstances occur: • Monitor-to-PC signal cable is frayed ...

Quick Start Guide
Page 2
... the separation between the device and receiver. • Connect the device into an outlet on , the user is your responsibility to dispose of conformity Hereby, Acer Inc., declares that to comply with the Class B limits may be determined by one or more information abut where you purchased the product. Operation with...
... the separation between the device and receiver. • Connect the device into an outlet on , the user is your responsibility to dispose of conformity Hereby, Acer Inc., declares that to comply with the Class B limits may be determined by one or more information abut where you purchased the product. Operation with...

User Manual
Page 2
... implied, with respect to your unit should include the serial number, model number and purchase information. All correspondence concerning your computer. Acer LCD Monitor User Guide Original Issue: 06/2008 Changes may be made periodically to their respective companies. Such changes will be reproduced,...a retrieval system, or transmitted, in any form or by photocopy, recording or otherwise, without the prior written permission of purchase Acer and the Acer logo are used herein for a particular purpose. The serial number and model number are recorded on the label affixed to the...
... implied, with respect to your unit should include the serial number, model number and purchase information. All correspondence concerning your computer. Acer LCD Monitor User Guide Original Issue: 06/2008 Changes may be made periodically to their respective companies. Such changes will be reproduced,...a retrieval system, or transmitted, in any form or by photocopy, recording or otherwise, without the prior written permission of purchase Acer and the Acer logo are used herein for a particular purpose. The serial number and model number are recorded on the label affixed to the...

User Manual
Page 3
iii Information for a few hours. It may include blemishes of 0.01% or less such as a missing pixel or a pixel lit all warnings and instructions marked on the product. Follow all the time. • Due to the nature of the LCD screen, an afterimage of the fluorescent light, the screen may find slightly uneven brightness on the screen depending on again to wipe the screen and cabinet front and sides. In this document for hours. Keep this case, the screen is displayed for future reference. Cleaning your safety and comfort Safety instructions Read these guidelines when ...
iii Information for a few hours. It may include blemishes of 0.01% or less such as a missing pixel or a pixel lit all warnings and instructions marked on the product. Follow all the time. • Due to the nature of the LCD screen, an afterimage of the fluorescent light, the screen may find slightly uneven brightness on the screen depending on again to wipe the screen and cabinet front and sides. In this document for hours. Keep this case, the screen is displayed for future reference. Cleaning your safety and comfort Safety instructions Read these guidelines when ...

User Manual
Page 4
Warnings • Do not use it under sporting, exercising, or any vibrating environment which will walk on the cord. • If an extension cord is easily accessible and located as close to the equipment operator as they may touch dangerous voltage points or short-out parts that the total This product should never be blocked by placing the product on a bed, sofa, rug or other similar surface. Using electrical power • This product should never be placed near or over a radiator or heat register, or in a built-in a fire or electric shock. If the product falls, it could result ...
Warnings • Do not use it under sporting, exercising, or any vibrating environment which will walk on the cord. • If an extension cord is easily accessible and located as close to the equipment operator as they may touch dangerous voltage points or short-out parts that the total This product should never be blocked by placing the product on a bed, sofa, rug or other similar surface. Using electrical power • This product should never be placed near or over a radiator or heat register, or in a built-in a fire or electric shock. If the product falls, it could result ...

User Manual
Page 5
Contact your electrician for service • the product does not operate normally after following requirements: detachable type, UL listed/CSA certified, type SPT-2, rated 7 A 125 V minimum, VDE approved or its equivalent, 4.6 meters (15 feet) maximum length. Warning! Product servicing Do not attempt to service this product yourself, as opening or removing covers may expose you need to rain or water • the product has been dropped or the case has been damaged • the product exhibits a distinct change in electric shock and/or injury. Make sure the power outlet is equipped...
Contact your electrician for service • the product does not operate normally after following requirements: detachable type, UL listed/CSA certified, type SPT-2, rated 7 A 125 V minimum, VDE approved or its equivalent, 4.6 meters (15 feet) maximum length. Warning! Product servicing Do not attempt to service this product yourself, as opening or removing covers may expose you need to rain or water • the product has been dropped or the case has been damaged • the product exhibits a distinct change in electric shock and/or injury. Make sure the power outlet is equipped...

User Manual
Page 6
... and disposal of used equipment, as grain, dust or metal powders. Switch off your vehicle engine. IT Equipment Recycling Information Acer is strongly committed to this electronic device into the trash when discarding. For more information and help when recycling, please go ...explosion or fire resulting in progress. Observe restrictions on the Waste from Electrical and Electronics Equipment (WEEE) regulations, visit http://global.acer.com/about/sustainability.htm They include below deck on boats, chemical transfer or storage facilities, vehicles using liquefied petroleum gas (such ...
... and disposal of used equipment, as grain, dust or metal powders. Switch off your vehicle engine. IT Equipment Recycling Information Acer is strongly committed to this electronic device into the trash when discarding. For more information and help when recycling, please go ...explosion or fire resulting in progress. Observe restrictions on the Waste from Electrical and Electronics Equipment (WEEE) regulations, visit http://global.acer.com/about/sustainability.htm They include below deck on boats, chemical transfer or storage facilities, vehicles using liquefied petroleum gas (such ...

User Manual
Page 7
...or appear as black or red dots. LCD pixel statement The LCD unit is in front of a computer. ENERGY STAR ® Acer's ENERGY STAR qualified products save money, conserve energy and improve the quality of our environment. More information refers to offer products and services... this product contain mercury and must be recycled or disposed of according to offer our customers products with high-precision manufacturing techniques. Acer is ENERGY STAR? Products that help customers save you money by reducing energy costs and helps protect the environment without sacrificing features ...
...or appear as black or red dots. LCD pixel statement The LCD unit is in front of a computer. ENERGY STAR ® Acer's ENERGY STAR qualified products save money, conserve energy and improve the quality of our environment. More information refers to offer products and services... this product contain mercury and must be recycled or disposed of according to offer our customers products with high-precision manufacturing techniques. Acer is ENERGY STAR? Products that help customers save you money by reducing energy costs and helps protect the environment without sacrificing features ...

User Manual
Page 8
The following tips: • refrain from staying too long in the hands, wrists, arms, shoulders, neck or back: • numbness, or a burning or tingling sensation • aching, soreness or tenderness • pain, swelling or throbbing • stiffness or tightness • coldness or weakness If you have these symptoms, or any light source • minimizing room light by using drapes, shades or blinds • using a footrest, or raising your eyes from the monitor and focusing on how to carpal tunnel syndrome, tendonitis, tenosynovitis or other recurring or persistent discomfort...
The following tips: • refrain from staying too long in the hands, wrists, arms, shoulders, neck or back: • numbness, or a burning or tingling sensation • aching, soreness or tenderness • pain, swelling or throbbing • stiffness or tightness • coldness or weakness If you have these symptoms, or any light source • minimizing room light by using drapes, shades or blinds • using a footrest, or raising your eyes from the monitor and focusing on how to carpal tunnel syndrome, tendonitis, tenosynovitis or other recurring or persistent discomfort...
User Manual
Page 9
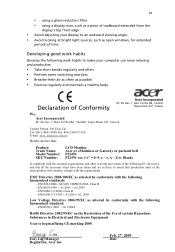
...the following work habits to make your display to begin affixing CE marking 2009. Declaration of Conformity Acer Incorporated 8F, 88, Sec. 1, Hsin Tai Wu Rd., Hsichih Taipei Hsien 221, Taiwan We, Acer Incorporated 8F, 88, Sec. 1, Hsin Tai Wu Rd., Hsichih, Taipei Hsien 221, Taiwan ... Person: Mr. Easy Lai Tel: 886-2-8691-3089 Fax: 886-2-8691-3120 E-mail: easy_lai@acer.com.tw Hereby declare that: Product: Trade Name: Model Number: SKU Number: LCD Monitor Acer or eMachines or Gateway or packard bell P224W P224W xxx ("x" = 0~9, a ~ z, A ~ Z or Blank) Is compliant with the essential...
...the following work habits to make your display to begin affixing CE marking 2009. Declaration of Conformity Acer Incorporated 8F, 88, Sec. 1, Hsin Tai Wu Rd., Hsichih Taipei Hsien 221, Taiwan We, Acer Incorporated 8F, 88, Sec. 1, Hsin Tai Wu Rd., Hsichih, Taipei Hsien 221, Taiwan ... Person: Mr. Easy Lai Tel: 886-2-8691-3089 Fax: 886-2-8691-3120 E-mail: easy_lai@acer.com.tw Hereby declare that: Product: Trade Name: Model Number: SKU Number: LCD Monitor Acer or eMachines or Gateway or packard bell P224W P224W xxx ("x" = 0~9, a ~ z, A ~ Z or Blank) Is compliant with the essential...

User Manual
Page 10
...: Model number: SKU number: Name of responsible party: Address of the FCC Rules. z, or A - z, or A - San Jose, CA 95110 USA Acer Representative 1-254-298-4000 1-254-298-4147 Z or blank) Acer America Corporation 333 West San Carlos St. The following two conditions: (1) This device may not cause harmful interference, and (2) This device... may cause undesired operation. x Federal Communications Commission Declaration of Conformity This device complies with Part 15 of responsible party: Contact person: Tel: Fax: LCD Monitor P224W ("x" = 0 - 9, a -
...: Model number: SKU number: Name of responsible party: Address of the FCC Rules. z, or A - z, or A - San Jose, CA 95110 USA Acer Representative 1-254-298-4000 1-254-298-4147 Z or blank) Acer America Corporation 333 West San Carlos St. The following two conditions: (1) This device may not cause harmful interference, and (2) This device... may cause undesired operation. x Federal Communications Commission Declaration of Conformity This device complies with Part 15 of responsible party: Contact person: Tel: Fax: LCD Monitor P224W ("x" = 0 - 9, a -

User Manual
Page 11
... color display signal cable 5 24-pin color display signal cable 6 19-pin color display signal cable* 6 Standard timing table 7 Installation 8 Users controls 9 Front panel controls 9 Acer eColor Management 10 Operation instructions 10 Features and benefits 10 Adjusting the OSD settings 11 Adjusting the picture quality 11 Adjusting the OSD position 12...
... color display signal cable 5 24-pin color display signal cable 6 19-pin color display signal cable* 6 Standard timing table 7 Installation 8 Users controls 9 Front panel controls 9 Acer eColor Management 10 Operation instructions 10 Features and benefits 10 Adjusting the OSD settings 11 Adjusting the picture quality 11 Adjusting the OSD position 12...

User Manual
Page 13
LCD monitor User guide Quick start guide D-sub cable DVI cable (only dualinput models) AC power cord English 1 Unpacking Please check that the following items are present when you unpack the box, and save the packing materials in case you need to ship or transport the monitor in the future.
LCD monitor User guide Quick start guide D-sub cable DVI cable (only dualinput models) AC power cord English 1 Unpacking Please check that the following items are present when you unpack the box, and save the packing materials in case you need to ship or transport the monitor in the future.

User Manual
Page 14
Carefully place the monitor face-down on a stable surface -- use a cloth to avoid scratching the screen. 2 1 1 Attach the the monitor stand arm to avoid injuring yourself. Note: Take care when performing the installation to the base. 2 Ensure that the base is locked onto the monitor stand arm. English 2 Attaching the base (for selected models) Note: Remove the monitor and monitor base from its packaging.
Carefully place the monitor face-down on a stable surface -- use a cloth to avoid scratching the screen. 2 1 1 Attach the the monitor stand arm to avoid injuring yourself. Note: Take care when performing the installation to the base. 2 Ensure that the base is locked onto the monitor stand arm. English 2 Attaching the base (for selected models) Note: Remove the monitor and monitor base from its packaging.

User Manual
Page 15
Note: Take care when performing the installation to avoid scratching the screen. use a cloth to avoid injuring yourself. Caution: Ensure that all screws are properly tightened before standing the monitor up on a stable surface -- English 3 Attaching the base (for selected models) Note: Remove the monitor and monitor base from its packaging. Carefully place the monitor face-down on the stand, otherwise you risk causing irreparable damage to the monitor. 1 Attach the the arm of the monitor stand to the base. 2 Secure the base to the monitor stand arm by turning the white screw using...
Note: Take care when performing the installation to avoid scratching the screen. use a cloth to avoid injuring yourself. Caution: Ensure that all screws are properly tightened before standing the monitor up on a stable surface -- English 3 Attaching the base (for selected models) Note: Remove the monitor and monitor base from its packaging. Carefully place the monitor face-down on the stand, otherwise you risk causing irreparable damage to the monitor. 1 Attach the the arm of the monitor stand to the base. 2 Secure the base to the monitor stand arm by turning the white screw using...

User Manual
Page 16
Power saving The monitor will be installed. No useradjustment is activated. The cord set consisting of H05VV-F cord and plug rated 10 A/250 V. Mode On Power saving LED light White Amber The power saving mode will be adjusted to 15 degrees up or 5 degrees down. 5° 15° Connecting the power cord • Check first to make sure that allows operation in either 100/120 V AC or 220/240 V AC voltage area. The monitor can adjust the monitor tilt, using both of your hands to hold the edges of the power cord to the AC inlet, and plug the other end into an AC outlet. ...
Power saving The monitor will be installed. No useradjustment is activated. The cord set consisting of H05VV-F cord and plug rated 10 A/250 V. Mode On Power saving LED light White Amber The power saving mode will be adjusted to 15 degrees up or 5 degrees down. 5° 15° Connecting the power cord • Check first to make sure that allows operation in either 100/120 V AC or 220/240 V AC voltage area. The monitor can adjust the monitor tilt, using both of your hands to hold the edges of the power cord to the AC inlet, and plug the other end into an AC outlet. ...

User Manual
Page 17
Display Data Channel (DDC) To make installation easier, so long as your system supports the DDC protocol, the monitor is a communication protocol through which the monitor automatically informs the host system about its capabilities; Connector pin assignment 15-pin color display signal cable 1 5 6 10 11 15 PIN No. for selected models) English Locate the docking device connector on the rear panel and connect it to plug-and-play. The monitor supports the DDC2B standard. Description 1 Red 2 Green 3 Blue 4 Monitor ground 5 DDC-return 6 R-ground 7 G-ground 8 B-ground PIN No. ...
Display Data Channel (DDC) To make installation easier, so long as your system supports the DDC protocol, the monitor is a communication protocol through which the monitor automatically informs the host system about its capabilities; Connector pin assignment 15-pin color display signal cable 1 5 6 10 11 15 PIN No. for selected models) English Locate the docking device connector on the rear panel and connect it to plug-and-play. The monitor supports the DDC2B standard. Description 1 Red 2 Green 3 Blue 4 Monitor ground 5 DDC-return 6 R-ground 7 G-ground 8 B-ground PIN No. ...

User Manual
Page 18
Description 2 TMDS Data2 Shield 4 TMDS Data1+ 6 TMDS Data1- 8 TMDS Data0 Shield 10 TMDS Clock+ 12 TMDS Clock- 14 Reserved (N.C. Description 1 TMDS Data2+ 3 TMDS Data2- 5 TMDS Data1 Shield 7 TMDS Data0+ 9 TMDS Data0- 11 TMDS Clock Shield 13 CEC 15 SCL 17 DDC/CEC Ground 19 Hot Plug Detect PIN No. on device) 16 SDA 18 +5V Power * only for +5 V hsync.vsync) 16 Hot-plug detection 17 TMDS data 0- 18 TMDS data 0+ 19 TMDS data 0/5 shield 20 NC 21 NC 22 TMDS clock shield 23 TMDS clock+ 24 DDC TMDS clock- 19-pin color display signal cable* 1917151311 9 7 5 3 1...
Description 2 TMDS Data2 Shield 4 TMDS Data1+ 6 TMDS Data1- 8 TMDS Data0 Shield 10 TMDS Clock+ 12 TMDS Clock- 14 Reserved (N.C. Description 1 TMDS Data2+ 3 TMDS Data2- 5 TMDS Data1 Shield 7 TMDS Data0+ 9 TMDS Data0- 11 TMDS Clock Shield 13 CEC 15 SCL 17 DDC/CEC Ground 19 Hot Plug Detect PIN No. on device) 16 SDA 18 +5V Power * only for +5 V hsync.vsync) 16 Hot-plug detection 17 TMDS data 0- 18 TMDS data 0+ 19 TMDS data 0/5 shield 20 NC 21 NC 22 TMDS clock shield 23 TMDS clock+ 24 DDC TMDS clock- 19-pin color display signal cable* 1917151311 9 7 5 3 1...

User Manual
Page 19
7 Standard timing table English Mode Resolution 1 640x480 60 Hz 2 VGA 640x480 72 Hz 3 640x480 75 Hz 4 MAC 640x480 66.7 Hz 5 VESA 720x400 70 Hz 6 800x600 56 Hz 7 800x600 60 Hz SVGA 8 800x600 72 Hz 9 800x600 75 Hz 10 MAC 832x624 74.55 Hz 11 1024x768 60 Hz 12 XGA 1024x768 70 Hz 13 1024x768 75 Hz 14 MAC 1152x870 75 Hz 15 VESA 1152x864 75 Hz 16 1280x960 60 Hz 17 1280x1024 60 Hz SXGA 18 1280x1024 75 Hz 19 VESA 1280x720 60 Hz 20 1360x768 60 Hz WXGA 21 1280x800 60 Hz 22 1440x900 60 Hz WXGA+ 23 1440x900 75...
7 Standard timing table English Mode Resolution 1 640x480 60 Hz 2 VGA 640x480 72 Hz 3 640x480 75 Hz 4 MAC 640x480 66.7 Hz 5 VESA 720x400 70 Hz 6 800x600 56 Hz 7 800x600 60 Hz SVGA 8 800x600 72 Hz 9 800x600 75 Hz 10 MAC 832x624 74.55 Hz 11 1024x768 60 Hz 12 XGA 1024x768 70 Hz 13 1024x768 75 Hz 14 MAC 1152x870 75 Hz 15 VESA 1152x864 75 Hz 16 1280x960 60 Hz 17 1280x1024 60 Hz SXGA 18 1280x1024 75 Hz 19 VESA 1280x720 60 Hz 20 1360x768 60 Hz WXGA 21 1280x800 60 Hz 22 1440x900 60 Hz WXGA+ 23 1440x900 75...

User Manual
Page 20
This sequence is very important. 4 If the monitor does not function properly, please refer to the troubleshooting section to the computer. English 8 Installation To install the monitor on your host system, please follow the steps below: Steps 1 Connect the video cable a Make sure both the monitor and computer are switched off . (2) Connect one end of the 24-pin DVI* cable to the back of the monitor and the other end to the computer's port. (3) Connect one end of the 19-pin HDMI* cable to the back of the monitor and the other end to the computer's port. 2 Connect the power cord ...
This sequence is very important. 4 If the monitor does not function properly, please refer to the troubleshooting section to the computer. English 8 Installation To install the monitor on your host system, please follow the steps below: Steps 1 Connect the video cable a Make sure both the monitor and computer are switched off . (2) Connect one end of the 24-pin DVI* cable to the back of the monitor and the other end to the computer's port. (3) Connect one end of the 19-pin HDMI* cable to the back of the monitor and the other end to the computer's port. 2 Connect the power cord ...
