
Quick Guide
Page 3
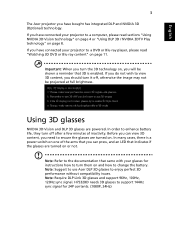
..." on , you have connected your projector to change the battery. Note: Suggest to use Acer DLP 3D glasses to support 144Hz sync signal for instructions how to turn them on . If you will be projected at full brightness. Using 3D glasses NVIDIA 3D Vision and DLP 3D glasses are turned on page 8. Important: When you can press, and an LED that 3D is a power switch on one of...
..." on , you have connected your projector to change the battery. Note: Suggest to use Acer DLP 3D glasses to support 144Hz sync signal for instructions how to turn them on . If you will be projected at full brightness. Using 3D glasses NVIDIA 3D Vision and DLP 3D glasses are turned on page 8. Important: When you can press, and an LED that 3D is a power switch on one of...
Quick Guide
Page 4
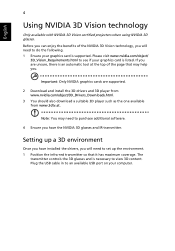
... controls the 3D glasses and is supported. Please visit www.nvidia.com/object/ 3D_Vision_Requirements.html to see if your computer. Plug the USB cable in to do the following. 1 Ensure your graphics card is necessary to set ...view 3D content. English 4 Using NVIDIA 3D Vision technology Only available with NVIDIA 3D Vision certified projectors when using NVIDIA 3D glasses. Setting up the environment. 1 Position the infra-red transmitter so that may need to purchase additional software. 4 Ensure you have installed the drivers, you are supported. 2 Download and install the 3D drivers...
... controls the 3D glasses and is supported. Please visit www.nvidia.com/object/ 3D_Vision_Requirements.html to see if your computer. Plug the USB cable in to do the following. 1 Ensure your graphics card is necessary to set ...view 3D content. English 4 Using NVIDIA 3D Vision technology Only available with NVIDIA 3D Vision certified projectors when using NVIDIA 3D glasses. Setting up the environment. 1 Position the infra-red transmitter so that may need to purchase additional software. 4 Ensure you have installed the drivers, you are supported. 2 Download and install the 3D drivers...
Quick Guide
Page 8
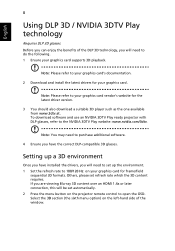
.... To download software and use an NVIDIA 3DTV Play ready projector with DLP glasses, refer to open the OSD. English 8 Using DLP 3D / NVIDIA 3DTV Play technology Requires DLP 3D glasses. Before you can enjoy the benefits of the window. If you will be set automatically. 2 Press the menu button on the left-hand side of the DLP 3D technology, you are viewing Blu-ray...
.... To download software and use an NVIDIA 3DTV Play ready projector with DLP glasses, refer to open the OSD. English 8 Using DLP 3D / NVIDIA 3DTV Play technology Requires DLP 3D glasses. Before you can enjoy the benefits of the window. If you will be set automatically. 2 Press the menu button on the left-hand side of the DLP 3D technology, you are viewing Blu-ray...
Quick Guide
Page 11
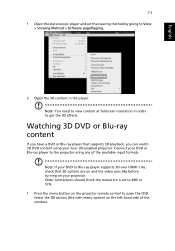
... the menu button on the projector remote control to open the OSD. Note: If your DVD or Blu-ray player supports 3D over HDMI 1.4a, check that supports 3D playback, you have a DVD or Blu-ray player that 3D options are on and the video uses 24p before turning on the left-hand side of the available input formats. Older connections should check the resolution is set the viewing...
... the menu button on the projector remote control to open the OSD. Note: If your DVD or Blu-ray player supports 3D over HDMI 1.4a, check that supports 3D playback, you have a DVD or Blu-ray player that 3D options are on and the video uses 24p before turning on the left-hand side of the available input formats. Older connections should check the resolution is set the viewing...

Instruction Manual
Page 3
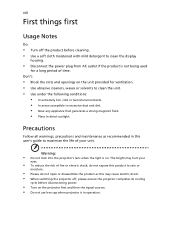
Follow all power cords from the power supplies. Turning the product off before cleaning. Caution for plug as disconnecting device Observe the following guidelines when connecting and disconnecting power to the external power supply unit: • Install the power supply unit before connecting the power cord to the AC power outlet. • Unplug the power cord before removing the power supply unit from the projector. • If the system has multiple sources of the product...
Follow all power cords from the power supplies. Turning the product off before cleaning. Caution for plug as disconnecting device Observe the following guidelines when connecting and disconnecting power to the external power supply unit: • Install the power supply unit before connecting the power cord to the AC power outlet. • Unplug the power cord before removing the power supply unit from the projector. • If the system has multiple sources of the product...

Instruction Manual
Page 5
... the projector's lens when the light is necessary. • Locations where temperatures may become excessively high, such as opening or removing covers may result in damage and will often require extensive work by the operating instructions, since improper adjustment of other controls may expose you to dangerous voltage points or other risks. v Product servicing Do not attempt to service this product from walls and free flow of air...
... the projector's lens when the light is necessary. • Locations where temperatures may become excessively high, such as opening or removing covers may result in damage and will often require extensive work by the operating instructions, since improper adjustment of other controls may expose you to dangerous voltage points or other risks. v Product servicing Do not attempt to service this product from walls and free flow of air...

Instruction Manual
Page 6
... hot. • Clean the air filter frequently if have adjusted. • Do not listen to music at high volumes for the fan to turn off before disconnecting power. • Do not frequently turn off . • Do not touch air outlet grille and bottom plate which may hurt your eyes. • Always open the lens shutter or remove the lens cap when the projector is on...
... hot. • Clean the air filter frequently if have adjusted. • Do not listen to music at high volumes for the fan to turn off before disconnecting power. • Do not frequently turn off . • Do not touch air outlet grille and bottom plate which may hurt your eyes. • Always open the lens shutter or remove the lens cap when the projector is on...
Instruction Manual
Page 8
... shock. • When switching the projector off the product before disconnecting power. • Turn on the projector first and then the signal sources. • Do not use lens cap when projector is on the unit provided for a long period of your unit. Warning: • Do not look into the projector's lens when the light is in this product to maximize the life of time. Don't: •...
... shock. • When switching the projector off the product before disconnecting power. • Turn on the projector first and then the signal sources. • Do not use lens cap when projector is on the unit provided for a long period of your unit. Warning: • Do not look into the projector's lens when the light is in this product to maximize the life of time. Don't: •...
Instruction Manual
Page 9
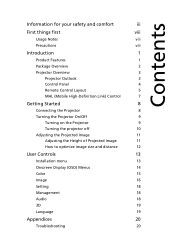
... Product Features 1 Package Overview 2 Projector Overview 3 Projector Outlook 3 Control Panel 4 Remote Control Layout 5 MHL (Mobile High-Definition Link) Control 7 Getting Started 8 Connecting the Projector 8 Turning the Projector On/Off 9 Turning on the Projector 9 Turning the projector off 10 Adjusting the Projected Image 11 Adjusting the Height of Projected Image 11 How to optimize image size and distance 12 User Controls 13 Installation menu 13 Onscreen Display (OSD) Menus 14 Color 15 Image 16 Setting 18 Management 18 Audio 18 3D 19 Language...
... Product Features 1 Package Overview 2 Projector Overview 3 Projector Outlook 3 Control Panel 4 Remote Control Layout 5 MHL (Mobile High-Definition Link) Control 7 Getting Started 8 Connecting the Projector 8 Turning the Projector On/Off 9 Turning on the Projector 9 Turning the projector off 10 Adjusting the Projected Image 11 Adjusting the Height of Projected Image 11 How to optimize image size and distance 12 User Controls 13 Installation menu 13 Onscreen Display (OSD) Menus 14 Color 15 Image 16 Setting 18 Management 18 Audio 18 3D 19 Language...
Instruction Manual
Page 11
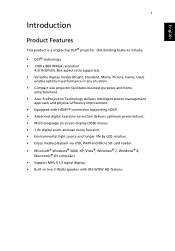
... size projector facilitates business purposes and home entertainment. • Acer EcoProjeciton Technology delivers Intelligent power management approach and physical efficiency improvement. • Equipped with HDMI™ connection supporting HDCP. • Advanced digital keystone correction delivers optimum presentations. • Multi-language on screen display (OSD) menus. • 1.0x digital zoom and pan move function. • Environmental light source and longer life by LED solution. • Enjoy media playback via USB...
... size projector facilitates business purposes and home entertainment. • Acer EcoProjeciton Technology delivers Intelligent power management approach and physical efficiency improvement. • Equipped with HDMI™ connection supporting HDCP. • Advanced digital keystone correction delivers optimum presentations. • Multi-language on screen display (OSD) menus. • 1.0x digital zoom and pan move function. • Environmental light source and longer life by LED solution. • Enjoy media playback via USB...

Instruction Manual
Page 15
... display the image and volume. Press "HIDE" to hide the image and volume, press again to the "Turning the Projector On/Off" section. 4 HIDE 5 MODE 6 SOURCE 7 RATIO 8 9 10 11 MEDIA HOME MEDIA SETUP MENU 12 13 14 BACK 15 ENTER Hide Mode Source Momentarily turns off the video. Menu Volume down , left, right buttons to select items or make select keys adjustments to increase the volume. English 5 Remote Control...
... display the image and volume. Press "HIDE" to hide the image and volume, press again to the "Turning the Projector On/Off" section. 4 HIDE 5 MODE 6 SOURCE 7 RATIO 8 9 10 11 MEDIA HOME MEDIA SETUP MENU 12 13 14 BACK 15 ENTER Hide Mode Source Momentarily turns off the video. Menu Volume down , left, right buttons to select items or make select keys adjustments to increase the volume. English 5 Remote Control...
Instruction Manual
Page 19
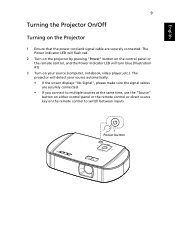
The projector will turn blue.(Illustration #1) 3 Turn on your source automatically. • If the screen displays "No Signal", please make sure the signal cables are securely connected. English 9 Turning the Projector On/Off Turning on the Projector 1 Ensure that the power cord and signal cable are securely connected. • If you connect to multiple sources at the same time, use the "Source" button on either control panel or the remote control or direct source key on the remote control to switch between inputs. 1 Power button The Power indicator LED will flash red. 2 Turn on...
The projector will turn blue.(Illustration #1) 3 Turn on your source automatically. • If the screen displays "No Signal", please make sure the signal cables are securely connected. English 9 Turning the Projector On/Off Turning on the Projector 1 Ensure that the power cord and signal cable are securely connected. • If you connect to multiple sources at the same time, use the "Source" button on either control panel or the remote control or direct source key on the remote control to switch between inputs. 1 Power button The Power indicator LED will flash red. 2 Turn on...

Instruction Manual
Page 22
...projector is 1.50 m from the screen. Screen size 46.4" A 1.50 m Desired Distance Height: 63 cm C Screen size Top Desired Distance (m) (Min zoom) Diagonal (inch) W (cm) x H (cm) From base to find the optimal image sizes achievable when the projector is possible for image sizes 46.4". English 12 How to optimize image size and distance Consult the table below figure, the space of image....0 172 x 108 108 Zoom Ratio: 1.0x Note: Remind as below to top of 63 cm height is required when located at a desired distance from the screen, good image quality is positioned at 1.50...
...projector is 1.50 m from the screen. Screen size 46.4" A 1.50 m Desired Distance Height: 63 cm C Screen size Top Desired Distance (m) (Min zoom) Diagonal (inch) W (cm) x H (cm) From base to find the optimal image sizes achievable when the projector is possible for image sizes 46.4". English 12 How to optimize image size and distance Consult the table below figure, the space of image....0 172 x 108 108 Zoom Ratio: 1.0x Note: Remind as below to top of 63 cm height is required when located at a desired distance from the screen, good image quality is positioned at 1.50...

Instruction Manual
Page 23
... settings and adjustments for projector installation and maintenance. 3 The background pattern acts as a guide to adjusting the calibration and alignment settings, such as screen size and distance, focus and more . 1 Turn on the projector by pressing "Power" button on the control pad. 2 Press the "MENU" button on the screen. Note: The OSD screenshot is displayed on the control pad to launch the OSD for screen size and distance, focus, keystone correction and more . English 13 User Controls Installation menu The installation menu...
... settings and adjustments for projector installation and maintenance. 3 The background pattern acts as a guide to adjusting the calibration and alignment settings, such as screen size and distance, focus and more . 1 Turn on the projector by pressing "Power" button on the control pad. 2 Press the "MENU" button on the screen. Note: The OSD screenshot is displayed on the control pad to launch the OSD for screen size and distance, focus, keystone correction and more . English 13 User Controls Installation menu The installation menu...

Instruction Manual
Page 25
at lower color temperatures, the screen looks warmer. Note: "Saturation" and "Tint" functions are several choices, including white, light yellow, light blue, pink, dark green. There are not supported under computer mode or HDMI mode. Adjust a video image from black and white to fully saturated color. • Press to decrease the amount of color in the image. • Press to increase the amount of the picture. "Contrast" controls the difference between the lightest...
at lower color temperatures, the screen looks warmer. Note: "Saturation" and "Tint" functions are several choices, including white, light yellow, light blue, pink, dark green. There are not supported under computer mode or HDMI mode. Adjust a video image from black and white to fully saturated color. • Press to decrease the amount of color in the image. • Press to increase the amount of the picture. "Contrast" controls the difference between the lightest...

Instruction Manual
Page 26
... image down for ceiling-mounted projection. Rear: Reverses the image so you can project from behind a translucent screen. If you can see a vertical flickering bar in by tilting projection. (±40 degrees) Sharpness H. "Frequency" changes the projector's refresh rate to move the image up. Position Frequency The Manual Keystone function is unavailable under Auto Keystone setting to make the necessary adjustments. Auto: Automatically adjusts projection location of your desired aspect ratio. • Auto: Keep...
... image down for ceiling-mounted projection. Rear: Reverses the image so you can project from behind a translucent screen. If you can see a vertical flickering bar in by tilting projection. (±40 degrees) Sharpness H. "Frequency" changes the projector's refresh rate to move the image up. Position Frequency The Manual Keystone function is unavailable under Auto Keystone setting to make the necessary adjustments. Auto: Automatically adjusts projection location of your desired aspect ratio. • Auto: Keep...

Instruction Manual
Page 28
... factory default settings. Management ECO Mode High Altitude Turn Off Mode Auto Shutdown LED Calibration Choose "On" to decrease the volume. Audio Volume Volume Boost SRS Treble Bass Mute Alarm Volume Audio Out • Press • Press to dim the projector LED brightness which will automatically shutdown when there is no signal input after the allocated time. (default is pressed again within 2 minutes. Choose "Off" to play sound...
... factory default settings. Management ECO Mode High Altitude Turn Off Mode Auto Shutdown LED Calibration Choose "On" to decrease the volume. Audio Volume Volume Boost SRS Treble Bass Mute Alarm Volume Audio Out • Press • Press to dim the projector LED brightness which will automatically shutdown when there is no signal input after the allocated time. (default is pressed again within 2 minutes. Choose "Off" to play sound...

Instruction Manual
Page 29
... reminder screen if 3D still enable when power on graphic card 3D application program for DLP 3D). Stereoscopic Player (Trial): http://www.3dtv.at/Downloads/Index_en.aspx - Please adjust setting depended on web page below, - Use the or key to get best match of left/right image sequence to select your purpose. Note: It needs correct settings on projector. If...
... reminder screen if 3D still enable when power on graphic card 3D application program for DLP 3D). Stereoscopic Player (Trial): http://www.3dtv.at/Downloads/Index_en.aspx - Please adjust setting depended on web page below, - Use the or key to get best match of left/right image sequence to select your purpose. Note: It needs correct settings on projector. If...

Instruction Manual
Page 31
... Image Size by Adjusting Distance and Zoom" section for more information. • Change the display color depth settings on your computer. 6 Image has vertical • Use "Frequency" to make it . Refer to the or flickering "Image" section for more information. • Check and reconfigure the display mode of your computer. • Press the toggle output settings. 21 English 3 Partial, scrolling • For an incorrectly displayed image: or incorrectly displayed image (for...
... Image Size by Adjusting Distance and Zoom" section for more information. • Change the display color depth settings on your computer. 6 Image has vertical • Use "Frequency" to make it . Refer to the or flickering "Image" section for more information. • Check and reconfigure the display mode of your computer. • Press the toggle output settings. 21 English 3 Partial, scrolling • For an incorrectly displayed image: or incorrectly displayed image (for...

Instruction Manual
Page 35
... power) Standby < 0.5 W 5 ºC to 40 ºC / 41 ºF to 104 ºF • DC input x1 • USB x 1 • Audio In x1 • HDMI (MHL) x1 • Universal input x1 • Micro SD x1 • Power cord x1 • Remote control x1 • Battery x1 (for remote control) (option) • User's guide (CD-ROM) x1 • User's guide (CD-ROM) x1 (for multi-media and wireless functions) • Quick start guide...
... power) Standby < 0.5 W 5 ºC to 40 ºC / 41 ºF to 104 ºF • DC input x1 • USB x 1 • Audio In x1 • HDMI (MHL) x1 • Universal input x1 • Micro SD x1 • Power cord x1 • Remote control x1 • Battery x1 (for remote control) (option) • User's guide (CD-ROM) x1 • User's guide (CD-ROM) x1 (for multi-media and wireless functions) • Quick start guide...


