User Manual
Page 1
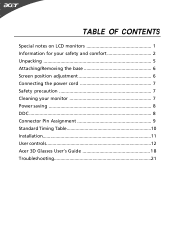
TABLE OF CONTENTS Special notes on LCD monitors 1 Information for your safety and comfort 2 Unpacking 5 Attaching/Removing the base 6 Screen position adjustment 6 Connecting the power cord 7 Safety precaution 7 Cleaning your monitor 7 Power saving 8 DDC 8 Connector Pin Assignment 9 Standard Timing Table 10 Installation 11 User controls 12 Acer 3D Glasses User's Guide 1 8 Troubleshooting 21
TABLE OF CONTENTS Special notes on LCD monitors 1 Information for your safety and comfort 2 Unpacking 5 Attaching/Removing the base 6 Screen position adjustment 6 Connecting the power cord 7 Safety precaution 7 Cleaning your monitor 7 Power saving 8 DDC 8 Connector Pin Assignment 9 Standard Timing Table 10 Installation 11 User controls 12 Acer 3D Glasses User's Guide 1 8 Troubleshooting 21

User Manual
Page 2
... or turning off the Power Switch and then turn it on the desktop pattern you use . In this case, the screen is displayed for hours. 3D Experience: • 3D visual effects require 3D compatible player, 3D content and Acer 3D glasses.
... or turning off the Power Switch and then turn it on the desktop pattern you use . In this case, the screen is displayed for hours. 3D Experience: • 3D visual effects require 3D compatible player, 3D content and Acer 3D glasses.

User Manual
Page 6
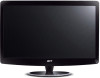
UNPACKING Please check the following items are present when you unpack the box, and save the packing materials in case you will need to ship or transport the monitor in future. • LCD Monitor • 3D glasses • AC Power Cord • D-Sub Cable (Optional) • HDMI Cabel (Optional) • Audio Cable (Optional) • User Manual • Quick Start Guide EN-5
UNPACKING Please check the following items are present when you unpack the box, and save the packing materials in case you will need to ship or transport the monitor in future. • LCD Monitor • 3D glasses • AC Power Cord • D-Sub Cable (Optional) • HDMI Cabel (Optional) • Audio Cable (Optional) • User Manual • Quick Start Guide EN-5

User Manual
Page 16
Adjusting the OSD 3D Notification Off 1 Press the MENU key to adjust. EN-15 Then navigate to the feature you wish to bring up the OSD. 2 Using the directional keys, select OSD from the on screen display.
Adjusting the OSD 3D Notification Off 1 Press the MENU key to adjust. EN-15 Then navigate to the feature you wish to bring up the OSD. 2 Using the directional keys, select OSD from the on screen display.

User Manual
Page 19
...LED lights up. To turn on the 3D glasses: • Press the power button located on the left side of the frame. Recommended viewing zone • Horizontal: 20 to 160º Vertical: 20 to your home with the Acer 3D glasses. 3D content and adequate PC/Player settings are ...necessary for displaying correctly. Acer 3D Glasses High-speed HDMI Cabel • It is important to use a high-speed HDMI™ cable to...
...LED lights up. To turn on the 3D glasses: • Press the power button located on the left side of the frame. Recommended viewing zone • Horizontal: 20 to 160º Vertical: 20 to your home with the Acer 3D glasses. 3D content and adequate PC/Player settings are ...necessary for displaying correctly. Acer 3D Glasses High-speed HDMI Cabel • It is important to use a high-speed HDMI™ cable to...

User Manual
Page 20
EN-19 Viewing 3D content • Connect the Acer 3D Monitor to your Blu-ray player with a High-speed HDMI™ cable and attach the power cable. • Turn on the monitor and Blu-ray player*. • On the Acer 3D monitor, press Input to set the HDMI™ source. • Play the 3D title on the Blu-ray player. • Turn on the 3D glasses*.
EN-19 Viewing 3D content • Connect the Acer 3D Monitor to your Blu-ray player with a High-speed HDMI™ cable and attach the power cable. • Turn on the monitor and Blu-ray player*. • On the Acer 3D monitor, press Input to set the HDMI™ source. • Play the 3D title on the Blu-ray player. • Turn on the 3D glasses*.

User Manual
Page 21
... face outwards. EN-20 You should pull out the current nosepiece horizontally and insert the one that fits you a comfortable fit. Battery indicator • The 3D glasses have power for 5 second, then the 3D glasses will flash 4 times consecutively every 1 minute and till the battery life is ended. Changing the nosepiece •...
... face outwards. EN-20 You should pull out the current nosepiece horizontally and insert the one that fits you a comfortable fit. Battery indicator • The 3D glasses have power for 5 second, then the 3D glasses will flash 4 times consecutively every 1 minute and till the battery life is ended. Changing the nosepiece •...

User Manual
Page 23
If necessary, adjust your viewing position. · Select "Auto" from the OSD to reconnect the Glasses. · Ensure the battery is sufficiently charged. Ensure the 3D glasses are switched ON. EN-22 (HDMI Mode) Problems Current Status Monitor LED ON No 3D effect After checking the items above Glasses not Monitor LED ON working Remedy · Ensure the video playback device or game console has 3D mode turned ON. Ensure the content supports 3D.
If necessary, adjust your viewing position. · Select "Auto" from the OSD to reconnect the Glasses. · Ensure the battery is sufficiently charged. Ensure the 3D glasses are switched ON. EN-22 (HDMI Mode) Problems Current Status Monitor LED ON No 3D effect After checking the items above Glasses not Monitor LED ON working Remedy · Ensure the video playback device or game console has 3D mode turned ON. Ensure the content supports 3D.

