User Manual
Page 3
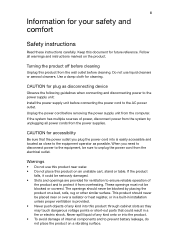
... is easily accessible and located as close to the equipment operator as disconnecting device Observe the following guidelines when connecting and disconnecting power to the power supply unit: Install the power supply unit before cleaning. Follow all power cords from the computer. Turning the product off before removing the power supply unit from the power supplies. Keep this product from the electrical outlet. CAUTION for plug as possible. Use a damp...
... is easily accessible and located as close to the equipment operator as disconnecting device Observe the following guidelines when connecting and disconnecting power to the power supply unit: Install the power supply unit before cleaning. Follow all power cords from the computer. Turning the product off before removing the power supply unit from the power supplies. Keep this product from the electrical outlet. CAUTION for plug as possible. Use a damp...
User Manual
Page 9
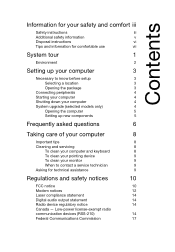
... information v Disposal instructions vi Tips and information for comfortable use vii System tour 1 Environment 2 Setting up your computer 3 Necessary to know before setup 3 Selecting a location 3 Opening the package 3 Connecting peripherals 4 Starting your computer 4 Shutting down your computer 4 System upgrade (selected models only) 4 Opening the computer 5 Setting up new components 5 Frequently asked questions 6 Taking care of your computer 8 Important tips 8 Cleaning and servicing 8 To clean...
... information v Disposal instructions vi Tips and information for comfortable use vii System tour 1 Environment 2 Setting up your computer 3 Necessary to know before setup 3 Selecting a location 3 Opening the package 3 Connecting peripherals 4 Starting your computer 4 Shutting down your computer 4 System upgrade (selected models only) 4 Opening the computer 5 Setting up new components 5 Frequently asked questions 6 Taking care of your computer 8 Important tips 8 Cleaning and servicing 8 To clean...
User Manual
Page 11
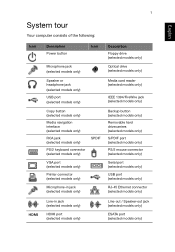
... keyboard connector (selected models only) SPDIF VGA port (selected models only) Printer connector (selected models only) Microphone-in jack (selected models only) Description Floppy drive (selected models only) Optical drive (selected models only) Media card reader (selected models only) IEEE 1394/FireWire jack (selected models only) Backup button (selected models only) Removable hard drivecarriers (selected models only) S/PDIF port (selected models only) PS/2 mouse connector (selected models only) Serial port (selected models only) USB port (selected models only) RJ-45 Ethernet connector...
... keyboard connector (selected models only) SPDIF VGA port (selected models only) Printer connector (selected models only) Microphone-in jack (selected models only) Description Floppy drive (selected models only) Optical drive (selected models only) Media card reader (selected models only) IEEE 1394/FireWire jack (selected models only) Backup button (selected models only) Removable hard drivecarriers (selected models only) S/PDIF port (selected models only) PS/2 mouse connector (selected models only) Serial port (selected models only) USB port (selected models only) RJ-45 Ethernet connector...
User Manual
Page 14
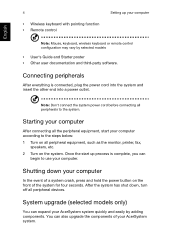
..., speakers, etc. 2 Turn on the front of the system for four seconds. Once the start your computer according to use your AcerSystem system. System upgrade (selected models only) You can also upgrade the components of a system crash, press and hold the power button on the system. After the system has shut down your computer Note: Mouse, keyboard, wireless keyboard or remote control configuration may vary by adding...
..., speakers, etc. 2 Turn on the front of the system for four seconds. Once the start your computer according to use your AcerSystem system. System upgrade (selected models only) You can also upgrade the components of a system crash, press and hold the power button on the system. After the system has shut down your computer Note: Mouse, keyboard, wireless keyboard or remote control configuration may vary by adding...
User Manual
Page 15
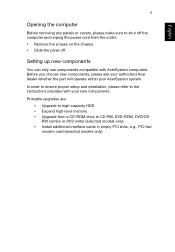
... AcerSystem computers. Setting up new components You can only use components compatible with your AcerSystem system. English 5 Opening the computer Before removing any panels or covers, please make sure to shut off the computer and unplug the power cord from a CD-ROM drive to CD-RW, DVD-ROM, DVD/CDRW combo or DVD writer (selected models only) • Install additional interface cards in empty PCI slots, e.g., PCI fax/ modem card (selected models only)
... AcerSystem computers. Setting up new components You can only use components compatible with your AcerSystem system. English 5 Opening the computer Before removing any panels or covers, please make sure to shut off the computer and unplug the power cord from a CD-ROM drive to CD-RW, DVD-ROM, DVD/CDRW combo or DVD writer (selected models only) • Install additional interface cards in empty PCI slots, e.g., PCI fax/ modem card (selected models only)
User Manual
Page 16
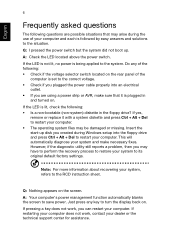
Do any key to turn the display back on. However, if the diagnostic utility still reports a problem, then you created during the use of the computer is set to restart your system and make sure that may arise during Windows setup into an ...LED is not lit, no power is plugged in the floppy drive? Insert the start-up . This will automatically diagnose your computer. • The operating system files may be damaged or missing. Just press any of the following: • Check if the voltage selector switch located on the rear panel of your computer. If yes, remove or replace...
Do any key to turn the display back on. However, if the diagnostic utility still reports a problem, then you created during the use of the computer is set to restart your system and make sure that may arise during Windows setup into an ...LED is not lit, no power is plugged in the floppy drive? Insert the start-up . This will automatically diagnose your computer. • The operating system files may be damaged or missing. Just press any of the following: • Check if the voltage selector switch located on the rear panel of your computer. If yes, remove or replace...
User Manual
Page 17
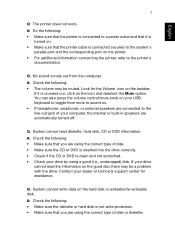
... your computer, the internal or built-in speakers are automatically turned off. Contact your drive cannot read diskette, hard disk, CD or DVD information. If it is turned on. • Make sure that the printer cable is connected securely to the line-out jack of your drive by using the correct type of disk. • Make sure the CD or DVD is inserted into the drive correctly. •...
... your computer, the internal or built-in speakers are automatically turned off. Contact your drive cannot read diskette, hard disk, CD or DVD information. If it is turned on. • Make sure that the printer cable is connected securely to the line-out jack of your drive by using the correct type of disk. • Make sure the CD or DVD is inserted into the drive correctly. •...
User Manual
Page 19
... to replace or upgrade any of an optical mouse, refer to the documentation that came with your monitor. You may also access the Web site (http://www.acer.com) for maintenance instructions. When to contact a service technician • If you dropped and damaged the computer • If liquid has been spilled into the computer • If the computer is not operating...
... to replace or upgrade any of an optical mouse, refer to the documentation that came with your monitor. You may also access the Web site (http://www.acer.com) for maintenance instructions. When to contact a service technician • If you dropped and damaged the computer • If liquid has been spilled into the computer • If the computer is not operating...
User Manual
Page 23
... continue to support pulse dialing. 7 Use of pulse dialing, when this equipment is connected to the same line as other equipment, may give rise to the same line. 9 Under power failure conditions this appliance may also cause a false answer condition. The associated equipment shall be set to operate within the following limits for compliance with Telecom's Specifications: a There...
... continue to support pulse dialing. 7 Use of pulse dialing, when this equipment is connected to the same line as other equipment, may give rise to the same line. 9 Under power failure conditions this appliance may also cause a false answer condition. The associated equipment shall be set to operate within the following limits for compliance with Telecom's Specifications: a There...
User Manual (Windows 8.1)
Page 3
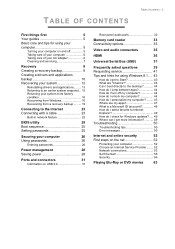
...your system to its factory condition 16 Recovering from Windows 16 Recovering from a recovery backup ......... 19 Connecting to the Internet 23 Connecting with a cable 23 Built-in network feature 23 BIOS utility 25 Boot sequence 25 Setting passwords 25 Securing your computer 26 Using passwords 26 Entering passwords 26 Power management 28 Saving power 28 Ports and connectors 31 Information on USB 3.0 31 Rear panel audio ports 32 Memory card reader 33 Connectivity options 33 Video and audio connectors 35 HDMI 36 Universal Serial Bus (USB) 37 Frequently...
...your system to its factory condition 16 Recovering from Windows 16 Recovering from a recovery backup ......... 19 Connecting to the Internet 23 Connecting with a cable 23 Built-in network feature 23 BIOS utility 25 Boot sequence 25 Setting passwords 25 Securing your computer 26 Using passwords 26 Entering passwords 26 Power management 28 Saving power 28 Ports and connectors 31 Information on USB 3.0 31 Rear panel audio ports 32 Memory card reader 33 Connectivity options 33 Video and audio connectors 35 HDMI 36 Universal Serial Bus (USB) 37 Frequently...
User Manual (Windows 8.1)
Page 5
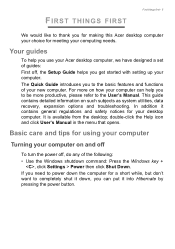
... following: • Use the Windows shutdown command: Press the Windows key + , click Settings > Power then click Shut Down. This guide contains detailed information on how your computer can put it into Hibernate by pressing the power button. double-click the Help icon and click User's Manual in the menu that opens. If you need to power down , you can help you use your Acer desktop computer, we have...
... following: • Use the Windows shutdown command: Press the Windows key + , click Settings > Power then click Shut Down. This guide contains detailed information on how your computer can put it into Hibernate by pressing the power button. double-click the Help icon and click User's Manual in the menu that opens. If you need to power down , you can help you use your Acer desktop computer, we have...
User Manual (Windows 8.1)
Page 15
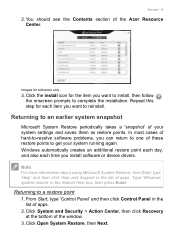
... and Support in the list of apps. 2. From Start, type 'Control Panel' and then click Control Panel in the list of your system running again. Click the install icon for the item you install software or device drivers. Returning to an earlier system snapshot Microsoft System Restore periodically takes a 'snapshot' of apps. Click System and Security > Action Center, then click Recovery at the bottom of the Acer Resource Center. Returning...
... and Support in the list of apps. 2. From Start, type 'Control Panel' and then click Control Panel in the list of your system running again. Click the install icon for the item you install software or device drivers. Returning to an earlier system snapshot Microsoft System Restore periodically takes a 'snapshot' of apps. Click System and Security > Action Center, then click Recovery at the bottom of the Acer Resource Center. Returning...
User Manual (Windows 8.1)
Page 18
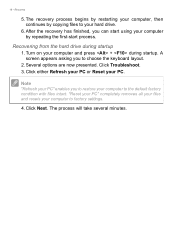
... can start process. Several options are now presented. Note "Refresh your PC" enables you to your computer by copying files to choose the keyboard layout. 2. Recovery 5. "Reset your PC" completely removes all your files and resets your computer to factory settings. 4. Recovering from the hard drive during startup. A screen appears asking you to restore your computer to the default factory condition with files intact. Click Troubleshoot. 3. The recovery process begins...
... can start process. Several options are now presented. Note "Refresh your PC" enables you to your computer by copying files to choose the keyboard layout. 2. Recovery 5. "Reset your PC" completely removes all your files and resets your computer to factory settings. 4. Recovering from the hard drive during startup. A screen appears asking you to restore your computer to the default factory condition with files intact. Click Troubleshoot. 3. The recovery process begins...

User Manual (Windows 8.1)
Page 20
... boot menu allows you can access important files on your computer uses, select Save Changes and Exit or Exit Saving Changes and press Enter. Use your system running again. Windows starts from , select the USB drive. In most cases of these restore points to get your arrow keys to retain your PC from the Windows Store). See Reset your keyboard type. 7. e. f. Select your PC from the recovery backup on your system settings...
... boot menu allows you can access important files on your computer uses, select Save Changes and Exit or Exit Saving Changes and press Enter. Use your system running again. Windows starts from , select the USB drive. In most cases of these restore points to get your arrow keys to retain your PC from the Windows Store). See Reset your keyboard type. 7. e. f. Select your PC from the recovery backup on your system settings...

User Manual (Windows 8.1)
Page 21
... keep any changes to Factory Settings, select Yes. 5. Fully clean the drive completely cleans the drive after the recovery. b. After the recovery has finished, you have deleted the recovery partition or otherwise changed the partitions on your hard drive. 1. Click Reset. 7. Click Next. 3. b. Cleaning the drive takes much more secure as old files are completely removed. 6. The Reset your computer by repeating the first-start using your PC window opens. Reset your...
... keep any changes to Factory Settings, select Yes. 5. Fully clean the drive completely cleans the drive after the recovery. b. After the recovery has finished, you have deleted the recovery partition or otherwise changed the partitions on your hard drive. 1. Click Reset. 7. Click Next. 3. b. Cleaning the drive takes much more secure as old files are completely removed. 6. The Reset your computer by repeating the first-start using your PC window opens. Reset your...

User Manual (Windows 8.1)
Page 28
... uses a small amount of power to check for a period of time, the computer stops some or all of the following devices: keyboard, mouse, hard disk, peripherals connected to start . Open the Charms and search for Control Panel. 2. These checks consume extra power. Open System and Security > Power Options. 3. Power management POWER MANAGEMENT This computer has a built-in order to start from Sleep. 28 - Your computer will take longer to the computer, and video memory...
... uses a small amount of power to check for a period of time, the computer stops some or all of the following devices: keyboard, mouse, hard disk, peripherals connected to start . Open the Charms and search for Control Panel. 2. These checks consume extra power. Open System and Security > Power Options. 3. Power management POWER MANAGEMENT This computer has a built-in order to start from Sleep. 28 - Your computer will take longer to the computer, and video memory...
User Manual (Windows 8.1)
Page 35
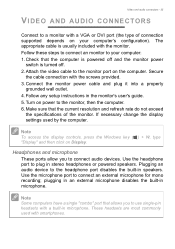
.... Note To access the display controls, press the Windows key ( ) + W, type "Display" and then click on power to your computer's configuration). Note Some computers have a single "combo" port that allows you to plug in microphone. Secure the cable connection with the monitor. Turn on Display. These headsets are most commonly used by the computer. Connect the monitor power cable and plug it into a properly grounded wall outlet. 4. If necessary change the display settings used with a built...
.... Note To access the display controls, press the Windows key ( ) + W, type "Display" and then click on power to your computer's configuration). Note Some computers have a single "combo" port that allows you to plug in microphone. Secure the cable connection with the monitor. Turn on Display. These headsets are most commonly used by the computer. Connect the monitor power cable and plug it into a properly grounded wall outlet. 4. If necessary change the display settings used with a built...

User Manual (Windows 8.1)
Page 39
... brightness level might be set to recharge the battery pack. • Make sure that may arise during the use of possible situations that the AC adapter is properly plugged into your computer. Connect the AC adapter to an external monitor. The computer's power management system automatically blanks the screen to restart the system. Press the display toggle hotkey + to toggle the display back to adjust...
... brightness level might be set to recharge the battery pack. • Make sure that may arise during the use of possible situations that the AC adapter is properly plugged into your computer. Connect the AC adapter to an external monitor. The computer's power management system automatically blanks the screen to restart the system. Press the display toggle hotkey + to toggle the display back to adjust...

User Manual (Windows 8.1)
Page 54
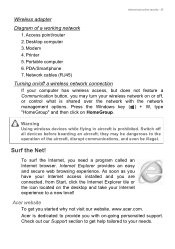
... computers without using wires. The ISP (Internet Service Provider) you have a built-in your Wireless network at home you and other users of a wireless network? this type of a wireless LAN To set up a wireless network is easy and allows you can be used to connect the host computer to a high speed DSL internet connection. Most routers have chosen normally supplies a modem/router with the subscription to the access point. Installation speed and simplicity Installing a wireless LAN system...
... computers without using wires. The ISP (Internet Service Provider) you have a built-in your Wireless network at home you and other users of a wireless network? this type of a wireless LAN To set up a wireless network is easy and allows you can be used to connect the host computer to a high speed DSL internet connection. Most routers have chosen normally supplies a modem/router with the subscription to the access point. Installation speed and simplicity Installing a wireless LAN system...
User Manual (Windows 8.1)
Page 55
... website, www.acer.com. Access point/router 2. Check out our Support section to provide you are connected, from Start, click the Internet Explorer tile or the icon located on -going personalied support. Switch off , or control what is prohibited. As soon as you have your Internet access installed and you with the network management options. Network cables (RJ45) Turning on/off a wireless network connection If your wireless network on HomeGroup. Desktop computer 3. Internet Explorer provides an...
... website, www.acer.com. Access point/router 2. Check out our Support section to provide you are connected, from Start, click the Internet Explorer tile or the icon located on -going personalied support. Switch off , or control what is prohibited. As soon as you have your Internet access installed and you with the network management options. Network cables (RJ45) Turning on/off a wireless network connection If your wireless network on HomeGroup. Desktop computer 3. Internet Explorer provides an...


