User Guide
Page 5
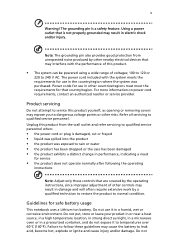
... service provider. Guidelines for that are covered by the operating instructions, since improper adjustment of this product from unexpected noise produced by a qualified technician to restore the product to temperatures over 60°C (140°F). Do not use in other controls may interfere with the system meets the requirements for service...
... service provider. Guidelines for that are covered by the operating instructions, since improper adjustment of this product from unexpected noise produced by a qualified technician to restore the product to temperatures over 60°C (140°F). Do not use in other controls may interfere with the system meets the requirements for service...

User Guide
Page 17
...computer xiii Turning your computer on - ly for certain models) 5 Video 6 16:9 display 6 Using the system utilities 7 Acer Bio-Protection (only for surround/multi-channel sound (on and off xiii Taking care of your computer xiv Taking care of ... keys 4 Audio 5 Acer PureZone (only for certain models) 5 Tuba (only for certain models) 5 Using Dolby Home Theater for certain models) 7 Acer GridVista (dual-display compatible) 8 Acer Backup Manager 9 Power management 10 Acer eRecovery Management 11 Burn backup discs 12 Restore 13 Restore Windows from backup discs ...
...computer xiii Turning your computer on - ly for certain models) 5 Video 6 16:9 display 6 Using the system utilities 7 Acer Bio-Protection (only for surround/multi-channel sound (on and off xiii Taking care of your computer xiv Taking care of ... keys 4 Audio 5 Acer PureZone (only for certain models) 5 Tuba (only for certain models) 5 Using Dolby Home Theater for certain models) 7 Acer GridVista (dual-display compatible) 8 Acer Backup Manager 9 Power management 10 Acer eRecovery Management 11 Burn backup discs 12 Restore 13 Restore Windows from backup discs ...
User Guide
Page 23
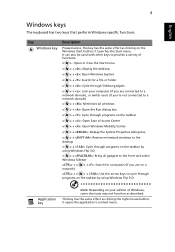
... the Run dialog box < > + : Cycle through programs on the taskbar < > + : Open Ease of Access Center < > + : Open Windows Mobility Center < > + : Display the System Properties dialog box < > + : Restore minimized windows to the desktop < > + : Cycle through programs on the taskbar by using Windows Flip 3-D < > + : Bring all gadgets to the front and select Windows Sidebar...
... the Run dialog box < > + : Cycle through programs on the taskbar < > + : Open Ease of Access Center < > + : Open Windows Mobility Center < > + : Display the System Properties dialog box < > + : Restore minimized windows to the desktop < > + : Cycle through programs on the taskbar by using Windows Flip 3-D < > + : Bring all gadgets to the front and select Windows Sidebar...
User Guide
Page 30
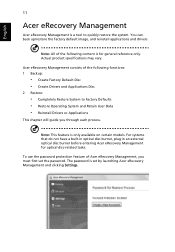
... is for optical disc-related tasks. Actual product specifications may vary. Acer eRecovery Management consists of Acer eRecovery Management, you through each process. The password is set the password. English 11 Acer eRecovery Management Acer eRecovery Management is a tool to Factory Defaults • Restore Operating System and Retain User Data • Reinstall Drivers or Applications...
... is for optical disc-related tasks. Actual product specifications may vary. Acer eRecovery Management consists of Acer eRecovery Management, you through each process. The password is set the password. English 11 Acer eRecovery Management Acer eRecovery Management is a tool to Factory Defaults • Restore Operating System and Retain User Data • Reinstall Drivers or Applications...
User Guide
Page 32
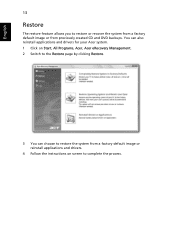
English 13 Restore The restore feature allows you to restore or recover the system from a factory default image or from a factory default image or reinstall applications and drivers. 4 Follow the instructions on Start, All Programs, Acer, Acer eRecovery Management. 2 Switch to the Restore page by clicking Restore. 3 You can choose to complete the process. You can also reinstall applications and drivers for your Acer system. 1 Click on screen to restore the system from previously created CD and DVD backups.
English 13 Restore The restore feature allows you to restore or recover the system from a factory default image or from a factory default image or reinstall applications and drivers. 4 Follow the instructions on Start, All Programs, Acer, Acer eRecovery Management. 2 Switch to the Restore page by clicking Restore. 3 You can choose to complete the process. You can also reinstall applications and drivers for your Acer system. 1 Click on screen to restore the system from previously created CD and DVD backups.
User Guide
Page 33
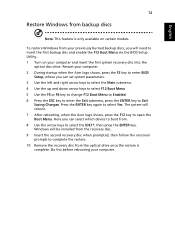
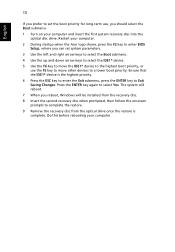
...to select Yes. Do this before rebooting your computer. 2 During startup when the Acer logo shows, press the F2 key to enter BIOS Setup, where you can select which device to boot from. 8 Use the arrow keys to complete the restore. 10 Remove the recovery disc from the optical drive once the... restore is only available on your previously burned backup discs, you can set system parameters. 3 Use the left and right...
...to select Yes. Do this before rebooting your computer. 2 During startup when the Acer logo shows, press the F2 key to enter BIOS Setup, where you can select which device to boot from. 8 Use the arrow keys to complete the restore. 10 Remove the recovery disc from the optical drive once the... restore is only available on your previously burned backup discs, you can set system parameters. 3 Use the left and right...
User Guide
Page 34
Do this before rebooting your computer and insert the first system recovery disc into the optical disc drive. Restart your computer. 2 During startup when the Acer logo shows, press the F2 key to enter BIOS Setup, where you should select the Boot submenu. 1 Turn on your computer. The system will... the recovery disc. 8 Insert the second recovery disc when prompted, then follow the onscreen prompts to complete the restore. 9 Remove the recovery disc from the optical drive once the restore is the highest priority. 6 Press the ESC key to enter the Exit submenu, press the ENTER key to ...
Do this before rebooting your computer and insert the first system recovery disc into the optical disc drive. Restart your computer. 2 During startup when the Acer logo shows, press the F2 key to enter BIOS Setup, where you should select the Boot submenu. 1 Turn on your computer. The system will... the recovery disc. 8 Insert the second recovery disc when prompted, then follow the onscreen prompts to complete the restore. 9 Remove the recovery disc from the optical drive once the restore is the highest priority. 6 Press the ESC key to enter the Exit submenu, press the ENTER key to ...
User Guide
Page 64
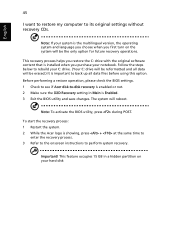
...data files before using this option. Note: To activate the BIOS utility, press during POST. Before performing a restore operation, please check the BIOS settings. 1 Check to see if Acer disk-to back up all data will be the only option for future recovery operations. To start the recovery ...GB in Main is the multilingual version, the operating system and language you choose when you purchase your hard disk This recovery process helps you restore the C: drive with the original software content that is showing, press + at the same time to enter the recovery process. 3 Refer ...
...data files before using this option. Note: To activate the BIOS utility, press during POST. Before performing a restore operation, please check the BIOS settings. 1 Check to see if Acer disk-to back up all data will be the only option for future recovery operations. To start the recovery ...GB in Main is the multilingual version, the operating system and language you choose when you purchase your hard disk This recovery process helps you restore the C: drive with the original software content that is showing, press + at the same time to enter the recovery process. 3 Refer ...


