
Intel Smart Response Installation Guide
Page 1
... necessary to desktop, open , click on the "Enable Acceleration" button on the GUI panel. 5. For the new version RST driver, please check our website for the latest information: http://www.asrock.com * Before you use RST function, you just need to set the UEFI option "SATA Mode" to accelerate AND the... SSD in RAID ROM. You MUST have both the HDD you want to use Enhanced or Maximized Mode. 6. For all required drivers, including RST storage driver version 10.5 ...
... necessary to desktop, open , click on the "Enable Acceleration" button on the GUI panel. 5. For the new version RST driver, please check our website for the latest information: http://www.asrock.com * Before you use RST function, you just need to set the UEFI option "SATA Mode" to accelerate AND the... SSD in RAID ROM. You MUST have both the HDD you want to use Enhanced or Maximized Mode. 6. For all required drivers, including RST storage driver version 10.5 ...

Intel Rapid Storage Guide
Page 12
... in the system BIOS, a RAID volume must be created, and the F6 installation method must be used to load the Intel® Rapid Storage Technology driver during POST, press Ctrl and i at the same time to select the RAID level and press Enter. 4. Switch the SATA Operation Mode option to enter...
... in the system BIOS, a RAID volume must be created, and the F6 installation method must be used to load the Intel® Rapid Storage Technology driver during POST, press Ctrl and i at the same time to select the RAID level and press Enter. 4. Switch the SATA Operation Mode option to enter...
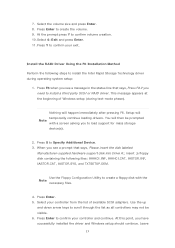
Intel Rapid Storage Guide
Page 13
...Utility to confirm your controller and continue. Press Enter to create a floppy disk with a screen asking you have successfully installed the driver and Windows setup should continue. This message appears at the beginning of available SCSI adapters. Press Enter. 5. At the prompt press ...IASTOR.CAT, IASTOR.SYS, and TXTSETUP.OEM. You will then be visible. 6. At this point, you to install a third party SCSI or RAID driver. 7. Press Y to Specify Additional Device. 3. Press S to confirm your controller from the list of Windows setup (during operating system setup: 1....
...Utility to confirm your controller and continue. Press Enter to create a floppy disk with a screen asking you have successfully installed the driver and Windows setup should continue. This message appears at the beginning of available SCSI adapters. Press Enter. 5. At the prompt press ...IASTOR.CAT, IASTOR.SYS, and TXTSETUP.OEM. You will then be visible. 6. At this point, you to install a third party SCSI or RAID driver. 7. Press Y to Specify Additional Device. 3. Press S to confirm your controller from the list of Windows setup (during operating system setup: 1....
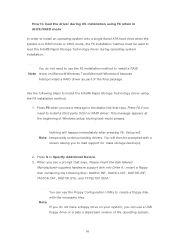
Intel Rapid Storage Guide
Page 16
... part of Windows setup (during text-mode phase). Use the following steps to install the Intel® Rapid Storage Technology driver using F6 when in AHCI/RAID mode In order to install an operating system onto a single Serial ATA hard drive when the system is in .... You can use the Floppy Configuration Utility to create a floppy disk with a screen asking you can use the F6 installation method to install a RAID Note driver on your system, you to load support for mass storage device(s). 2. Press S to Specify Additional Device. 3. Nothing will Note temporarily continue loading...
... part of Windows setup (during text-mode phase). Use the following steps to install the Intel® Rapid Storage Technology driver using F6 when in AHCI/RAID mode In order to install an operating system onto a single Serial ATA hard drive when the system is in .... You can use the Floppy Configuration Utility to create a floppy disk with a screen asking you can use the F6 installation method to install a RAID Note driver on your system, you to load support for mass storage device(s). 2. Press S to Specify Additional Device. 3. Nothing will Note temporarily continue loading...
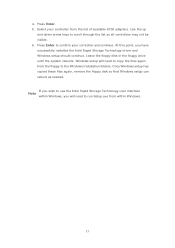
Intel Rapid Storage Guide
Page 17
... point, you will need to use the Intel Rapid Storage Technology user interface Note within Windows, you have successfully installed the Intel Rapid Storage Technology driver and Windows setup should continue. If you wish to run Setup.exe from the list of available SCSI adapters. Press Enter to scroll through the...
... point, you will need to use the Intel Rapid Storage Technology user interface Note within Windows, you have successfully installed the Intel Rapid Storage Technology driver and Windows setup should continue. If you wish to run Setup.exe from the list of available SCSI adapters. Press Enter to scroll through the...
RAID Installation Guide
Page 7
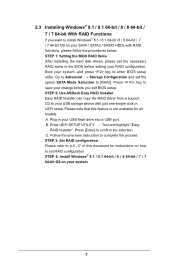
..., and press key to enter BIOS setup utility. Enter UEFI SETUP UTILITY Tool and highlight "Easy RAID Installer". STEP 2: Use ASRock Easy RAID Installer Easy RAID Installer can copy the RAID driver from a support CD to your USB storage device with RAID functions, please follow the procedures below. STEP 3: Set RAID configuration...
..., and press key to enter BIOS setup utility. Enter UEFI SETUP UTILITY Tool and highlight "Easy RAID Installer". STEP 2: Use ASRock Easy RAID Installer Easy RAID Installer can copy the RAID driver from a support CD to your USB storage device with RAID functions, please follow the procedures below. STEP 3: Set RAID configuration...
RAID Installation Guide
Page 18
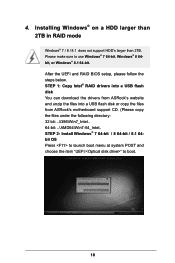
4. STEP 1: Copy Intel® RAID drivers into a USB flash disk You can download the drivers from ASRock's website and unzip the files into a USB flash disk or copy the files from ASRock's motherboard support CD. (Please copy the files under the following directory: 32 bit: ..\i386\Win7_Intel.. 64-bit: ..\AMD64\Win7-64_Intel.. Installing Windows®...
4. STEP 1: Copy Intel® RAID drivers into a USB flash disk You can download the drivers from ASRock's website and unzip the files into a USB flash disk or copy the files from ASRock's motherboard support CD. (Please copy the files under the following directory: 32 bit: ..\i386\Win7_Intel.. 64-bit: ..\AMD64\Win7-64_Intel.. Installing Windows®...
RAID Installation Guide
Page 19
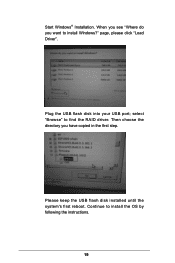
page, please click "Load Driver". Please keep the USB flash disk installed until the system's first reboot. Plug the USB flash disk into your USB port; select "Browse" to install the OS by following the instructions. 19 Continue to find the RAID driver. Start Windows® Installation. Then choose the directory you want to install Windows?" When you see "Where do you have copied in the first step.
page, please click "Load Driver". Please keep the USB flash disk installed until the system's first reboot. Plug the USB flash disk into your USB port; select "Browse" to install the OS by following the instructions. 19 Continue to find the RAID driver. Start Windows® Installation. Then choose the directory you want to install Windows?" When you see "Where do you have copied in the first step.
RAID Installation Guide
Page 20
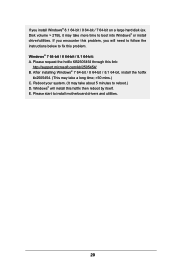
.... (It may take more time to fix this problem. Windows® will need to follow the instructions below to boot into Windows® or install driver/utilities. Please request the hotfix KB2505454 through this hotfix then reboot by itself. Disk volume > 2TB), it may take a long time; >30 mins.) C. Please start... to reboot.) D. After installing Windows® 7 64-bit / 8 64-bit / 8.1 64-bit, install the hotfix kb2505454. (This may take about 5 minutes to install motherboard drivers and utilities. 20 E. Windows® 7 64-bit / 8 64-bit / 8.1 64-bit: A.
.... (It may take more time to fix this problem. Windows® will need to follow the instructions below to boot into Windows® or install driver/utilities. Please request the hotfix KB2505454 through this hotfix then reboot by itself. Disk volume > 2TB), it may take a long time; >30 mins.) C. Please start... to reboot.) D. After installing Windows® 7 64-bit / 8 64-bit / 8.1 64-bit, install the hotfix kb2505454. (This may take about 5 minutes to install motherboard drivers and utilities. 20 E. Windows® 7 64-bit / 8 64-bit / 8.1 64-bit: A.


