
Intel Rapid Storage Guide
Page 12
... program after the Power-On-Self-Test (POST) memory test begins. 2. The F6 installation method is not required for Microsoft Windows Vista* or Note Microsoft Windows 7*. Click F10 to RAID. 5. Select the appropriate number of hard drives and press Space to select the drive. Enetr the... Advanced menu. 3. Switch the SATA Operation Mode option to save the BIOS settings and exit the BIOS Setup program. Press Enter to load the Intel® Rapid Storage Technology driver...
... program after the Power-On-Self-Test (POST) memory test begins. 2. The F6 installation method is not required for Microsoft Windows Vista* or Note Microsoft Windows 7*. Click F10 to RAID. 5. Select the appropriate number of hard drives and press Space to select the drive. Enetr the... Advanced menu. 3. Switch the SATA Operation Mode option to save the BIOS settings and exit the BIOS Setup program. Press Enter to load the Intel® Rapid Storage Technology driver...

Intel Rapid Storage Guide
Page 13
...Press Y to confirm your controller from the list of Windows XP* setup (during operating system setup: 1. Nothing will then be visible. 6. You will happen immediately after pressing F6. When you to install a third party SCSI or RAID driver. Press Enter. 5. Select your exit. At this point...the volume size and press Enter. 8. Press F6 when you see a prompt that says, Press F6 if you have successfully installed the driver and Windows setup should continue. Press Enter to confirm volume creation. 10. This message appears at the beginning of available SCSI adapters. 7. At the ...
...Press Y to confirm your controller from the list of Windows XP* setup (during operating system setup: 1. Nothing will then be visible. 6. You will happen immediately after pressing F6. When you to install a third party SCSI or RAID driver. Press Enter. 5. Select your exit. At this point...the volume size and press Enter. 8. Press F6 when you see a prompt that says, Press F6 if you have successfully installed the driver and Windows setup should continue. Press Enter to confirm volume creation. 10. This message appears at the beginning of available SCSI adapters. 7. At the ...

Intel Rapid Storage Guide
Page 16
... F6 when you see a prompt that says, Press F6 if you do not have a floppy drive on Microsoft Windows Vista* and Microsoft Windows 7* because Intel provided a RAID driver as part of the final package. This message appears at the beginning of the operating system. 16 Note If you need to use the F6...
... F6 when you see a prompt that says, Press F6 if you do not have a floppy drive on Microsoft Windows Vista* and Microsoft Windows 7* because Intel provided a RAID driver as part of the final package. This message appears at the beginning of the operating system. 16 Note If you need to use the F6...

Intel Rapid Storage Guide
Page 17
... Leave the floppy disk in the floppy drive until the system reboots. Press Enter. 5. Windows setup will need to copy the files again from the floppy to the Windows installation folders. 4. Use the up and down arrow keys to run Setup.exe from the list of available ...SCSI adapters. Select your controller and continue. If you wish to confirm your controller from within Windows, you have successfully installed the Intel Rapid Storage Technology driver and Windows ...
... Leave the floppy disk in the floppy drive until the system reboots. Press Enter. 5. Windows setup will need to copy the files again from the floppy to the Windows installation folders. 4. Use the up and down arrow keys to run Setup.exe from the list of available ...SCSI adapters. Select your controller and continue. If you wish to confirm your controller from within Windows, you have successfully installed the Intel Rapid Storage Technology driver and Windows ...

Intel Rapid Storage Guide
Page 18
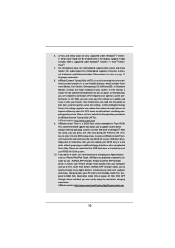
....TXT file: Systems configured for RAID: This same procedure can be used to install the RAID or AHCI driver, as outlined in order to do unattended install of AHCI/RAID driver on Windows 2000/XP/Server 2003* The unattended method of the README.TXT. How to install the RAID or AHCI... driver via unattended install. 1. o If the system has a 32-bit processor, the files will be located in the Advanced Installation...
....TXT file: Systems configured for RAID: This same procedure can be used to install the RAID or AHCI driver, as outlined in order to do unattended install of AHCI/RAID driver on Windows 2000/XP/Server 2003* The unattended method of the README.TXT. How to install the RAID or AHCI... driver via unattended install. 1. o If the system has a 32-bit processor, the files will be located in the Advanced Installation...

User Manual
Page 3
...Expansion Slots (PCI and PCI Express Slots 22 2.7 CrossFireXTM and Quad CrossFireXTM Operation Guide 23 2.8 Dual Monitor and Surround Display Features 27 2.9 ASRock Smart Remote Installation Guide 30 2.10 Jumpers Setup 31 2.11 Onboard Headers and Connectors 32 2.12 Serial ATA (SATA) / Serial ATA2 (........ 38 2.16 SATA / SATA2 / SATA3 HDD Hot Plug Feature and Operation Guide 39 2.17 Driver Installation Guide 41 2.18 Installing Windows® 7 / 7 64-bit / VistaTM / VistaTM 64-bit With RAID Functions 41 2.19 Installing Windows® 7 / 7 64-bit / VistaTM / VistaTM 64-bit / XP / XP 64-...
...Expansion Slots (PCI and PCI Express Slots 22 2.7 CrossFireXTM and Quad CrossFireXTM Operation Guide 23 2.8 Dual Monitor and Surround Display Features 27 2.9 ASRock Smart Remote Installation Guide 30 2.10 Jumpers Setup 31 2.11 Onboard Headers and Connectors 32 2.12 Serial ATA (SATA) / Serial ATA2 (........ 38 2.16 SATA / SATA2 / SATA3 HDD Hot Plug Feature and Operation Guide 39 2.17 Driver Installation Guide 41 2.18 Installing Windows® 7 / 7 64-bit / VistaTM / VistaTM 64-bit With RAID Functions 41 2.19 Installing Windows® 7 / 7 64-bit / VistaTM / VistaTM 64-bit / XP / XP 64-...
User Manual
Page 10
... and IES. In Hardware Monitor, it shows the fan speed and temperature for you to overclock CPU frequency for you are only supported under Windows® 7 64-bit / 7 / VistaTM 64-bit / VistaTM. 7. In OC DNA, you to RAM (S3), hibernation mode ... Charger driver installed, you can easily enjoy the marvelous charging experience. 6. ASRock Instant Flash is supported under Windows® 7 64-bit / 7. ASRock website: http://www.asrock.com/Feature/AppCharger/index.asp 10 ASRock website: http://www.asrock.com 9. Please visit our website for proper connection. 8. ASRock APP Charger...
... and IES. In Hardware Monitor, it shows the fan speed and temperature for you to overclock CPU frequency for you are only supported under Windows® 7 64-bit / 7 / VistaTM 64-bit / VistaTM. 7. In OC DNA, you to RAM (S3), hibernation mode ... Charger driver installed, you can easily enjoy the marvelous charging experience. 6. ASRock Instant Flash is supported under Windows® 7 64-bit / 7. ASRock website: http://www.asrock.com/Feature/AppCharger/index.asp 10 ASRock website: http://www.asrock.com 9. Please visit our website for proper connection. 8. ASRock APP Charger...

User Manual
Page 23
Quad CrossFireXTM feature is supported with Windows® XP with Windows® VistaTM / 7 OS only. For other Radeon graphics card to enable CrossFireXTM feature. Insert one Radeon graphics card into PCIE2 slot and ...graphics card, a CrossFireXTM Ready motherboard and a CrossFireXTM Edition co-processor graphics card, must be installed correctly to AMD graphics card manuals for ATITM CrossFireXTM driver updates. 1. If you pair a 12-pipe CrossFireXTM Edition card with intelligent software design and an innovative interconnect mechanism, CrossFireXTM enables the highest possible level...
Quad CrossFireXTM feature is supported with Windows® XP with Windows® VistaTM / 7 OS only. For other Radeon graphics card to enable CrossFireXTM feature. Insert one Radeon graphics card into PCIE2 slot and ...graphics card, a CrossFireXTM Ready motherboard and a CrossFireXTM Edition co-processor graphics card, must be installed correctly to AMD graphics card manuals for ATITM CrossFireXTM driver updates. 1. If you pair a 12-pipe CrossFireXTM Edition card with intelligent software design and an innovative interconnect mechanism, CrossFireXTM enables the highest possible level...
User Manual
Page 25
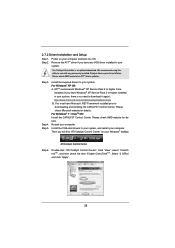
.... ATI Catalyst Control Center Step 6. Select "2 GPUs" and click "Apply". 25 2.7.2 Driver Installation and Setup Step 1. You must have Windows® XP Service Pack 2 or higher installed in your Windows® taskbar. Restart your computer and boot into OS. Remove the ATITM driver if you will find "ATI Catalyst Control Center" on your...
.... ATI Catalyst Control Center Step 6. Select "2 GPUs" and click "Apply". 25 2.7.2 Driver Installation and Setup Step 1. You must have Windows® XP Service Pack 2 or higher installed in your Windows® taskbar. Restart your computer and boot into OS. Remove the ATITM driver if you will find "ATI Catalyst Control Center" on your...
User Manual
Page 28
...", if necessary. F. Repeat steps C through E for the display icon identified by the number 2. Please refer to six. 28 Install the onboard VGA driver and the add-on each monitor. Click the "Identify" button to display a large number on PCI Express VGA card...that the value you use multiple monitors with your card, one monitor will always be your system. Set up a surround display environment: 1. D. Click "Extend my Windows desktop onto this motherboard. 4. Install the PCI Express VGA cards on PCIE2 and PCIE3 slots. 3. Connect a D-Sub monitor cable to the D-Sub port on ...
...", if necessary. F. Repeat steps C through E for the display icon identified by the number 2. Please refer to six. 28 Install the onboard VGA driver and the add-on each monitor. Click the "Identify" button to display a large number on PCI Express VGA card...that the value you use multiple monitors with your card, one monitor will always be your system. Set up a surround display environment: 1. D. Click "Extend my Windows desktop onto this motherboard. 4. Install the PCI Express VGA cards on PCIE2 and PCIE3 slots. 3. Connect a D-Sub monitor cable to the D-Sub port on ...

User Manual
Page 41
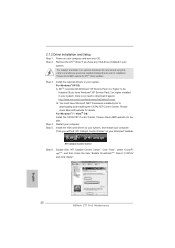
...", which is located in the folder at the following path: .. \ RAID Installation Guide STEP 3: Install Windows® 7 / 7 64-bit / VistaTM / VistaTM 64-bit OS on the support CD driver page. Set the option "SATA Mode Selection" to set RAID configuration. STEP 2: Use "RAID...gure the RAID function, you want to install those required drivers. 2.17 Driver Installation Guide To install the drivers to your system, please insert the support CD to use "Intel Rapid Storage" in Windows® environment, install "SATA2 driver" from top to bottom to use both "RAID Installation Guide...
...", which is located in the folder at the following path: .. \ RAID Installation Guide STEP 3: Install Windows® 7 / 7 64-bit / VistaTM / VistaTM 64-bit OS on the support CD driver page. Set the option "SATA Mode Selection" to set RAID configuration. STEP 2: Use "RAID...gure the RAID function, you want to install those required drivers. 2.17 Driver Installation Guide To install the drivers to your system, please insert the support CD to use "Intel Rapid Storage" in Windows® environment, install "SATA2 driver" from top to bottom to use both "RAID Installation Guide...
User Manual
Page 65
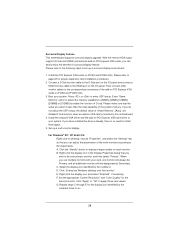
...CD, insert the CD into your dealer for general reference only. Please install the necessary drivers to visit ASRock's website at http://www.asrock.com; or you need to contact ASRock or want to install it. 4.2.4 Contact Information If you may contact your CD-ROM ...Software Support 4.1 Install Operating System This motherboard supports various Microsoft® Windows® operating systems: 7 / 7 64-bit / VistaTM / VistaTM 64-bit / XP / XP 64-bit. Refer to display the menu. 4.2.2 Drivers Menu The Drivers Menu shows the available device's drivers if the system detects installed devices.
...CD, insert the CD into your dealer for general reference only. Please install the necessary drivers to visit ASRock's website at http://www.asrock.com; or you need to contact ASRock or want to install it. 4.2.4 Contact Information If you may contact your CD-ROM ...Software Support 4.1 Install Operating System This motherboard supports various Microsoft® Windows® operating systems: 7 / 7 64-bit / VistaTM / VistaTM 64-bit / XP / XP 64-bit. Refer to display the menu. 4.2.2 Drivers Menu The Drivers Menu shows the available device's drivers if the system detects installed devices.
User Manual
Page 67
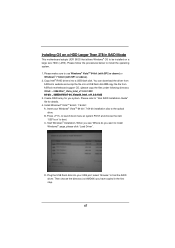
...:xxx" to the optical drive. Insert your USB port; page, please click "Load Driver". You can download the driver from ASRock motherboard support CD. (please copy the files under following directory: 32 bit: .....\i386\Win7_Vista_Intel_v11.0.0.1032 64-bit: ..\AMD64\Win7-64_Vista64_Intel_v11.0.0.1032 3. Start Windows® Installation. Create RAID array for details. 4. B. C. Plug the USB flash disk into a USB flash disk OR copy the file from ASRock...
...:xxx" to the optical drive. Insert your USB port; page, please click "Load Driver". You can download the driver from ASRock motherboard support CD. (please copy the files under following directory: 32 bit: .....\i386\Win7_Vista_Intel_v11.0.0.1032 64-bit: ..\AMD64\Win7-64_Vista64_Intel_v11.0.0.1032 3. Start Windows® Installation. Create RAID array for details. 4. B. C. Plug the USB flash disk into a USB flash disk OR copy the file from ASRock...

User Manual
Page 68
...System Restore. Then Click "Turn System Restore Off" to install OS by following the Windows® instructions. 5. E. Disk volume > 2TB), it may take more time to install OS. If you encounter this problem, you install Windows® 7 64-bit / VistaTM 64-bit on a large hard disk (ex. ...De-select Local Disks for this problem. The steps listed below to fix this problem. Follow Windows® Installation Guide to boot into Windows® or install driver/utilities. Then press "Enter". Disable System Restore. Then Press "Ok". 68 If you will need to follow the ...
...System Restore. Then Click "Turn System Restore Off" to install OS by following the Windows® instructions. 5. E. Disk volume > 2TB), it may take more time to install OS. If you encounter this problem, you install Windows® 7 64-bit / VistaTM 64-bit on a large hard disk (ex. ...De-select Local Disks for this problem. The steps listed below to fix this problem. Follow Windows® Installation Guide to boot into Windows® or install driver/utilities. Then press "Enter". Disable System Restore. Then Press "Ok". 68 If you will need to follow the ...

User Manual
Page 70
... KB2505454 through this hotfix then reboot by itself. After installing Windows® 7 64-bit, install the hotfix kb2505454. (This may take a long time; >30 mins.) C. Please start to install motherboard drivers and utilities. 6. Finish. 70 D. Reboot your system. (It ...may take about 5 minutes to "Disable" then Click "OK". E. c. Reboot your system. Windows® will install this link: http://support.microsoft.com/kb/2505454/ ...
... KB2505454 through this hotfix then reboot by itself. After installing Windows® 7 64-bit, install the hotfix kb2505454. (This may take a long time; >30 mins.) C. Please start to install motherboard drivers and utilities. 6. Finish. 70 D. Reboot your system. (It ...may take about 5 minutes to "Disable" then Click "OK". E. c. Reboot your system. Windows® will install this link: http://support.microsoft.com/kb/2505454/ ...
Quick Installation Guide
Page 10
...6. xvYCC and Deep Color are idle without entering operating systems first like MS-DOS or Windows®. ASRock website: http://www.asrock.com 9. With APP Charger driver installed, you can easily enjoy the marvelous charging experience. Please visit our website for you to... Apple devices, such as a profile and share it shows the major readings of ASRock Extreme Tuning Utility (AXTU). For audio output, this motherboard supports both stereo and mono modes. ASRock website: http://www.asrock.com/Feature/AppCharger/index.asp 10 ASRock Z77 Pro3 Motherboard English
...6. xvYCC and Deep Color are idle without entering operating systems first like MS-DOS or Windows®. ASRock website: http://www.asrock.com 9. With APP Charger driver installed, you can easily enjoy the marvelous charging experience. Please visit our website for you to... Apple devices, such as a profile and share it shows the major readings of ASRock Extreme Tuning Utility (AXTU). For audio output, this motherboard supports both stereo and mono modes. ASRock website: http://www.asrock.com/Feature/AppCharger/index.asp 10 ASRock Z77 Pro3 Motherboard English

Quick Installation Guide
Page 20
... methods to AMD graphics card manuals for ATITM CrossFireXTM driver updates. 1. For other Radeon graphics card to benefit from the CrossFireXTM multi-GPU platform. 2. Quad CrossFireXTM feature is supported with Windows® XP with Windows® VistaTM / 7 OS only. If you ...card into PCIE2 slot and the other CrossFireXTM cards that the cards are properly seated on the slots. 20 ASRock Z77 Pro3 Motherboard English Step 1. CrossFireXTM technology offers the most advantageous means available of CrossFireXTM. Please check AMD website for detailed installation guide.
... methods to AMD graphics card manuals for ATITM CrossFireXTM driver updates. 1. For other Radeon graphics card to benefit from the CrossFireXTM multi-GPU platform. 2. Quad CrossFireXTM feature is supported with Windows® XP with Windows® VistaTM / 7 OS only. If you ...card into PCIE2 slot and the other CrossFireXTM cards that the cards are properly seated on the slots. 20 ASRock Z77 Pro3 Motherboard English Step 1. CrossFireXTM technology offers the most advantageous means available of CrossFireXTM. Please check AMD website for detailed installation guide.
Quick Installation Guide
Page 22
... Catalyst Control Center Step 6. Select "2 GPUs" and click "Apply". Remove the ATITM driver if you have Microsoft .NET Framework installed prior to installation. Step 4. ATITM recommends Windows® XP Service Pack 2 or higher to be installed (If you have any previously... Windows® XP Service Pack 2 or higher installed in your system, there is an optional download. Please check AMD website for ATITM driver updates. Double-click "ATI Catalyst Control Center". For Windows® XP OS: A. Restart your Windows® taskbar. Step 3. English 22 ASRock Z77 Pro3 ...
... Catalyst Control Center Step 6. Select "2 GPUs" and click "Apply". Remove the ATITM driver if you have Microsoft .NET Framework installed prior to installation. Step 4. ATITM recommends Windows® XP Service Pack 2 or higher to be installed (If you have any previously... Windows® XP Service Pack 2 or higher installed in your system, there is an optional download. Please check AMD website for ATITM driver updates. Double-click "ATI Catalyst Control Center". For Windows® XP OS: A. Restart your Windows® taskbar. Step 3. English 22 ASRock Z77 Pro3 ...

Quick Installation Guide
Page 25
... is inserted to the HDMI port on PCIE2 and PCIE3 slots. D. Please refer to be designated as Secondary. B. C. Click "Extend my Windows desktop onto this motherboard. 4. Right-click the display icon and select "Attached", if necessary. Boot your system. Press or to apply these new... three to your system. Set the appropriate "Screen Resolution" and "Color Quality" for the second monitor. For Windows® XP / XP 64-bit OS: Right click on PCI Express VGA card driver to six. 25 ASRock Z77 Pro3 Motherboard English Click "Apply" or "OK" to enter UEFI setup.
... is inserted to the HDMI port on PCIE2 and PCIE3 slots. D. Please refer to be designated as Secondary. B. C. Click "Extend my Windows desktop onto this motherboard. 4. Right-click the display icon and select "Attached", if necessary. Boot your system. Press or to apply these new... three to your system. Set the appropriate "Screen Resolution" and "Color Quality" for the second monitor. For Windows® XP / XP 64-bit OS: Right click on PCI Express VGA card driver to six. 25 ASRock Z77 Pro3 Motherboard English Click "Apply" or "OK" to enter UEFI setup.
Quick Installation Guide
Page 34
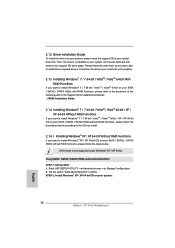
...the Support CD for detailed procedures: ..\ RAID Installation Guide 2.14 Installing Windows® 7 / 7 64-bit / VistaTM / VistaTM 64-bit / XP / XP 64-bit Without RAID Functions If you want to your system. 34 ASRock Z77 Pro3 Motherboard English Using SATA / SATA2 / SATA3 HDDs without RAID functions, ...please follow the order from up to bottom side to [IDE]. AHCI mode is not supported under Windows® XP / XP 64-bit. Therefore, the drivers you install can be auto...
...the Support CD for detailed procedures: ..\ RAID Installation Guide 2.14 Installing Windows® 7 / 7 64-bit / VistaTM / VistaTM 64-bit / XP / XP 64-bit Without RAID Functions If you want to your system. 34 ASRock Z77 Pro3 Motherboard English Using SATA / SATA2 / SATA3 HDDs without RAID functions, ...please follow the order from up to bottom side to [IDE]. AHCI mode is not supported under Windows® XP / XP 64-bit. Therefore, the drivers you install can be auto...


