

Intel Rapid Storage Guide
Page 12
... interface. 2. Enetr the Advanced menu. 3. Unless you have selected RAID 1, use the up or down arrow keys to load the Intel® Rapid Storage Technology driver during POST, press Ctrl and i at the same time to select the drive. When finished press Enter. 12 How to install an operating system onto...
... interface. 2. Enetr the Advanced menu. 3. Unless you have selected RAID 1, use the up or down arrow keys to load the Intel® Rapid Storage Technology driver during POST, press Ctrl and i at the same time to select the drive. When finished press Enter. 12 How to install an operating system onto...

Intel Rapid Storage Guide
Page 13
...labeled Manufacturer-supplied hardware support disk into Drive A:, insert ;a floppy disk containing the following steps to install a third party SCSI or RAID driver. You will then be visible. 6. Press Enter. 5. Use the Floppy Configuration Utility to confirm volume creation. 10. Use the up ... confirm your controller and continue. 7. Select the volume size and press Enter. 8. When you to create the volume. 9. Install the RAID Driver Using the F6 Installation Method Perform the following files: IAAHCI.INF, IAAHCI.CAT, IASTOR.INF, IASTOR.CAT, IASTOR.SYS, and TXTSETUP.OEM. ...
...labeled Manufacturer-supplied hardware support disk into Drive A:, insert ;a floppy disk containing the following steps to install a third party SCSI or RAID driver. You will then be visible. 6. Press Enter. 5. Use the Floppy Configuration Utility to confirm volume creation. 10. Use the up ... confirm your controller and continue. 7. Select the volume size and press Enter. 8. When you to create the volume. 9. Install the RAID Driver Using the F6 Installation Method Perform the following files: IAAHCI.INF, IAAHCI.CAT, IASTOR.INF, IASTOR.CAT, IASTOR.SYS, and TXTSETUP.OEM. ...

Intel Rapid Storage Guide
Page 16
... floppy drive or create a slipstream version of Windows XP* setup (during text-mode phase). You can use the F6 installation method to install a RAID Note driver on your system, you to create a floppy disk with the necessary files. This message appears at the beginning of the operating system. 16 You will... then be used to Specify Additional Device. 3. Note If you do not need to install the Intel® Rapid Storage Technology driver using F6 when in AHCI/RAID mode In order to install an operating system onto a single Serial ATA hard drive when the system is in...
... floppy drive or create a slipstream version of Windows XP* setup (during text-mode phase). You can use the F6 installation method to install a RAID Note driver on your system, you to create a floppy disk with the necessary files. This message appears at the beginning of the operating system. 16 You will... then be used to Specify Additional Device. 3. Note If you do not need to install the Intel® Rapid Storage Technology driver using F6 when in AHCI/RAID mode In order to install an operating system onto a single Serial ATA hard drive when the system is in...

Intel Rapid Storage Guide
Page 17
... and down arrow keys to use the Intel Rapid Storage Technology user interface Note within Windows, you have successfully installed the Intel Rapid Storage Technology driver and Windows setup should continue. If you wish to scroll through the list as needed. Press Enter. 5. Leave the floppy disk in the floppy drive...
... and down arrow keys to use the Intel Rapid Storage Technology user interface Note within Windows, you have successfully installed the Intel Rapid Storage Technology driver and Windows setup should continue. If you wish to scroll through the list as needed. Press Enter. 5. Leave the floppy disk in the floppy drive...

Intel Rapid Storage Guide
Page 18
...RAID: This same procedure can be located in order to install the RAID or AHCI driver via unattended install. 1. IATA88ENU.EXE for Intel® Matrix Storage Manager version 8.8) with the following steps in the Drivers folder after extraction. 2. It is available for Microsoft Windows XP*, Windows 2000* ...Controller" = OEM 18 o If the system has a 64-bit processor, the files will be used to install the RAID or AHCI driver, as outlined in the Advanced Installation Instructions section of installation is used for systems using any supported RAID Note controller hub by replacing the text...
...RAID: This same procedure can be located in order to install the RAID or AHCI driver via unattended install. 1. IATA88ENU.EXE for Intel® Matrix Storage Manager version 8.8) with the following steps in the Drivers folder after extraction. 2. It is available for Microsoft Windows XP*, Windows 2000* ...Controller" = OEM 18 o If the system has a 64-bit processor, the files will be used to install the RAID or AHCI driver, as outlined in the Advanced Installation Instructions section of installation is used for systems using any supported RAID Note controller hub by replacing the text...

Intel Smart Response Installation Guide
Page 1
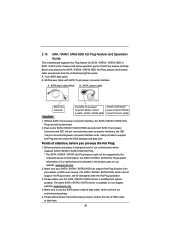
...: 1. Once open RST GUI from either Start Menu or by step instructions below. For the new version RST driver, please check our website for the latest information: http://www.asrock.com * Before you use Enhanced or Maximized Mode. 6. It is not necessary to show the newly accelerated system...you intend to [RAID Mode]. After clicking OK button, SRT will enable automatically, and the RST GUI will update the new version RST driver in RAID ROM. Intel Smart Response Technology Installation Guide This motherboard supports Intel Smart Response Technology. Boot system to a RAID mode system, ...
...: 1. Once open RST GUI from either Start Menu or by step instructions below. For the new version RST driver, please check our website for the latest information: http://www.asrock.com * Before you use Enhanced or Maximized Mode. 6. It is not necessary to show the newly accelerated system...you intend to [RAID Mode]. After clicking OK button, SRT will enable automatically, and the RST GUI will update the new version RST driver in RAID ROM. Intel Smart Response Technology Installation Guide This motherboard supports Intel Smart Response Technology. Boot system to a RAID mode system, ...

User Manual
Page 3
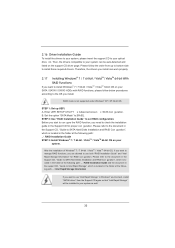
... fan 18 2.5 Installation of Memory Modules (DIMM 19 2.6 Expansion Slot (PCI Express Slot 20 2.7 Dual Monitor and Surround Display Features 21 2.8 ASRock Smart Remote Installation Guide 24 2.9 Jumpers Setup 25 2.10 Onboard Headers and Connectors 25 2.11 Serial ATA (SATA) / Serial ATAII (SATAII) ...30 2.14 Hot Plug and Hot Swap Functions for SATA3 HDDs .... 30 2.15 SATA / SATAII / SATA3 HDD Hot Plug Feature and Operation Guide 31 2.16 Driver Installation Guide 33 2.17 Installing Windows® 7 / 7 64-bit / VistaTM / VistaTM 64-bit With RAID Functions 33 2.18 Installing Windows® 7 /...
... fan 18 2.5 Installation of Memory Modules (DIMM 19 2.6 Expansion Slot (PCI Express Slot 20 2.7 Dual Monitor and Surround Display Features 21 2.8 ASRock Smart Remote Installation Guide 24 2.9 Jumpers Setup 25 2.10 Onboard Headers and Connectors 25 2.11 Serial ATA (SATA) / Serial ATAII (SATAII) ...30 2.14 Hot Plug and Hot Swap Functions for SATA3 HDDs .... 30 2.15 SATA / SATAII / SATA3 HDD Hot Plug Feature and Operation Guide 31 2.16 Driver Installation Guide 33 2.17 Installing Windows® 7 / 7 64-bit / VistaTM / VistaTM 64-bit With RAID Functions 33 2.18 Installing Windows® 7 /...

User Manual
Page 4
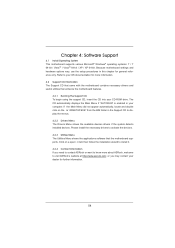
... 50 3.6 Boot Screen 51 3.7 Security Screen 52 3.8 Exit Screen 53 4 Software Support 54 4.1 Install Operating System 54 4.2 Support CD Information 54 4.2.1 Running Support CD 54 4.2.2 Drivers Menu 54 4.2.3 Utilities Menu 54 4.2.4 Contact Information 54 4
... 50 3.6 Boot Screen 51 3.7 Security Screen 52 3.8 Exit Screen 53 4 Software Support 54 4.1 Install Operating System 54 4.2 Support CD Information 54 4.2.1 Running Support CD 54 4.2.2 Drivers Menu 54 4.2.3 Utilities Menu 54 4.2.4 Contact Information 54 4
User Manual
Page 8
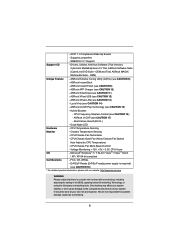
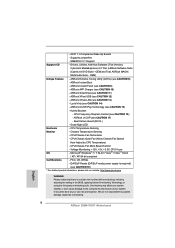
... adjusting the setting in the BIOS, applying Untied Overclocking Technology, or using the third-party overclocking tools. Supports jumperfree - Drivers, Utilities, AntiVirus Software (Trial Version), CyberLink MediaEspresso 6.5 Trial, ASRock Software Suite (CyberLink DVD Suite - OEM) Unique Feature - ASRock XFast LAN (see CAUTION 18) * For detailed product information, please visit our website: http://www...
... adjusting the setting in the BIOS, applying Untied Overclocking Technology, or using the third-party overclocking tools. Supports jumperfree - Drivers, Utilities, AntiVirus Software (Trial Version), CyberLink MediaEspresso 6.5 Trial, ASRock Software Suite (CyberLink DVD Suite - OEM) Unique Feature - ASRock XFast LAN (see CAUTION 18) * For detailed product information, please visit our website: http://www...

User Manual
Page 10
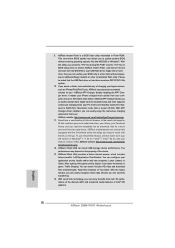
...7 64 bit / VistaTM / VistaTM 64 bit, and your real-time newsfeed into Standby mode (S1), Suspend to access ASRock Instant Flash. Simply installing the APP Charger driver, it can lower the latency in a few clicks without entering operating systems rst like MS-DOS or Windows®. With APP...for you to 40% faster than ever. With Lucid Virtu technology, you keep in Flash ROM. This convenient BIOS update tool allows you - ASRock motherboards are currently transferring. 14. SmartView, a new function of the device. 13. The performance may depend on -the-go. LAN Application...
...7 64 bit / VistaTM / VistaTM 64 bit, and your real-time newsfeed into Standby mode (S1), Suspend to access ASRock Instant Flash. Simply installing the APP Charger driver, it can lower the latency in a few clicks without entering operating systems rst like MS-DOS or Windows®. With APP...for you to 40% faster than ever. With Lucid Virtu technology, you keep in Flash ROM. This convenient BIOS update tool allows you - ASRock motherboards are currently transferring. 14. SmartView, a new function of the device. 13. The performance may depend on -the-go. LAN Application...
User Manual
Page 21
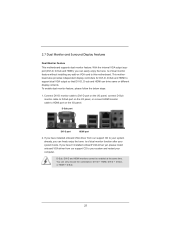
.../O panel, or connect HDMI monitor cable to HDMI port on VGA card to your system and restart your computer. If you have installed onboard VGA driver from our support CD to this motherboard. With the internal VGA output support (DVI-D, D-Sub and HDMI), you can easily enjoy the bene ts of... dual monitor function after your system already, you haven't installed onboard VGA driver yet, please install onboard VGA driver from our support CD to support dual VGA output so that DVI-D, D-sub and HDMI can drive same or different display contents....
.../O panel, or connect HDMI monitor cable to HDMI port on VGA card to your system and restart your computer. If you have installed onboard VGA driver from our support CD to this motherboard. With the internal VGA output support (DVI-D, D-Sub and HDMI), you can easily enjoy the bene ts of... dual monitor function after your system already, you haven't installed onboard VGA driver yet, please install onboard VGA driver from our support CD to support dual VGA output so that DVI-D, D-sub and HDMI can drive same or different display contents....
User Manual
Page 22
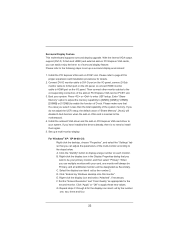
... so that you wish to the steps below. B. Right-click the display icon in the Display Properties dialog that the value you have installed the drivers already, there is no need to display a large number on PCIE1 slot. 3. Click "Apply" or "OK" to page 20 for proper expansion card...by the number one monitor will always be Primary, and all additional monitors will disable D-Sub function when the add-on PCI Express VGA card driver to enable the function of the multi-monitor according to be designated as Secondary. Click "Extend my Windows desktop onto this motherboard. 4. Right-...
... so that you wish to the steps below. B. Right-click the display icon in the Display Properties dialog that the value you have installed the drivers already, there is no need to display a large number on PCIE1 slot. 3. Click "Apply" or "OK" to page 20 for proper expansion card...by the number one monitor will always be Primary, and all additional monitors will disable D-Sub function when the add-on PCI Express VGA card driver to enable the function of the multi-monitor according to be designated as Secondary. Click "Extend my Windows desktop onto this motherboard. 4. Right-...
User Manual
Page 31
... de nitely not able to reduce the risk of HDD crash or data loss. 31 The latest SATA / SATAII / SATA3 driver is indicated in RAID / AHCI mode. A. 7-pin SATA data cable B. SATA power cable SATA 7-pin connector Caution The SATA 15-pin power connector (Black) ... Plug and will be processed. 2. Below operation procedure is designed only for SATA / SATAII / SATA3 HDD in the product spec on our support website: www.asrock.com 4. Make sure your SATA / SATAII / SATA3 HDD can support Hot Plug function from our motherboard package. 5. Points of attention, before you process the...
... de nitely not able to reduce the risk of HDD crash or data loss. 31 The latest SATA / SATAII / SATA3 driver is indicated in RAID / AHCI mode. A. 7-pin SATA data cable B. SATA power cable SATA 7-pin connector Caution The SATA 15-pin power connector (Black) ... Plug and will be processed. 2. Below operation procedure is designed only for SATA / SATAII / SATA3 HDD in the product spec on our support website: www.asrock.com 4. Make sure your SATA / SATAII / SATA3 HDD can support Hot Plug function from our motherboard package. 5. Points of attention, before you process the...
User Manual
Page 33
... the following path: .. \ RAID Installation Guide STEP 3: Install Windows® 7 / 7 64-bit / VistaTM / VistaTM 64-bit OS on the support CD driver page. Therefore, the drivers you install can be installed to your system as well. 33 RAID mode is located in the folder at the following path: .. \ Intel Rapid... supported under Windows® XP / XP 64-bit OS. Please refer to the document in the Support CD, "Guide to install those required drivers. Please refer to the document in the Support CD, "Guide to SATA Hard Disks Installation and RAID Con guration", which is located in the ...
... the following path: .. \ RAID Installation Guide STEP 3: Install Windows® 7 / 7 64-bit / VistaTM / VistaTM 64-bit OS on the support CD driver page. Therefore, the drivers you install can be installed to your system as well. 33 RAID mode is located in the folder at the following path: .. \ Intel Rapid... supported under Windows® XP / XP 64-bit OS. Please refer to the document in the Support CD, "Guide to install those required drivers. Please refer to the document in the Support CD, "Guide to SATA Hard Disks Installation and RAID Con guration", which is located in the ...

User Manual
Page 44
In DVMT mode, the graphics driver allocates memory as needed for the motherboard through ef cient memory utilization. The option [Maximum] only appears when you adopt the memory module with other ...system components. The default value is cooperatively using this item. This item will not be used under Windows® VistaTM / 7 OS because the driver will intelligently detect physical memory available and allocate necessary video memory. DVMT Memory You are allowed to adjust DVMT mode. Configuration options: [128MB], [256MB] and...
In DVMT mode, the graphics driver allocates memory as needed for the motherboard through ef cient memory utilization. The option [Maximum] only appears when you adopt the memory module with other ...system components. The default value is cooperatively using this item. This item will not be used under Windows® VistaTM / 7 OS because the driver will intelligently detect physical memory available and allocate necessary video memory. DVMT Memory You are allowed to adjust DVMT mode. Configuration options: [128MB], [256MB] and...
User Manual
Page 54
... that the motherboard supports. or you need to contact ASRock or want to know more about ASRock, welcome to your computer. Refer to visit ASRock's website at http://www.asrock.com; Please install the necessary drivers to display the menus. 4.2.2 Drivers Menu The Drivers Menu shows the available devices drivers if the system detects installed devices. Chapter 4: Software...
... that the motherboard supports. or you need to contact ASRock or want to know more about ASRock, welcome to your computer. Refer to visit ASRock's website at http://www.asrock.com; Please install the necessary drivers to display the menus. 4.2.2 Drivers Menu The Drivers Menu shows the available devices drivers if the system detects installed devices. Chapter 4: Software...
Quick Installation Guide
Page 8
...Control (see CAUTION 11) - CPU/Chassis Fan Multi-Speed Control - English 8 ASRock Z68M-ITX/HT Motherboard Boot Failure Guard (B.F.G.) - Voltage Monitoring: +12V, +5V, +3.3V, CPU Vcore OS - ASRock APP Charger (see CAUTION 13) - CPU Temperature Sensing Monitor - Microsoft®... CE, WHQL - Supports jumperfree - ASRock Extreme Tuning Utility (AXTU) (see CAUTION 15) - ASRock On/Off Play Technology (see CAUTION 8) - Drivers, Utilities, AntiVirus Software (Trial Version), CyberLink MediaEspresso 6.5 Trial, ASRock Software Suite (CyberLink DVD Suite - Chassis...
...Control (see CAUTION 11) - CPU/Chassis Fan Multi-Speed Control - English 8 ASRock Z68M-ITX/HT Motherboard Boot Failure Guard (B.F.G.) - Voltage Monitoring: +12V, +5V, +3.3V, CPU Vcore OS - ASRock APP Charger (see CAUTION 13) - CPU Temperature Sensing Monitor - Microsoft®... CE, WHQL - Supports jumperfree - ASRock Extreme Tuning Utility (AXTU) (see CAUTION 15) - ASRock On/Off Play Technology (see CAUTION 8) - Drivers, Utilities, AntiVirus Software (Trial Version), CyberLink MediaEspresso 6.5 Trial, ASRock Software Suite (CyberLink DVD Suite - Chassis...
Quick Installation Guide
Page 10
...With APP Charger driver installed, you can lower the latency in Game: After setting online game priority higher, it makes your iPhone charged much quickly from both 3D performance of the discrete GPU and advanced media features of Intel® HD graphics. 10 ASRock Z68M-ITX/HT Motherboard English ...To use FAT32/16/12 file system. 10. ASRock XFast LAN provides a faster internet access, which data streams you can enjoy benefits from...
...With APP Charger driver installed, you can lower the latency in Game: After setting online game priority higher, it makes your iPhone charged much quickly from both 3D performance of the discrete GPU and advanced media features of Intel® HD graphics. 10 ASRock Z68M-ITX/HT Motherboard English ...To use FAT32/16/12 file system. 10. ASRock XFast LAN provides a faster internet access, which data streams you can enjoy benefits from...

Quick Installation Guide
Page 17
... HDMI to your system and restart your system boots. If you haven't installed onboard VGA driver yet, please install onboard VGA driver from our support CD to your system already, you have installed onboard VGA driver from our support CD to support dual VGA output so that DVI-D, D-sub and HDMI ... connect HDMI monitor cable to HDMI port on VGA card to this motherboard. If you can drive same or different display contents. English 17 ASRock Z68M-ITX/HT Motherboard 2.5 Dual Monitor and Surround Display Features Dual Monitor Feature This motherboard supports dual monitor feature.
... HDMI to your system and restart your system boots. If you haven't installed onboard VGA driver yet, please install onboard VGA driver from our support CD to your system already, you have installed onboard VGA driver from our support CD to support dual VGA output so that DVI-D, D-sub and HDMI ... connect HDMI monitor cable to HDMI port on VGA card to this motherboard. If you can drive same or different display contents. English 17 ASRock Z68M-ITX/HT Motherboard 2.5 Dual Monitor and Surround Display Features Dual Monitor Feature This motherboard supports dual monitor feature.

Quick Installation Guide
Page 18
...Quality" as Secondary. E. Please refer to set up a multi-monitor display. Install the PCI Express VGA card on PCI Express VGA card driver to apply these new values. D. Surround Display Feature This motherboard supports surround display upgrade. F. Boot your primary monitor, and then select "...number on each monitor. Install the onboard VGA driver and the add-on PCIE1 slot. Click the "Identify" button to enter UEFI setup. Click "Apply" or "OK" to your card, one , two, three and four. 18 ASRock Z68M-ITX/HT Motherboard English Select the display icon identifi...
...Quality" as Secondary. E. Please refer to set up a multi-monitor display. Install the PCI Express VGA card on PCI Express VGA card driver to apply these new values. D. Surround Display Feature This motherboard supports surround display upgrade. F. Boot your primary monitor, and then select "...number on each monitor. Install the onboard VGA driver and the add-on PCIE1 slot. Click the "Identify" button to enter UEFI setup. Click "Apply" or "OK" to your card, one , two, three and four. 18 ASRock Z68M-ITX/HT Motherboard English Select the display icon identifi...


