
User Manual
Page 3
... 18 2.4 Installation of Heatsink and CPU fan 20 2.5 Installation of Memory Modules (DIMM 21 2.6 Expansion Slots (PCI Express Slots 23 2.7 ASRock Game Blaster Installation Guide 25 2.8 SLITM, 3-Way SLITM and Quad SLITM Operation Guide ... 34 2.9 CrossFireXTM, 3-Way CrossFireXTM and Quad CrossFireXTM Operation.../ SATAII / SATA3 HDD Hot Plug Feature and Operation Guide 61 2.22 Driver Installation Guide 63 2.23 Installing Windows® 7 / 7 64-bit / VistaTM / VistaTM 64-bit With RAID Functions 63 2.24 Installing Windows® 7 / 7 64-bit / VistaTM / VistaTM 64-bit / XP / XP 64-bit Without ...
... 18 2.4 Installation of Heatsink and CPU fan 20 2.5 Installation of Memory Modules (DIMM 21 2.6 Expansion Slots (PCI Express Slots 23 2.7 ASRock Game Blaster Installation Guide 25 2.8 SLITM, 3-Way SLITM and Quad SLITM Operation Guide ... 34 2.9 CrossFireXTM, 3-Way CrossFireXTM and Quad CrossFireXTM Operation.../ SATAII / SATA3 HDD Hot Plug Feature and Operation Guide 61 2.22 Driver Installation Guide 63 2.23 Installing Windows® 7 / 7 64-bit / VistaTM / VistaTM 64-bit With RAID Functions 63 2.24 Installing Windows® 7 / 7 64-bit / VistaTM / VistaTM 64-bit / XP / XP 64-bit Without ...
User Manual
Page 4
2.24.2 Installing Windows® 7 / 7 64-bit / VistaTM / VistaTM 64-bit Without RAID Functions 65 2.25 Teaming Function Operation Guide 66 2.26 Untied Overclocking Technology 69 3 UEFI SETUP UTILITY ...
2.24.2 Installing Windows® 7 / 7 64-bit / VistaTM / VistaTM 64-bit Without RAID Functions 65 2.25 Teaming Function Operation Guide 66 2.26 Untied Overclocking Technology 69 3 UEFI SETUP UTILITY ...
User Manual
Page 5
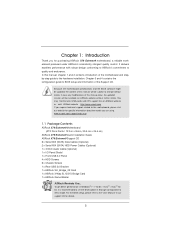
...cations of the Support CD. www.asrock.com/support/index.asp 1.1 Package Contents ASRock X79 Extreme9 Motherboard (ATX Form Factor: 12.0-in x 9.6-in our support CD for purchasing ASRock X79 Extreme9 motherboard, a reliable motherboard produced under ASRock's consistently stringent quality control. It delivers...To get better performance in Windows® 7 / 7 64-bit / VistaTM / VistaTM 64bit, it is recommended to set the BIOS option in Storage Configuration to the "User Manual" in , 30.5 cm x 24.4 cm) ASRock X79 Extreme9 Quick Installation Guide ASRock X79 Extreme9 Support CD 6 x Serial ...
...cations of the Support CD. www.asrock.com/support/index.asp 1.1 Package Contents ASRock X79 Extreme9 Motherboard (ATX Form Factor: 12.0-in x 9.6-in our support CD for purchasing ASRock X79 Extreme9 motherboard, a reliable motherboard produced under ASRock's consistently stringent quality control. It delivers...To get better performance in Windows® 7 / 7 64-bit / VistaTM / VistaTM 64bit, it is recommended to set the BIOS option in Storage Configuration to the "User Manual" in , 30.5 cm x 24.4 cm) ASRock X79 Extreme9 Quick Installation Guide ASRock X79 Extreme9 Support CD 6 x Serial ...
User Manual
Page 8
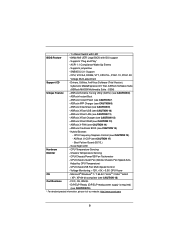
... Tachometer - CPU/Chassis/SB Fan Multi-Speed Control - Voltage Monitoring: +12V, +5V, +3.3V, CPU Vcore OS - ASRock SmartView (see CAUTION 13) - ASRock XFast RAM (see CAUTION 9) - Hybrid Booster: - Good Night LED Hardware - Chassis Temperature Sensing - Microsoft® Windows® 7 / 7 64-bit / VistaTM / VistaTM 64-bit / XP / XP 64-bit compliant (see CAUTION 7) - Supports...
... Tachometer - CPU/Chassis/SB Fan Multi-Speed Control - Voltage Monitoring: +12V, +5V, +3.3V, CPU Vcore OS - ASRock SmartView (see CAUTION 13) - ASRock XFast RAM (see CAUTION 9) - Hybrid Booster: - Good Night LED Hardware - Chassis Temperature Sensing - Microsoft® Windows® 7 / 7 64-bit / VistaTM / VistaTM 64-bit / XP / XP 64-bit compliant (see CAUTION 7) - Supports...
User Manual
Page 9
WARNING Please realize that Windows® cannot use ASRock XFast RAM to get the same OC settings....asrock.com 9 If above four DDR3 DIMM slots are allowed to adjust. It depends on future CPU updates and releases. 6. In Fan Control, it shows the major readings of memory modules on DDR3_A1, DDR3_B1, DDR3_C1 and DDR3_D1 for system usage under Windows... install the memory modules on page 21 for the operation procedures of output phases to DDR3_ C2.) 4. For Windows® OS with your own risk and expense. In IES (Intelligent Energy Saver), the voltage regulator can use...
WARNING Please realize that Windows® cannot use ASRock XFast RAM to get the same OC settings....asrock.com 9 If above four DDR3 DIMM slots are allowed to adjust. It depends on future CPU updates and releases. 6. In Fan Control, it shows the major readings of memory modules on DDR3_A1, DDR3_B1, DDR3_C1 and DDR3_D1 for system usage under Windows... install the memory modules on page 21 for the operation procedures of output phases to DDR3_ C2.) 4. For Windows® OS with your own risk and expense. In IES (Intelligent Energy Saver), the voltage regulator can use...

User Manual
Page 10
...lower the latency in a few clicks without entering operating systems first like MS-DOS or Windows®. Just launch this utility, you keep in Flash ROM. If you are transferring currently. 12. ASRock XFast LAN provides a faster internet access, which data streams you desire a faster, less restricted... way of Your Data: With the status window, you can press the key during the POST or the key to quickly...
...lower the latency in a few clicks without entering operating systems first like MS-DOS or Windows®. Just launch this utility, you keep in Flash ROM. If you are transferring currently. 12. ASRock XFast LAN provides a faster internet access, which data streams you desire a faster, less restricted... way of Your Data: With the status window, you can press the key during the POST or the key to quickly...
User Manual
Page 11
... Product, was a provision regulated by Microsoft® Windows® XP / XP 64-bit. 19. Only USB2.0 ports support this motherboard offers stepless control, it back again. Intel Rapid Storage Technology enterprise 3.0, ASRock XFast RAM and ASRock Game Blaster are required. According to Intel's suggestion,...BIOS files need to a certain temperature under 100 mA current consumption. ASRock XFast RAM is a new function that is that cannot be under Windows® OS 32-bit CPU. Normally, ASRock X-FAN will be higher than 50% under heavy-loading or overclocking. To meet...
... Product, was a provision regulated by Microsoft® Windows® XP / XP 64-bit. 19. Only USB2.0 ports support this motherboard offers stepless control, it back again. Intel Rapid Storage Technology enterprise 3.0, ASRock XFast RAM and ASRock Game Blaster are required. According to Intel's suggestion,...BIOS files need to a certain temperature under 100 mA current consumption. ASRock XFast RAM is a new function that is that cannot be under Windows® OS 32-bit CPU. Normally, ASRock X-FAN will be higher than 50% under heavy-loading or overclocking. To meet...

User Manual
Page 16
... Gold Capacitor design (100% Japan-made high- Powerful 32-bit 200Mhz QUAD-Processor SIMD DSP - 102dB 24-bit DAC - 101dB 24-bit ADC - Microsoft® Windows® 7 / 7 64-bit / VistaTM / VistaTM 64-bit compliant 16 Specifications Platform Chipset Output Features Input Features Audio LAN Rear Panel I /O Panel - 1 x Coaxial SPDIF Out Port...
... Gold Capacitor design (100% Japan-made high- Powerful 32-bit 200Mhz QUAD-Processor SIMD DSP - 102dB 24-bit DAC - 101dB 24-bit ADC - Microsoft® Windows® 7 / 7 64-bit / VistaTM / VistaTM 64-bit compliant 16 Specifications Platform Chipset Output Features Input Features Audio LAN Rear Panel I /O Panel - 1 x Coaxial SPDIF Out Port...

User Manual
Page 25
Follow the step by step driver setup directions. ASRock Game Blaster is not supported under Windows® XP / XP 64-bit. 2.7 ASRock Game Blaster Installation Guide 2.7.1 ASRock Game Blaster and Driver Installation Step 1. Please make sure to take effect. 25 Restart your computer for ASRock Game Blaster to use Windows® VistaTM 32-bit / 64-bit or Windows® 7 32-bit / 64-bit. Step3. Step2. Please refer to the "Expansion Slots" section then insert ASRock Game Blaster into PCIE3 slot.
Follow the step by step driver setup directions. ASRock Game Blaster is not supported under Windows® XP / XP 64-bit. 2.7 ASRock Game Blaster Installation Guide 2.7.1 ASRock Game Blaster and Driver Installation Step 1. Please make sure to take effect. 25 Restart your computer for ASRock Game Blaster to use Windows® VistaTM 32-bit / 64-bit or Windows® 7 32-bit / 64-bit. Step3. Step2. Please refer to the "Expansion Slots" section then insert ASRock Game Blaster into PCIE3 slot.

User Manual
Page 34
...version 280.41 and later). Install the identical SLITM-ready graphics cards that are NVIDIA® certified. Currently, NVIDIA® SLITM technology supports Windows® XP / XP 64-bit / VistaTM / VistaTM 64-bit / 7 / 7 64-bit OS. It is recommended to the PCI Express ...Installing Two SLITM-Ready Graphics Cards Step 1. Make sure that are NVIDIA® certified. NVIDIA® 3-Way SLITM and Quad SLITM technology support Windows® VistaTM / VistaTM 64-bit / 7 / 7 64-bit OS only. If required, connect the auxiliary power source to use NVIDIA® certi...
...version 280.41 and later). Install the identical SLITM-ready graphics cards that are NVIDIA® certified. Currently, NVIDIA® SLITM technology supports Windows® XP / XP 64-bit / VistaTM / VistaTM 64-bit / 7 / 7 64-bit OS. It is recommended to the PCI Express ...Installing Two SLITM-Ready Graphics Cards Step 1. Make sure that are NVIDIA® certified. NVIDIA® 3-Way SLITM and Quad SLITM technology support Windows® VistaTM / VistaTM 64-bit / 7 / 7 64-bit OS only. If required, connect the auxiliary power source to use NVIDIA® certi...

User Manual
Page 37
... acceleration item, please select Enabled. After that, you can freely enjoy the benefit of SLITM feature. 37 C. Please follow the below procedures to your Windows® taskbar. 2.8.2 Driver Installation and Setup Install the graphics card drivers to enable the multi-GPU feature. B. In Select an SLI configuration item..., please select Enable SLI. And click Apply. You can enable the MultiGraphics Processing Unit (GPU) feature in the NVIDIA® nView system tray utility. For Windows® XP / XP 64-bit OS: (For SLITM mode only) A. Reboot your system. D.
... acceleration item, please select Enabled. After that, you can freely enjoy the benefit of SLITM feature. 37 C. Please follow the below procedures to your Windows® taskbar. 2.8.2 Driver Installation and Setup Install the graphics card drivers to enable the multi-GPU feature. B. In Select an SLI configuration item..., please select Enable SLI. And click Apply. You can enable the MultiGraphics Processing Unit (GPU) feature in the NVIDIA® nView system tray utility. For Windows® XP / XP 64-bit OS: (For SLITM mode only) A. Reboot your system. D.

User Manual
Page 38
... Set SLI and PhysX configuration. D. In Set PhysX GPU acceleration item, please select Enabled. F. B. For Windows® VistaTM / VistaTM 64-bit / 7 / 7 64-bit OS: (For SLITM and Quad SLITM mode) A. Reboot your Windows taskbar. E. G. Click the Start icon on your system. Select NVIDIA Control Panel tab. And click Apply. C. From...
... Set SLI and PhysX configuration. D. In Set PhysX GPU acceleration item, please select Enabled. F. B. For Windows® VistaTM / VistaTM 64-bit / 7 / 7 64-bit OS: (For SLITM and Quad SLITM mode) A. Reboot your Windows taskbar. E. G. Click the Start icon on your system. Select NVIDIA Control Panel tab. And click Apply. C. From...

User Manual
Page 39
... Enabled. In Select a hardware acceleration setting for identification or explanation and to the owners' benefit, without intent to D on page 38. B. For Windows® VistaTM / VistaTM 64-bit / 7 / 7 64-bit OS: (For 3-Way SLITM mode) A. Follow steps A to infringe. 39 In Select an SLI configuration item...
... Enabled. In Select a hardware acceleration setting for identification or explanation and to the owners' benefit, without intent to D on page 38. B. For Windows® VistaTM / VistaTM 64-bit / 7 / 7 64-bit OS: (For 3-Way SLITM mode) A. Follow steps A to infringe. 39 In Select an SLI configuration item...

User Manual
Page 40
... and Quad CrossFireXTM Operation Guide This motherboard supports CrossFireXTM, 3-way CrossFireXTM and Quad CrossFireXTM feature. Currently CrossFireXTM feature is supported with Windows® XP with Service Pack 2 / VistaTM / 7 OS. 3-way CrossFireXTM and Quad CrossFireXTM feature are properly seated on... the slots. 40 CrossFireXTM technology offers the most advantageous means available of different operating modes with Windows® VistaTM / 7 OS only. Combining a range of combining multiple high performance Graphics Processing Units (GPU) in ...
... and Quad CrossFireXTM Operation Guide This motherboard supports CrossFireXTM, 3-way CrossFireXTM and Quad CrossFireXTM feature. Currently CrossFireXTM feature is supported with Windows® XP with Service Pack 2 / VistaTM / 7 OS. 3-way CrossFireXTM and Quad CrossFireXTM feature are properly seated on... the slots. 40 CrossFireXTM technology offers the most advantageous means available of different operating modes with Windows® VistaTM / 7 OS only. Combining a range of combining multiple high performance Graphics Processing Units (GPU) in ...

User Manual
Page 43
... Center". We recommend using this utility to download it again): http://www.microsoft.com/windowsxp/sp2/default.mspx B. Step 5. AMD recommends Windows® XP Service Pack 2 or higher to be installed (If you have Microsoft .NET Framework installed prior to installation. Install the ...VGA card drivers to your Windows® taskbar. Please check AMD website for ATITM driver updates. Then you have any previously installed Catalyst drivers prior to downloading and...
... Center". We recommend using this utility to download it again): http://www.microsoft.com/windowsxp/sp2/default.mspx B. Step 5. AMD recommends Windows® XP Service Pack 2 or higher to be installed (If you have Microsoft .NET Framework installed prior to installation. Install the ...VGA card drivers to your Windows® taskbar. Please check AMD website for ATITM driver updates. Then you have any previously installed Catalyst drivers prior to downloading and...
User Manual
Page 63
...CD to your system, and click the "Load Driver" button to check the installation guide in the following path: .. \ RAID Installation Guide STEP 3: Install Windows® 7 / 7 64-bit / VistaTM / VistaTM 64-bit OS on Intel® SATA2 / SATA3 ports with RAID functions, please follow below steps...folder at the following path of our Support CD: 32 bit: ..\i386\Win7_Vista_Intel_v3.0.0.1112 64-bit: ..\AMD64\Win7-64_Vista64_Intel_v3.0.0.1112 After that, please insert Windows® 7 / 7 64-bit / VistaTM / VistaTM 64-bit optical disk into the optical drive to boot your system, and follow the order...
...CD to your system, and click the "Load Driver" button to check the installation guide in the following path: .. \ RAID Installation Guide STEP 3: Install Windows® 7 / 7 64-bit / VistaTM / VistaTM 64-bit OS on Intel® SATA2 / SATA3 ports with RAID functions, please follow below steps...folder at the following path of our Support CD: 32 bit: ..\i386\Win7_Vista_Intel_v3.0.0.1112 64-bit: ..\AMD64\Win7-64_Vista64_Intel_v3.0.0.1112 After that, please insert Windows® 7 / 7 64-bit / VistaTM / VistaTM 64-bit optical disk into the optical drive to boot your system, and follow the order...

User Manual
Page 64
...figuration", which is located in the folder at the following path: .. \ RAID Installation Guide and the document in the support CD, "Guide to install Windows® 7 / 7 64-bit / VistaTM / VistaTM 64-bit / XP / XP 64bit OS on your system. 64 Enter UEFI SETUP UTILITY Advanced screen ...64-bit OS on your SATA / SATA2 / SATA3 HDDs without RAID functions, please follow below procedures according to the OS you install. 2.24.1 Installing Windows® XP / XP 64-bit Without RAID Functions If you want to use both "RAID Installation Guide" and "Intel Rapid Storage Information" for SATA3_0...
...figuration", which is located in the folder at the following path: .. \ RAID Installation Guide and the document in the support CD, "Guide to install Windows® 7 / 7 64-bit / VistaTM / VistaTM 64-bit / XP / XP 64bit OS on your system. 64 Enter UEFI SETUP UTILITY Advanced screen ...64-bit OS on your SATA / SATA2 / SATA3 HDDs without RAID functions, please follow below procedures according to the OS you install. 2.24.1 Installing Windows® XP / XP 64-bit Without RAID Functions If you want to use both "RAID Installation Guide" and "Intel Rapid Storage Information" for SATA3_0...

User Manual
Page 65
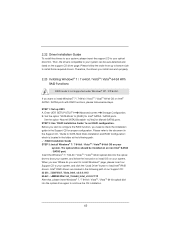
... SATA3 Operation Mode" to [AHCI] for SATA3_M0 to [AHCI] for SATA3_0 and SATA3_1 ports. 2.24.2 Installing Windows® 7 / 7 64-bit / VistaTM / VistaTM 64-bit Without RAID Functions If you want to install Windows® 7 / 7 64-bit / VistaTM / VistaTM 64-bit OS on your SATA / SATA2 / SATA3... HDDs without NCQ function STEP 1: Set Up UEFI. STEP 2: Install Windows® 7 / 7 64-bit / VistaTM / VistaTM 64-bit OS on your system...
... SATA3 Operation Mode" to [AHCI] for SATA3_M0 to [AHCI] for SATA3_0 and SATA3_1 ports. 2.24.2 Installing Windows® 7 / 7 64-bit / VistaTM / VistaTM 64-bit Without RAID Functions If you want to install Windows® 7 / 7 64-bit / VistaTM / VistaTM 64-bit OS on your SATA / SATA2 / SATA3... HDDs without NCQ function STEP 1: Set Up UEFI. STEP 2: Install Windows® 7 / 7 64-bit / VistaTM / VistaTM 64-bit OS on your system...

User Manual
Page 68
... first disable and reenable all network adapters made by others are defined, they have defined and exit the Manage Teams window. 13. Click Apply/Exit to create all the teams you attempt to a switch. * Not all team members before applying the changes. 12. Repeat steps 5. through...
... first disable and reenable all network adapters made by others are defined, they have defined and exit the Manage Teams window. 13. Click Apply/Exit to create all the teams you attempt to a switch. * Not all team members before applying the changes. 12. Repeat steps 5. through...

User Manual
Page 72
... [Enabled]. If you can switch between multiple frequency and voltage points to enable power savings. 3.3 OC Tweaker Screen In the OC Tweaker screen, you install Windows® VistaTM / 7 and want to enable this function, please set this item to enable/disable CPU Internal PLL Overvoltage Function. Please note that enabling this...
... [Enabled]. If you can switch between multiple frequency and voltage points to enable power savings. 3.3 OC Tweaker Screen In the OC Tweaker screen, you install Windows® VistaTM / 7 and want to enable this function, please set this item to enable/disable CPU Internal PLL Overvoltage Function. Please note that enabling this...


