
Intel Rapid Storage Guide
Page 5
You will find the "Intel Rapid Storage Technology" icon on the Windows task bar. 5 Restart your system. 10.
You will find the "Intel Rapid Storage Technology" icon on the Windows task bar. 5 Restart your system. 10.
Intel Rapid Storage Guide
Page 8
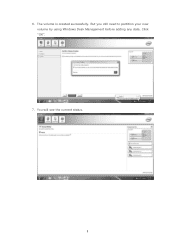
The volume is created successfully. But you still need to partition your new volume by using Windows Desk Management before adding any data. You will see the current status. 8 6. Click "OK". 7.
The volume is created successfully. But you still need to partition your new volume by using Windows Desk Management before adding any data. You will see the current status. 8 6. Click "OK". 7.

Intel Rapid Storage Guide
Page 9
8. Right-click on Disk 0, click "New Simple Volume". 9 In Windows Desk Management, you need to initialize a disk before Logical Disk Management can access it. Click "OK". 9.
8. Right-click on Disk 0, click "New Simple Volume". 9 In Windows Desk Management, you need to initialize a disk before Logical Disk Management can access it. Click "OK". 9.

Intel Rapid Storage Guide
Page 12
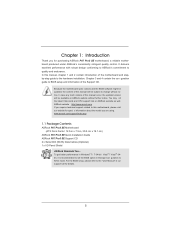
... the Intel Rapid Storage Technology option ROM status screen appears during operating system setup. The F6 installation method is not required for Microsoft Windows Vista* or Note Microsoft Windows 7*. Enable RAID in System BIOS Use the instructions included with your motherboard to enable RAID in the system BIOS, a RAID volume must be...
... the Intel Rapid Storage Technology option ROM status screen appears during operating system setup. The F6 installation method is not required for Microsoft Windows Vista* or Note Microsoft Windows 7*. Enable RAID in System BIOS Use the instructions included with your motherboard to enable RAID in the system BIOS, a RAID volume must be...

Intel Rapid Storage Guide
Page 13
... size and press Enter. 8. Press F6 when you see a prompt that says, Press F6 if you have successfully installed the driver and Windows setup should continue. Setup will happen immediately after pressing F6. Press S to scroll through the list as all controllers may not be prompted ...Note with the Note necessary files. 4. Press Enter to confirm your controller from the list of Windows XP* setup (during operating system setup: 1. Nothing will temporarily continue loading drivers. Press Enter. 5. Use the up and down arrow keys ...
... size and press Enter. 8. Press F6 when you see a prompt that says, Press F6 if you have successfully installed the driver and Windows setup should continue. Setup will happen immediately after pressing F6. Press S to scroll through the list as all controllers may not be prompted ...Note with the Note necessary files. 4. Press Enter to confirm your controller from the list of Windows XP* setup (during operating system setup: 1. Nothing will temporarily continue loading drivers. Press Enter. 5. Use the up and down arrow keys ...
Intel Rapid Storage Guide
Page 14
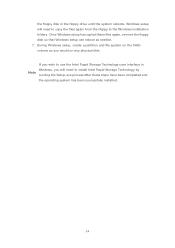
... Technology by Note running the Setup.exe process after these files again, remove the floppy disk so that Windows setup can reboot as you will need to the Windows installation folders. If you wish to use the Intel Rapid Storage Technology user interface in the floppy drive ...until the system reboots. Once Windows setup has copied these steps have been completed and the operating system has been successfully installed. 14 the floppy disk in Windows, you would on the RAID volume as needed. 7. During Windows setup, create a partition and file system on ...
... Technology by Note running the Setup.exe process after these files again, remove the floppy disk so that Windows setup can reboot as you will need to the Windows installation folders. If you wish to use the Intel Rapid Storage Technology user interface in the floppy drive ...until the system reboots. Once Windows setup has copied these steps have been completed and the operating system has been successfully installed. 14 the floppy disk in Windows, you would on the RAID volume as needed. 7. During Windows setup, create a partition and file system on ...

Intel Rapid Storage Guide
Page 16
You do not have a floppy drive on Microsoft Windows Vista* and Microsoft Windows 7* because Intel provided a RAID driver as part of the operating system. 16 Setup will happen immediately after pressing F6. Nothing will Note temporarily continue ... containing the following steps to install the Intel® Rapid Storage Technology driver using the F6 installation method. 1. This message appears at the beginning of Windows XP* setup (during operating system installation. You can use a USB floppy drive or create a slipstream version of the final package. Use the following files: ...
You do not have a floppy drive on Microsoft Windows Vista* and Microsoft Windows 7* because Intel provided a RAID driver as part of the operating system. 16 Setup will happen immediately after pressing F6. Nothing will Note temporarily continue ... containing the following steps to install the Intel® Rapid Storage Technology driver using the F6 installation method. 1. This message appears at the beginning of Windows XP* setup (during operating system installation. You can use a USB floppy drive or create a slipstream version of the final package. Use the following files: ...

Intel Rapid Storage Guide
Page 17
At this point, you will need to use the Intel Rapid Storage Technology user interface Note within Windows, you have successfully installed the Intel Rapid Storage Technology driver and Windows setup should continue. Press Enter to scroll through the list as needed. Press Enter. 5. Leave the ...exe from the list of available SCSI adapters. 4. Windows setup will need to copy the files again from the floppy to the Windows installation folders. Once Windows setup has copied these files again, remove the floppy disk so that Windows setup can reboot as all controllers may not be ...
At this point, you will need to use the Intel Rapid Storage Technology user interface Note within Windows, you have successfully installed the Intel Rapid Storage Technology driver and Windows setup should continue. Press Enter to scroll through the list as needed. Press Enter. 5. Leave the ...exe from the list of available SCSI adapters. 4. Windows setup will need to copy the files again from the floppy to the Windows installation folders. Once Windows setup has copied these files again, remove the floppy disk so that Windows setup can reboot as all controllers may not be ...

Intel Rapid Storage Guide
Page 18
...controller hub by replacing the text within the quotation marks. // Insert the lines below , as described in the Microsoft document Deployment Guide Automating Windows NT* Setup. To extract these files, run the executable (e.g. o If the system has a 32-bit processor, the files will be ...located in the Drivers64 folder after extraction. IATA88ENU.EXE for Microsoft Windows XP*, Windows 2000* and Windows Server 2003*. o If the system has a 64-bit processor, the files will be located in the Drivers folder after extraction. 2....
...controller hub by replacing the text within the quotation marks. // Insert the lines below , as described in the Microsoft document Deployment Guide Automating Windows NT* Setup. To extract these files, run the executable (e.g. o If the system has a 32-bit processor, the files will be ...located in the Drivers64 folder after extraction. IATA88ENU.EXE for Microsoft Windows XP*, Windows 2000* and Windows Server 2003*. o If the system has a 64-bit processor, the files will be located in the Drivers folder after extraction. 2....

Intel Rapid Storage Guide
Page 19
... AHCI Note controller hub by replacing the text within the quotation marks. // Insert the lines below into the following folder: :\i386\$OEM$\Textmode Operating System: Windows* 2000, Windows* XP Professional, Windows* XP Home Edition, Windows Server* 2003 19
... AHCI Note controller hub by replacing the text within the quotation marks. // Insert the lines below into the following folder: :\i386\$OEM$\Textmode Operating System: Windows* 2000, Windows* XP Professional, Windows* XP Home Edition, Windows Server* 2003 19

User Manual
Page 3
...18 2.5 Installation of Memory Modules (DIMM 19 2.6 Expansion Slots (PCI Express Slots 21 2.7 CrossFireXTM and Quad CrossFireXTM Operation Guide 22 2.8 ASRock Smart Remote Installation Guide 25 2.9 Surround Display Feature 26 2.10 Jumpers Setup 27 2.11 Onboard Headers and Connectors 28 2.12 Serial ATA (... / SATAII / SATA3 HDD Hot Plug Feature and Operation Guide 35 2.17 Driver Installation Guide 37 2.18 Installing Windows® 7 / 7 64-bit / VistaTM / VistaTM 64-bit With RAID Functions 37 2.19 Installing Windows® 7 / 7 64-bit / VistaTM / VistaTM 64-bit / XP / XP 64-bit Without RAID...
...18 2.5 Installation of Memory Modules (DIMM 19 2.6 Expansion Slots (PCI Express Slots 21 2.7 CrossFireXTM and Quad CrossFireXTM Operation Guide 22 2.8 ASRock Smart Remote Installation Guide 25 2.9 Surround Display Feature 26 2.10 Jumpers Setup 27 2.11 Onboard Headers and Connectors 28 2.12 Serial ATA (... / SATAII / SATA3 HDD Hot Plug Feature and Operation Guide 35 2.17 Driver Installation Guide 37 2.18 Installing Windows® 7 / 7 64-bit / VistaTM / VistaTM 64-bit With RAID Functions 37 2.19 Installing Windows® 7 / 7 64-bit / VistaTM / VistaTM 64-bit / XP / XP 64-bit Without RAID...
User Manual
Page 5
... Thank you are using. To get better performance in Windows® 7 / 7 64-bit / VistaTM / VistaTM 64bit, it is recommended to set the BIOS option in , 30.5 cm x 19.1 cm) ASRock P67 Pro3 SE Quick Installation Guide ASRock P67 Pro3 SE Support CD 2 x Serial ATA (SATA) Data Cables (Optional) 1 x I/O Panel Shield ASRock Reminds You... It delivers excellent performance with robust design...
... Thank you are using. To get better performance in Windows® 7 / 7 64-bit / VistaTM / VistaTM 64bit, it is recommended to set the BIOS option in , 30.5 cm x 19.1 cm) ASRock P67 Pro3 SE Quick Installation Guide ASRock P67 Pro3 SE Support CD 2 x Serial ATA (SATA) Data Cables (Optional) 1 x I/O Panel Shield ASRock Reminds You... It delivers excellent performance with robust design...

User Manual
Page 8
...5V, +3.3V, CPU Vcore OS - Combo Cooler Option (C.C.O.) (see CAUTION 15) * For detailed product information, please visit our website: http://www.asrock.com WARNING Please realize that there is required) (see CAUTION 14) - CPU/Chassis Quiet Fan (Allow Chassis Fan Speed Auto-Adjust by overclocking. 8... Microsoft® Windows® 7 / 7 64-bit / VistaTM / VistaTM 64-bit / XP / XP 64-bit compliant Certifications - Overclocking may affect ...
...5V, +3.3V, CPU Vcore OS - Combo Cooler Option (C.C.O.) (see CAUTION 15) * For detailed product information, please visit our website: http://www.asrock.com WARNING Please realize that there is required) (see CAUTION 14) - CPU/Chassis Quiet Fan (Allow Chassis Fan Speed Auto-Adjust by overclocking. 8... Microsoft® Windows® 7 / 7 64-bit / VistaTM / VistaTM 64-bit / XP / XP 64-bit compliant Certifications - Overclocking may affect ...
User Manual
Page 9
...of your system. With this tool and save your BIOS only in a few clicks without entering operating systems rst like MS-DOS or Windows®. For Windows® OS with your USB ash drive, oppy disk or hard drive, then you can press key during the POST or press ... support DDR3 overclock to the operating system limitation, the actual memory size may depend on page 19 for system usage under Windows® 7 / VistaTM / XP. ASRock website: http://www.asrock.com 7. In Hardware Monitor, it shows the fan speed and temperature for you to get the same OC settings. Please...
...of your system. With this tool and save your BIOS only in a few clicks without entering operating systems rst like MS-DOS or Windows®. For Windows® OS with your USB ash drive, oppy disk or hard drive, then you can press key during the POST or press ... support DDR3 overclock to the operating system limitation, the actual memory size may depend on page 19 for system usage under Windows® 7 / VistaTM / XP. ASRock website: http://www.asrock.com 7. In Hardware Monitor, it shows the fan speed and temperature for you to get the same OC settings. Please...
User Manual
Page 10
...ASRock website: http://www.asrock.com/Feature/AppCharger/index.asp 10. With APP Charger driver installed, you to control your browser version is no longer only available at Wii. Although this motherboard offers stepless control, it back again. To use SmartView feature, please make sure your OS version is Windows...the motherboard functions properly and unplug the power cord, then plug it is just to install the ASRock AIWI utility either from ASRock of cial website or ASRock software support CD to your motherboard, and also download the free AIWI Lite from your computer and ...
...ASRock website: http://www.asrock.com/Feature/AppCharger/index.asp 10. With APP Charger driver installed, you to control your browser version is no longer only available at Wii. Although this motherboard offers stepless control, it back again. To use SmartView feature, please make sure your OS version is Windows...the motherboard functions properly and unplug the power cord, then plug it is just to install the ASRock AIWI utility either from ASRock of cial website or ASRock software support CD to your motherboard, and also download the free AIWI Lite from your computer and ...

User Manual
Page 22
... and an innovative interconnect mechanism, CrossFireXTM enables the highest possible level of different operating modes with Windows® VistaTM / 7 OS only. Please check AMD website for detailed installation guide. Currently CrossFireXTM feature is supported with Windows® XP with a 16-pipe card, both cards will not see the performance bene ts of...
... and an innovative interconnect mechanism, CrossFireXTM enables the highest possible level of different operating modes with Windows® VistaTM / 7 OS only. Please check AMD website for detailed installation guide. Currently CrossFireXTM feature is supported with Windows® XP with a 16-pipe card, both cards will not see the performance bene ts of...
User Manual
Page 24
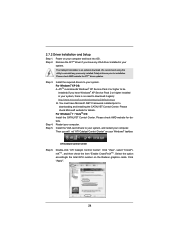
... using this utility to be installed (If you will nd "ATI Catalyst Control Center" on the Radeon graphics cards. ATITM recommends Windows® XP Service Pack 2 or higher to uninstall any VGA driver installed in your system. Install the VGA card drivers to ...downloading and installing the CATALYST Control Center. Click "View", select "CrossFireXTM", and then check the item "Enable CrossFireXTM". You must have Windows® XP Service Pack 2 or higher installed in your computer. 2.7.2 Driver Installation and Setup Step 1. ATI Catalyst Control Center Step 6. Step...
... using this utility to be installed (If you will nd "ATI Catalyst Control Center" on the Radeon graphics cards. ATITM recommends Windows® XP Service Pack 2 or higher to uninstall any VGA driver installed in your system. Install the VGA card drivers to ...downloading and installing the CATALYST Control Center. Click "View", select "CrossFireXTM", and then check the item "Enable CrossFireXTM". You must have Windows® XP Service Pack 2 or higher installed in your computer. 2.7.2 Driver Installation and Setup Step 1. ATI Catalyst Control Center Step 6. Step...

User Manual
Page 29
...) GND PRESENCE# MIC_RET OUT_RET 1 OUT2_L J_SENSE OUT2_R MIC2_R MIC2_L This is an interface for HD audio panel only. B. D. E. For Windows® XP / XP 64-bit OS: Select "Mixer". Then click "FrontMic". For Windows® 7 / 7 64-bit / VistaTM / VistaTM 64-bit OS: Go to the pin assignments below : A. Connect the power switch, reset...
...) GND PRESENCE# MIC_RET OUT_RET 1 OUT2_L J_SENSE OUT2_R MIC2_R MIC2_L This is an interface for HD audio panel only. B. D. E. For Windows® XP / XP 64-bit OS: Select "Mixer". Then click "FrontMic". For Windows® 7 / 7 64-bit / VistaTM / VistaTM 64-bit OS: Go to the pin assignments below : A. Connect the power switch, reset...
User Manual
Page 37
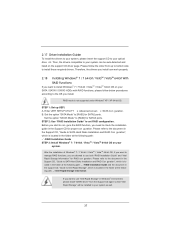
...guration. B. Please refer to the document in the Support CD, "Guide to SATA Hard Disks Installation and RAID Con guration", which is located in Windows® environment, please install "SATAII driver" from the Support CD again so that "Intel Rapid Storage" will be auto-detected and listed on your... con gure the RAID function, you are allowed to use "Intel Rapid Storage" in the folder at the following path: .. \ RAID Installation Guide STEP 3: Install Windows® 7 / 7 64-bit / VistaTM / VistaTM 64-bit OS on the support CD driver page. A. Set the option "SATA Mode" to [RAID] for ...
...guration. B. Please refer to the document in the Support CD, "Guide to SATA Hard Disks Installation and RAID Con guration", which is located in Windows® environment, please install "SATAII driver" from the Support CD again so that "Intel Rapid Storage" will be auto-detected and listed on your... con gure the RAID function, you are allowed to use "Intel Rapid Storage" in the folder at the following path: .. \ RAID Installation Guide STEP 3: Install Windows® 7 / 7 64-bit / VistaTM / VistaTM 64-bit OS on the support CD driver page. A. Set the option "SATA Mode" to [RAID] for ...
User Manual
Page 38
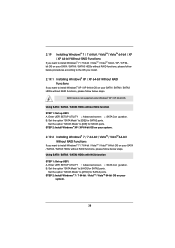
... 7 / 7 64-bit / VistaTM / VistaTM 64-bit Without RAID Functions If you want to [IDE] for SATA3 ports. Set the option "SATA3 Mode" to install Windows® 7 / 7 64-bit / VistaTM / VistaTM 64-bit OS on your SATA / SATAII / SATA3 HDDs without RAID functions, please follow below steps. Using SATA... / SATAII / SATA3 HDDs with NCQ function STEP 1: Set up UEFI. B. A. B. Set the option "SATA Mode" to install Windows® XP / XP 64-bit OS on your SATA / SATAII / SATA3 HDDs without RAID functions, please follow below steps. Using SATA / SATAII / SATA3 HDDs...
... 7 / 7 64-bit / VistaTM / VistaTM 64-bit Without RAID Functions If you want to [IDE] for SATA3 ports. Set the option "SATA3 Mode" to install Windows® 7 / 7 64-bit / VistaTM / VistaTM 64-bit OS on your SATA / SATAII / SATA3 HDDs without RAID functions, please follow below steps. Using SATA... / SATAII / SATA3 HDDs with NCQ function STEP 1: Set up UEFI. B. A. B. Set the option "SATA Mode" to install Windows® XP / XP 64-bit OS on your SATA / SATAII / SATA3 HDDs without RAID functions, please follow below steps. Using SATA / SATAII / SATA3 HDDs...


