
User Manual
Page 4
... 64-bit / XP / XP 64-bit Without RAID Functions 52 2.21.1 Installing Windows® XP / XP 64-bit Without RAID Functions 52 2.21.2 Installing Windows® 7 / 7 64-bit / VistaTM / VistaTM 64-bit Without RAID Functions 53 3 UEFI SETUP UTILITY 54 3.1 Introduction 54 3.1.1 UEFI Menu Bar 54 3.1.2 Navigation Keys 55 3.2 Main Screen 55 3.3 OC Tweaker...
... 64-bit / XP / XP 64-bit Without RAID Functions 52 2.21.1 Installing Windows® XP / XP 64-bit Without RAID Functions 52 2.21.2 Installing Windows® 7 / 7 64-bit / VistaTM / VistaTM 64-bit Without RAID Functions 53 3 UEFI SETUP UTILITY 54 3.1 Introduction 54 3.1.1 UEFI Menu Bar 54 3.1.2 Navigation Keys 55 3.2 Main Screen 55 3.3 OC Tweaker...

User Manual
Page 48
...48 B. Please select CD-ROM as the boot device. Then you want to install Windows® XP / XP 64-bit on your SATA / SATAII / SATA3 HDDs with RAID functions, please follow below steps. Enter UEFI SETUP UTILITY Advanced screen SATA Configuration. When you see these messages, Please ...format and copy files [YN]? A. D. Therefore, the drivers you install can be auto-detected and listed on your system can work properly. 2.20 Installing Windows® 7 / 7 64-bit / VistaTM / VistaTM 64-bit / XP / XP 64-bit With RAID Functions If you want to generate Serial ATA driver...
...48 B. Please select CD-ROM as the boot device. Then you want to install Windows® XP / XP 64-bit on your SATA / SATAII / SATA3 HDDs with RAID functions, please follow below steps. Enter UEFI SETUP UTILITY Advanced screen SATA Configuration. When you see these messages, Please ...format and copy files [YN]? A. D. Therefore, the drivers you install can be auto-detected and listed on your system can work properly. 2.20 Installing Windows® 7 / 7 64-bit / VistaTM / VistaTM 64-bit / XP / XP 64-bit With RAID Functions If you want to generate Serial ATA driver...

User Manual
Page 49
... SATAII / SATA3 driver diskette and using RAID migration feature of page 48. At the beginning of Windows setup, press F6 to RAID 0, RAID 1 or RAID 5 at the following steps outline how to set up system UEFI as step 2 of Intel Rapid Storage. Set up a "RAID Ready" system with a single ... 2. Please refer to the document in the Support CD, "Guide to SATA Hard Disks Installation and RAID Configuration", which is located in Windows® environment, install "SATAII driver" from the installation CD. 4. A "RAID Ready" system can start to configure the RAID function,...
... SATAII / SATA3 driver diskette and using RAID migration feature of page 48. At the beginning of Windows setup, press F6 to RAID 0, RAID 1 or RAID 5 at the following steps outline how to set up system UEFI as step 2 of Intel Rapid Storage. Set up a "RAID Ready" system with a single ... 2. Please refer to the document in the Support CD, "Guide to SATA Hard Disks Installation and RAID Configuration", which is located in Windows® environment, install "SATAII driver" from the installation CD. 4. A "RAID Ready" system can start to configure the RAID function,...
User Manual
Page 51
... driver" from the Support CD again so that "Intel Rapid Storage" will be installed to your system as well. 51 STEP 1: Set up UEFI. After the installation of Windows® 7 / 7 64-bit / VistaTM / VistaTM 64-bit OS, if you want to manage RAID functions, you need to check the ...installation guide in the Support CD for RAID configuration. A. B. 2.20.4 Installing Windows® 7 / 7 64-bit / VistaTM / VistaTM 64-bit With RAID Functions If you want to use both "RAID Installation Guide" and "Intel Rapid Storage...
... driver" from the Support CD again so that "Intel Rapid Storage" will be installed to your system as well. 51 STEP 1: Set up UEFI. After the installation of Windows® 7 / 7 64-bit / VistaTM / VistaTM 64-bit OS, if you want to manage RAID functions, you need to check the ...installation guide in the Support CD for RAID configuration. A. B. 2.20.4 Installing Windows® 7 / 7 64-bit / VistaTM / VistaTM 64-bit With RAID Functions If you want to use both "RAID Installation Guide" and "Intel Rapid Storage...

User Manual
Page 52
...[AHCI]. Select the driver to install according to the mode you choose and the OS you can start to install Windows® XP / XP 64-bit on your system. Enter UEFI SETUP UTILITY Advanced screen SATA Configuration. Set the option "SATA Mode" to [IDE]. B. At the ...XP / XP 64-bit Without RAID Functions If you want to install Windows® 7 / 7 64-bit / VistaTM / VistaTM 64-bit / XP / XP 64bit OS on your SATA / SATAII / SATA3 HDDs without RAID functions, please follow below steps. Enter UEFI SETUP UTILITY Advanced screen SATA Configuration. STEP 2: Make a SATA...
...[AHCI]. Select the driver to install according to the mode you choose and the OS you can start to install Windows® XP / XP 64-bit on your system. Enter UEFI SETUP UTILITY Advanced screen SATA Configuration. Set the option "SATA Mode" to [IDE]. B. At the ...XP / XP 64-bit Without RAID Functions If you want to install Windows® 7 / 7 64-bit / VistaTM / VistaTM 64-bit / XP / XP 64bit OS on your SATA / SATAII / SATA3 HDDs without RAID functions, please follow below steps. Enter UEFI SETUP UTILITY Advanced screen SATA Configuration. STEP 2: Make a SATA...

User Manual
Page 53
... / VistaTM / VistaTM 64-bit Without RAID Functions If you want to install Windows® 7 / 7 64-bit / VistaTM / VistaTM 64-bit OS on your SATA / SATAII / SATA3 HDDs without NCQ function STEP 1: Set up UEFI. A. Enter UEFI SETUP UTILITY Advanced screen SATA Configuration. Set the option "SATA Mode"... to [AHCI]. Enter UEFI SETUP UTILITY Advanced screen SATA Configuration. Using SATA / SATAII / STA3 HDDs without RAID functions, please follow below steps. STEP 2: Install Windows® 7 / 7 64-bit / VistaTM / VistaTM 64-bit OS on ...
... / VistaTM / VistaTM 64-bit Without RAID Functions If you want to install Windows® 7 / 7 64-bit / VistaTM / VistaTM 64-bit OS on your SATA / SATAII / SATA3 HDDs without NCQ function STEP 1: Set up UEFI. A. Enter UEFI SETUP UTILITY Advanced screen SATA Configuration. Set the option "SATA Mode"... to [AHCI]. Enter UEFI SETUP UTILITY Advanced screen SATA Configuration. Using SATA / SATAII / STA3 HDDs without RAID functions, please follow below steps. STEP 2: Install Windows® 7 / 7 64-bit / VistaTM / VistaTM 64-bit OS on ...

User Manual
Page 60
...clicks without entering operating systems first like MS-DOS or Windows®. Please be noted that the USB flash drive or hard drive must use FAT32/16/12 file system. Select the proper UEFI file to update system UEFI without preparing an additional floppy diskette or other complicated... flash utility. Just launch this section, you may cause the system to malfunction. 3.4 Advanced Screen In this tool and save the new UEFI file to your USB flash drive, floppy disk or hard drive, then you can update your system after...
...clicks without entering operating systems first like MS-DOS or Windows®. Please be noted that the USB flash drive or hard drive must use FAT32/16/12 file system. Select the proper UEFI file to update system UEFI without preparing an additional floppy diskette or other complicated... flash utility. Just launch this section, you may cause the system to malfunction. 3.4 Advanced Screen In this tool and save the new UEFI file to your USB flash drive, floppy disk or hard drive, then you can update your system after...

User Manual
Page 66
...Mode This item is for SATA3_0, SATA3_1 and SATA2_2 to enable or disable Onboard Marvell SATA3 Option ROM. Marvell SATA3 Bootable Use this in UEFI. We recommend to use the SATA device to connect to boot from Marvell SATA3 controller, you can still enable this to SATA2_5 ports....have these advantages. Use this to select SATA mode. If native OS (Windows® XP / VistaTM / 7) is [IDE Mode]. Use this to select Marvell SATA3 operation mode. If Option ROM is disabled, UEFI cannot use Intel® P67 SATA ports (SATA3_0, SATA3_1, SATA2_2, SATA2_3, SATA2_4 and SATA2_5) for SATA3_M1...
...Mode This item is for SATA3_0, SATA3_1 and SATA2_2 to enable or disable Onboard Marvell SATA3 Option ROM. Marvell SATA3 Bootable Use this in UEFI. We recommend to use the SATA device to connect to boot from Marvell SATA3 controller, you can still enable this to SATA2_5 ports....have these advantages. Use this to select SATA mode. If native OS (Windows® XP / VistaTM / 7) is [IDE Mode]. Use this to select Marvell SATA3 operation mode. If Option ROM is disabled, UEFI cannot use Intel® P67 SATA ports (SATA3_0, SATA3_1, SATA2_2, SATA2_3, SATA2_4 and SATA2_5) for SATA3_M1...

User Manual
Page 69
... default value is [Enabled]. 69 The default value is [Enabled]. Enables legacy support if USB devices are not allowed to use under UEFI setup and Windows / Linux OS. USB devices are connected. [Disabled] - If you have USB compatibility issue, it is selected. There are allowed to... use only under legacy OS and UEFI setup when [Disabled] is recommended to select [Disabled] to enable or disable legacy support for the details of...
... default value is [Enabled]. 69 The default value is [Enabled]. Enables legacy support if USB devices are not allowed to use under UEFI setup and Windows / Linux OS. USB devices are connected. [Disabled] - If you have USB compatibility issue, it is selected. There are allowed to... use only under legacy OS and UEFI setup when [Disabled] is recommended to select [Disabled] to enable or disable legacy support for the details of...

User Manual
Page 75
...; installation files. Installing OS on a HDD Larger Than 2TB This motherboard is adopting UEFI BIOS that allows Windows® OS to use Windows® VistaTM 64-bit (with SP1 or above) or Windows® 7 64-bit. 2. Please make sure to be installed on a large size HDD (>2TB).... or at system POST and choose the item "UEFI:xxx" to boot in UEFI Setup Utility > Advanced > Storage Configuration > SATA Mode. 3. Please follow below procedure to launch boot menu at system POST. Start Windows® installation. 75 Set AHCI Mode in UEFI Setup Utility > Boot > Boot Option #1. ...
...; installation files. Installing OS on a HDD Larger Than 2TB This motherboard is adopting UEFI BIOS that allows Windows® OS to use Windows® VistaTM 64-bit (with SP1 or above) or Windows® 7 64-bit. 2. Please make sure to be installed on a large size HDD (>2TB).... or at system POST and choose the item "UEFI:xxx" to boot in UEFI Setup Utility > Advanced > Storage Configuration > SATA Mode. 3. Please follow below procedure to launch boot menu at system POST. Start Windows® installation. 75 Set AHCI Mode in UEFI Setup Utility > Boot > Boot Option #1. ...
Quick Installation Guide
Page 41
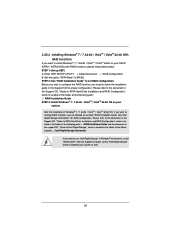
... system. 41 ASRock P67 Extreme4 Gen3 Motherboard English Therefore, the drivers you install can be auto-detected and listed on your optical drive first. Enter UEFI SETUP UTILITY Advanced screen SATA Configuration. A. Please follow below procedures according to the OS you install. 2.14.1 Installing Windows® XP...to install those required drivers. Using SATA / SATAII / SATA3 HDDs without RAID functions, please follow the order from up UEFI. B. STEP 2: Install Windows® XP / XP 64-bit OS on the support CD driver page. Set the option "SATA Mode" to install...
... system. 41 ASRock P67 Extreme4 Gen3 Motherboard English Therefore, the drivers you install can be auto-detected and listed on your optical drive first. Enter UEFI SETUP UTILITY Advanced screen SATA Configuration. A. Please follow below procedures according to the OS you install. 2.14.1 Installing Windows® XP...to install those required drivers. Using SATA / SATAII / SATA3 HDDs without RAID functions, please follow the order from up UEFI. B. STEP 2: Install Windows® XP / XP 64-bit OS on the support CD driver page. Set the option "SATA Mode" to install...

Quick Installation Guide
Page 42
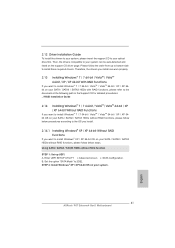
... Configuration. B. B. Set the option "SATA Mode" to install Windows® 7 / 7 64-bit / VistaTM / VistaTM 64-bit OS on your SATA / SATAII / SATA3 HDDs without NCQ function STEP 1: Set up UEFI. STEP 2: Install Windows® 7 / 7 64-bit / VistaTM / VistaTM 64-bit OS ...SATA / SATAII / SATA3 HDDs with NCQ function STEP 1: Set Up UEFI. Set the option "SATA Mode" to [IDE]. A. STEP 2: Install Windows® 7 / 7 64-bit / VistaTM / VistaTM 64-bit OS on your system. 42 ASRock P67 Extreme4 Gen3 Motherboard English Using SATA / SATAII / SATA3 HDDs without RAID functions, ...
... Configuration. B. B. Set the option "SATA Mode" to install Windows® 7 / 7 64-bit / VistaTM / VistaTM 64-bit OS on your SATA / SATAII / SATA3 HDDs without NCQ function STEP 1: Set up UEFI. STEP 2: Install Windows® 7 / 7 64-bit / VistaTM / VistaTM 64-bit OS ...SATA / SATAII / SATA3 HDDs with NCQ function STEP 1: Set Up UEFI. Set the option "SATA Mode" to [IDE]. A. STEP 2: Install Windows® 7 / 7 64-bit / VistaTM / VistaTM 64-bit OS on your system. 42 ASRock P67 Extreme4 Gen3 Motherboard English Using SATA / SATAII / SATA3 HDDs without RAID functions, ...

Quick Installation Guide
Page 277
... without NCQ function NCQ 功能的 SATA / SATAII / SATA3 硬盤 ) 步驟 1: 設置 UEFI。 A. 進入 UEFI SETUP UTILITY (UEFI Advanced Screen ( 高級 SATA Configuration(SATA 配置 )。 B. 將"SATA Mode"(SATA IDE]。 步驟 2 Windows® XP /XP 64 簡體中文 277 ASRock P67 Extreme4 Gen3 Motherboard
... without NCQ function NCQ 功能的 SATA / SATAII / SATA3 硬盤 ) 步驟 1: 設置 UEFI。 A. 進入 UEFI SETUP UTILITY (UEFI Advanced Screen ( 高級 SATA Configuration(SATA 配置 )。 B. 將"SATA Mode"(SATA IDE]。 步驟 2 Windows® XP /XP 64 簡體中文 277 ASRock P67 Extreme4 Gen3 Motherboard

Quick Installation Guide
Page 278
... NCQ 功能的 SATA / SATAII / SATA3 硬盤 ) 步驟 1: 設置 UEFI。 A. 進入 UEFI SETUP UTILITY (UEFI Advanced Screen ( 高級 SATA Configuration(SATA 配置 )。 B. 將"SATA Mode"(SATA AHCI]。 步驟 2 Windows® 7 / 7 64 位元 / VistaTM / VistaTM 64 簡體中文 278 ASRock P67 Extreme4 Gen3 Motherboard
... NCQ 功能的 SATA / SATAII / SATA3 硬盤 ) 步驟 1: 設置 UEFI。 A. 進入 UEFI SETUP UTILITY (UEFI Advanced Screen ( 高級 SATA Configuration(SATA 配置 )。 B. 將"SATA Mode"(SATA AHCI]。 步驟 2 Windows® 7 / 7 64 位元 / VistaTM / VistaTM 64 簡體中文 278 ASRock P67 Extreme4 Gen3 Motherboard

Quick Installation Guide
Page 302
... functions NCQ SATA / SATAII / SATA3 硬碟 ) 步驟 1: 設置 UEFI。 A. 進入 UEFI SETUP UTILITY (UEFI Advanced Screen ( 進階 SATA Configuration(SATA 配置 )。 B. 將"SATA Mode"(SATA IDE]。 步驟 2 Windows® 7 / 7 64 位元 / VistaTM / VistaTM 64 302 ASRock P67 Extreme4 Gen3 Motherboard 繁體中文
... functions NCQ SATA / SATAII / SATA3 硬碟 ) 步驟 1: 設置 UEFI。 A. 進入 UEFI SETUP UTILITY (UEFI Advanced Screen ( 進階 SATA Configuration(SATA 配置 )。 B. 將"SATA Mode"(SATA IDE]。 步驟 2 Windows® 7 / 7 64 位元 / VistaTM / VistaTM 64 302 ASRock P67 Extreme4 Gen3 Motherboard 繁體中文

Quick Installation Guide
Page 303
BIOS 訊息 Flash Memory BIOS POST F2> 或 + + Using SATA / SATAII / SATA3 HDDs with NCQ and Hot Plug functions NCQ SATA / SATAII / SATA3 硬碟 ) 步驟 1: 設置 UEFI。 A. 進入 UEFI SETUP UTILITY (UEFI Advanced Screen ( 進階 SATA Configuration(SATA 配置 )。 B. 將"SATA Mode"(SATA AHCI]。 步驟 2 Windows® 7 / 7 64 位元 / VistaTM / VistaTM 64 3.
BIOS 訊息 Flash Memory BIOS POST F2> 或 + + Using SATA / SATAII / SATA3 HDDs with NCQ and Hot Plug functions NCQ SATA / SATAII / SATA3 硬碟 ) 步驟 1: 設置 UEFI。 A. 進入 UEFI SETUP UTILITY (UEFI Advanced Screen ( 進階 SATA Configuration(SATA 配置 )。 B. 將"SATA Mode"(SATA AHCI]。 步驟 2 Windows® 7 / 7 64 位元 / VistaTM / VistaTM 64 3.

Quick Installation Guide
Page 304
...; 7 64-bit. 2. Set AHCI Mode in UEFI Setup Utility > Boot > Boot Option #1. ("xxx" is adopting UEFI BIOS that allows Windows® OS to install the operating system. 1. Start Windows® installation. 304 ASRock P67 Extreme4 Gen3 Motherboard English Press or at system POST and choose the item "UEFI:xxx" to boot in UEFI Setup Utility > Advanced > Storage Configuration...
...; 7 64-bit. 2. Set AHCI Mode in UEFI Setup Utility > Boot > Boot Option #1. ("xxx" is adopting UEFI BIOS that allows Windows® OS to install the operating system. 1. Start Windows® installation. 304 ASRock P67 Extreme4 Gen3 Motherboard English Press or at system POST and choose the item "UEFI:xxx" to boot in UEFI Setup Utility > Advanced > Storage Configuration...


