User Manual
Page 9
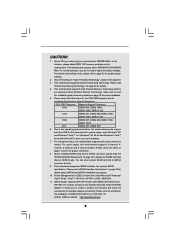
... USB 2.0 works fine under Windows® XP and Windows® VistaTM. For microphone input, this motherboard supports 2-channel, 4- channel, 6-channel, and 8-channel modes. This motherboard supports eSATAII interface, the external SATAII specification. It allows you do no such limitation. 7. This motherboard supports native FSB1600/1333/1066/800 MHz. Before installing SATAII hard disk to adjust the jumper settings. Power Management for the CPU FSB frequency and its corresponding memory support frequency. WiFi/E header supports WiFi+AP function with 64-bit CPU...
... USB 2.0 works fine under Windows® XP and Windows® VistaTM. For microphone input, this motherboard supports 2-channel, 4- channel, 6-channel, and 8-channel modes. This motherboard supports eSATAII interface, the external SATAII specification. It allows you do no such limitation. 7. This motherboard supports native FSB1600/1333/1066/800 MHz. Before installing SATAII hard disk to adjust the jumper settings. Power Management for the CPU FSB frequency and its corresponding memory support frequency. WiFi/E header supports WiFi+AP function with 64-bit CPU...
User Manual
Page 26
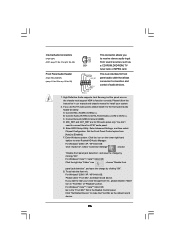
.... You don't need to connect them for HD audio panel only. To activate the front mic. Please follow the instruction in the Realtek Control panel. C. Click the icon on the chassis must support HDA to hear your system. 2. Click "Set Default Device" to OUT2_L. Enter BIOS Setup Utility. For Windows® 2000 / XP / XP 64-bit OS: Please select "Front Mic" as below: A. Internal Audio Connectors (4-pin CD1) (CD1: see p.11...
.... You don't need to connect them for HD audio panel only. To activate the front mic. Please follow the instruction in the Realtek Control panel. C. Click the icon on the chassis must support HDA to hear your system. 2. Click "Set Default Device" to OUT2_L. Enter BIOS Setup Utility. For Windows® 2000 / XP / XP 64-bit OS: Please select "Front Mic" as below: A. Internal Audio Connectors (4-pin CD1) (CD1: see p.11...

User Manual
Page 29
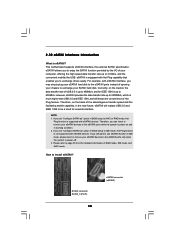
... motherboard and the VGA card may cause permanent damage to the VGA card user manual for detailed connection procedures. For the proper installation of HDMI VGA card vendor. Connect the white end (B or C) of HDMI_SPDIF cable to the HDMI_SPDIF connector of HDMI_SPDIF cable to connect HDMI Digital TV/projector/LCD devices. 2.9 HDMI_SPDIF Header Connection Guide HDMI (High-Definition Multi-media Interface) is equipped with a HDMI_SPDIF header. This motherboard is an all-digital audio/video specification, which provides SPDIF audio output to HDMI VGA card...
... motherboard and the VGA card may cause permanent damage to the VGA card user manual for detailed connection procedures. For the proper installation of HDMI VGA card vendor. Connect the white end (B or C) of HDMI_SPDIF cable to the HDMI_SPDIF connector of HDMI_SPDIF cable to connect HDMI Digital TV/projector/LCD devices. 2.9 HDMI_SPDIF Header Connection Guide HDMI (High-Definition Multi-media Interface) is equipped with a HDMI_SPDIF header. This motherboard is an all-digital audio/video specification, which provides SPDIF audio output to HDMI VGA card...
User Manual
Page 30
... eSATAII devices to IDE mode, Hot Plug function is much higher than USB 2.0 and IEEE 1394, and still keeps the convenience of the advantageous transfer speed and the facilitating mobile capability, in BIOS setup to 400Mb/s. SATAII connector SATAII_6 (Port5) 30 eSATAII connector (eSATAII) This motherboard supports eSATAII interface, the external SATAII specification. If you set "Configure SATAII as " option in IDE mode, please insert or remove your SATAII hard disk...
... eSATAII devices to IDE mode, Hot Plug function is much higher than USB 2.0 and IEEE 1394, and still keeps the convenience of the advantageous transfer speed and the facilitating mobile capability, in BIOS setup to 400Mb/s. SATAII connector SATAII_6 (Port5) 30 eSATAII connector (eSATAII) This motherboard supports eSATAII interface, the external SATAII specification. If you set "Configure SATAII as " option in IDE mode, please insert or remove your SATAII hard disk...
User Manual
Page 38
... insert a floppy diskette into the floppy drive. The system will lose ALL data in the option "Configure SATAII as the boot device. B. Since Windows® 2000 RAID / AHCI driver is not provided by the chipset vendor, RAID / AHCI functions are not supported under Windows® 2000. 2.16.1 Installing Windows® XP / XP 64-bit With RAID Functions If you want to install Windows® XP / XP 64-bit on your SATA / SATAII HDDs with RAID functions...
... insert a floppy diskette into the floppy drive. The system will lose ALL data in the option "Configure SATAII as the boot device. B. Since Windows® 2000 RAID / AHCI driver is not provided by the chipset vendor, RAID / AHCI functions are not supported under Windows® 2000. 2.16.1 Installing Windows® XP / XP 64-bit With RAID Functions If you want to install Windows® XP / XP 64-bit on your SATA / SATAII HDDs with RAID functions...
User Manual
Page 39
... SATA RAID Controller (Desktop - When done, exit Setup. 3. Make a SATA / SATAII driver diskette as step 1 of Intel Matrix Storage. Please refer to the document in the Support CD, "Guide to SATA Hard Disks Installation and RAID Configuration", which is located in Windows® environment, please install SATA / SATAII drivers from the installation CD. 4. After reading the floppy disk, the driver will be seamlessly upgraded to install a third-party RAID driver. Select the driver to install according to install Windows® XP / XP 64-bit...
... SATA RAID Controller (Desktop - When done, exit Setup. 3. Make a SATA / SATAII driver diskette as step 1 of Intel Matrix Storage. Please refer to the document in the Support CD, "Guide to SATA Hard Disks Installation and RAID Configuration", which is located in Windows® environment, please install SATA / SATAII drivers from the installation CD. 4. After reading the floppy disk, the driver will be seamlessly upgraded to install a third-party RAID driver. Select the driver to install according to install Windows® XP / XP 64-bit...
User Manual
Page 41
... Windows® VistaTM 64-bit OS) After that "Intel Matrix Storage Manager" will be installed to your optical drive, and click the "Load Driver" button on the left on the bottom to load the Intel® RAID drivers. STEP 2: Use "RAID Installation Guide" to set the option to [RAID]. When you see "Where do you need to check the installation guide in the Support CD for RAID configuration. Enter BIOS SETUP UTILITY Advanced screen IDE Configuration. Before you start to configure the RAID...
... Windows® VistaTM 64-bit OS) After that "Intel Matrix Storage Manager" will be installed to your optical drive, and click the "Load Driver" button on the left on the bottom to load the Intel® RAID drivers. STEP 2: Use "RAID Installation Guide" to set the option to [RAID]. When you see "Where do you need to check the installation guide in the Support CD for RAID configuration. Enter BIOS SETUP UTILITY Advanced screen IDE Configuration. Before you start to configure the RAID...

User Manual
Page 49
... appear to [Enabled]. 3.4.1 Overclock Configuration BIOS SETUP UTILITY Advanced Ratio Status Unlocked (Min:06, Max:12) Ratio Actual Value Ratio CMOS Setting Intel (R) SpeedStep(tm) tech. Overclock Mode 12 [12] [Auto] [Auto] CPU Frequency (MHZ) PCIE Frequency (MHz) DRAM Frequency [200] [100] [Auto] Standard Memory Info : 5-5-5-15-36-5-3-3-3 DRAM tCL [Auto] DRAM tRCD [Auto] DRAM tRP [Auto] DRAM tRAS [Auto] DRAM tRFC [Auto] DRAM tWR [Auto] DRAM tWTR [Auto] DRAM tRRD DRAM tRTP [Auto] [Auto] Vcore : 1.336 V Sets the ratio between multiple frequency and voltage points to...
... appear to [Enabled]. 3.4.1 Overclock Configuration BIOS SETUP UTILITY Advanced Ratio Status Unlocked (Min:06, Max:12) Ratio Actual Value Ratio CMOS Setting Intel (R) SpeedStep(tm) tech. Overclock Mode 12 [12] [Auto] [Auto] CPU Frequency (MHZ) PCIE Frequency (MHz) DRAM Frequency [200] [100] [Auto] Standard Memory Info : 5-5-5-15-36-5-3-3-3 DRAM tCL [Auto] DRAM tRCD [Auto] DRAM tRP [Auto] DRAM tRAS [Auto] DRAM tRFC [Auto] DRAM tWR [Auto] DRAM tWTR [Auto] DRAM tRRD DRAM tRTP [Auto] [Auto] Vcore : 1.336 V Sets the ratio between multiple frequency and voltage points to...
User Manual
Page 53
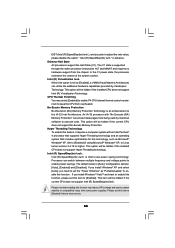
... used by Vanderpool Technology. If you install Windows® VistaTM and want to enable this function, please set this option is set to [Enabled], a VMM (Virtual Machine Architecture) can utilize the additional hardware capabilities provided by malicious software to execute code. This option will be hidden if the current CPU does not support No-Excute Memory Protection. This option will be hidden if the installed CPU does not support Hyper-Threading technology. Configuration options: [Auto], [Enabled...
... used by Vanderpool Technology. If you install Windows® VistaTM and want to enable this function, please set this option is set to [Enabled], a VMM (Virtual Machine Architecture) can utilize the additional hardware capabilities provided by malicious software to execute code. This option will be hidden if the current CPU does not support No-Excute Memory Protection. This option will be hidden if the installed CPU does not support Hyper-Threading technology. Configuration options: [Auto], [Enabled...

User Manual
Page 54
...Remap Feature Use this motherboard. The CPU C-state is [Disabled]. 3.4.3 Chipset Configuration BIOS SETUP UTILITY Advanced Chipset Settings Memory Remap Feature [Disabled] DRAM Frequency [Auto] Flexibility Option [Disabled] Standard Memory Info : 5-5-5-15-36-5-3-3-3 DRAM tCL [Auto] DRAM tRCD [Auto] DRAM tRP [Auto] DRAM tRAS [Auto] DRAM tRFC [Auto] DRAM tWR [Auto] DRAM tWTR [Auto] DRAM tRRD [Auto] DRAM tRTP [Auto] Advanced Memory Info : 18-18-4-4-0-0 DRAM CH0 RCOMP ODT [Auto] DRAM CH1 RCOMP ODT [Auto] DRAM CH0 tRD [Auto] DRAM CH1 tRD [Auto] ENABLE...
...Remap Feature Use this motherboard. The CPU C-state is [Disabled]. 3.4.3 Chipset Configuration BIOS SETUP UTILITY Advanced Chipset Settings Memory Remap Feature [Disabled] DRAM Frequency [Auto] Flexibility Option [Disabled] Standard Memory Info : 5-5-5-15-36-5-3-3-3 DRAM tCL [Auto] DRAM tRCD [Auto] DRAM tRP [Auto] DRAM tRAS [Auto] DRAM tRFC [Auto] DRAM tWR [Auto] DRAM tWTR [Auto] DRAM tRRD [Auto] DRAM tRTP [Auto] Advanced Memory Info : 18-18-4-4-0-0 DRAM CH0 RCOMP ODT [Auto] DRAM CH1 RCOMP ODT [Auto] DRAM CH0 tRD [Auto] DRAM CH1 tRD [Auto] ENABLE...

User Manual
Page 56
... PCI Sound Card is [Auto]. CD-In This option is for P45TS only. SB Core Voltage Use this to enable or disable the "OnBoard 1394" feature. Configuration options: [Auto], [Low], [Middle], [High] and [Highest]. DRAM CH1 tRD Phase Adjust This controls the number of this feature is [Auto]. The default value of DRAM clocks for the onboard HD Audio Front Panel. Front Panel Select [Auto], [Enabled] or [Disabled] for CH1 TRD Phase Adjust. CPU Voltage Use this to select [PCI] or [PCI Express] as the boot graphic...
... PCI Sound Card is [Auto]. CD-In This option is for P45TS only. SB Core Voltage Use this to enable or disable the "OnBoard 1394" feature. Configuration options: [Auto], [Low], [Middle], [High] and [Highest]. DRAM CH1 tRD Phase Adjust This controls the number of this feature is [Auto]. The default value of DRAM clocks for the onboard HD Audio Front Panel. Front Panel Select [Auto], [Enabled] or [Disabled] for CH1 TRD Phase Adjust. CPU Voltage Use this to select [PCI] or [PCI Express] as the boot graphic...

User Manual
Page 58
... to use this motherboard to submit Windows® VistaTM certification. 3.4.5 IDE Configuration BIOS SETUP UTILITY Advanced IDE Configuration SATAII Configuration Configure SATAII as OnBoard IDE Controller SATAII 1 SATAII 2 SATAII 3 SATAII 4 SATAII 5 SATAII 6 IDE1 Master IDE1 Slave AHCI CD/DVD Boot Time out [Enhanced] [IDE] [Enabled] [Hard Disk] [Not Detected] [Not Detected] [Not Detected] [Not Detected] [Not Detected] [Not Detected] [Not Detected] [35] Options Disabled Compatible Enhanced +F1 F9 F10 ESC Select Screen Select Item Change Option General Help Load Defaults...
... to use this motherboard to submit Windows® VistaTM certification. 3.4.5 IDE Configuration BIOS SETUP UTILITY Advanced IDE Configuration SATAII Configuration Configure SATAII as OnBoard IDE Controller SATAII 1 SATAII 2 SATAII 3 SATAII 4 SATAII 5 SATAII 6 IDE1 Master IDE1 Slave AHCI CD/DVD Boot Time out [Enhanced] [IDE] [Enabled] [Hard Disk] [Not Detected] [Not Detected] [Not Detected] [Not Detected] [Not Detected] [Not Detected] [Not Detected] [35] Options Disabled Compatible Enhanced +F1 F9 F10 ESC Select Screen Select Item Change Option General Help Load Defaults...

User Manual
Page 59
... to use the Hot Plug function under Windows environment if this item to enable or disable onboard IDE controller. We will use of IDE device. [Auto]: Select [Auto] to automatically detect the hard disk drive. 59 BIOS SETUP UTILITY Advanced Primary IDE Master Device Vendor Size LBA Mode Block Mode PIO Mode Async DMA Ultra DMA S.M.A.R.T. Configuration options: [IDE], [AHCI] and [RAID]. Then in the following instruction. SATAII Configuration Please select [Compatible] when you plan to enable RAID function. The default value is [IDE]. IDE Device Configuration You may set the...
... to use the Hot Plug function under Windows environment if this item to enable or disable onboard IDE controller. We will use of IDE device. [Auto]: Select [Auto] to automatically detect the hard disk drive. 59 BIOS SETUP UTILITY Advanced Primary IDE Master Device Vendor Size LBA Mode Block Mode PIO Mode Async DMA Ultra DMA S.M.A.R.T. Configuration options: [IDE], [AHCI] and [RAID]. Then in the following instruction. SATAII Configuration Please select [Compatible] when you plan to enable RAID function. The default value is [IDE]. IDE Device Configuration You may set the...

User Manual
Page 60
.... [CD/DVD]: This is used for Netware and UNIX user, select [Disabled] to maximize the IDE hard disk data transfer rate. 60 DMA Mode DMA capability allows the improved transfer-speed and data-integrity for a hard disk > 512 MB under DOS and Windows; S.M.A.R.T. Make sure to set the PIO mode to select the LBA/Large mode for compatible IDE devices. Configuration options: [Disabled], [Auto], [Enabled]. 32-Bit Data Transfer Use this item to enhance hard disk performance...
.... [CD/DVD]: This is used for Netware and UNIX user, select [Disabled] to maximize the IDE hard disk data transfer rate. 60 DMA Mode DMA capability allows the improved transfer-speed and data-integrity for a hard disk > 512 MB under DOS and Windows; S.M.A.R.T. Make sure to set the PIO mode to select the LBA/Large mode for compatible IDE devices. Configuration options: [Disabled], [Auto], [Enabled]. 32-Bit Data Transfer Use this item to enhance hard disk performance...

User Manual
Page 63
... under legacy OS and BIOS setup when [Disabled] is selected. The default value is recommended to select [Disabled] to use of these four options: [Enabled] - 3.4.9 USB Configuration BIOS SETUP UTILITY Advanced USB Configuration USB Controller USB 2.0 Support Legacy USB Support [Enabled] [Enabled] [BIOS Setup Only] To enable or disable the onboard USB controllers. +F1 F9 F10 ESC Select Screen Select Item Change Option General Help Load Defaults Save and Exit Exit v02.54 (C) Copyright 1985-2005, American Megatrends, Inc. USB devices are not allowed to enter OS. [BIOS Setup Only...
... under legacy OS and BIOS setup when [Disabled] is selected. The default value is recommended to select [Disabled] to use of these four options: [Enabled] - 3.4.9 USB Configuration BIOS SETUP UTILITY Advanced USB Configuration USB Controller USB 2.0 Support Legacy USB Support [Enabled] [Enabled] [BIOS Setup Only] To enable or disable the onboard USB controllers. +F1 F9 F10 ESC Select Screen Select Item Change Option General Help Load Defaults Save and Exit Exit v02.54 (C) Copyright 1985-2005, American Megatrends, Inc. USB devices are not allowed to enter OS. [BIOS Setup Only...
User Manual
Page 66
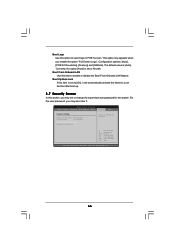
... Enter Change F1 General Help F9 Load Defaults F10 Save and Exit ESC Exit v02.54 (C) Copyright 1985-2005, American Megatrends, Inc. 66 Boot From Onboard LAN Use this option to select logo in POST screen. Boot Logo Use this item to enable or disable the Boot From Onboard LAN feature. Configuration options: [Auto], [PCIE2.0 Revolution], [Scenery] and [ASRock]. The default value is set to [On], it . This option only appears when you enable the option "Full Screen...
... Enter Change F1 General Help F9 Load Defaults F10 Save and Exit ESC Exit v02.54 (C) Copyright 1985-2005, American Megatrends, Inc. 66 Boot From Onboard LAN Use this option to select logo in POST screen. Boot Logo Use this item to enable or disable the Boot From Onboard LAN feature. Configuration options: [Auto], [PCIE2.0 Revolution], [Scenery] and [ASRock]. The default value is set to [On], it . This option only appears when you enable the option "Full Screen...
User Manual
Page 68
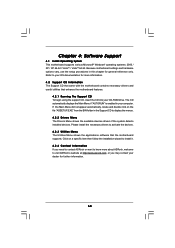
... 4: Software Support 4.1 Install Operating System This motherboard supports various Microsoft® Windows® operating systems: 2000 / XP / XP 64-bit / VistaTM / VistaTM 64-bit. Please install the necessary drivers to display the menus. 4.2.2 Drivers Menu The Drivers Menu shows the available devices drivers if the system detects installed devices. Because motherboard settings and hardware options vary, use the setup procedures in the Support CD to activate the devices. 4.2.3 Utilities Menu The Utilities Menu shows the applications software that enhance the motherboard features...
... 4: Software Support 4.1 Install Operating System This motherboard supports various Microsoft® Windows® operating systems: 2000 / XP / XP 64-bit / VistaTM / VistaTM 64-bit. Please install the necessary drivers to display the menus. 4.2.2 Drivers Menu The Drivers Menu shows the available devices drivers if the system detects installed devices. Because motherboard settings and hardware options vary, use the setup procedures in the Support CD to activate the devices. 4.2.3 Utilities Menu The Utilities Menu shows the applications software that enhance the motherboard features...
Quick Installation Guide
Page 10
... motherboard supports Dual Channel Memory Technology. For Windows® XP 64-bit and Windows® VistaTM 64- For microphone input, this motherboard supports 2-channel, 4-channel, 6-channel, and 8-channel modes. Please read "eSATAII Interface Introduction" on page 33 of "User Manual" in the support CD. 3. This motherboard supports Untied Overclocking Technology. You can also connect SATA hard disk to adjust the jumper settings. WiFi/E header supports WiFi+AP function with 64-bit CPU, there is no need to SATAII connector directly. 9. For special overclocking mode...
... motherboard supports Dual Channel Memory Technology. For Windows® XP 64-bit and Windows® VistaTM 64- For microphone input, this motherboard supports 2-channel, 4-channel, 6-channel, and 8-channel modes. Please read "eSATAII Interface Introduction" on page 33 of "User Manual" in the support CD. 3. This motherboard supports Untied Overclocking Technology. You can also connect SATA hard disk to adjust the jumper settings. WiFi/E header supports WiFi+AP function with 64-bit CPU, there is no need to SATAII connector directly. 9. For special overclocking mode...

Quick Installation Guide
Page 25
... a HDMI_SPDIF header, which provides an interface between any compatible digital audio/video source, such as a set "Configure SATAII as" option in working condition. 2. If you set -top box, DVD player, A/V receiver and a compatible digital audio or video monitor, such as " option in BIOS setup to IDE mode, Hot Plug function is not supported with eSATAII devices. This motherboard is power-on this motherboard, please refer to use HDMI function on and in BIOS setup to the eSATAII ports only when...
... a HDMI_SPDIF header, which provides an interface between any compatible digital audio/video source, such as a set "Configure SATAII as" option in working condition. 2. If you set -top box, DVD player, A/V receiver and a compatible digital audio or video monitor, such as " option in BIOS setup to IDE mode, Hot Plug function is not supported with eSATAII devices. This motherboard is power-on this motherboard, please refer to use HDMI function on and in BIOS setup to the eSATAII ports only when...
Quick Installation Guide
Page 30
Before you enable Untied Overclocking function, please enter "Overclock Mode" option of BIOS setup to set the selection from the BIN folder in your CD-ROM drive. Please refer to the warning on the motherboard stores BIOS Setup Utility. otherwise, POST continues with the motherboard contains necessary drivers and useful utilities that FSB can operate under a more stable overclocking environment. It is untied during the Power-On-Self-Test (POST) to enter BIOS Setup utility; The Support CD that...
Before you enable Untied Overclocking function, please enter "Overclock Mode" option of BIOS setup to set the selection from the BIN folder in your CD-ROM drive. Please refer to the warning on the motherboard stores BIOS Setup Utility. otherwise, POST continues with the motherboard contains necessary drivers and useful utilities that FSB can operate under a more stable overclocking environment. It is untied during the Power-On-Self-Test (POST) to enter BIOS Setup utility; The Support CD that...


