RAID Installation Guide
Page 2
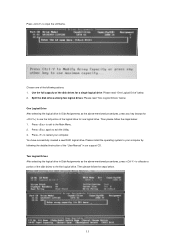
.... WARNING!! 1. For optimal performance, please install identical drives of data from one drive to configure RAID functions by following the detailed instruction of the "User Manual" in our support CD, then you to a second drive. After you make a SATA driver diskette, press or to enter BIOS setup to set . Although RAID...
.... WARNING!! 1. For optimal performance, please install identical drives of data from one drive to configure RAID functions by following the detailed instruction of the "User Manual" in our support CD, then you to a second drive. After you make a SATA driver diskette, press or to enter BIOS setup to set . Although RAID...
RAID Installation Guide
Page 11
... again to the first logical drive. Two Logical Drives After selecting the logical drive in our support CD. Use the full capacity of the "User Manual" in Disk Assignments as the above -mentioned procedures, press to allocate a portion of the following the detailed instruction of the disk drives for one of...
... again to the first logical drive. Two Logical Drives After selecting the logical drive in our support CD. Use the full capacity of the "User Manual" in Disk Assignments as the above -mentioned procedures, press to allocate a portion of the following the detailed instruction of the disk drives for one of...

RAID Installation Guide
Page 12
... "Create Array" option. *Be sure to exit the Utility. 3. Please install the operating system to your computer by following the detailed instruction of the "User Manual" in our support CD. 1.4.2 Configuring Legacy RAID ROM For AMD A88X Chipset When the appropriate prompt appears during POST, press to enter the RAID BIOS...
... "Create Array" option. *Be sure to exit the Utility. 3. Please install the operating system to your computer by following the detailed instruction of the "User Manual" in our support CD. 1.4.2 Configuring Legacy RAID ROM For AMD A88X Chipset When the appropriate prompt appears during POST, press to enter the RAID BIOS...
RAID Installation Guide
Page 18
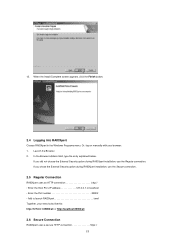
... Finish button. 2.4 Logging into RAIDXpert Choose RAIDXpert in the Windows Programs menu. In the Browser address field, type the entry explained below. Or, log on manually with your entry looks like this: http://127.0.0.1:25902/ati or http://localhost:25902/ati 2.6 Secure Connection RAIDXpert uses a secure HTTP connection https:// 18 If...
... Finish button. 2.4 Logging into RAIDXpert Choose RAIDXpert in the Windows Programs menu. In the Browser address field, type the entry explained below. Or, log on manually with your entry looks like this: http://127.0.0.1:25902/ati or http://localhost:25902/ati 2.6 Secure Connection RAIDXpert uses a secure HTTP connection https:// 18 If...

User Manual
Page 5
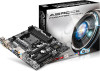
... 4 contains the configuration guide of the motherboard and step-by-step installation guides. In this manual will be updated, the content of the software and utilities. www.asrock.com/support/index.asp 1.1 Package Contents ASRock FM2A75M Pro4+ Motherboard (Micro ATX Form Factor) ASRock FM2A75M Pro4+ Quick Installation Guide ASRock FM2A75M Pro4+ Support CD 2 x Serial ATA (SATA) Data Cables (Optional) 1 x I/O Panel Shield...
... 4 contains the configuration guide of the motherboard and step-by-step installation guides. In this manual will be updated, the content of the software and utilities. www.asrock.com/support/index.asp 1.1 Package Contents ASRock FM2A75M Pro4+ Motherboard (Micro ATX Form Factor) ASRock FM2A75M Pro4+ Quick Installation Guide ASRock FM2A75M Pro4+ Support CD 2 x Serial ATA (SATA) Data Cables (Optional) 1 x I/O Panel Shield...

User Manual
Page 21
Then connect the CPU fan to the instruction manuals of CPU Fan and Heatsink After you install the CPU into this motherboard, it is necessary to install a larger heatsink and cooling fan to improve ...
Then connect the CPU fan to the instruction manuals of CPU Fan and Heatsink After you install the CPU into this motherboard, it is necessary to install a larger heatsink and cooling fan to improve ...

User Manual
Page 27
... panel only. To activate the front mic. B. C. For Windows® 8 / 8 64-bit / 7 / 7 64-bit 64-bit OS: Go to the "FrontMic" Tab in our manual and chassis manual to the pin assignments below : A. Connect the power switch, reset switch and system status indicator on the chassis to this header according to install...
... panel only. To activate the front mic. B. C. For Windows® 8 / 8 64-bit / 7 / 7 64-bit 64-bit OS: Go to the "FrontMic" Tab in our manual and chassis manual to the pin assignments below : A. Connect the power switch, reset switch and system status indicator on the chassis to this header according to install...

User Manual
Page 31
... installation guide. 2.7.1 Installing Two CrossFireXTM-Ready Graphics Cards Step 1 Insert one graphics card into PCIE1 slot and the other graphics card to AMD graphics card manuals for details.) 27 Download the drivers from the AMD's website: www.amd.com 3. It is provided with the graphics card you purchase, not bundled with...
... installation guide. 2.7.1 Installing Two CrossFireXTM-Ready Graphics Cards Step 1 Insert one graphics card into PCIE1 slot and the other graphics card to AMD graphics card manuals for details.) 27 Download the drivers from the AMD's website: www.amd.com 3. It is provided with the graphics card you purchase, not bundled with...

User Manual
Page 53
...) This item appears only when you set up overclocking features. Use this to your own risk and expense. CPU Configuration Overclock Mode Use this to [Manual]. The default value is reduced when overclocking. 49 Please be noted that overclocking may cause damage to select Overclock Mode. If [Enabled] is selected, the... enable or disable AMD Turbo Core Technology. It should always be done at or below the TDP for better system stability. Configuration options: [Auto] and [Manual]. The default value is [Enabled]. Configuration options: [Enabled] and [Disabled].
...) This item appears only when you set up overclocking features. Use this to your own risk and expense. CPU Configuration Overclock Mode Use this to [Manual]. The default value is reduced when overclocking. 49 Please be noted that overclocking may cause damage to select Overclock Mode. If [Enabled] is selected, the... enable or disable AMD Turbo Core Technology. It should always be done at or below the TDP for better system stability. Configuration options: [Auto] and [Manual]. The default value is [Enabled]. Configuration options: [Enabled] and [Disabled].

User Manual
Page 54
... the memory module(s) inserted and assigns appropriate frequency automatically. 50 Multiplier/Voltage Change This item is under heavy load. If it is not recommended to [Manual], you to adjust the value of Processor Frequency and Processor Voltage. However, for safety and system stability, it is not recommended to adjust the value...
... the memory module(s) inserted and assigns appropriate frequency automatically. 50 Multiplier/Voltage Change This item is under heavy load. If it is not recommended to [Manual], you to adjust the value of Processor Frequency and Processor Voltage. However, for safety and system stability, it is not recommended to adjust the value...

User Manual
Page 69
... value [Disabled]. Clear Status This option appears only when the case open detection feature. The default is value [Full On]. Confi guration options: [Full On], [Manual Mode] and [Automatic Mode]. 4.6 Hardware Health Event Monitoring Screen In this section, it allows you to set the CPU fan 1 & 2 speed. Over Temperature Protection Use...
... value [Disabled]. Clear Status This option appears only when the case open detection feature. The default is value [Full On]. Confi guration options: [Full On], [Manual Mode] and [Automatic Mode]. 4.6 Hardware Health Event Monitoring Screen In this section, it allows you to set the CPU fan 1 & 2 speed. Over Temperature Protection Use...

Quick Installation Guide
Page 6
... "User Manual" in the Support CD. It delivers excellent performance with robust design conforming to ASRock's commitment to AHCI mode. In case any modifications of the motherboard can be updated, the content of the motherboard and step-bystep installation guide. www.asrock.com/support/index.asp 1.1 Package Contents ASRock FM2A75M Pro4+ Motherboard (Micro ATX Form Factor) ASRock FM2A75M Pro4...
... "User Manual" in the Support CD. It delivers excellent performance with robust design conforming to ASRock's commitment to AHCI mode. In case any modifications of the motherboard can be updated, the content of the motherboard and step-bystep installation guide. www.asrock.com/support/index.asp 1.1 Package Contents ASRock FM2A75M Pro4+ Motherboard (Micro ATX Form Factor) ASRock FM2A75M Pro4...
Quick Installation Guide
Page 18
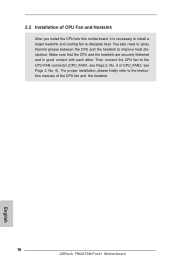
... sure that the CPU and the heatsink are securely fastened and in good contact with each other. Then connect the CPU fan to the instruction manuals of CPU Fan and Heatsink After you install the CPU into this motherboard, it is necessary to install a larger heatsink and cooling fan to improve... kindly refer to the CPU FAN connector (CPU_FAN1, see Page 2, No. 3 or CPU_FAN2, see Page 2, No. 4). 2.2 Installation of the CPU fan and the heatsink. 18 ASRock FM2A75M Pro4+ Motherboard English You also need to spray thermal grease between the CPU and the heatsink to dissipate heat.
... sure that the CPU and the heatsink are securely fastened and in good contact with each other. Then connect the CPU fan to the instruction manuals of CPU Fan and Heatsink After you install the CPU into this motherboard, it is necessary to install a larger heatsink and cooling fan to improve... kindly refer to the CPU FAN connector (CPU_FAN1, see Page 2, No. 3 or CPU_FAN2, see Page 2, No. 4). 2.2 Installation of the CPU fan and the heatsink. 18 ASRock FM2A75M Pro4+ Motherboard English You also need to spray thermal grease between the CPU and the heatsink to dissipate heat.

Quick Installation Guide
Page 24
... functions. C. For Windows® 8 / 8 64-bit / 7 / 7 64-bit 64-bit OS: Go to the "FrontMic" Tab in our manual and chassis manual to the pin assignments below : A. English Connect the power switch, reset switch and system status indicator on the chassis front panel. Note the positive... the chassis must support HDA to the power switch on the chassis to this header according to install your system using the power switch. 24 ASRock FM2A75M Pro4+ Motherboard Connect Ground (GND) to the front panel audio header as below . E. Infrared Module Header (5-pin IR1) (see p.2 No. 25...
... functions. C. For Windows® 8 / 8 64-bit / 7 / 7 64-bit 64-bit OS: Go to the "FrontMic" Tab in our manual and chassis manual to the pin assignments below : A. English Connect the power switch, reset switch and system status indicator on the chassis front panel. Note the positive... the chassis must support HDA to the power switch on the chassis to this header according to install your system using the power switch. 24 ASRock FM2A75M Pro4+ Motherboard Connect Ground (GND) to the front panel audio header as below . E. Infrared Module Header (5-pin IR1) (see p.2 No. 25...

Quick Installation Guide
Page 28
... the BIN folder in the Support CD. 4. For the detailed information about BIOS Setup, please refer to the User Manual (PDF file) contained in the Support CD to display the menus. 28 ASRock FM2A75M Pro4+ Motherboard English To begin using the Support CD, insert the CD into your computer. The BIOS Setup program is...
... the BIN folder in the Support CD. 4. For the detailed information about BIOS Setup, please refer to the User Manual (PDF file) contained in the Support CD to display the menus. 28 ASRock FM2A75M Pro4+ Motherboard English To begin using the Support CD, insert the CD into your computer. The BIOS Setup program is...

Quick Installation Guide
Page 128
1 FM2A75M Pro4 BIOS CPU http://www.asrock.com www.asrock.com/support/index.asp 1.1 華擎 FM2A75M Pro4+ 主板 (Micro ATX FM2A75M Pro4 FM2A75M Pro4 Serial ATA(SATA I/O 擋板 ASRock 為了在 Windows® 8 / 8 64-bit / 7 / 7 64-bit BIOS中將Storage Configuration AHCI BIOS User Manual 128 ASRock FM2A75M Pro4+ Motherboard 簡體中文
1 FM2A75M Pro4 BIOS CPU http://www.asrock.com www.asrock.com/support/index.asp 1.1 華擎 FM2A75M Pro4+ 主板 (Micro ATX FM2A75M Pro4 FM2A75M Pro4 Serial ATA(SATA I/O 擋板 ASRock 為了在 Windows® 8 / 8 64-bit / 7 / 7 64-bit BIOS中將Storage Configuration AHCI BIOS User Manual 128 ASRock FM2A75M Pro4+ Motherboard 簡體中文
